
Protecting the Base of a Wooden Garden Shed from Ground Moisture
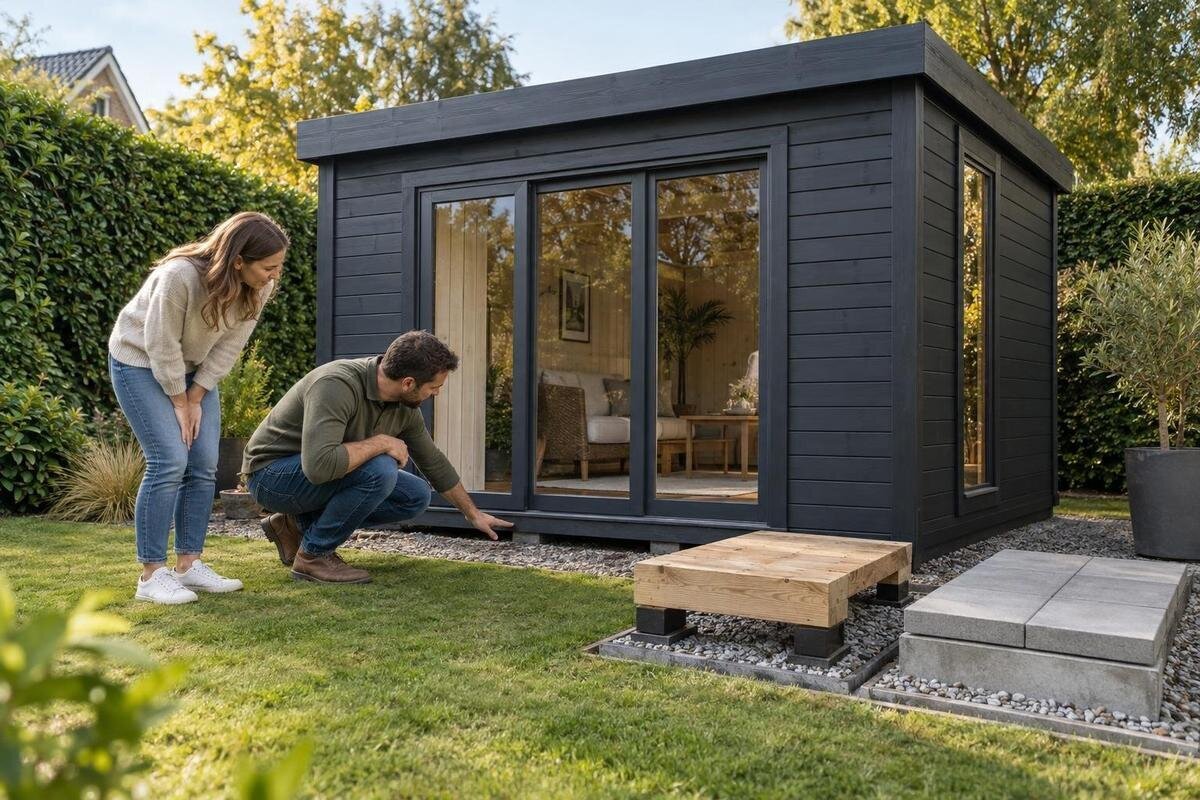
Garden shed base planning
Ground moisture is an easy part of garden-shed planning to overlook because the base is less visible than the roof or walls. The lower timber can stay damp where it meets soil, a porous support or a floor edge that cannot dry readily. Repeated or prolonged wetting may affect the timber over time, even if the rest of the structure looks sound. Useful decisions happen before the order is final: understand the site, confirm a support detail for the exact shed, keep timber clear of damp ground and agree how the finished base will be checked. This guide explains those decisions without prescribing one foundation for every property.

01
Why the bottom edge needs its own moisture plan
Ground moisture is not limited to a visible puddle. Soil can stay damp below a dry-looking surface, and some base materials can retain or pass moisture to material resting on them. If the lowest wall board, floor edge or another timber member remains against that source, it may dry slowly. Repeated wetting can lead to staining, softening or decay over time. The vulnerable joint depends on the shed’s construction, and it is usually hidden once assembly is complete, so identify it in the instructions rather than assuming every design meets the base in the same way.
Think about how long the timber stays damp, not only whether it gets wet once. A splash that dries promptly is different from constant contact with moist soil, a damp slab or debris packed against a wall. Paint, stain or preservative may form part of a maintenance plan, but none removes moisture beneath the structure or compensates for a poorly designed support. The aim is to interrupt the route from ground to timber, avoid trapping moisture at the junction and preserve access for inspection. Treat the floor, wall and base as one connection; protecting only the visible wall face can miss the vulnerable edge. A coated exterior can look dry while the covered underside remains damp, so check both where possible.
Read the site before choosing the base
Before settling on a support, observe the intended footprint after ordinary rain or garden watering, not only during a dry spell. Note where soil stays damp, whether the spot remains shaded, and whether a tap, irrigation line or nearby planting repeatedly wets it. Look for areas that hold surface water or existing paving that remains damp. Repeating the observation on more than one occasion gives a more useful picture than treating one visit as conclusive. These clues do not diagnose the soil or determine a foundation design, but they help you explain the site conditions to an installer.
Record what is already there—bare soil, paving, a slab or an older base—and whether its surface is cracked, uneven or visibly damp. If water regularly collects at the footprint, resolve that site’s water-management issue before treating a new base as the answer; this guide concerns the shed-to-support junction, not a drainage design. When shortlisting the Verdana 1 garden shed, use the exact model name in questions to the seller or installer and request its base drawing, footprint and installation requirements. A product photograph or name cannot confirm that the site is suitable. Keep simple notes or photographs so a professional can see the conditions you observed rather than relying on a general description such as “usually dry”.
02
Keep lower timber clear of soil
The basic protective principle is to avoid direct contact between timber and soil. Grass, mulch, leaves and soil piled against a lower board can keep it damp even when the supporting base is raised; plants against the wall can also hold debris at the same edge. Plan the finished ground level so later landscaping does not bury the bottom board. Do not choose a universal clearance by eye: the required separation depends on the shed design and base detail. Follow the manufacturer’s drawing, and ask an installer to resolve a missing or unclear dimension before the site is prepared.
Look at the full connection: which member rests on the base, whether the floor edge is exposed and where the wall panels finish. Ask for a section or assembly drawing that shows intended contact and any separation layer. Avoid inventing a gap with loose offcuts, packing pieces or an unapproved strip; an improvised spacer may affect support or alignment, while an open edge may leave timber exposed. For the Verdana 2 garden shed, request product-specific guidance on this junction rather than assuming a photograph proves the timber is clear of damp ground. Check that the drawing matches the exact version you plan to order.
Choose support for the shed and the ground
The support needs to keep the shed stable as well as limit moisture exposure. It must carry the structure as specified and meet the manufacturer’s requirements for bearing and level; a soft patch or settling support can distort the floor and open joints. A surface that looks sound does not establish whether the soil or an existing paved area is suitable beneath the whole footprint. If the site has loose fill, a cracked or uneven slab, uncertain ground or another condition you cannot assess, ask a competent installer or building professional to specify a suitable base. Do not choose a foundation type or size by guesswork. Use the shed instructions, not a generic sketch, to anchor the discussion.
When comparing proposals, ask what supports the entire footprint, whether the base detail separates lower timber from moisture and how the structure will be secured as its instructions require. The answer should refer to the exact model rather than a generic diagram. The name the Durano garden shed does not provide its footprint, weight or foundation specification; request those details from the product documentation before arranging groundwork. If more than one contractor is involved, agree who confirms the prepared base before assembly and who flags any mismatch with the product requirements. This makes it easier to compare a support plan against the actual shed, not just a broad product category.

03
Concrete and paving still need a moisture detail
A concrete base can provide a firm surface, but it is not automatically a moisture barrier. Concrete may retain or transmit moisture, and timber or a floor placed directly against it may still need a specified separation detail. Do not assume that a slab is dry because it looks smooth, or that a generic sheet, coating or sealant is the right solution. A barrier must suit the shed’s floor and support design; a poorly chosen layer could trap moisture or interfere with a stable fit. Ask the manufacturer or installer whether a moisture break is required, which material is approved and how its edges should be finished. Do not buy a barrier until that detail is clear.
With paving, check the same basics: it should be sound and suited to the specified support, with soil or mulch kept away from lower boards. Joints and edges do not make paving waterproof, and a line of pavers is not necessarily a complete foundation. When reviewing the Veltor 1 garden shed, ask whether the proposed surface is acceptable for that exact design and what preparation the supplier expects. If existing paving or a slab is damp, cracked or shifting, have it assessed before ordering installation. Covering warning signs with another layer can hide them without resolving the cause.
Set the finished ground level before assembly
Plan the finished ground around the shed as carefully as the base itself. A level support and the surrounding ground level are separate matters: soil, mulch or paving added later can rise against the wall and bridge the intended separation. Include garden beds, paths and planned landscaping in the site drawing before installation, and tell the installer if those levels may change. Keep the lower edge visible rather than burying it or leaving debris piled there. This is about preserving the shed-to-base detail, not prescribing a ground slope or drainage route. Decide who will set and maintain the final level.
Use the product’s stated dimensions to plan the footprint and the base specified in its instructions; do not scale a photograph or assume the model name describes its size. Confirm how the finished shed floor and threshold relate to nearby paving, and who is responsible for setting the external ground level. For the Orello 1 garden shed, use the exact listing as an identifier and request the relevant installation drawing before fixing the base layout. Agree any mismatch between the proposed surface and required height with a professional before ordering materials. Include any edging planned around the base in that conversation, since it can conceal the junction or make later inspection difficult.
04
Plan for underside ventilation and inspection
Moisture can linger where the underside is enclosed and cannot dry as intended. Whether a particular shed needs a ventilated space, an open perimeter or another detail depends on its design; do not add vents, close gaps or build a skirt without guidance. Blocking a designed opening or sealing every edge can change how the base behaves, while an improvised gap may leave timber exposed or undermine its support. Ask the manufacturer or installer to explain the required underside detail, including how it manages moisture and whether the arrangement must remain open. A neatly boxed-in perimeter is not automatically a better-protected one.
Consider inspection access before the shed is placed. You should be able to see the lower timber and the base junction, or have the installer explain how that area will be checked if it is concealed. Avoid planning permanent edging, dense planting or stored objects where they prevent a simple visual inspection. When asking about the Modano 1 garden shed, request the under-floor and perimeter details for that exact model rather than assuming a photograph shows the whole arrangement. Decide where access is needed while the site is clear; a hidden junction can make early signs of persistent damp harder to notice.
Confirm timber treatment and assembly details
Ask what the product documentation says about timber protection at the base: whether the supplied finish is intended for the stated exposure, whether further treatment is required and how exposed or cut ends should be handled. Do not assume that timber described as treated is suitable for direct ground contact, or that a decorative coating is the same as a moisture break. Use only treatments and application methods approved in the instructions; an incompatible product or a coating applied over damp timber can make drying harder. If the guidance is unclear, get an answer before placing the order.
Assembly details matter just as much as treatment. Follow the model-specific sequence for fitting the floor, walls and any barrier, and do not trim or bury lower pieces to disguise a poor fit. Keep the manual and maintenance notes with the shed so future owners know what was specified. For the wooden garden tool shed M, ask which base interface and post-assembly care apply to that exact listing; its name alone does not answer either question. If an installer is assembling it, agree who checks the lowest edge before it is enclosed. That way, the junction can be confirmed against the instructions before it is hidden.

05
Include the base in the order scope
Put the shed and its base on the same order checklist, even if different people supply them. Confirm exactly what is included: the structure, floor components, any support system or moisture barrier, site preparation, assembly and finishing work. Do not assume that a shed quote includes a foundation or that a base quote includes protection at the timber junction. Ask who will check that the prepared support matches the model’s drawing, and who must resolve a mismatch before assembly. Clear scope prevents a gap between what the instructions require and what the site contractor believes is being supplied. Note the responsible person for each item in the written order.
Before committing, request the exact dimensions, support requirements, floor-to-base detail, installation instructions and maintenance guidance for the selected model. Share photographs and notes about the proposed site with the installer, but do not treat images as a substitute for assessing uncertain ground or a slab. Apply the same questions to the wooden garden tool shed S: its listing identifies the item but cannot tell you what your property needs beneath it. Compare written quotations by complete scope, responsibilities and specified materials, not by a model name or a single line labelled “base”. If a required support or barrier is not included, agree who obtains and installs it before work is scheduled.
Inspect the timber-to-base junction over time
Once assembled, make an initial visual check while the base edges are easy to reach and before storing items along the walls. Confirm that soil, mulch and building offcuts are not touching the lower timber, and note any place that stays wet after the rest of the surface has dried. Photograph the junction for reference and keep the installation drawing nearby. If a coating or moisture layer is part of the approved detail, check that it was fitted or applied as specified; do not add an unapproved sealant simply because a seam looks exposed. A dry-looking wall does not prove the underside is dry.
Look at the lower edge again after wet weather or watering, especially where planning showed persistent damp. There is no useful universal inspection interval; local exposure and the product’s maintenance instructions should guide it. Persistent discolouration, soft timber, dampness that does not clear or an unusual odour may justify prompt investigation, but these signs do not identify the cause. Keep the area clear, record what changes and ask the installer or a qualified professional to assess recurring moisture before painting over it or covering the base. A maintenance coating can help only when the underlying junction is sound and the timber is prepared as instructed.
Frequently asked questions
What is the most important way to protect a wooden shed base?
Keep the lowest timber clear of soil and persistently damp surfaces, and follow the base detail specified for the exact shed. A moisture barrier may be required, but it is not a universal fix: its suitability and edge detail depend on the shed and its support. Check the product instructions and ask an installer to clarify anything that is not shown.
Will a concrete slab prevent ground moisture from reaching the shed?
Not necessarily. Concrete can retain or transmit moisture, so timber or a floor resting on it may still need a suitable separation detail. Ask the manufacturer or installer whether a moisture break is required, which materials are compatible and how the edges should be finished. Do not assume a smooth-looking slab is dry.
How much clearance should there be between the shed and the ground?
There is no universal clearance that suits every shed and base. The required separation depends on the product design and installation detail. Request the relevant drawing and use it to plan the final ground level, including paving, mulch and garden beds. If the instructions are unclear, get advice before preparing the site.
Can timber treatment replace a moisture barrier?
No. A treatment or coating may be part of the shed’s maintenance plan, but it does not remove damp soil, correct direct ground contact or resolve moisture trapped beneath the floor. Follow the product’s instructions for any treatment, and confirm whether the base needs a separate moisture break.
What should I confirm with the supplier before ordering?
Ask for the exact model’s dimensions, base and floor details, installation instructions, timber-treatment guidance and maintenance notes. Confirm what the order includes and who supplies the support, any moisture barrier, site preparation and assembly. Share observations about the proposed site, and ask who will check that the prepared base matches the product requirements.
A wooden shed’s base stays better protected when three decisions work together: the actual site, support suited to the model and clear separation between damp ground and the lowest timber. Keep the junction visible, follow the product-specific assembly and treatment guidance, and treat recurring damp as a reason to investigate rather than simply paint over it. That makes the base part of the purchase and installation plan, not a problem discovered after the shed is assembled.
