
Set Up a Greenhouse: Layout, Plants & Care | Bloomcabin
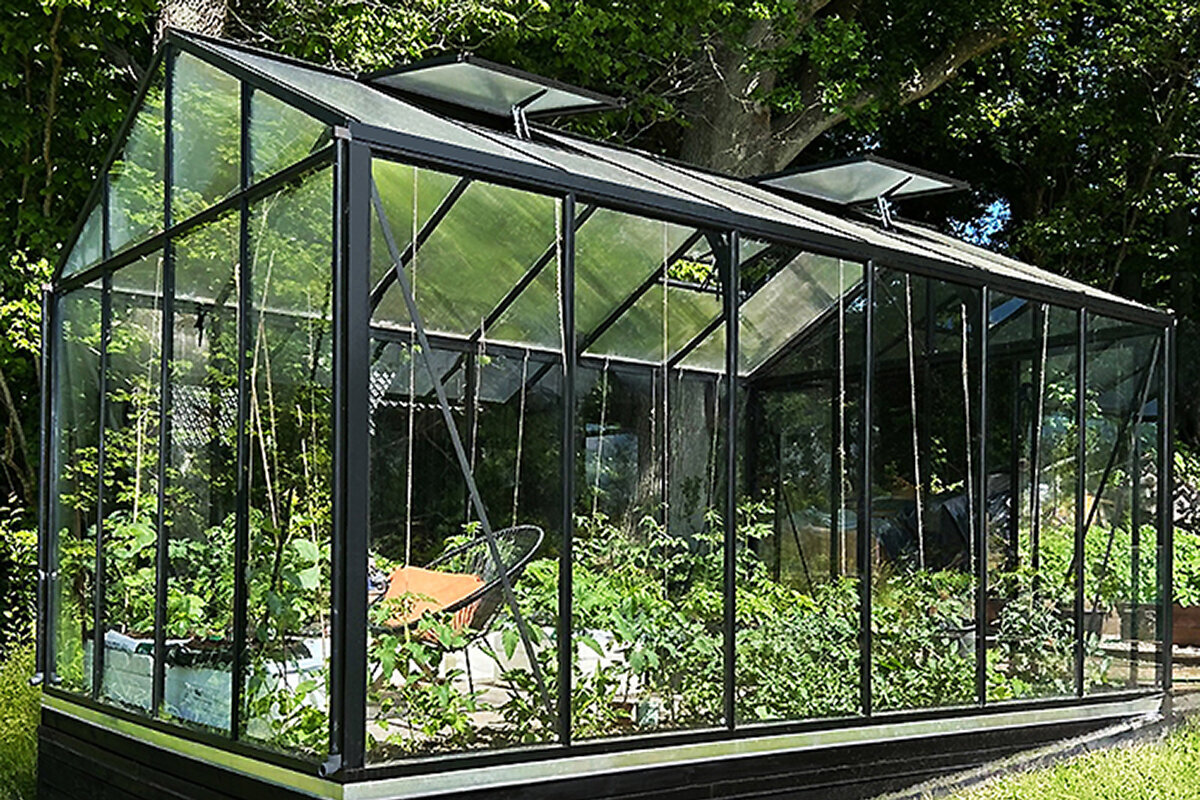
Set up your greenhouse after assembly: first steps for a practical Bloomcabin greenhouse in South Africa
Your Bloomcabin greenhouse is assembled—excellent. The frame is in place, the glazing fitted, the door running smoothly and the first sunlight is coming in. Now comes the part that turns “assembled” into “working every day”: thoughtful layout, planning and care. A greenhouse is more than an attractive garden feature. It is a manageable space where light, air, water and temperature work together, helping you achieve better results over many months than outdoors.
That is especially valuable in South Africa, where conditions vary greatly by region: dry inland heat, coastal humidity, strong winds, abrupt temperature shifts and cooler winter nights in many areas. A quality aluminium greenhouse provides stability, extends your growing opportunities and supports planned cultivation of vegetables, fruit, herbs and flowers.
This detailed guide covers the first steps after assembly and helps you find the best greenhouse layout for your Bloomcabin aluminium greenhouse in South Africa. It goes far beyond putting benches on one side and beds on the other, covering the everyday essentials: a logical layout, microclimate zones, suitable first plants, a watering routine, effective ventilation, easy cleaning, long-term maintenance and practical tips to keep your greenhouse productive and attractive.
If you are also comparing greenhouse models, sizes or categories, explore the Bloomcabin range here: Bloomcabin South Africa – greenhouses and conservatories.
1) After assembly: why your greenhouse layout matters
A greenhouse does not work automatically simply because it is standing. After assembly, it is an empty space with potential. Your layout and routines turn it into a system: one where plants grow well, where you work efficiently and where you still enjoy spending time weeks later.
Many greenhouse owners begin enthusiastically, then discover constant condensation, cramped access, daily watering pressure and unhealthy tomatoes because there is too little air movement. That is rarely bad luck; it is usually a setup issue:
- Too little air movement (condensation + still air = fungal pressure)
- Plants positioned too closely (poor access, poor hygiene and difficult cleaning)
- An unsuitable watering routine (too frequent, too late in the day or too much water on foliage)
- No clear zones (propagation, growing, storage and workspace become mixed)
- Cleaning only when it looks bad (algae, dirt, lost light and pests)
The good news is that careful planning prevents these issues. This is where a quality Bloomcabin aluminium greenhouse shows its strengths: durable construction, precise finishing, contemporary design and materials made for long-term use. The better your layout, the more you will notice this quality every day.
2) The first week: observe, measure and understand
Before filling beds, building benches or filling every corner, use the first week to get to know your greenhouse. It may sound unremarkable, but it is the quickest route to a setup that will not need constant adjustment later.
2.1 Function check (days 1–2)
- Door and tracks: Does the door run easily? Is there friction? Keep the track free of sand and soil.
- Roof vents: Open and close them fully, then check their stopping position.
- Seals and joins: Inspect connections visually; the aim is not perfect sealing, but clean, reliable joins.
- Wind test: A windy day quickly reveals stronger draughts around doors, corners and the roof.
2.2 Observe climate and light (days 3–5)
- Record sun movement: Take photographs morning, midday and afternoon to identify shade from trees, buildings or hedges.
- Note temperatures: Minimum and maximum readings over 2–3 days are enough to begin.
- Watch condensation: When does glazing mist up, and how quickly does it dry? This reveals much about humidity and air exchange.
2.3 Rain and ground conditions (days 6–7)
- Drainage: Are there puddles by the base? A gravel strip or neat edge treatment can help.
- Splashback: Soil splashes on glazing reduce light. Planning early saves cleaning later.
- Access: Is the approach comfortable in rain? A greenhouse is valuable in poor weather when access is easy.
After this week, you will have the best information for your layout: where is warmest, dampest and brightest? Where is a workbench useful? Where can a bed sit without making later cleaning difficult?
3) Your greenhouse goal: what should it do for you?
The best greenhouse setup begins not with furniture, but with a decision: What do you mainly want to use your greenhouse for? A propagation layout differs from one for tomato production, and a relaxed garden-room layout differs from one focused on maximum harvests.
3.1 Choose one main goal
- Propagation and young plants: plenty of surfaces, an organisation system, light and temperature monitoring, hygiene.
- Greenhouse vegetables: beds, supports, irrigation, airflow and a nutrient plan.
- Extend the season: thermal mass, insulation options, cool-season crops and condensation control.
- Flowers and overwintering: growing space, pest monitoring, good airflow and dry zones.
- A greenhouse as garden room: tidy, attractive, walkable, with workspace and a welcoming atmosphere.
3.2 Add a realistic secondary goal
- Gradually harden young plants to outdoor conditions
- An earlier start for basil, tomatoes and peppers
- Herbs for much of the year
- Trying special varieties that struggle outdoors
Tip: begin with a setup you can easily manage. A premium greenhouse offers little if it overwhelms you. A Bloomcabin greenhouse should make gardening easier, not more complicated.
4) Greenhouse microclimates: warmth, coolness, air and humidity
A greenhouse is a small ecosystem. Even a compact model has zones that behave differently. Use them deliberately and you will encounter fewer problems—and often harvest more.
4.1 The key zones
- High and warm: warm air rises, so the roof area and ridge are usually warmest.
- Low and cool: the ground and door area are often cooler and more draughty.
- Corners and humidity: where air circulates poorly, moisture lingers longer.
- Airflow: the ventilation route between door and roof vents is often the healthiest zone.
4.2 Position plants by zone
- Warm zone: tomatoes, peppers, chillies, aubergines, basil and cucumbers with good airflow.
- Cool zone: lettuces, spinach, rocket, coriander and plants being hardened off.
- Humid corner: keep it open where possible, or plant it lightly to reduce mildew and Botrytis risk.
- Airflow zone: Mediterranean herbs, robust young plants and plants with dense foliage.
The more effectively you use these zones, the less often you work against the greenhouse. Smoothly functioning doors and vents in a quality aluminium greenhouse make daily ventilation and climate management easier.
5) Plan the layout: paths, beds, benches and zones
A good layout does not frustrate you in daily use. A greenhouse is used by you as well as plants: you enter, water, tie in, prune, harvest, pot up and clean. If the route is too narrow, you may visit less often without noticing, reducing both harvest and enjoyment.
5.1 The most important measurement: path width
Where possible, allow a central path of around 60–75 cm. It may seem generous, but it separates comfortable working from constantly catching on something. In a narrower greenhouse, at least ensure that every area is reachable and cleaning is not acrobatic.
5.2 Reach rule: do not step into beds
Plan beds so every plant can be reached without stepping into the soil. Compaction harms drainage, reduces air in the soil and makes roots more vulnerable. For wide beds, provide access from two sides or make them narrower.
5.3 Three proven layout models
Layout A: harvest focus (classic)
- Bed on the left + path + bed on the right
- Bench or shelf at the rear for propagation and tools
- Support lines above beds for tomatoes and cucumbers
Layout B: hybrid (best for many gardeners)
- One side: bench or shelves for young plants, herbs and pots
- Other side: bed for summer crops such as tomatoes, cucumbers and peppers
- Path: deliberately clear for comfort, cleaning and transport
Layout C: greenhouse as garden room
- Narrow planting zones along the walls
- Clean path of gravel or slabs for dry shoes and easy care
- Small work surface and stool
- Hanging plants or flowers for atmosphere
Important: the best layout is not the one crammed with the most pots. It is the one you can keep clean, airy and organised for months, because that supports healthy plants.
6) Beds, benches, containers or a hybrid system?
After assembly comes the big question: how will you grow in the greenhouse? There is no single correct system. The right one suits your routine and the plants you genuinely want to grow.
6.1 In-ground greenhouse beds
Beds suit vegetables that appreciate even moisture and steady nutrients. Tomatoes and cucumbers benefit particularly well. Beds work neatly with drip irrigation and can give excellent yields.
- Ideal for: tomatoes, cucumbers, peppers, chillies, basil, lettuces, spinach and Swiss chard
- Benefits: more stable moisture, less daily watering stress and high yields
- Challenge: soil care, crop rotation, yearly compost and hygiene
6.2 Benches and shelves
Benches are ideal for propagation, potted herbs and organisation. They lift plants off the ground, reducing algae and fungus gnats, improving airflow and making work more comfortable.
- Ideal for: seed trays, cuttings, herb pots and flower boxes
- Benefits: flexible, clean, orderly and easy to rearrange
- Challenge: pots dry faster in hot weather and need regular feeding
6.3 Pots and containers
Containers are the flexible choice. You can move plants, isolate them when needed and shape the greenhouse visually. They also make it easier to trial specialist plants.
6.4 Hybrid system
A hybrid setup combines the advantages: one bed for productive seasonal crops, a bench for propagation and order, plus a few containers. For many Bloomcabin owners, it is the best greenhouse arrangement: productive, easy to maintain and attractive.
7) Soil and growing media: compost, structure and hygiene
If your greenhouse is a premium growing space, soil is its engine. Good soil means strong roots, reliable moisture, less stress and better crops. Poor soil creates continual problems, whatever the quality of the greenhouse.
7.1 For beds: structure matters more than richness
- Loose and airy: roots need oxygen. Heavy soil is a greenhouse problem.
- Compost as a base: mature, crumbly compost improves structure and nutrient supply.
- Annual refresh: a compost top-dressing is a simple standard practice.
- Use mulch thoughtfully: mulch limits evaporation but must not create waterlogged conditions.
7.2 For pots: quality and routine
- Quality potting mix: good drainage, stable structure and no rapid collapse.
- Regular nutrients: potting media are depleted faster than bed soil.
- Clean pots and trays: hygiene helps prevent damping-off in young plants.
7.3 Soil hygiene: especially important under cover
Greenhouse growing is often denser and more intensive than outdoor growing. Plant debris, old leaves and spilled soil are not merely untidy; they can support fungus gnats, mould and disease. Small routines, including weekly tidying and a clean work surface, act like a protective barrier.
8) What to plant first: vegetables, fruit, herbs and flowers
The best start creates early successes. In your first season, choose plants that teach you about the greenhouse: how quickly does it dry, how does it respond to sun, when should you ventilate and which corner remains damp?
8.1 Beginner-friendly success plants
- Lettuces: loose-leaf, Batavia and oak-leaf lettuces are quick, rewarding and ideal for succession sowing.
- Rocket: robust, aromatic and quick-growing.
- Spinach: excellent in cooler periods.
- Radishes: a perfect morale booster because they crop quickly.
- Spring onions: uncomplicated and space-saving.
- Herbs: parsley and coriander prefer cooler conditions; basil likes warmth and sun.
8.2 Greenhouse classics for South Africa
- Tomatoes: the greenhouse favourite. With support, pruning and good airflow, they are dependable.
- Cucumbers: very productive and heat-loving, but they need airflow against mildew.
- Peppers and chillies: heat-loving and often more successful under cover than outdoors.
- Aubergines: for gardeners with some experience; they need consistent warmth and care.
8.3 Fruit under cover: realistic expectations
- Strawberries in pots: simple and suitable for hanging baskets.
- Figs in containers: possible as a project, but they need consistent watering and pruning.
- Grapes for experienced growers: possible, but more of a project than a beginner crop.
8.4 Flowers and companion plants
- Marigolds: easy, colourful and often useful companions.
- Nasturtiums: edible, quick and cheerful.
- Calendula: robust, attractive and can support beneficial insects.
- Scented flowers: ideal when your greenhouse is also a garden room.
Tip for a confident first year: combine quick crops such as lettuce and radishes with long-season main crops such as tomatoes and cucumbers. You will harvest continually while larger plants develop.
9) Seasonal plan for South Africa: what works when?
South Africa has major regional climate differences, so use this calendar as a guide and adapt it to your province, altitude, coast or inland conditions.
January–February: summer production
- Clean tracks, check vents and openers, and keep tools organised
- Clean glazing when needed to maintain light
- Harvest summer crops, prune tomatoes for light and airflow, and sow heat-tolerant succession crops where suitable
- Focus: shade, airflow and careful watering during hot spells
March: prepare for autumn growing
- Start cool-season crops or prepare young plants for local conditions
- Sow lettuces, spinach and radishes for quick crops
- Maintain ventilation: sunny days may still be intensely warm
April: transition month
- Warm days and cooler nights call for flexible ventilation
- Harden off young plants in the greenhouse
- Prepare beds and plan climbing supports
May: cool-season growing
- Plant suitable crops according to local temperatures and frost risk
- Adjust mulch or covers as needed and check irrigation
- Air still matters: dense growth needs circulation
June–August: winter care
- Harvest cool-season crops as growth slows in lower light, and remove unhealthy foliage promptly
- Water and feed consistently, but reduce watering under lower-light conditions
- Use protection for cold nights where your local climate requires it
- Hygiene: remove plant debris immediately
September–October: spring transition
- Clear finished winter crops gradually to create space
- Sow or prepare tomatoes, cucumbers, peppers and chillies where local temperatures suit them
- Clean in stages rather than tackling everything at once
November–December: summer crops establish
- Harvest regularly and monitor plants closely as growth accelerates
- Ventilate to control condensation when cool nights meet warm days
- Refine layout and prepare materials for the next season
With this rhythm, your Bloomcabin greenhouse becomes a year-round garden project, not only a summer tool.
10) Watering and irrigation: choose a system that suits you
In a greenhouse, water can mean success or frustration. The most common problem is not too little water, but inconsistent watering and watering at the wrong time. In lower-light periods, it is particularly easy to overwater.
10.1 Ground rules that usually apply
- Water in the morning: plants dry during the day, helping to reduce fungal risk.
- Water the root zone: wet leaves with little air movement encourage mildew and Botrytis.
- Keep it even, not extreme: steady moisture is healthier.
- Think about weather: water less on dull days; in heat, water earlier and perhaps more often, but check first.
10.2 Options: from simple to convenient
Option A: hand watering
Hand watering is excellent for beginners because you see how plants respond every day. Use a watering can with a rose or a hose with a gentle attachment, watering carefully at plant bases.
Option B: drip irrigation for beds
Drip irrigation reduces wet foliage, saves time and creates consistency. For many gardeners, it is the greatest comfort improvement after assembly; once adjusted, it makes greenhouse care noticeably easier.
Option C: soaker hose
Simple, reliable and useful for long beds. Water gently and thoroughly rather than briefly flooding.
Option D: capillary mats for propagation
For seed trays and young plants on benches, capillary mats provide even moisture without leaving the surface constantly wet.
10.3 Quick check: is your greenhouse too damp?
- Condensation stays on the glazing
- The soil surface is always wet
- Fungus gnats appear
- Grey mould appears on leaves or flowers
If several signs apply, water less, water earlier, ventilate more, thin plants and keep corners clean.
11) Ventilation and airflow: prevent mould, improve crops
Ventilation is not optional in a greenhouse; it is fundamental to plant health. Humid coastal areas and periods of warm days with cool nights can create condensation and fungal conditions. Consistent ventilation greatly reduces problems.
11.1 How effective ventilation works
- Out at the top: roof vents let warm, humid air escape.
- In at the bottom: a door or low opening supplies fresh air.
- Cross-ventilation: a gentle through-breeze is better than a short blast of wind.
- Air circulation: a small fan can prevent stagnant corners, especially in dense planting.
11.2 A practical ventilation routine
- Sunny days: ventilate earlier than expected because heat builds quickly
- Cloudy days: ventilate briefly and purposefully if condensation is heavy
- Evening: close in time to retain warmth, but not while everything inside is dripping wet
11.3 Airiness through layout
Ventilation is more than opening windows. It also means space between plants, clear corners, vertical growth rather than bushy congestion and clean paths. A thoughtful layout gives you ventilation without extra work.
12) Temperature management: shade, thermal mass and cold protection
A greenhouse can be a heat store on one day and an overheated space on another. The aim is not to eliminate every fluctuation, but to help plants grow steadily without constant stress.
12.1 Shade during hot periods
- Shade netting: reduces heat peaks and sun scorch on sensitive plants.
- Keep paths clear: so air can circulate freely.
- Water evenly: heat stress increases with irregular water supply.
12.2 Thermal mass
Thermal mass is especially useful in transitional weather: it absorbs warmth during the day and releases it slowly overnight. Water containers, stones or paving already included in your ground plan are practical choices. Keep access and cleaning in mind.
12.3 Cold nights
In frost-prone inland areas, sunny days can be followed by cold nights. A calm strategy helps:
- Keep fleece ready for sensitive young plants
- Close vents at night and ventilate carefully by day
- Do not leave young plants exposed too early
13) Grow vertically: supports, strings and nets for more yield per m²
Vertical growing is one of the most useful greenhouse techniques: it uses height instead of floor area, improves airflow, simplifies harvesting and keeps the space orderly. It is particularly valuable for tomatoes, cucumbers and some beans or peas.
13.1 Systems that work
- Strings and clips: ideal for tomatoes and cucumbers
- Trellis netting: flexible for cucumbers, peas and ornamental plants
- Stakes: simple, quick and effective for individual plants
13.2 Tomato management: avoiding a jungle
- remove side shoots regularly
- remove lower leaves as plants grow for more air and fewer leaf diseases
- take spacing seriously: air matters as much as fertiliser
An orderly vertical crop looks better and is easier to clean, inspect and harvest. It also reflects Bloomcabin design: refined, practical and made to high standards.
14) Care and maintenance: help your aluminium greenhouse last
A Bloomcabin aluminium greenhouse is made for long-term use. Even so, longevity comes from small, regular actions—not one enormous annual task, but a little each week. This protects appearance, function and your growing climate.
14.1 Daily mini-routine (5–10 minutes)
- Quick plant check: wilting or pest signs?
- Adjust windows and ventilation to the weather
- Remove fallen leaves
14.2 Weekly routine (20–40 minutes)
- Sweep the path and inspect corners
- Keep tracks and door area clean
- Check supports and ties
- Wipe the work surface
14.3 Monthly routine (30–60 minutes)
- Spot-clean glazing for maximum light
- Check moving parts: vents and door guides
- Clear out empty pots, old trays and packaging; order reduces moisture traps
Because Bloomcabin uses quality materials and careful finishing, this care is worthwhile: it keeps your greenhouse as elegant years later as it was on day one.
15) Cleaning: how often, what to use and how to simplify it
Cleaning is not just cosmetic in a greenhouse. Clean glazing means more light; clean surfaces mean fewer pests; clean paths mean less algae and fewer fungus gnats. In practice, cleaning can improve crops.
15.1 A realistic cleaning schedule
- Weekly: sweep, remove leaves and clear spilled soil
- Monthly: spot-clean glazing, wipe benches and inspect corners
- 1–2 times per year: a deep clean, often before spring planting and/or in autumn
15.2 Deep clean step by step
- Group plants together or move them out temporarily if weather permits
- Clean dry first: sweep and remove dirt from corners and beneath benches
- Clean glazing and surfaces with lukewarm water, mild soap and a soft cloth
- Rinse thoroughly so no residue remains
- Ventilate well and allow it to dry
- Clean seed pots and trays separately before new propagation begins
15.3 What to avoid
- abrasive sponges or aggressive cleaners that may damage surfaces
- high pressure directly on tracks and joins, which can force in dirt or water
- closing while wet without ventilation, which retains condensation and encourages mould
16) Pests and diseases: prevention is your advantage
Greenhouses are warm and sheltered, which unfortunately appeals to some pests too. The best strategy is not to fight problems later, but to prevent them early. That is easier than many gardeners expect.
16.1 Common greenhouse pests
- Aphids: often appear on soft new growth
- Whitefly: likes warmth and dense planting
- Spider mites: more common in heat and dry air
- Fungus gnats: often indicate overly wet soil or algae
- Slugs: yes, they also enter greenhouses, especially with damp soil and an open door
16.2 Common diseases and issues
- Powdery mildew: often linked to stress, poor air and dense growth
- Botrytis (grey mould): favoured by high humidity and poor airflow
- Damping-off: in propagation, often from excessive moisture, cold and poor air
16.3 Prevention checklist that works
- Ventilate daily (even briefly)
- Avoid overcrowding plants
- Remove leaves and plant debris immediately
- Water in the morning, rather than wetting leaves at night
- Inspect weekly (including leaf undersides)
- Keep things organised (pests love cluttered corners)
Follow these points and most problems will remain small. That is the real luxury of a premium greenhouse: not merely looking good, but being easy to keep healthy.
17) Workflow and order: a productive garden space
Many gardeners underestimate how much order improves success. A tidy greenhouse is used more often, and frequent use means spotting problems sooner, reacting faster and harvesting better.
17.1 Simple zones that always help
- Propagation zone: bench or shelf, trays, labels and possibly capillary mat
- Production zone: bed and support area for main crops
- Work zone: small clear area for potting and pruning
- Storage corner: strictly limited and clean, not a dumping ground
17.2 Organisation tips: practical, not perfectionist
- Use boxes for small items such as labels, clips and ties
- Use hooks for secateurs, twine and gloves
- Store rarely used items elsewhere; a greenhouse is a climate-controlled growing space
- A clear path is not wasted space; it is the key to care and hygiene
18) FAQ: common questions after assembly
How soon can I plant after assembly?
Once the greenhouse is stable and your system is ready. Observing sun, condensation and wind for 3–7 days often leads to better layout decisions.
What is the most important greenhouse success factor?
Ventilation and air movement. They are the quickest route to less mildew, less Botrytis and healthier plants overall.
How often should I clean my greenhouse?
Tidy briefly each week, spot-clean monthly and deep-clean 1–2 times each year. Clean glazing gives noticeably more light, especially in darker months.
Why do I have fungus gnats?
Usually the soil is staying too wet or algae and organic debris are present. Water less or earlier, let the surface dry more, keep soil clean and improve air movement.
How do I prevent a summer jungle?
Grow vertically, prune tomatoes regularly, keep paths clear and allow enough spacing. An orderly layout prevents 80% of later problems.
19) Conclusion: the best setup is the one you use
The best greenhouse layout is not the most complicated. It is the one that is practical to use: easy to enter, ventilate, water and keep clean. When your greenhouse achieves these four things, you will use it often—and frequent use is the true key to success.
A Bloomcabin aluminium greenhouse gives you a premium foundation: quality materials, high standards, considered construction and a design that looks elegant in the garden. Combine that foundation with a clear layout, intelligent ventilation, even watering, regular cleaning and straightforward maintenance, and your greenhouse can become one of the most valuable places in your garden, season after season.
Discover suitable models and categories for South Africa: Bloomcabin South Africa – greenhouses and conservatories.
Enjoy setting up your space—and, above all, harvesting.
