
Window security: locks, handles, glass and evidence
Comparing secure windows and doors
When choosing windows for a new build, renovation or replacement project, do not treat security details as a list of separate extras. A lockable handle, special glazing or several locking points may each be useful, but none alone shows how the complete window resists an attack. The interaction of sash, frame, hardware, glazing, fixings and professional installation is what matters. For ground-floor windows, easily reached patio openings and secondary rooms, compare requirements by opening type and location rather than applying one standard to every room. This guide explains the questions that support a sound quote comparison, how to read evidence properly and why security planning should be coordinated with the whole project before ordering.
Buyer checklist 1
Start with an opening map, not individual wishes
The first security decision is made from the floor plan, not at the handle. Record how every opening can be reached: directly from the garden, via a balcony, garage roof, canopy or neighbouring property. Also note visibility, room use and whether the opening is regularly needed for ventilation. A basement window may be small yet discreet; a patio door may be prominent but used often. This creates a priority list that directs security level, convenience and budget where they matter. It avoids fitting every window identically when actual access opportunities differ greatly. For each position, add a simple category such as directly accessible, accessible with assistance or difficult to access, and mark assumptions that the local planner still needs to confirm.
Include doors and fixed glazing in this map. Large glazed areas are sometimes planned only for light or appearance, yet they may form part of the same façade strategy as opening windows. In a new build, hinge sides, external areas and lighting can be coordinated early. For replacements, establish whether shutters, insect screens, sills or reveals affect access to the handle and hardware. Also record which windows must open quickly without a key for escape, cleaning or ventilation. These use requirements are not minor details: they determine whether a chosen handle or operating arrangement remains practical every day. Separate observable conditions from desired solutions: a low external sill is a condition, while a lockable handle is initially only one possible response.
Understand the window as a tested unit
A security window is not simply a standard window with stronger hardware. A classified construction assesses how components work together: profile and frame, locks and keeps, hinges, glazing, glass retention, handle, size and sash arrangement. If one of these features changes, it is not automatically clear that the statement still applies to the new version. Therefore, “similarly secure” is not a reliable basis for comparison. Ask suppliers to describe the offered configuration unambiguously and link the evidence to that precise configuration or an expressly covered variant. A comparison table is useful, with one row for every quoted position; combined statements for a whole window schedule can easily conceal differences between standard sizes, special sizes and combined elements.
For an single inward-opening window the operating side is part of planning, but the product title does not reveal a security class. The same applies to material, glass, hardware and locking. Compare quotations line by line: which resistance class is stated? Does it apply to the whole window or only one component? Which dimensions, sash count and opening direction does the document cover? If an answer refers only to an accessory, the crucial link to complete-system testing is usually still missing. Written clarification for each position before approval is far more useful than a general sales statement. Also record the exact product or system name used in the evidence and the name that will appear later on the order confirmation, delivery note and marking.
Buyer checklist 2
Put resistance classes in the right context
Resistance classes describe tested resistance to defined forced-entry attempts under specified conditions. For a buying decision, it is less important to memorise every test method than to consistently connect the class with risk exposure and evidence. A higher class is not a universal substitute for planning: it can affect weight, operation, glass, hardware and cost. Conversely, a lower-class or unclassified version must not be upgraded through isolated security terms. Ask not only, “Which class?”, but also, “For which position and final size does it apply?” Record additional needs, such as frequent ventilation, limited reach or intensive daily use, separately so that a security choice does not unintentionally create an opening that is difficult to operate.
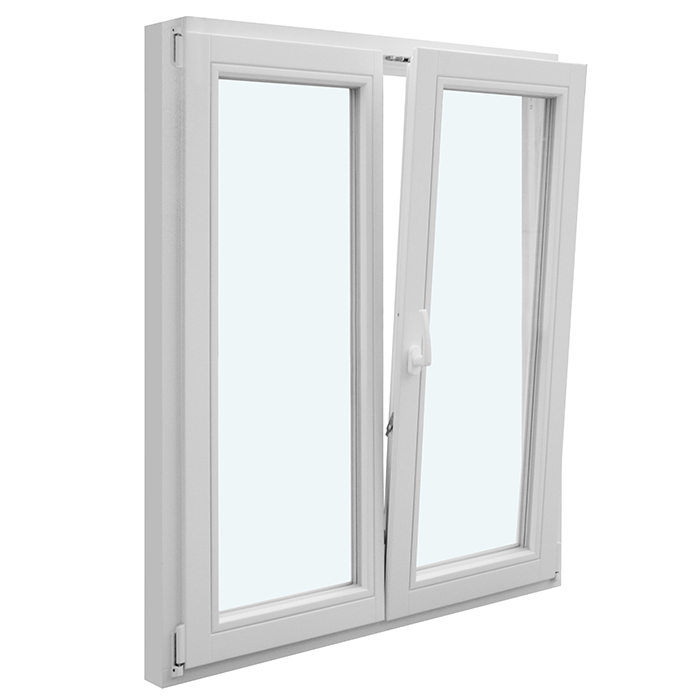
Plan by zones. Ground-level, screened or readily accessible openings may need something different from a window high above ground. One classification across the full façade can simplify tendering and documentation, but may create unnecessary restrictions. A graded solution instead requires a careful position list. Mark unusual shapes and large elements there too. With double inward-opening windows the central mullion, sash proportions and operating sequence change the construction compared with a small single sash. Do not accept a sample image alone; require allocation to the exact window position and chosen size. Compare alternatives not only by class name, but also by whether sash division, opening sequence and usable clear width suit the intended room use.
Check locking and hardware across the whole sash
Locking points are intended to connect the sash to the frame at several locations. Their number alone is not a dependable quality measure. Their position, matching frame keeps, fixings and coordination with sash size and opening type are also decisive. A marketing claim of “multi-point locking” does not answer whether the hardware configuration is tested or intended for your ordered size. Ask which hardware version is offered, whether it is documented as part of the required complete construction, and what maintenance or adjustment work is expected after installation. The quotation should also distinguish between a statement about a hardware series, the number of individual components and tested overall function; these are not equivalent claims.
Give particular attention to areas where hardware is stressed in use: the hinge side, corners, scissor stays on tilt functions and the area around the handle. Large or frequently used sashes do not automatically require the same solution as a rarely opened secondary window. For a single inward-opening patio door daily passage needs consideration alongside outside access. Clarify how the sash is operated when locked, who manages keys and whether residents will reliably follow the procedure. A security feature that is routinely bypassed does not meet its practical purpose. Agree that hardware, handle and keeps are described by position rather than only in general terms. A brief operating trial on a comparable sample can show early whether handle height, closing force and opening sequence are practical for the intended users.
Buyer checklist 3
Assess lockable handles sensibly
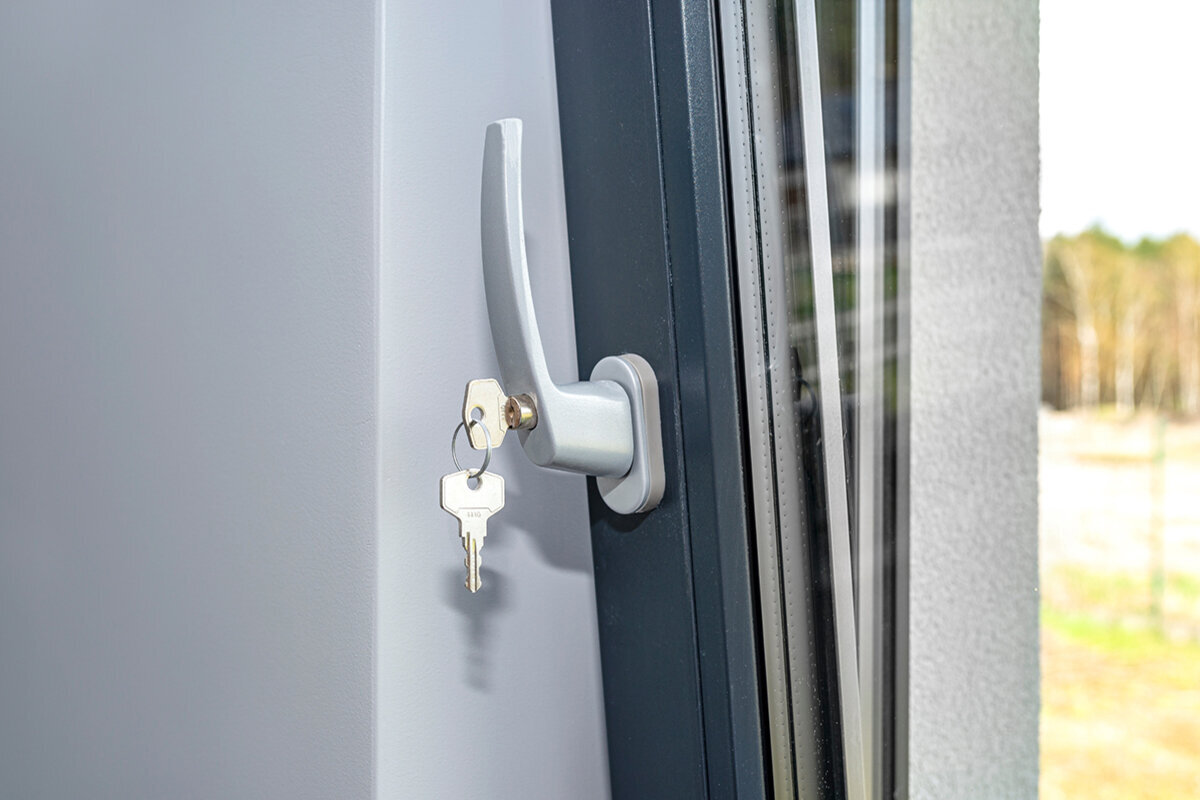
A lockable window handle can make unwanted operation of the handle more difficult and supports a clear operating routine. It is not, however, a substitute for an intrusion-resistant complete construction. Its value depends on how it works with the hardware, sash and glazing, and whether it forms part of the tested specification. Check day-to-day practicality too: how many keys are needed, who has access, and does a key remain in the lock or get stored separately? In homes with several users, a very strict key routine can make ventilation awkward or leave windows unintentionally unlocked. Before ordering, ask whether several handles are available keyed alike or with different keys, and treat both as operating options rather than proof of a particular resistance class.
The handle must also suit the opening ergonomically. For difficult-to-reach windows, rooflights or windows behind furniture, usability matters as much as the locking mechanism. An top-hung outward-opening casement window raises different questions from a full-height tilt-and-turn element: how is it opened, where is the handle, and how is closure checked after ventilation? Discuss the operating sequence on the floor plan and, where appropriate, with a sample. Ask the supplier specifically whether the selected handle forms part of the documented security specification. If it is replaced later, establish whether this could affect allocation of the evidence. Also define whether cleaning, child safety or restricted hand movement creates special operating requirements that must be assessed separately from intrusion resistance.
Do not choose glass separately from frame and beads
Glazing affects the security assessment, but terms such as safety glass or laminated safety glass do not replace a description of the complete window construction. What matters is the offered glass build-up, which side it is placed on, how it is retained in sash or frame, and whether this exact combination is considered in the evidence. Ask for an unambiguous glazing designation in the order and for the version intended for each window position. Avoid assumptions based on a sample: a large, divided or differently opening version may need a different glazing allocation. If another glass build-up is proposed during order clarification, the supplier should confirm its compatibility with the agreed security specification again in writing, rather than describing it merely as technically equivalent.
Fixed glazing makes this distinction particularly clear. A window with fixed glazing has no handle or moving hardware, yet glass, frame, glass retention and the connection to the building opening remain relevant to the overall solution. Check fixed and opening sections separately in combined elements. A high-quality-looking glazed panel beside an opening sash does not automatically prove security for the whole element. Privacy, solar control, sound insulation and thermal performance may introduce further requirements. Set these goals alongside one another so that glass is not chosen on a single basis and later changes do not alter the security configuration unnoticed. Record decorative requests such as glazing bars or divisions by position, because a visual sketch alone does not show whether a bar divides the glass or is made differently.
Buyer checklist 4
Specify large openings and sliding doors separately
Wide openings require a separate review of operation and evidence limits. Sliding, lift-and-slide and folding elements work differently from conventional casement windows; their locking, moving sashes and connection details must not be transferred as general assumptions. For every large opening, ask for the specific security specification for width, height, sash division and opening type. Also consider the position normally used in daily life. A door left only ajar, a permanently accessible garden area or items stored outside can change practical risk without altering the element itself. Record which sash is operated first, where the handle must be reachable and whether fixed side panels within the same opening receive their own glazing and evidence allocation.
For Patio Life lift-and-slide doors the product name describes a lift-and-slide door configuration, not its resistance class or glazing. Request information about the equipment actually offered rather than drawing conclusions from the name. Coordinate the threshold and transition to the floor build-up with installation planning. This matters for usability and for implementing the intended fixing method. Where several full-height openings are involved, a joint meeting with the window supplier, planning or installation specialist, and where relevant site management, is worthwhile. It helps prevent dimensions, connections, drainage concept and security requirements being set inconsistently in separate orders. Bring the current floor build-up and planned outside levels so a later threshold-level change does not silently create different connection assumptions.
Reading test certificates and classification reports
Request documents that can clearly be traced to the offered component. A test certificate or classification report should show who tested or classified it, which system and version are covered, which class is stated and what restrictions apply. Check dimensions, sash count, opening direction, glazing, hardware and possible scope extensions. A document is not automatically unusable because your size is not written in exactly the same terms; it must then be professionally explained why that size falls within the covered scope. A product brochure, symbol or general claim is not an equivalent substitute. Ensure all pages, annexes and tables are present and readable, as these often explain variants, size ranges or conditions for allocation.
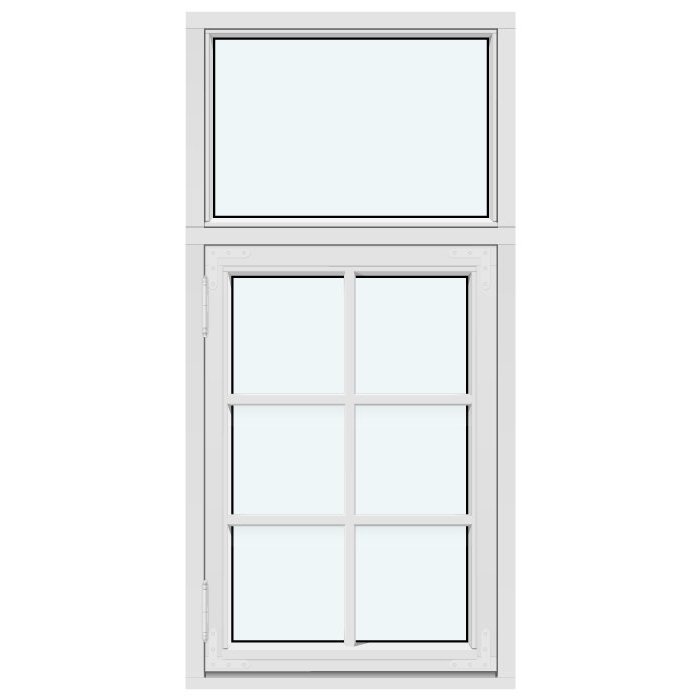
Ask for a clear link between document name, revision, product position and ordered configuration. This makes checks much easier for site management and installers. Also ask whether evidence is separately required for special sizes, combined elements or particular glazing-bar variations. Design details can alter the construction. With a historic-style outward-opening combination casement window the title reveals neither security class nor glass type, and visible glazing bars can be constructed in different ways. Use the terms glazing bar, glass-dividing glazing bar and no glazing bars precisely in the order. Especially with historic styling, the desired appearance should not be treated as silent approval of an unconfirmed security version. Keep unresolved points in a separate question list with the responsible person and response date so that a verbal explanation is not mistakenly treated as final evidence.
Buyer checklist 5
Plan installation and building connections from the start
Even the best documented window specification can perform as intended only with a suitable building connection. Frame fixing, substrate, fixings, spacing, load transfer and reveal construction therefore belong in project coordination. Installation must not be decided only when elements arrive. Provide the installation contractor early with the position schedule, dimensions, wall build-up, opening direction and security requirements. Clarify which system-provider requirements apply to fixing and how deviations will be documented. The responsible qualified specialist should assess technical connection details for the specific project. In existing buildings, the preliminary assessment should also identify whether the substrate, existing linings or concealed installation conditions can only be finally assessed after removal, and how deviations will then be decided.
A handover record for every sensitive opening is practical: ordered version, delivered marking, glass and handle variant, visible damage, fixing as planned and final functional check. Its purpose is not to certify installation itself, but to identify mix-ups early. For single outward-opening patio doors consider opening space, external surfacing and later furniture together. An item placed before the element can change its use; privacy screening added later can affect accessibility or operation. Keep quotations, order confirmation, evidence, installation documents and the key schedule together. This project file is more useful for maintenance, alterations or a change of ownership than remembering individual equipment wishes. Add photographs of markings and the connection area before covering it, where agreed with the installation contractor and where images can clearly be allocated to a position.
Secure ordering, handover and later changes
Before ordering, every relevant position should have an unambiguous specification. This includes element type, size, opening direction, sash arrangement, required security version, handle, glass and reference to agreed documents. Do not write only “intrusion-resistant”; record the specific confirmed classification where it has been agreed. For alternatives, check whether they are merely visually comparable or genuinely provide the same documented specification. Changes due to availability, colour, glazing-bar pattern or size can affect more than appearance. Have replacement or change proposals assessed against the security requirement again before agreeing. An approval list with columns for position, latest drawing, confirmed evidence, unresolved deviation and approval status helps prevent older plans or unclarified variants being ordered accidentally.
At handover, first check identity and function: do quantity, opening directions, labels, handles and glass details match the order? Can sashes close and lock without unusual friction? Record visible deviations in writing and resolve them before later finishing work makes access difficult. After handover, keep keys, operating instructions and maintenance information in a known place. Plan regular visual and functional checks, and seek professional assistance if operation becomes stiff or damage occurs. Bloomcabin states a 5-year warranty for windows and doors; delivery is 4–6 weeks, subject to order confirmation. These details do not replace checking the security specification actually ordered. If handle, glass, hardware or connection details change later, add the installer, date, reason and technical documents to the project file instead of retaining only the invoice.
Frequently asked questions
Is a lockable window handle enough for burglary protection?
No. A lockable handle can be a useful part of an operating and security strategy, but it does not prove resistance of the complete window. Always check the combination of frame, hardware, locking, glazing, glass retention and installation. Ask whether the handle belongs to the documented specification for the particular window position.
How can I tell whether a test report suits my window?
Compare the system, opening type, sash count, dimensions, hardware, handle and glazing with your quotation. Also check the stated class and any restrictions or extensions. If your variant is not immediately identifiable, ask the supplier for written allocation. A general brochure does not replace this check.
Is safety glass necessary for every window?
That depends on the opening, chosen security strategy and further project requirements. Safety glass should not be selected in isolation. Ask which glazing build-up is intended for each position, how it is retained in the element and whether it forms part of the evidenced complete specification. The responsible specialists assess the specific design.
Can I simply upgrade a standard window later?
A handle may sometimes be replaced, but this does not automatically create a documented intrusion-resistant complete construction. Upgrades can involve hardware, glass, frame or fixings. Before taking action, have the technically sensible change, achievable performance and continued relevance of existing documentation assessed.
Which documents should I keep after installation?
Keep the quotation, order confirmation, position schedule, technical evidence, installation documents, operating and care instructions, and a key schedule together. Add a handover record with identified deviations and their resolution. This makes later maintenance, repairs or alterations easier to coordinate with the original specification.
Next step
Window security becomes dependable when it is considered as a documented complete configuration rather than an individual accessory. Start with a map of accessible openings, define requirements by position and compare quotations using identical details. Resistance class, hardware, handle and glass are meaningful only when their interaction is evidenced for the exact element size and opening type. Involve installation planning early and document changes consistently. For your next enquiry, an opening list, floor plans or dimensions, preferred operating types and the question of which documents cover the offered security specification are enough.
