
Growing Cauliflower in a Greenhouse
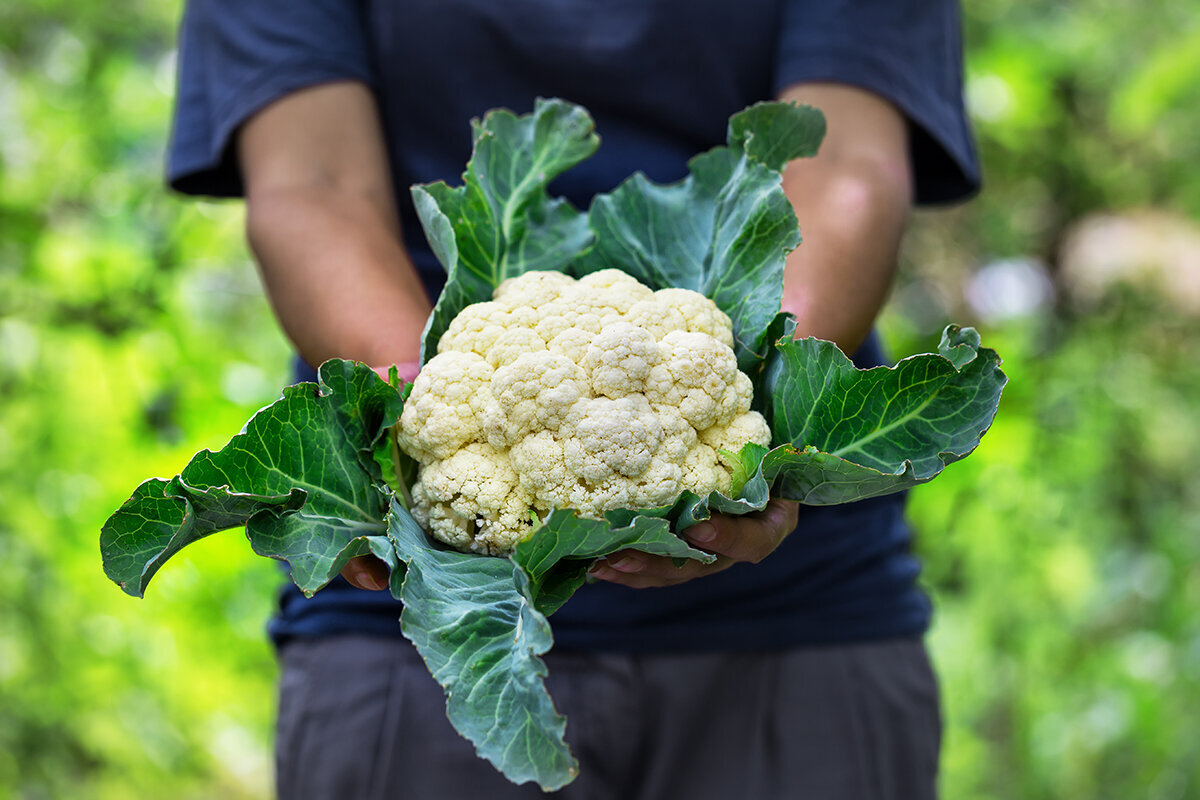
The Blanching Atelier · T17
Raising Cauliflower Under Cover
Perfect cauliflower curds are not produced by luck or abundant heat. They reveal a season of cool air, reliable moisture at the roots, vigorous foliage and uninterrupted development.
Greenhouse protection improves the odds only when the structure stays cool and regulated instead of becoming a solar oven. It can advance planting, carry picking further into autumn, buffer erratic weather and put irrigation under your control. Australia’s midsummer heat, however, cannot be managed into cauliflower’s preferred climate.
Crop-planning notePreferred period: late winter through spring, or late summer into autumn, adjusted for cultivar and district. Reserve room for mature foliage, plan to vent away warmth and expect one carefully timed cut.
To accommodate broad brassica foliage, generous spacing, unobstructed airflow and an aisle that stays dry, consider the Classic Aluminium Greenhouse.
01 / The desired finish
“A pale, closed head records a steady crop: robust leaves first, then cool development, followed by timely protection until the precise harvest cut.”
Precision matters more with cauliflower than with many protected crops because peak quality passes quickly. After brief dryness, a tomato may recover and merely carry smaller fruit. Cauliflower disturbed while building leaves or initiating a curd may instead button, turn grainy, develop leafy bracts or loosen prematurely.
Protected cultivation helps because key conditions remain manageable. Seedlings gain shelter from wind and downpours, watering can be directed accurately, and air movement can be deliberately set. First establish a broad, vigorous plant; thereafter, avoid swings in moisture, nutrition or temperature while its clean, tight head develops.
02 / Variety, maturity and season
Put cauliflower into the coolest stretch of the local growing calendar.
For an unheated Australian greenhouse, schedule cauliflower in the cool season. A spring crop works where vents open early and fully with sunny weather. In many districts, planting near summer’s end for an autumn harvest is easier because falling temperatures favour sound curds. The cover excludes downpours and seasonal damp while buffering chilly nights. Still, use frost cloth or another suitable cover whenever frost is forecast.
Match the variety to planting date, maturity speed, local conditions, heat tolerance and its leaf-covering behaviour—not only an appealing picture or claims of huge heads. Choose quick early varieties for spring. Slower autumn types are suitable when their heads will form in cooler weather. White self-blanching varieties curve inner leaves over the head naturally, reducing the amount of manual covering needed.
Early cultivar / spring crop
Fast maturity before warmth
Useful where harvest must finish before warmer weather arrives. Begin only when you can reliably avoid cold stress in young plants and later heat build-up.
Maincrop cultivar / autumn crop
Measured growth into cool weather
Frequently the safer option: start seedlings during summer, transplant as temperatures retreat and keep the crop sheltered into autumn.
Self-covering / white curd
Inner foliage closes naturally
Practical when daily inspection is not possible. Still check heads regularly: covering leaves reduce light, but cannot correct heat, drought or nutrient shortage.
03 / Raising plants
Young plants should grow stocky, well rooted and without setbacks.
01 / Seed
02 / Seedling cell
03 / Young plant
04 / Plant out
Start clean and controlled
Place a single seed in each cell of fresh, hygienic seed-raising mix. Maintain consistent moisture without waterlogging, then mark both the cultivar and planned transplanting date.
Build roots, not height
Immediately after emergence, give seedlings excellent light and mild air circulation. Aim for a short, sturdy plant with cohesive roots, not weak indoor growth stretched by poor light.
Keep the early stage stable
Do not leave plants crowded, hungry or root-bound while they wait for the bed. Overgrown cauliflower plants are especially sensitive to this early growth interruption.
Transplant an intact, vigorous root ball
Transplant once several true leaves have formed and roots hold the mix together. Keep the cell’s planting depth, settle soil gently around each plant and water thoroughly.
Propagation is your earliest quality checkpoint. In Germany, an early crop is often sown from February. Guidance from the Bavarian State Institute for Viticulture and Horticulture specifies 16 to 18 °C for germinating early cauliflower, followed by 14 to 16 °C during seedling production. Prolonged potting, excessive cold or other stress may trigger very small, premature heads. When a bed is delayed, sowing a modest replacement batch is often wiser than keeping mature transplants waiting.
Over several days, acclimatise seedlings to brighter light and cooler air movement before transplanting. Their root balls must remain moist, and exposure to cold nights is not sensible hardening. If practical, move them in late afternoon or beneath cloud. Make the change almost uneventful: avoid severe wilt, injured roots or any check to growth that could later appear in the curd.
04 / Space for full-grown foliage
Allow for the leaves that will develop, not the small transplant.
50–60 cm plant spacingUnobstructed working aisleClearance beside the glazingUnblocked airflow line
Spacing the crop
Depending on the variety, 50 to 60 cm between plants and rows is a practical guide. Give vigorous autumn varieties the wider spacing so their leaves dry promptly.
Access path
Leave an aisle wide enough for access. Inspect curds, soil moisture and leaf undersides without trampling the bed or repeatedly brushing the crop.
Glazing edge
Outer leaves should not touch the glazing or greenhouse wall. A clear margin improves airflow and reduces condensation problems and sharp temperature shifts beside the enclosure.
Ventilation corridor
Keep foliage clear of doors, roof vents and other openings. Cauliflower needs mild circulation beneath its canopy, not trapped humidity.
A newly planted row can look almost too empty at first. Keep that space. The later broad leaves provide energy for a substantial head. Compressed foliage also creates damp areas that dry particularly slowly under cover. Two rows make sense only if both sides remain reachable and neither bed nor roots need to be walked on for care or harvest.
With limited floor space, a few well-tended plants will outperform a crowded row that promises yield only on paper. Consider the Classic Aluminium Greenhouse as a growing space for large-leaved brassicas, orderly propagation and a genuinely usable central path, not simply weather shelter for individual pots.
05 / Temperature, ventilation and light
Maintain brightness while keeping the structure cool.
Cauliflower gains nothing from being roasted behind glazing. Vent through doors and roof openings as morning temperatures begin climbing; waiting until the air feels stifling is too late. Shade cloth may ease an exceptional hot spell, yet it cannot compensate for poor seasonal timing or inadequate ventilation. For objective conditions, mount a minimum–maximum thermometer level with the crop canopy rather than judging from a moment inside.
Cauliflower needs a cool, even run. In an Australian spring, hard sun behind closed glazing can raise temperatures unexpectedly. Hot days and mild nights interfere with curd formation and encourage open texture. When frost threatens during transitional weather, add frost cloth overnight, then remove it next morning so foliage and soil can dry.
Ventilation is also part of prevention. Apply morning irrigation at soil level, then air the structure well enough that neither curds nor foliage stay wet after dark. If you install a fan, use a soft flow through the planting rather than a blast that dries one side of the bed. Other designs and options for controllable growing conditions appear among the Bloomcabin Aluminium Greenhouses.
06 / A place for consistency
Every interruption will later show in the head.
Avoid alternating saturated, rank growth with a spell of dry soil. Equally, a stalled planting cannot reliably be caught up by dumping on nitrogen late. When the root environment fluctuates, foliage develops unevenly and the resulting disorder carries into curd development.
01 / Root zone→
02 / Foliage→
03 / Head formation→
04 / Finish
Maintain even moisture through the feeding-root depth. Before adding water, probe below the deceptively dry top layer with a finger, slender dibber or small trowel.
Stable moisture and balanced nutrition produce broad, healthy leaves. This foliage supplies energy needed before a head is visible.
Cool conditions and an undisturbed plant allow a sensibly sized head to form. Early stress can instead cause a premature, much-too-small button head.
Even growth supports a firm, finely textured head. Heat, drought or hurried fertiliser applications can loosen and coarsen the surface or fill it with small leaves.
Irrigate calmly and consistently
Soak an in-ground bed until moisture penetrates the root layer, then inspect it before watering again. Rain never reaches covered soil naturally, while its texture, solar exposure and the crop’s size keep altering demand. Choose drip lines or slow delivery near the ground over repeated light spraying. Clean, loosely spread mulch moderates evaporation but must not hold dampness against the stem.
Match fertiliser to the soil
This is a hungry crop, but indiscriminately increasing fertiliser is no plan. Incorporate well-matured compost before transplanting and provide a balanced organic base suited to need. When growth looks weak or abnormal, test the soil rather than feeding blindly. A modest top-up while foliage expands can help; however, a large quantity of readily available nitrogen promises neither generous heads nor dependable quality.
If you want robust construction, thoughtfully placed vents and beds reachable from the path, use the Classic Aluminium Greenhouse as the basis for a deliberately organised growing area.
07 / Head formation begins
Inspect carefully from the moment a pale crown first shows.
When a light-coloured speck appears between the newest central leaves, revisit every specimen at intervals of two to three days. This stage calls for steadiness, not major corrections. Keep ventilation and soil moisture consistent, clear weeds, and trim solely damaged or diseased foliage that touches the ground. Leave sound leaves attached because they feed the curd before becoming its natural sun cover.
White cauliflower heads remain most appealing when protected from direct, intense sun. The leaf canopy acts as shade and as a quality indicator: a vigorous plant with plenty of healthy leaves had good conditions for a firm head. Do not remove large leaves for supposed ventilation. Air comes from spacing, clear paths and open vents, not stripping the plant.
08 / Blanching and leaf protection
Bring leaves together like shutters, never like tight wrapping.
To blanch cauliflower, use its outer foliage to shade the white curd and preserve the light ivory colour from harsh sunshine. Do not begin until the young head is visibly firm. Timing cannot be fixed in advance: cultivar, conditions and development pace decide when cutting approaches. Once foliage conceals the curd, inspect it often.
A self-covering cultivar reduces the task, but individual plants may still leave part of the curd exposed. Inspect briefly for a sunny gap. During humid or hot conditions, arrange the foliage with extra room. Leaves lying wet against the curd invite decay; create ventilated shade rather than sealing in moisture.
01 / Open
02 / Shade
03 / Secure
04 / Reopen and inspect
Before covering the curd
Leave the inner foliage open until a small, firm curd can be seen; beforehand it requires light and unrestricted air exchange.
First shade
Loosely draw two or three dry, healthy outer leaves across the head without sharply creasing or breaking their ribs.
Secure loosely
Where support is necessary, fasten a soft clip or loosely knotted twine well above the curd, preserving open space for air.
Inspect regularly
Briefly open the cover after dew, high humidity and before harvest. Check dryness, firmness, discolouration and hidden pests.
09 / Checking the finish
Read the surface before blaming the variety.
Not every variation makes a head inedible, but it does reveal something about the crop’s progress. Use the visible result to improve the next planting instead of trying to repair a formed head with hurried interventions.
Ideal compactness
Buttoning
Granular surface
Leafy bracts
Soft tissue rot
Pale and firm
Aim for a pale, firm dome with tightly packed, uniform grain and no florets projecting from the surface. Harvest before that closed form begins to open.
Buttoning
A head that forms far too early and remains tiny commonly reflects previous stress: aged transplants, cold, overheating, drought, injured roots, poor nutrition or pests.
Graininess
When individual florets stretch and separate, the head loses its fine closure. Heat or marked growth fluctuations commonly came first. If still usable, harvest promptly.
Bracting
Small green leaves between florets can be varietal, but are also encouraged by heat, drought and other disturbance during early head formation.
Discolouration or rot
For yellowing or brown marks, reassess frost cover and exposure to sunshine. Where tissue is dark, damp or yielding, investigate injury, condensation, cleanliness and circulation.
Change for the next crop
Review seedling temperatures first, followed by planting time, root health, airflow and irrigation. You cannot reconstruct a curd already formed, though better scheduling can improve the following planting.
Buttoning signals that curd initiation occurred before enough foliage was made. Trouble commonly started weeks beforehand, perhaps with overly cold propagation, an extended wait in the pot, damaged roots or water stress directly after transplanting. Extra feed applied later will not expand the button. Take it small while still firm, then correct those early conditions when preparing another crop.
When grain develops or small leaves push through a curd, look chiefly at temperature and moisture management. Hot conditions, dryness and stop–start growth encourage leafy or open texture. For another planting, align curd development with cooler weather, begin sunny-day ventilation earlier and keep root moisture predictable. Flooding a bed after it dries cannot restore the former continuity.
10 / Crop health, pests and hygiene
Maintain visibility and cleanliness throughout the house.
Shelter does not exclude brassica pests. At least twice weekly, turn over leaves and inspect growing points for aphids, eggs, caterpillars, webbing, frass or chewed tissue. On a small planting, hand-pick caterpillars early. Fine crop netting fitted securely across ventilated sides can limit cabbage white butterflies, provided airflow remains clear. If more control is needed, identify the pest and follow current label directions for that product on edible brassicas.
Watch for clubroot. Wilting in damp soil with enlarged, knotted roots warrants concern. Keep affected plants out of compost, clear cruciferous weeds and exclude cabbage-family crops from that ground for years; test suspected soil. Rotation includes cauliflower, broccoli, kohlrabi, radish, mustard, rocket and related green manures. Water near ground level, remove diseased debris promptly and encourage rapid drying. Before applying chemical control, verify current APVMA registration or permit and your state or territory’s use rules.
After harvest, clear every root, leaf and spill of soil. Wash knives, seedling trays, benches and paths, especially after abnormal plants. Hygiene is practical disease control: it breaks continuity between the finished planting and its carefully scheduled successor.
11 / Picking, cooling and keeping
Cut at peak firmness, then cool promptly.
Signs of maturity
Harvest while the curd is pale, dense, firm and evenly closed, before florets separate. If warm weather approaches or graininess appears, forget the maximum size pictured in catalogues. A moderately sized curd cut at peak quality serves the kitchen better than an oversized one left for an extra day.
With a sanitised, sharp knife, sever the stalk underneath the curd. Retain several surrounding leaves to form a protective collar, limiting bruises and moisture loss during the trip indoors.
Cool
Remove the cauliflower from the structure straight after cutting. Keep it unwashed in the refrigerator crisper, with loose leaf cover around it, and rinse only when preparing it. Because chilled air can dehydrate produce, its original collar remains worthwhile.
Store and preserve
Cauliflower tastes finest just after picking, so use it within a few days. Inspect stored curds and discard those developing dark or soft areas. For longer keeping, separate the head into florets, immerse them briefly in boiling water, chill quickly and freeze. Prompt preservation avoids sacrificing quality by leaving the crop uncut.
12 / At the greenhouse bench: questions
Greenhouse cauliflower FAQs
Is year-round greenhouse cauliflower realistic?
Only in places and seasons where stable coolness can genuinely be maintained. Across much of Australia, cauliflower under cover fits the cool season. Summer heat is usually the chief obstacle, while low light and frost constrain winter crops in colder districts. An unheated structure broadens the calendar but does not erase seasonal boundaries.
Must self-blanching cauliflower be covered as well?
Generally no: their inner foliage naturally arches across the curd. Even so, inspect plants individually. Where hard sun reaches an uncovered section, drape some dry outside leaves over it without packing them down. Moist foliage must never remain tightly bound around the curd.
Why does my cauliflower have only a tiny head?
This is commonly buttoning, where the head starts before enough leaf area has developed. It may follow overgrown or root-bound seedlings, cold stress, heat, drought, injured roots, nutrient imbalance or pest pressure. Late feeding cannot enlarge it. Cut the little head while it is firm, then improve the schedule and conditions for the next crop.
How many cauliflowers suit a compact greenhouse?
Calculate using mature leaf width, not bed length alone. With 50 to 60 cm spacing, a clear access path and enough distance from the walls, a small greenhouse often accommodates fewer plants than expected. The key is keeping doors and vents usable, and reaching each plant for checking, watering and harvest without continually brushing foliage.
Can cauliflower be grown under cover in a container?
It can, but a deep bed inside the structure is generally more reliable. Choose a roomy, stable pot with effective drainage. Because container roots heat and lose water faster, the even conditions cauliflower needs become harder to maintain. Position pots clear of the warmest glazing and assess moisture every day.
13 / References for further study
Technical evidence behind a finer curd
These specialist references underpin the sections on propagation, greenhouse climate, crop health, curd quality and prevention.
More from Bloomcabin: “Plan a Greenhouse: Layout, Crops & Upkeep” · on shielding aluminium-greenhouse crops from weather and pests · “Harvest Fresh Food Throughout the Year”
- LWG Bavaria: Producing seedlings at home or purchasing them
- LWG Bavaria: Early cropping in small greenhouses
- Saxon Garden Academy: Home-garden cauliflower production
- APVMA: Registered chemical products and permits search
- North Rhine-Westphalia Chamber of Agriculture: Clubroot identification and prevention
- Royal Horticultural Society guide to growing cauliflower
- LWG Bavaria: Temperatures and methods for cauliflower propagation
The final fitting
Provide timely airflow around greenhouse cauliflower.
- Timing: Place head formation in the most reliably cool part of your spring or autumn season.
- Leaf room: Give every plant 50 to 60 cm of space, an accessible path and clearance from glazing.
- Ventilation: Vent before heat builds, maintain even root-zone moisture and ensure covering foliage stays airy and dry.
Classic Aluminium GreenhouseAluminium Greenhouses from Bloomcabin
