
Growing Ginger Successfully in a Greenhouse
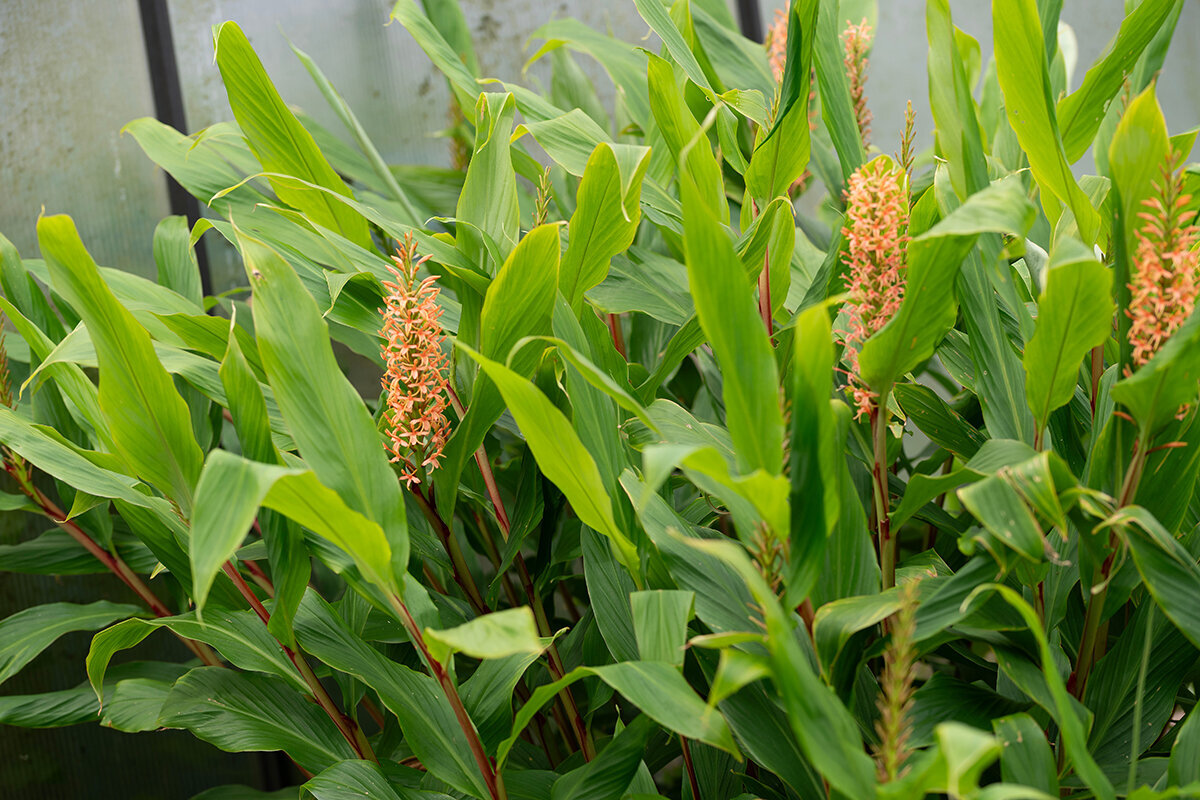
Classic aluminium greenhouseAustralian greenhouse crop profile
Banked heat / unhurried growth / richly scented crop
A reliable ginger crop
under greenhouse cover
Ginger asks for no theatrical tropics. Success comes from a drawn-out season with consistent heat, humidity that still feels airy, and time for the rhizome to travel laterally.
Why shelter helps
Ginger uses a greenhouse less as a refuge than as a means of holding onto summer.
An edible ginger plant develops from a rhizome and thrives on heat. In Australia's cooler zones, an exposed growing period may not stay warm or stable long enough to produce substantial branching. Under cover, establishment is protected, warmth around the roots is more even, and cooling autumn nights arrive less abruptly.
Uniform conditions are crucial because the crop is hidden in the mix. Chilled soil, saturation followed by drought, and waterlogged roots all set ginger back. Give it a wide planting space with rapid drainage, stable warmth and gentle moisture. Begin growth somewhere warm, then avoid prolonged pauses once development is under way.
Southern coasts and cooler districts Begin early inside or add mild heat, because protected establishment offsets chilly nights.
Elevated districts and tablelands Allow for late returns of cold, then air the structure before summer temperatures surge.
Subtropical districts and warm inland areas On hot days, air the house promptly, add temporary shade where useful and check pot moisture carefully.
Temperate highland climates Cover maintains the extended heat that otherwise disappears through colder nights.
01 / The crop is designed underground
Treat rhizome choice as the decision that shapes the whole crop.
That choice truly does shape it. New ginger plants come from sections of rhizome, not seed. Where available, source firm, fresh planting material through a reputable nursery or specialist grower. A supermarket piece can shoot, yet its health is uncertain and it might have been treated to suppress sprouting. Reject any soft or questionable starter for a carefully controlled crop.
Select
Firm, plump, lively
- Skin smooth and well filled
- Visible buds, one or two
- Cuts clean and fully dry
- Weighty, with a fresh aroma
Reject
Any softness deserves caution.
- Fermented odour or visible mould
- Dark cavities or mushy nodes
- Severe shrivelling
- Undersized pieces with little vigour
Guidance from the Bavarian State Research Centre for Viticulture and Horticulture suggests home gardeners use sections weighing about 30 to 40 g, with two shoot buds on each. Cut larger hands using a sanitised knife. Before they touch damp propagation medium, cure every new cut completely in a clean spot with good airflow. Sound flesh, hygienic tools and exposed, dry wounds provide straightforward protection from decay.
02 / Growth begins out of sight
Let temperature, rather than impatience, govern pre-sprouting.
Little may seem to happen for weeks, although roots are beginning and the dormant rhizome is activating. Choose a low container that drains, filled with loose seed-raising mix or coir kept barely moist. Supply about 22 to 26 °C with a heat mat or a reliably warm indoor location; 24 °C makes a practical reference point.
Days 1–2Cure the cut facesKeep dry with airflow.
Weeks 1–2Rest in warmthDamp only, not soaked.
Weeks 3–4Tips and roots emergeWatch for fresh green.
Weeks 4–6Move on while vigorousShelter first; transplant next.
Moisten the propagation material sparingly; saturation is never appropriate. Wait until the top begins drying before adding a careful amount, rather than drenching the tray. Lift any humidity cover each day to release stagnant air. Prepare the final bed or pot when robust green growth and slender roots become visible. Crowded pieces left together will entwine, making avoidable root breakage likely during transfer.
03 / Width for a travelling rhizome
Set it near the surface, turn buds skywards and reserve depth for topping up.
Rhizomes travel across the pot, making width more valuable than excessive depth. For each starter section, provide roughly 25 to 35 litres and no less than 30 to 35 cm of mix. In a wide bed or trough, leave about 30 cm between plants. Fit several generous drain holes and raise containers slightly so water can escape. Keep the crop reachable for checks, irrigation and future mounding.
Bud upward
Face the active growing tip towards the top.
Face the active growing tip towards the top.
Cover lightly
Begin with just 3–5 cm.
Begin with just 3–5 cm.
Drainage below
Loose mix, clear outlets.
Loose mix, clear outlets.
Combine premium peat-free potting medium with finished compost and a porous mineral component—perlite, pumice or fine expanded clay are suitable. Clay-heavy garden soil compacts inside pots, holds too much water and makes moisture harder to judge. Lay each section with its buds facing skywards, add a shallow cover and give one careful watering. Do not maintain saturation afterwards. When fresh rhizome ends press upwards in summer, add loose medium or mature compost in successive 2 to 4 cm layers. This excludes light from the branching rhizome without burying the shoot bases too far.
04 / Direct the environment, not a tropical stage set
Moist air should be paired with oxygenated roots and an escape route for excess heat.
People often assume protected ginger should stay wet at all times. That approach is harmful. Warmth, comfortable humidity and consistent moisture beneath the surface are welcome, but the underground stems also require air and swift drainage. Schedule irrigation so the top layer can breathe. Think warm and responsive, never closed and steamy.
Warmth
Prioritise the root area.
Active-growth range: about 25–30 °C
EstablishmentPeak summerMaturity
Water and airflow
Moist beneath, with air always present.
Irrigate the medium and keep exchanging air.
Light
Well lit, filtered and adjustable.
Prevent heat damage to foliage.
Warmth
A useful pre-sprouting range is 22 to 26 °C. Once plants are moved, active development is best supported by keeping roots at 20 °C or warmer; summer productivity is often good between 25 and 30 °C. Check temperatures inside the pot, not merely in the greenhouse air. Sunshine in early spring can warm glazing while nights remain cold. A chilled medium may pause an otherwise healthy plant for several weeks.
Moisture and ventilation
Apply enough water to reach the whole rooting depth, then wait until the top 3 to 5 cm feels dry while lower layers retain a little moisture. Drip lines or slow application onto the medium keeps leaves drier than frequent overhead watering. Vent early each morning, ahead of rising temperatures, and again during a humid afternoon. If glazing, leaves and containers remain damp for extended periods, water less often and move more air.
Summer light and heat
Although ginger accepts filtered sun, continual gloom produces spindly plants. Choose a light position but soften fierce midday radiation passing through the glazing. For a sustained hot period, exterior shade cloth rated around 30 to 40 percent can help. Coordinate roof vents with door openings before the house overheats to create through-flow. Shade supports good ventilation; it cannot replace it.
The classic aluminium greenhouse offers an orderly growing space, sheltering an early-spring start, releasing heat effectively and allowing tall ginger foliage to stand apart from shorter crops that favour direct sun.
05 / Notes through active growth
Care for ginger through small, repeatable routines.
Above the mix, healthy ginger appears uneventful: its shoots stand straight, foliage stays clean and little changes from one day to the next. Timely, measured care creates that stability; rushed remedies after symptoms appear do not.
Watering pattern
Test first; apply water gently afterwards.
Push a finger into the upper 3 to 5 cm. If that layer has dried while slight dampness remains below, irrigation is approaching. Apply water gradually at the shoot bases until some drains out, then clear the saucer. In beds, a drip line or slow, deep soak reaches the rhizomes without pooling. A sunny, warm house may require this every one to three days; overcast periods require far less.
Feeding pattern
Add nutrients without building salts in the pot.
Although compost supports early development, the season is long. After sturdy shoots form, provide dilute organic liquid feed at intervals of two to three weeks, or follow the label for a balanced slow-release product. A moderate supply that includes sufficient potassium is appropriate. Pale foliage can suggest shortage, yet inspect warmth, drainage and root condition before feeding again. Nutrients remain unavailable when the medium is cold or saturated.
Topping-up pattern
Keep rhizomes covered without crowding the shoot bases.
If new rhizome growth reaches the top, spread 2 to 4 cm of fresh open mix or well-matured compost across it. Add more only when the plant reveals a need, commonly between one and three occasions over summer. Chopped foliage, straw or untreated hemp fibre can form a light mulch to temper moisture loss and heat peaks. Leave a gap around each shoot base for air.
Keep a concise season record with dates for planting and emergence, periods of heat, feeds and the onset of autumn colour. Memory becomes unreliable over a long crop; a few exact observations separate ordinary ripening from trouble. Arrange floor space, paths and air routes to suit from day one. A classic aluminium greenhouse creates a practical framework that remains useful.
06 / Local seasons control the timetable
Build the program around Australia's weather, not an imagined tropical ideal.
Cold starts to spring
Use indoor heat, a warming mat or a gently heated house to begin in late winter or early spring. A permanently unheated greenhouse should wait until nights moderate and potting medium remains comfortably above 15 °C. Soil near 20 °C encourages vigorous establishment. That head start adds valuable cropping time in southern, elevated and frost-exposed gardens.
Inland summer heat
In a heatwave, read temperatures beside the ground and in dark-coloured pots, not only in the air. Medium that remains well beyond 30 °C calls for earlier ventilation, measured irrigation and shade where appropriate. A sudden deluge cannot cure overheating and may drive oxygen from the rhizosphere.
Humid, rainy districts
Humidity itself is seldom lacking in these places; the concern is that surfaces dry too slowly. Elevate each pot, remove standing water from saucers and space containers so air can circulate. Use doors and roof vents together. If dampness persists, first lengthen the interval between waterings rather than adding further moisture.
Long, mild autumns
Maintain restrained care while leaves stay green and sound. Additional warm weeks let older rhizomes thicken and develop a stronger flavour. Begin tapering irrigation only when shortening daylight, colder nights and consistent yellowing indicate natural decline. A yellow leaf is not automatically a request for more feed.
These responses are simpler in a structure with balanced proportions. Consider the classic aluminium greenhouse for a layout with broad potting areas, unobstructed paths, and doors and windows arranged around heat-loving plants. Another perspective on a garden building intended for long service is the classic aluminium greenhouse.
07 / Investigate signals before intervening
A symptom is a clue to follow, not a diagnosis for every plant.
Begin with the potting medium and roots, then assess how symptoms are distributed over the plant. Uniform yellowing in late autumn carries a different message from the abrupt collapse of a green summer shoot. Quarantine the container if decay seems possible. Keep its water and medium from reaching healthy stock via hands or equipment.
Yellowing in autumn
Perhaps normal seasonal ripening
Leaf tips turning brown
Possible dry root ball, sun or heat
Stalled growth
Cold, deficiency, compaction
Webs or fine mottling
Inspect for spider mites
Soft rhizomes or wilting
Respond promptly and consider rot
Trace the signal
Uniform yellowing as the crop finishes: Natural ripening is often the cause. Ease back irrigation, discontinue strong fertiliser applications, then choose between lifting the crop and allowing a little further maturation.
Pale patches or browned leaf ends: Assess harsh sunlight through the glazing, insufficient moisture and excess heat around roots. Soften midday sun, stabilise irrigation and increase air movement; constant saturation is not an appropriate remedy.
Poor vigour with lower foliage gradually turning yellow: Review medium warmth, outlet holes, compaction and the feeding already supplied. Restricted pot volume may also slow the crop. Change a single limiting condition at a time so any response can be interpreted.
Tiny speckles, fine webs or lacklustre foliage: Inspect leaf undersides for spider mites, focusing on dry, hot corners with little air movement. If necessary, quarantine the pot, wash foliage thoroughly and physically suppress a light early outbreak. At the same time, improve ventilation around it.
Green shoots collapsing suddenly, softened flesh or dark rhizomes with an unpleasant smell: Assume serious decay or root injury may be present and respond immediately. Quarantine and remove the plant together with its medium; never add diseased matter to compost. Wash tools and containers thoroughly, then review drainage and irrigation for nearby stock. Infected sections must not be retained for propagation. Starting with clean material, separating growing media and allowing a long rotation offer better protection than attempting a late cure.
08 / Shift from active moisture to lifting
Time the harvest for the style of ginger required in the kitchen.
The crop offers two rewarding stages. Young ginger carries pale, delicate skin over crisp, succulent flesh. With more time, the rhizome becomes solid, more pungent and better able to keep for a while. Protection under glass allows either result instead of letting the first chilly night dictate the finish.
Young ginger
Delicate, for prompt use
- Lift while leaves remain green
- Wash with care
- Use promptly
Fully developed ginger
Solid and better for keeping
- Lift once foliage naturally declines
- Air-dry away from sunlight
- Reserve perfect sections for planting
Young ginger
LWG guidance says fresh rhizomes can be lifted as early as three to four months. Choose a vigorous specimen and carefully expose an outer section, or ease the complete root ball from its container. At this stage, the skin is pale and fragile and the flesh succulent with fewer fibres. Use it for tea, syrup, delicate dishes or pickles. After a gentle rinse, cook with it soon or chill it briefly. A partial harvest should disturb the central branches as little as possible.
Mature ginger
For a firmer crop with deeper aroma, wait for the leaves to decline by themselves. Gradually withhold water as most foliage yellows and nights become cooler. Lift on a dry day, tipping out a container or loosening the bed with a garden fork; never haul on the shoots. Trim away stalk remnants, brush off loose earth softly, then place the crop in moving air for a few hours.
Freshly dug ginger should not bake in direct sun or be packed closely while still damp. For brief keeping, place sound sections somewhere dry, cool and protected from frost, checking them often. Set aside exceptionally firm, intact sections with distinct buds as next season's stock. Discard any suspect medium and wash pots, implements and drain zones after lifting. Calm, thorough hygiene is part of preparing successfully for the coming season.
From the potting-bench notebook
Greenhouse ginger FAQ
Is year-round greenhouse ginger practical?
Only reliable, continuous heat makes uninterrupted growth feasible. In cooler parts of Australia, most home growers will find a lengthy warm-season crop more practical. Without heating, a winter greenhouse cannot keep the rhizosphere warm enough, so development can cease entirely. Begin with warm pre-sprouting late in winter, use cover across the warmer growing months and plan an autumn harvest.
How much sunlight suits ginger under cover?
Good illumination is necessary, although fierce summer rays through glazing may overheat both foliage and medium. Keep the plant in a light position and screen midday radiation during long hot spells. Judge conditions from leaf behaviour, moisture around the rhizome and a root-zone temperature reading, rather than prescribing fixed daily sunshine hours.
Will ginger grow in a greenhouse raised bed?
It will, provided spring brings adequate warmth and the bed contains an open medium that sheds surplus water. Separate planting points by about 30 cm and retain enough depth to cover rhizomes that later appear. Containers are handier where a plant may need quarantine, close moisture management or relocation during sudden cold.
What stops my ginger from shooting?
Possible causes include dormancy, anti-sprouting treatment, a chilled rooting area, propagation material kept continually wet, or simply expecting results too soon. The section should feel firm and show no darkened soft patches. Keep only gentle moisture around it and hold roughly 22 to 26 °C. Several weeks may pass before healthy material produces visible green growth.
Does ginger require daily misting?
Daily spraying cannot replace sound irrigation around the rhizome. A light mist may be useful during the starting phase or when air is exceptionally dry. Problems are encouraged by foliage that stays wet, an unopened cover and stagnant air. Instead, maintain lightly moist medium with unobstructed drainage, let leaves dry before night, and exchange the greenhouse air routinely.
Which greenhouse arrangement works for ginger?
The crop occupies modest floor space, yet wide pots, warmth near ground level and moving air around its tall foliage are valuable. A classic aluminium greenhouse works particularly well with a roomy bed or pot strip along one side and open paths for irrigation, topping up, examination and lifting.
References and additional reading
Working references for this extended-season crop.
These specialist materials underpin the guidance on heat, starting rhizomes, media, irrigation, crop health and lifting. Their recommendations are presented here at workable home-garden scale and interpreted for Australia's varied seasons under cover.
More from Bloomcabin: Greenhouse setup: caring for plants and planning the layout · Overview of the Classic aluminium greenhouse · answers to common questions about Bloomcabin aluminium greenhouses
- Bavarian State Research Centre for Viticulture and Horticulture – Home-grown ginger
- LWG – Ginger: growing information and cultivation tips, PDF
- FiBL – Ginger cultivation guide for protected growing, PDF
- University of Illinois Extension – Watering and Soil Moisture Guidelines for Ginger
- University of Illinois Extension – Fresh Ginger Rhizome Cultivation: Pre-Sprout Process
- University of Florida IFAS Extension – Ginger, Galangal, and Turmeric Production
- Bavarian State Research Centre for Viticulture and Horticulture – Field experience with ginger cultivation
