
Growing Peas in a Greenhouse
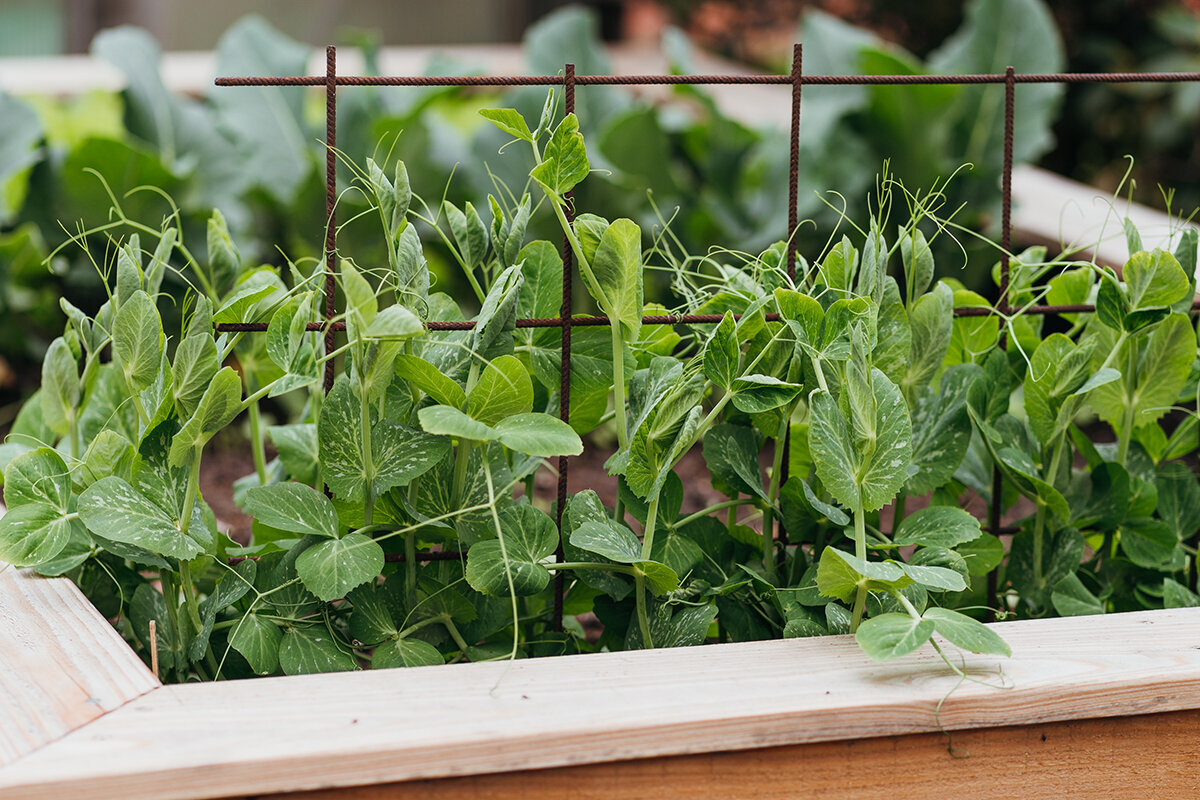
Cool-season cropping under cover
Raise peasinside a greenhouse
Cover does not make peas a summer vegetable. Instead, it brings sowing forward, shields the seed and soil, and lengthens the bright, cool conditions in which tender pods develop.
I. Beginning the cool season
Peas thrive through balance, not added heat: cool roots, moist but airy soil, support ready before growth starts, gentle ventilation and frequent harvesting. In that setting, the greenhouse serves peas well while tomatoes, capsicums and cucumbers wait for their warm-season opportunity.
Make protected space work across seasons
In Australia, pea timing should follow each region’s cooler growing window rather than one national month. Under cover, sowing can proceed while outside beds are cold, rain-soaked or difficult to work. Aim for a sheltered, accessible bed where roots establish early and harvest finishes before prolonged summer heat—not tropical warmth.
An unheated structure guards seed and seedlings against extended rain, surface crusting, wind and birds, while keeping the soil workable. Yet sunshine can lift the temperature under cover with surprising speed. Begin routine ventilation as soon as shoots emerge rather than waiting for wilted tips to signal excess heat.
Direct sowing for a calm start
Because peas establish a vigorous root early, germination is most dependable in their final growing position. Choose a deep covered bed or roomy container with unobstructed drainage instead of a shallow propagation tray. Where practical, arrange netting, twiggy supports or strings ahead of sowing.
When mice, slugs or an unfinished bed require advance raising, choose deep modules. Move seedlings while they are still very young, keeping the root ball entirely intact. Do not allow roots to circle or become dry. As soon as the bed is prepared, sowing in place is still the most straightforward method.
Planning for a short season
Plan peas as a deliberate bridge between seasons, not as year-round occupants. With a well-organised layout, the early row can give way to heat-loving plants without congestion. A practical starting point is the Classic aluminium greenhouse from Bloomcabin provides a suitable basis.
Give peas and early leafy crops the cooler edge where air circulates well. The sunny centre then remains open for tomatoes, capsicums or cucumbers when warm-season planting begins.
II. Choosing the right type
Shelling peas, snow peas or sugar snap peas: each needs its own place.
They all belong to the species Pisum sativum yet their edible results differ. Begin with the harvest you want, then assess whether the plant’s height, required support and picking access will work in the greenhouse’s cooler section.
Shelling peasThe sweet seeds form within the pod. Harvest while pods are rounded, full and vividly green, then remove the tender peas without delay.
Snow peasHarvest the flat, glossy pods before the seeds become clearly visible. Their brief quality window calls for regular, attentive picking.
Sugar snap peasThe crisp pod is eaten whole. Pick when full, juicy and glossy, before the pod walls and seams become tough or stringy.
Dwarf varietiesCompact plants suit low side areas or containers and often finish their harvest in a concentrated period. They also benefit from twiggy branches, strings or low netting.
III. Sowing rhythm
Sow into cool, loose soil with dependable drainage.
Measure temperature where the seed will sit rather than judging by one warm afternoon. Peas start reliably at about 8 to 10 °C when the bed is crumbly and no longer sodden. Cold, smeared soil slows emergence and raises the chance of rot. Containers likewise need fresh mix, enough root volume and unblocked drainage holes.
Clear the bed and check drainage.
Sow 4 to 5 cm deep and water in.
Keep soil evenly fresh.
Finish supports and ventilate early.
Optionally sow a short follow-up row.
Get the bed ready without excessive feeding. Remove fallen foliage, crumble large clods and correct obvious drainage trouble. Work in only a restrained amount of mature compost. A covered bed that previously held hungry summer vegetables may retain substantial fertility. Fresh manure and automatic applications of nitrogen are unsuitable for the pea row.
Sow directly and evenly. Set seeds 4 to 5 cm below the surface and, according to variety, about 5 to 8 cm apart. With paired rows, retain enough space between strips for picking and circulating air. Gently firm the surface to connect seed, soil and moisture, then give the bed one thorough watering.
Cool weather sets the pace. Germination may be unhurried in an unheated structure. Avoid digging for seed merely because several days have passed unless flooding, feeding damage or obvious decay is present. Peas need a moist root environment that still contains oxygen, never ground that remains saturated.
Support comes before vines. Young tendrils seek fine points of attachment early. Netting or twiggy branches installed before sowing prevent later disturbance around roots and keep the row orderly from the outset.
Repeat sparingly. Provided the outlook remains distinctly cool, another short row sown two to three weeks later may spread the picking period. Do not add more sowings when rising greenhouse temperatures are likely to arrive before the youngest plants can flower steadily and form pods.
Pea root active nodules plant sugars
The root feeds compatible bacteria; active nodules initially support the pea plant.
IV. Exchange below ground
As legumes, peas support their own nutrition—not a bed-wide supply of free fertiliser.
Compatible bacteria can produce nodules on pea roots; they belong to the genus Rhizobium . The plant contributes energy-rich carbohydrates to this partnership, while the bacteria capture atmospheric nitrogen and convert it into forms used first by the pea. Consequently, a forceful nitrogen feed is unnecessary in ordinary, properly prepared garden soil. Sound roots, aerated ground and consistent moisture without saturation are more important.
The key distinction is that these nodules initially nourish the living pea. They do not automatically release plant-ready nitrogen to neighbouring crops during that growing season.
An oversupply of readily available nitrogen produces lush, soft leaves and can unbalance the crop. Add mature compost sparingly after considering the bed’s previous feeding. Potassium, phosphorus and trace elements belong in overall plant nutrition, but should not be applied indiscriminately without evidence of need from the soil or plants.
If you want to examine nodule development, lift one dispensable plant gently after several weeks and look along its side roots. An absence of swellings is not a reason to add nitrogen immediately. Investigate drainage, texture, moisture and general plant health first. In protected cultivation, an aerated, active root zone usually contributes more than another fertiliser dose.
V. A duet of supports
Give tendrils fine, accessible points to hold.
A pea ascends through slender tendrils rather than stout stems that coil strongly. One thick post therefore offers little help. Fine netting, branched twigs, slim stakes or closely arranged strings create the small edges its tendrils need.
Compact
Dwarf peas
Low support of twiggy branches, string or netting.
Support
Install at sowing time.
Use roughly 10–15 cm mesh.
Leave space from glazing.
Climbing
Tall peas
Vertical netting with easy harvest access.
Low, compact peas
Although compact plants can look upright when young, heavy pods, watering or a reach towards light may cause them to open out. Usually, short branched sticks, low netting or two taut strings provide enough guidance. Avoid forming an immovable leaf barrier; keep plants upright, pods clear of the soil and spaces open between shoots for air.
- Set aside the front bed or a low section along the side.
- Keep paths clear for quick picking.
- Plant broad blocks only with good air movement.
The shared middle ground
Attach the net to bed edging, stakes in the soil or another independent frame—never the glazing. Arrange it for simple removal when picking ends. Leaving an open channel between the support and greenhouse wall aids circulation and cleaning, and lets you reach behind the foliage when necessary.
Tall climbing varieties
Long-vined peas suit upright netting or a pea fence that can be approached from both faces. Locate the support so picking does not require pushing leaves onto damp glazing or squeezing through growth. The structure’s cooler side can work well where it still obtains sufficient light during the local cool season.
- Keep foliage below roof windows and opening mechanisms.
- Choose removable supports for a clean crop change.
- Do not let vigorous pea growth block passage through the greenhouse.
A stable frame and well-positioned roof vents make seasonal growing easier. The Classic aluminium greenhouse offers a clean aluminium structure and roof vents for a carefully planned, well-aired cool-season growing area.
Soak the root zone thoroughly, then ventilate in time to dry the leaves.
Consistent moisture matters most as buds develop and pods fill. Since greenhouse soil receives no rain, assess the ground itself rather than watering by schedule. If soil several centimetres down has begun to lose its freshness, irrigate deeply in the morning. Repeated shallow splashes dampen only the surface and contribute little to the lower roots.
Deliver water beneath the canopy with a dripline, a slowly running hose or a watering can rather than wetting plants overhead. Moist foliage combined with still air encourages trouble. On clear mornings, open roof vents before warmth accumulates and use the door when conditions allow. Aim for soft circulation, not a forceful draught against tender vines.
Once seedlings are safely established in a ground bed, a light layer of clean mulch can slow moisture loss and reduce soil splashing onto low leaves. Leave a small clearance around stems. For container plants, ample mix, clear drainage outlets and saucers emptied consistently buffer changes in moisture without leaving roots in standing water.
For a lasting, bright, accessible and controllably ventilated growing area, the Classic aluminium greenhouse is a suitable foundation before the first net or seed row goes in.
VI. Flowers and pods
Peas are self-pollinating. Greenhouse climate still matters.
Most pea flowers fertilise themselves, so covered plants are not dependent on bumblebees or manual pollination. They remain well suited to greenhouse cropping only while air and root conditions stay balanced. When flowers arrive, resist reactive feeding. Concentrate instead on maintaining an environment where blooms remain attached and new pods develop evenly.
Cool days with good light favour flowering, but a shut greenhouse may become hot rapidly during sunny late-winter or spring afternoons. Vent through windows and the door before warmth accumulates. Temporary, moderate shade can help during intense sun, while timely irrigation should protect roots before water stress reaches the shoots.
Airflow still has a role even though the flowers are self-fertile. It shortens periods of wet foliage, moderates humidity within thick growth and helps reveal powdery mildew or weakening leaves while symptoms are still limited.
The edible sequence
1. Flower
Cool air, evenly fresh soil.
Cool air, evenly fresh soil.
2. Pod set
The narrow pod begins growing.
The narrow pod begins growing.
3. Flat pod
Harvest time for snow peas.
Harvest time for snow peas.
4. Filled pod
Pick sugar snaps or shelling peas.
Pick sugar snaps or shelling peas.
Choosing the picking stage directly affects eating quality. Developing seeds make snow-pea pods increasingly fibrous. Sugar snaps become less crisp and sweet as their shells dull and toughen, while overgrown shelling peas accumulate more starch. Frequent harvests protect pod quality and prompt the plants to continue setting.
During peak production, inspect the vines each day or no later than the following day. A run of bright, warm weather can push pods beyond their best stage quickly. Harvest methodically, cool what you pick soon after, and leave immature pods attached so they can finish growing.
VII. When warmth builds
As the greenhouse warms, peas need a new plan.
Cool to mildEven growth and tender pods.
Warm middaysVent early and check soil moisture.
Sustained heatPrepare to finish the crop.
Under cool or mild conditions, pea growth stays even, flowers are more likely to remain and balanced moisture helps preserve pod tenderness. As warmer afternoons become frequent, open the structure sooner, feel the soil beneath its top layer and shorten the interval between harvests. Production may continue, but the crop tolerates less stress.
Extended heat increases the risk of shed flowers, soft leafy growth and coarser pods. Ventilation, temporary shade and a thorough morning drink can reduce strain without converting peas into a summer vegetable. If high greenhouse temperatures become routine, end the crop in good time rather than pursuing another yield with more fertiliser or constantly soaked soil.
VIII. Harvesting
Pick according to pod condition.
Peas yield best when pods are removed carefully and often. During the busiest period, carry a small bowl through the greenhouse at intervals of one or two days. Support each shoot with one hand and detach the pod with the other. Tugging can loosen shallow-rooted plants or pull their tendrils away from the net.
Where practical, harvest during the morning, particularly ahead of a hot day. Once picked, the peas’ sugars begin changing into starch. Move pods promptly to the kitchen, or refrigerate them without washing and aim to use them that day.
Snow peasChoose glossy, elongated pods while they are still flat and before the seeds swell into rounded shapes. The pod wall should remain tender and break cleanly.
Sugar snap peasPick plump, crisp, still-glossy pods. Do not wait until they are dull, heavily bulged or fibrous along the seams.
Shelling peasChoose rounded, full pods that retain a fresh green colour, then shell them soon. A pale or wrinkled case indicates greater starch development.
Pea shootsVigorous plants can spare an occasional tender tip early in the season. Avoid repeatedly removing shoots from vines expected to deliver a substantial crop of pods later.
Short follow-up sowing: Make one modest extra row two to three weeks after the initial sowing only if the approaching weather still favours cool growth. Once warm afternoons occur routinely, release the space for cucumbers, tomatoes, capsicums, basil or another warm-season plant rather than forcing peas to continue through unsuitable summer conditions.
IX. Ending the crop
Finish cleanly and make space for the next planting.
As picking tapers off and warm conditions take charge, cut sound plants off just above soil level rather than pulling out every root. Fine roots may stay and decompose in the bed. Clear away foliage and vines carefully; material showing clear fungal disease or serious pest damage should not simply remain in the greenhouse system.
Before summer planting, inspect and wash the net, strings and irrigation equipment. Collect leaves from corners and disturb only the bed’s upper surface. Move future peas elsewhere if disease has recurred. Neither extra compost nor another fertiliser application can resolve defective drainage or poor crop sequencing by itself.
Questions from the greenhouse
Pea FAQs
Can peas succeed in a greenhouse without heating?
Yes. Without heating, the structure supplies shelter and makes workable soil available sooner, yet avoids the continuing warmth peas dislike. Sow in the final position when the bed has drained, crumbles easily and measures about 8 to 10 °C at seed depth. A soil thermometer gives better guidance than a date on the calendar.
Do greenhouse peas need pollinators?
Generally, no. Pea flowers are mainly self-fertile, so cool, steady growing conditions matter more than insects or pollination by hand. Timely venting supplies gentle air movement, which dries the foliage and lightly disturbs the flowers.
When do greenhouse peas need watering?
There is no universal daily schedule because sunlight, soil, container capacity and ventilation all change demand. Test the soil several centimetres down; once the root zone begins drying, water thoroughly during the morning. Moisture should stay consistent through flowering and pod filling, but the ground must not remain saturated.
Should I give peas nitrogen-rich fertiliser?
Not as a routine practice. Peas may form a partnership with suitable nodule bacteria, whereas excessive soluble nitrogen favours weak, leafy growth over balanced development. Use mature compost sparingly, consider what the bed previously received and address demonstrated deficiencies individually instead of automatically applying a nitrogen-rich complete fertiliser.
Which support suits sugar snap peas in a greenhouse?
Choose upright netting with openings of roughly 10 to 15 cm, finely branched sticks or strings placed close enough for tendrils to catch. Set the support in place before or during sowing. It needs to be secure, removable after harvest and separated from the greenhouse glazing.
Why are my pea pods tough?
Late harvesting, high temperatures and fluctuating moisture commonly produce tough pods. Take snow peas while flat, sugar snaps while plump and shiny, and shelling types when rounded and full but vividly green. Picking regularly is essential to eating quality as well as the total number of pods collected.
Sources and further reading
Plan with informed guidance
More from Bloomcabin: year-round fresh-food growing · preparing a greenhouse for spring · thoughtful greenhouse layout
- Saxon Garden Academy guide to peas in home and allotment gardens Technical information on varieties, site, cultivation and uses for vegetable peas.
- LTZ Augustenberg – Technical information on field peas Advice on sowing, nodule bacteria, basic nutrition and sensible crop rotation.
- Bavarian State Research Centre for Agriculture: sowing peas Information on early sowing, sowing depth and water needed for germination.
- RHS guide to growing peas Hands-on information covering sowing, plant spacing, suitable supports, crop maintenance and repeated picking.
- RHS advice on greenhouse ventilation and shading Fundamentals of ventilation, shading and avoiding heat stress under glass.
- Saxon Garden Academy – Technical guide to pea growing German practical advice on pea types, site choice, sowing, care and harvest.
- LTZ Augustenberg – Field peas Further detail on root nodules, nutrient supply, sowing conditions and crop rotation.
Final thoughts
Reserve a cool, bright growing area for the cooler season.
Peas need less warmth than summer greenhouse plants, and well-judged timing rewards the grower with pods that may be sampled before they reach the kitchen. Give them a well-lit, airy seasonal area with reachable roof vents, unobstructed paths and a structure built for continued use.
Place peas on the cooler side, leave an open route for regular harvesting and keep the warmest central ground available for true summer plants.
