





Integrated-storage aluminium greenhouse
A growing zone and separate store in one aluminium structure
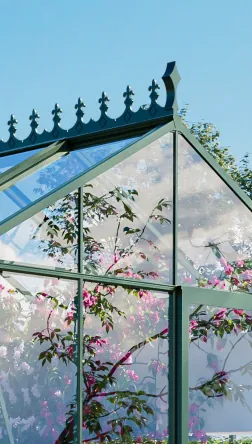
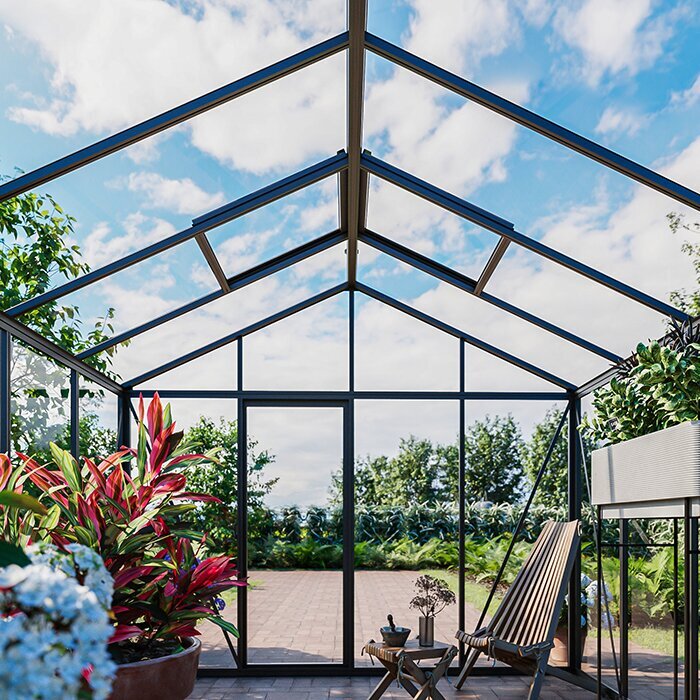
The Bloomcabin aluminium greenhouse with integrated storage places a light-filled plant zone beside a fixed, fully separated storage compartment. Pots, plants, tools and watering gear share one roof, yet stored supplies do not crowd the cultivation area or interrupt paths between plants. It is a practical option when a greenhouse is needed but a second footprint for a garden shed is not.
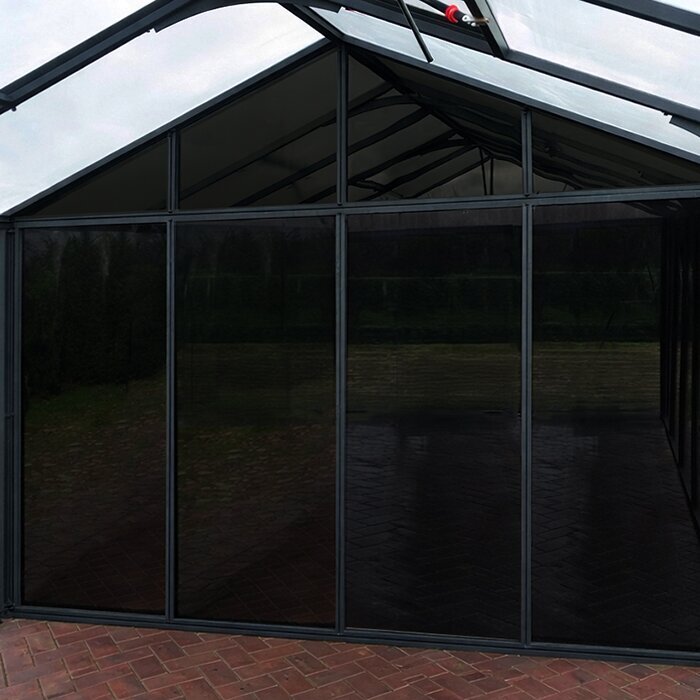
A broad choice includes configurations for smaller and more spacious gardens. Glazing in the cultivation zone varies with the configuration. The storage compartment uses tinted panels to screen tools, pots and supplies from view. Although each space serves a different purpose, the complete building retains a coordinated appearance.
Do not choose solely by the overall footprint. First calculate the area required for beds, planters and comfortable circulation, then allow an appropriate share for the equipment you already own. Sketching the intended crops and essential garden gear on a simple floor plan can clarify which configuration will work. Browse more greenhouse models from Bloomcabin.
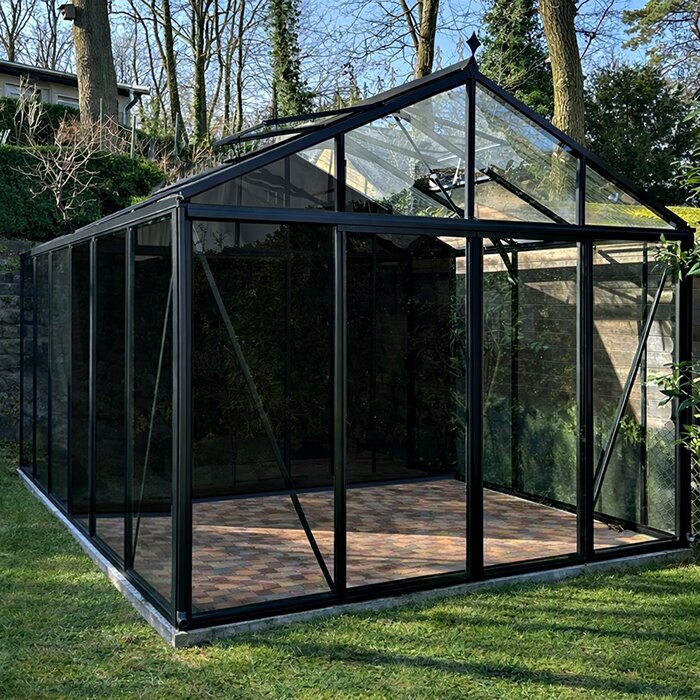
Cultivation and storage in a single building
One frame, with separate spaces for different tasks
Vegetables, herbs, young plants and ornamentals belong in the transparent greenhouse section. Position beds, tubs and plant benches with regard to daylight, ventilation and clear circulation. The store reduces the available cultivation footprint, but removes equipment that does not benefit from light or from the moisture produced whenever plants are watered.
Rather than leaving watering cans, stakes, empty pots, growing media and hand tools under benches or along paths, arrange them in the enclosed compartment. Items used often are most convenient near the connection with the plant zone. Occasional seasonal supplies can occupy rear positions or higher shelving.
Combining the two functions is valuable where separate greenhouse and shed sites would consume too much garden space. Even so, measure any bulky gear before ordering, including the access needed to move it through the doorway and into its proposed storage position.
Put garden tools close to the task
Nearby supplies streamline jobs from seed sowing through to clean-up
This layout earns its keep when a job involves several materials. Soil, labels, containers and tools can move from the store to the bench in sequence, then return to their assigned places. Equipment remains convenient without occupying the cultivation zone between tasks.
A flexible range of sizes
Options suited to modest plots and roomier gardens
Enclosed equipment store
Garden gear kept alongside the cultivation zone
Tinted panels
Stored contents are less exposed to view
Guarantee
12-year guarantee, subject to the applicable guarantee terms
An integrated store with tinted glazing
Screened contents within a consistent greenhouse design
Only the storage section receives tinted glazing, giving it a different visual role from the clear cultivation zone. A continuous roofline and matching frame nevertheless make the two sections read as a single building.
Base site planning on every external dimension of the configuration you select. Because the store forms a permanent part of the greenhouse, both sections must be located together; it cannot be positioned independently in the manner of a freestanding tool shed.
Use this compartment chiefly for clean, dry gardening items, including pots, irrigation accessories, ties, supports and suitable growing media. Anything subject to particular limits for heat, moisture or storage must continue to be handled exactly as its label and manufacturer guidance require.
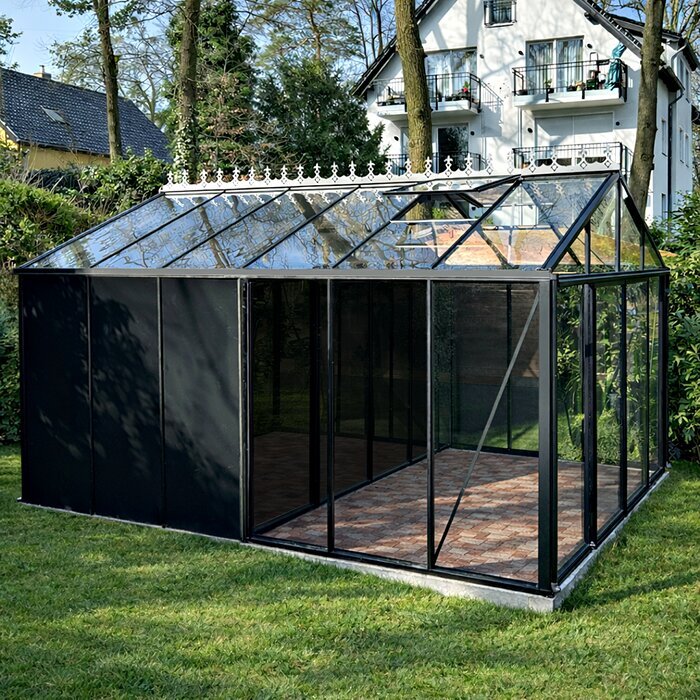
Technical details
Key dimensions, glazing choices and included equipment
Available sizes: 22 versions from 3.77 to 28.08 m².
Models 2.35 m wide: Ridge height approx. 2.32 m; door height approx. 1.65 m.
Models 3.10 m wide: Ridge height approx. 2.67 m; door height approx. 1.85 m.
Frame: High-quality aluminium profiles.
Growing-area glazing: Polycarbonate or 4 mm toughened safety glass.
Storage-compartment panels: Tinted glazing.
Doors: Depending on the model, 3.10 m-wide configurations use either single or double sliding doors.
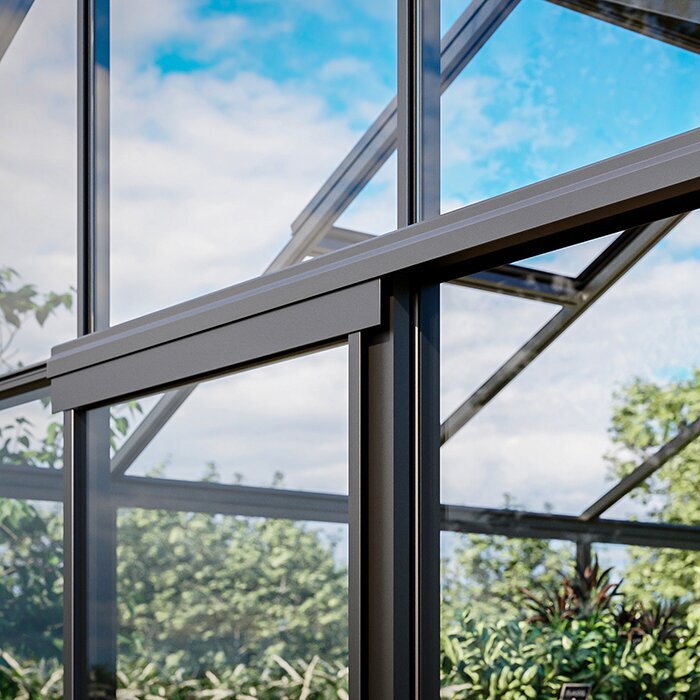
Features: Roof vents, built-in rain gutters and an integrated aluminium base frame. Design ratings are 30 m/s for wind speed and 210 kg/m² for snow load.
Other specifications vary between configurations.
Everyday supplies within easy reach
Collect supplies, care for plants, then return equipment to storage
Seed sowing, repotting and seasonal transitions can require several supplies in succession. Organise pots, labels, ties and hand tools by task. A compact group of everyday essentials close to the bench is more useful than leaving the entire work surface permanently crowded.
Keeping the floor open improves access to plants, shelves and irrigation points. Hoses, bags and crates should stay outside circulation routes. Define one uninterrupted central path before locating tubs, benches or shelving; this also preserves doorway access when large pots need to be moved.
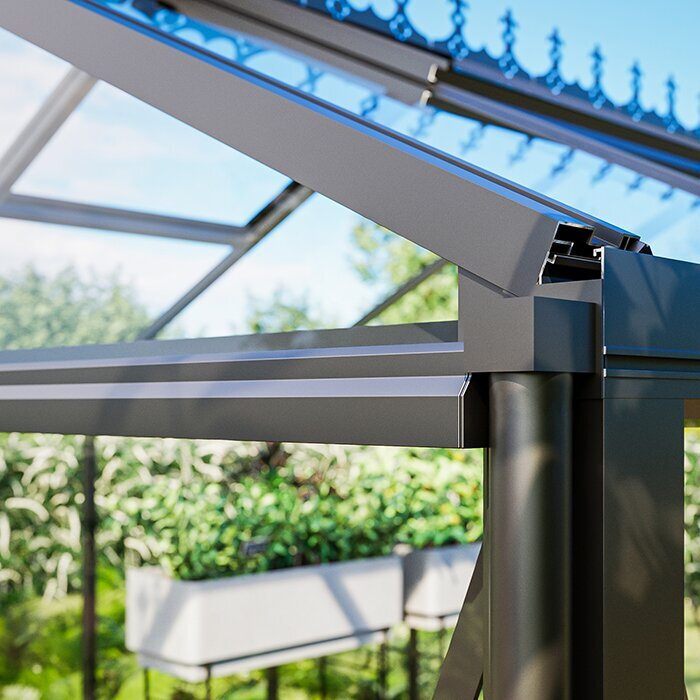
Ventilation of the plant zone is assisted by roof vents, so shelving, climbing supports and tall growth must remain clear of their moving parts. Storage can be arranged vertically: hang lightweight tools, sort small gear on narrow shelves and place substantial stable containers close to floor level.
Built-in storage or a freestanding shed?
Deciding whether the compartment can take the place of another shed
An adjoining store works well for gear used mainly inside the greenhouse, such as watering accessories, empty pots, hand tools and plant stakes. A mower, bicycle or large piece of outdoor furniture needs different doorway clearance, manoeuvring room and parking space, so assess those items separately.
Begin with an inventory rather than the floor area. Record which objects are actually used for greenhouse work, measure each one, and decide whether it will stand, lie flat or occupy shelving. That exercise reveals both whether the built-in store is adequate and the area it should receive.
Retain some capacity for equipment that is used together during particular jobs or seasons. Seedling pots, stakes and empty containers continue to occupy room between uses, so everyday requirements alone are not a sound basis for calculating the compartment size.
Getting ready for the growing season
Have seed-sowing and repotting materials prepared beforehand
Seed trays, propagation pots, labels and several hand tools may all be required when the growing season begins. Inspect each item in advance and organise supplies around the work they support. Discard empty or damaged packaging so current stocks are visible and shortages can be addressed early.
Set aside a defined place for pots and equipment that still need cleaning, away from prepared supplies. This keeps loose soil from clean propagation containers, labels and seeds. Once the task is complete, empty that holding area so access between storage and cultivation remains open.
Seeds and similarly sensitive goods should remain in the compartment only if their specified temperature, humidity and storage conditions can be maintained. Separation from routinely watered plants is useful but is not proof of suitable storage. Clearly marked, closable containers reduce spills and confusion among small items.
Ventilating during warm weather
Keep vents unobstructed and respond promptly as heat accumulates
Direct sun can raise the temperature of the cultivation zone considerably. Operate the roof vents when conditions call for it, while monitoring temperature and humidity. Keep foliage and supports away from the opening arc. Weather, planting density and use all vary, making regular observation preferable to a fixed timetable.
Train shoots and their supports away from opening windows and controls. Recheck them as growth develops through the season, rather than assuming the original clearance will remain. Before planting begins, clean away debris and confirm that each vent travels through its full movement without resistance.
Do not keep materials in the store if they are vulnerable to heat or pronounced temperature variation. The directions on each package remain decisive. Move any product with specialised requirements to a location capable of providing the stated conditions.
Directing rainwater safely
Use the gutters while keeping entrances and the base surrounds dry
Water collected from the roof by the integrated gutters may be directed into compatible drainage or a suitable storage vessel. Any vessel must have a secure footing and be positioned without reducing doorway clearance, storage access or space needed for maintenance.
For irrigation use, place the collection point where water can be drawn without awkward steps, sharp turns or lengthy carrying. Support the vessel on a surface capable of bearing its load. Regularly clear leaves and sediment from connections and gutter channels to maintain predictable drainage.
Route overflow away from door approaches, the foundation and the base frame. Standing water can soften nearby soil, track dirt through both compartments and make access inconvenient. Determine a suitable destination for surplus water as part of the initial site preparation.
Organising the equipment compartment
Assign hooks, shelving and floor space according to load and use
Use slim shelving to lift labels, hand tools, twine and spare parts away from the floor. Shelf corners must not project into circulation space or interfere with doors. Reserve comfortable reaching height for everyday gear and upper positions for lightweight items needed less often.
Put substantial bags and durable containers low down, arranging them so no stack can fall or bear against a frame or panel. Fragile pots should never sit beneath weighty tools. Balanced placement improves visibility, makes retrieval safer and leaves the compartment simpler to clean.
Give potting supplies, irrigation equipment, cleaning gear and plant supports their own zones to prevent disorder. Marked boxes make returning an item straightforward. Preserve enough circulation room to reach shelves at the back without first unloading everything stored in front.
Dividing space between crops and equipment
Classic or Storage: compare uninterrupted cultivation with a dedicated store
A Classic configuration devotes its entire footprint to cultivation and work areas. That can be preferable when another suitable store is already available or the priority is fitting the greatest possible number of beds, tubs and benches. Equipment and consumables must instead come from elsewhere or remain among the plants.
In a Storage configuration, one part of the structure becomes an enclosed equipment compartment. The continuous plant zone is consequently smaller, while tools remain organised nearby. Check that the cultivation area left over can still support the planned crops, furniture and circulation routes.
Gardeners who repot, train plants, irrigate or clean regularly may value having several tools beside the growing zone. By contrast, someone with minimal equipment who prioritises maximum planting room may prefer an uninterrupted interior. Draw the beds, routes and proposed shelving to compare the two layouts before choosing.
Preparing a dependable base
Support the integrated aluminium base frame on enduring, even and load-bearing ground
A firm, level bearing surface is essential beneath the integrated aluminium base. Irregular support may distort frame alignment, glazing fit or sliding-door movement. Check the whole proposed outline before assembly; correcting only isolated low points does not provide continuous support across the structure.
Minor variations in level become more significant as the structure length increases. Before adding glazing or further frame members, verify the diagonals, height and overall plane. Make any corrections at this stage and use the assembly directions supplied for the specific product.
Assess the site's soil, frost exposure, drainage and applicable local requirements before selecting a foundation. Also locate underground services and consider boundaries and neighbouring buildings before excavation, anchoring or material delivery begins.
Glazing for the cultivation zone
Select glazing that suits the way the growing area will be used
For traditional greenhouse styling and an unobstructed view, choose toughened safety glass. It makes plants readily visible from the garden, but also shows water marks and deposits more clearly. Observe the model-specific fitting and care directions, avoiding abrasive cleaners, rigid implements and concentrated pressure on the glass.
Polycarbonate has its own visual character, light behaviour and handling qualities when compared with clear glass. Decide according to preferred appearance, maintenance and intended use, then specify the material with the configuration. Whichever glazing is selected, install it correctly and periodically examine its retainers.
The tinted panels around the store are intended to obscure its contents, unlike glazing chosen for plant cultivation. Stored objects should still be separated from the panels. Clearance assists cleaning and stops protruding tool edges or insecure piles from loading the glazing.
Keep every entrance easy to approach
Align doors with practical garden and equipment routes
Locate each entrance according to how the garden is used in practice. Trace the direction from which plants, tools and growing media will be carried before settling on the site. Sliding mechanisms require unobstructed side zones, so keep large pots, raised beds and walls beyond their operating space.
Test the complete carrying route with the scale of its likely load in mind, whether that is a full watering can, large planter or bag of growing medium. Clearance on both sides matters as much as the doorway itself. Avoid sharp corners, unstable edges, steps and abrupt level changes that complicate handling.
Account for travel to the home, composting area and water point. A shorter line may prove less useful if wet weather makes it slippery or it cuts through delicate planting. A durable, reliable path makes routine greenhouse care easier across the season.
When the main season finishes
Check and clean supplies, then store them only when fully dry
Gather twine, clips, pots and plant supports after the principal growing period, removing anything damaged. Wash serviceable items and let them dry completely before returning them to their assigned locations. This avoids sealing accumulated soil and moisture into storage for months.
Clear dead growth and loose soil so glazing, frames and the base remain accessible. While these surfaces are exposed, inspect the fastenings and remove obstructions from vent mechanisms and door tracks. Complete this work before seasonal equipment begins to reduce circulation within the storage section.
Wet cartons, damp fabric and soiled containers are unsuitable for prolonged storage. Besides hiding other contents, they may produce staining or odours. Inspect seldom-used items for residual moisture as well, particularly before placing them in closed boxes or shelving towards the rear.
Storing garden chemicals with care
Follow product directions for fertilisers and garden pesticides
Retain fertilisers, garden pesticides and other chemicals in their designated packaging and observe the manufacturer's storage directions. Keep every label readable. Never transfer these substances into food containers, and separate them from seed stocks and vessels used for harvested produce.
Being beside the cultivation zone does not remove the need for proper packaging or specified storage conditions. Use another suitable location whenever this compartment cannot provide a product's required ventilation, temperature or moisture level. Consult that product's information for spill-management directions.
Choose secure, stable positions for chemicals, sharp implements and weighty containers, beyond the reach of pets and children. Shelving must also stand firmly, with contents arranged so opening a door cannot dislodge them.
A workstation among the plants
Fit a small potting area while preserving the principal walkway
Locating a bench near the connection with storage saves movement when repotting or sowing. Set its position and depth only after allowing for the path, door movement and vent controls. Choose an easily wiped surface, and keep below it only dry-stored items that leave access unobstructed.
Bring to the bench only the tools, pots and media required for the job underway. Afterwards, return clean implements, close remaining materials or dispose of them correctly. A dedicated small receptacle for plant trimmings prevents waste spreading across either the worktop or the equipment store.
Work should never make the main route impassable. Allocate a side position to crates and watering cans instead of leaving them by entrances. If large tubs will travel through regularly, rehearse that movement during layout planning to expose inconvenient shelves, supports or bench corners.
Planning longer configurations
Give the extra area a deliberate sequence of functions
A longer model will often contain additional crops, work equipment and seasonal stocks. Extra floor area should not automatically become more shelving. Arranging entry, storage, workstation and cultivation zones in a logical order makes navigation clearer and reduces carrying from one end of the structure to the other.
Larger plantings commonly bring more pots, stakes, ties and watering gear. Allow for those quantities without building up surplus stock. Modular containers can be reassigned as seasonal needs change, while tall stakes require a holder that prevents both toppling and doorway obstruction.
Divide extended shelves into manageable zones so everyday supplies remain visible instead of becoming buried behind seasonal stock. Maintain transverse access as well, allowing plants and panels to be reached without repeatedly shifting stored equipment.
Planning compact configurations
Assign each permanent position before fitting out a restricted footprint
Where a garden lacks another suitable store, the compartment remains useful even in a small configuration. However, every permanently parked crate takes a noticeable share of the available area. Give priority to items used for greenhouse tasks and find another home for bulky equipment that is seldom required there.
Plot the tubs, beds, benches and necessary walkway before purchase, then assess the cultivation area left beside the store. Base the plan on mature plants and their supports, not the dimensions of seedlings. This reduces the likelihood of congestion once the first season reaches full growth.
Appropriate sizing depends on both use and the preferred balance between storage and planting. Tall crops impose different spatial demands from a collection of tubs or benches. In practice, generous circulation may prove more valuable than an extra narrow position that eventually obstructs access to glazing or plants.
Maintain a clear view of supplies
Review stock and replace materials according to genuine need
For items used regularly, note the remaining quantities and which packs have been opened. Remove damaged components and empty packets from the record immediately so the inventory represents usable supplies rather than everything physically present.
Review supplies before periods of intensive work, buying only the shortfall for planned tasks. Legible labels distinguish similar parts and partly used packs, while a brief location note can prevent time being lost searching the compartment.
At season's end, compare purchases with actual consumption. Reduce future quantities of supplies repeatedly left over, while deliberately replenishing small essentials that were often unavailable. The contents of the store will then follow real greenhouse practice rather than habit.
Planning for arrival and construction
Arrange site access, working room and sheltered temporary storage in advance
Before the delivery arrives, trace a workable route for every component from the unloading point to the building location. Frames and glazing should not have to negotiate narrow gaps or dense planting. Also provide a clean, protected surface where the parts can be sorted and kept orderly ahead of assembly.
Provide working clearance beyond the full proposed perimeter. Move shrubs, loose objects and outdoor furniture that would hinder construction or future maintenance of gutters and exterior faces. Designate a separate place for packaging during the build so discarded material cannot obstruct an entrance or path.
Have the model-specific manual and associated documents available before construction. Check the delivered package against the stated contents prior to installing any glazing or frame sections, then complete the work in the sequence given by the instructions.
Frequently asked questions
Answers for selecting and using a Storage greenhouse
How do I calculate the storage-compartment space I need?
Inventory everything that will remain by the greenhouse and record its real dimensions. Allocate shelving, floor positions and unobstructed entry space on a plan. What remains must still accommodate the intended plants, circulation and working furniture.
Which items suit the storage compartment?
Prioritise clean, dry gardening gear: empty containers, stakes, hand tools, irrigation accessories and correctly packaged potting supplies. A product with defined limits for moisture, temperature or storage belongs here only when the compartment can satisfy every relevant manufacturer direction.
Do tinted panels protect sensitive products from heat?
No. The tint chiefly makes stored contents harder to see from outside. It neither controls the compartment at a set temperature nor substitutes for compliant packaging and storage. Keep anything sensitive to heat or light under the conditions specified by its manufacturer.
Which glazing option meets my needs?
Consider the unobstructed outlook and traditional finish of toughened safety glass alongside polycarbonate's different appearance and light behaviour. Review the care requirements for both, then confirm which material is offered with the configuration you want.
How do I check whether bulky items fit through the door?
Measure the widest dimensions of the largest object against the selected doorway, including handles and other projections. Then account for the space needed to turn on each side. Drawing these movements to scale can reveal a restriction before the greenhouse is ordered.
How can roof vents remain accessible?
Maintain free space around and below every roof vent. Shelves, tall growth and plant supports must stay outside the path of both the panel and its controls. Remove plant debris and dirt periodically, then test unhindered vent movement before each growing season.
What kind of site does the integrated aluminium base frame require?
Provide continuous, firm and level support capable of carrying the structure. Plan drainage so rainfall and overflow travel away rather than pooling beside the base or entrances. Sufficient perimeter clearance is also needed for construction, cleaning and routine inspection of the guttering.
How should shelving and weighty supplies be positioned?
Reserve low positions for heavy bags and containers that stand securely. Put frequently handled small items on shelving that is comfortable to reach. Nothing should narrow a doorway or path, and shelves and stored objects must remain clear of glazing and frame members.
Select a Storage configuration that fits
Balance plant room, equipment capacity and access for your garden routine
Compare the proposed site with both the planned crops and the equipment that will genuinely remain in storage. A well-matched configuration provides workable cultivation and circulation space without allowing pots, shelving or tools to constrict an entrance.
Checklist before comparing models
✓ Record the dimensions of the largest item intended for permanent storage
✓ Plot the longest stakes, broadest crates and largest tubs to scale
✓ Confirm the chosen configuration's glazing and door arrangement before ordering
✓ Preserve side clearance for sliding doors and equipment movement
✓ Plan where collected and overflowing rainwater will drain before site work
✓ Review the parts list, assembly manual and available building space before starting