
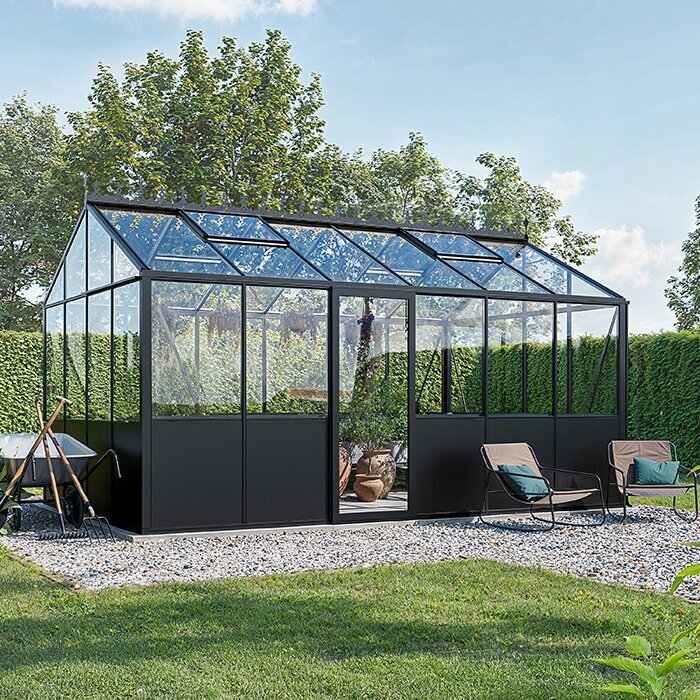





Bloomcabin Prestige Premium Greenhouse
Prestige Premium – aluminium greenhouse with enclosed base panels and adaptable glazing choices
The Bloomcabin Prestige Premium Greenhouse combines a productive growing environment with an enclosed lower section of aluminium panels. Pots, growing media and tools are less noticeable than they would be behind glazing extending to ground level. Beside a home or patio, the result is a calmer-looking garden room that remains bright through its glazed walls and roof.
The model range includes compact and spacious options. Along with floor area, the ridge and door heights change with the width. You can therefore select a greenhouse around the available site, intended walkways and the planting areas you want to create.
Begin with the greenhouse’s intended role, then assess summer sunshine, winter use, sightlines from the home, foundation requirements and rainwater disposal as one plan. Together, these factors shape the glazing choice and the positions of the entrance, roof vents and work zones. Permanent elements can then be selected carefully while the internal arrangement remains adaptable. Learn more about Bloomcabin Australia.
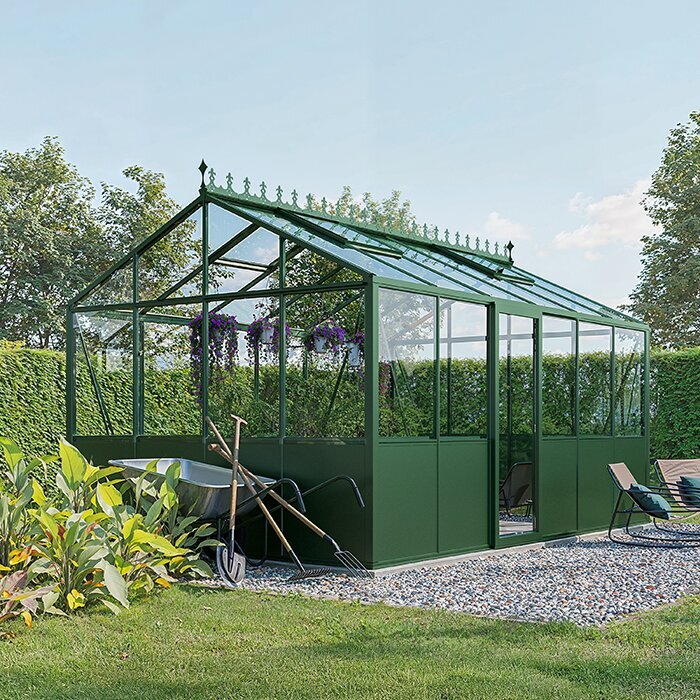
Sheltered base area
Enclosed aluminium base panels give greater privacy at low level
Around the lower interior, aluminium panels create an uninterrupted backdrop. Benches, shelving and substantial pots appear more orderly against this surface, and common gardening supplies attract less attention when viewed from outside.
Consider this feature when the structure will be seen from living rooms, a patio or a busy garden path. At lower eye level, the solid panels conceal more of the interior. Before choosing the position, inspect its sightlines from the house, outdoor seating and several points around the garden.
Daylight still enters through the glazed roof and upper walls. However, the point where glazing meets the solid lower panels affects the planting plan. Keep small sun-loving plants raised or away from the perimeter if the panelled edge would leave them with insufficient light from the side.
Choose the right size
Sizes for compact plots and expansive garden plans
Enclosed base panels
Screen low-level work and storage areas
Glazing to suit
Balance daylight, privacy, sun control and maintenance
Coordinate the colour
Blend the frame with house, patio and garden
Choose glazing thoughtfully
Match glazing to plants, privacy and sunlight
Available materials include polycarbonate and 4 mm toughened safety glass, along with self-cleaning, mirrored, solar-control and matt white specialist glass. These choices answer different needs. Work out whether your priority is abundant light, fewer views into the interior, relief from intense sunshine or easier cleaning before settling on the specification.
The sides and roof need not use the same glazing. For example, a light-oriented roof can sit above a side chosen for greater screening. Review every face on its own: the movement of the sun, nearby homes, patio position and existing vegetation create different conditions around the structure.
Site conditions, orientation, planting and the intended mix of cultivation, seating or display will determine the right combination. Crops with high light demands need appropriate exposure, while a sitting area may place more emphasis on glare and privacy. Settle these competing aims before committing to the permanently installed panes.
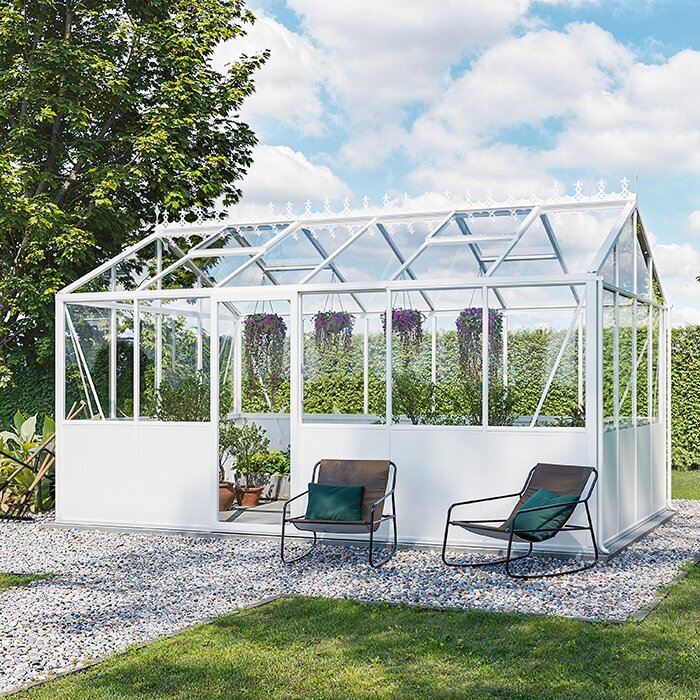
Prestige at a glance
Key dimensions and features
Model variety
22 configurations, 3.77–28.08 m²
Options for gardens and uses of different scales
Narrower model range
235 cm wide
Ridge height approx. 231 cm; door height approx. 165 cm
Wider model range
310 cm wide
Ridge height approx. 267 cm; door height approx. 185 cm
Base area
Enclosed aluminium base panels, 79 cm high
More privacy in the lower interior
Glazing and door options
Polycarbonate, 4 mm toughened safety glass and specialist glass
Single sliding door or double sliding door from 310 cm wide
Equipment and colour choice
Roof vents, gutters, integrated aluminium base frame and a choice of 37 RAL colours
12-year warranty
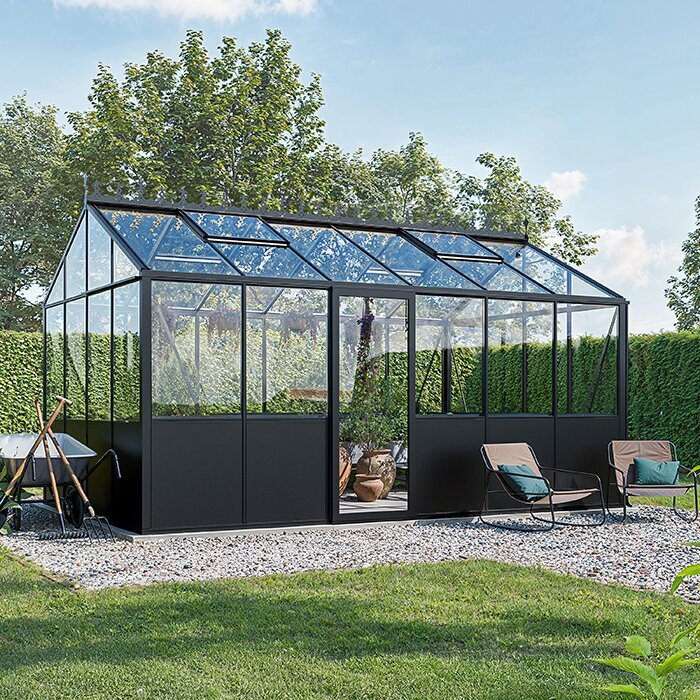
Ventilation and temperature
Coordinate roof vents, glazing and optional heating
Roof vents are included on every Prestige. Manual operation is standard, with automatic temperature-responsive openers available to reduce everyday attention. Arrange furniture and circulation routes so the manual controls can always be reached and used without first shifting equipment.
Where strong sunshine reaches the site, consider solar-control glazing or shade that can be introduced when needed. At dimmer locations, avoid taking useful light away from the plants. Optional heating may lengthen the usable season, provided it is controlled for the selected plants and installed by an appropriate professional.
Choose the destination for gutter water while planning the site. Falls, outlets and overflow routes should keep water clear of the foundation without obstructing paths. Position connections where future cleaning and inspection can be completed without difficulty.
Ways to use it
Four ideas for the Prestige interior
01
Vegetables and propagation
Beds, benches and accessible paths can organise the greenhouse for vegetables, young plants and a longer cultivation season. Use the solid lower panels behind practical work zones, leaving tall crops to extend into the bright glazed area above. Make irrigation and air movement part of the planting layout from the beginning.
02
Garden seating area
Appropriate chairs can turn part of the greenhouse into an occasional sheltered retreat. The panelled base obscures low-level contents and gives the interior a neater appearance. Furniture that can be moved is preferable to permanent fittings when crops expand, larger plants need winter shelter or the space is being cleaned.
03
Sensitive plant collection
A collection of citrus, tropical plants or other sensitive specimens may need its glazing, airflow and optional heat arranged around differing requirements. Avoid assuming that every plant needs identical conditions. Movable pots, distinct zones and clear floor space allow vulnerable specimens to be shifted towards or away from the entrance when conditions change.
04
A garden design feature
With numerous frame colours available, the aluminium can be coordinated with the home’s exterior, windows, patio and other garden features. Examine samples outdoors in natural light because surrounding colour, shade and reflections affect their appearance. A colour is more visually prominent against Prestige’s solid base than against glazing that continues to ground level.
Site and use through the year
Long-term suitability depends on the site, foundation, solar exposure and management of water. Confirm that components can reach the build area, pass through any constrained access and leave room for services and maintenance. A successful position must work not only for plants, but also for assembly, cleaning and future attention to the structure.
Heat in sunny locations
In Australia, north- and west-facing positions may become particularly hot on clear summer days. Base the glazing, ventilation and shade plan on sunshine actually reaching the chosen spot. Follow shadows from trees and buildings over a full day; morning shelter does not prevent a site receiving sustained afternoon sun.
As heated air rises, the roof vents provide an escape route. Keep shelves, crop supports and tall growth from interrupting that movement. Opening the entrance can add brief ventilation during extreme heat, but regular observations of both plant health and temperature remain important.
Reserve solar-control glass for surfaces exposed to persistent intense sun; adjustable shade can instead follow seasonal changes. Seedlings, fruiting crops and container plants kept through winter do not share the same light needs, so use the planting plan as your guide. Installed glazing is a lasting choice, whereas temporary shade can be repositioned.
Frost and foundation
A level, structurally sound surface appropriate to the location is required beneath the integrated aluminium base. Product ratings are wind resistance up to 30 m/s and snow loading of 210 kg/m². They depend on installation and anchoring in accordance with the instructions and do not remove the need to assess local exposure or ground conditions.
Ground movement caused by frost may disturb drainage, glazing alignment, the frame and smooth door operation. Have the foundation design matched professionally to local soil conditions, with particular attention to secure anchoring and a consistently level bearing surface. Careful preparation is far simpler than trying to correct distortion once the structure is assembled.
Decide the foundation depth, drainage arrangement and completed build level ahead of installation. Include the proposed internal surface and doorway transition in those calculations. Doing so helps prevent awkward steps and sends water away from the structure; later changes to ground height may compromise access, door movement or adjoining details.
Privacy near the home and patio
Screening from the base panels is concentrated below the upper glazing, through which taller plants, furniture and shelving can still be seen. Plan around what will remain below that boundary and what will project above it. Use views from windows, paths and the patio to decide where different items belong.
Keep everyday supplies and potting benches conveniently close to the entrance without narrowing circulation. If light conditions permit, locate the main working zone on the side least visible from the principal viewpoint. This arrangement can shorten gardening tasks while preserving an orderly view from outside.
Planting beside the greenhouse can visually connect it with the wider garden. Allow sufficient separation from the panels, glass and gutters for maintenance and washing. Base that clearance on the plants’ expected mature height and spread rather than their dimensions on planting day.
Collecting and directing rainwater
Rain collected by the built-in gutters may be sent to drainage or a storage tank. Route hoses and pipework away from the entrance, maintenance access and working paths. Any tank needs a secure position, convenient access and, where practical, a short connection back to the plants.
Bigger Prestige configurations may justify a larger rainwater tank. Select capacity by considering the roof area, rainfall pattern, room available and irrigation demand together. During wet spells, reserve volume and an overflow with a controlled discharge provide useful safeguards.
Direct surplus water far enough from the foundation to avoid ponding or scouring nearby ground. Downpipes, joints and points used for cleaning must remain reachable. Leaf guards or filters may reduce maintenance demands, although they still require routine inspection.
Plants and interior
Good internal organisation supports airflow, plant care and future rearrangement. Plot immovable elements first—the entrance, vents and water point—before assigning the main walkway, growing positions and work zone. This prevents furniture from concealing operating parts or consuming the space required for movement.
Plan the interior
Benches, shelves and elevated growing areas sit neatly against the solid panelled background. Because less lateral light reaches the perimeter at low level, raise small sun-loving plants to a brighter position. Large pots also require a firm, stable base where excess irrigation can be captured or carried away predictably.
Maintain a useful central zone for watering, repotting and carrying trays. Draw the layout to scale to test realistic bench dimensions, walkway widths and room to turn. Show doors in their open position, mature plant growth and projecting shelves so access remains practical after the greenhouse is fully occupied.
Nothing inside should prevent doors or roof vents from operating or make glazed surfaces impossible to clean. Provide an air gap behind shelving placed near the walls to discourage trapped moisture. Keep panels, frame members and fasteners in view and within reach so changes can be noticed early and affected areas cleaned.
Tall crops
Use the glazed upper volume for tomatoes, climbers and other tall specimens, accounting for mature growth and training needs when assigning positions. Install ties only at points designed to accept them. Glass, moving hardware and roof-vent frames must never be treated as supports for plants.
Light direction and the route taken by air towards the vents should guide the placement of tall crops. Avoid positions that cast day-long shade over shorter plants. Moving crops between seasons can support different rotations while leaving permanent benches and fittings unchanged.
Keep vigorous growth clear of entrances, vents and every opening device. Generous working aisles make harvesting, pruning and tying easier without bruising tender shoots. Maintain a gap between broad foliage and the glass as well, preserving cleaning access and preventing damp leaves from remaining pressed against a pane.
Automatic ventilation
Automatic roof-opening equipment reacts as the internal temperature climbs, reducing the attention required for daytime ventilation. It is useful when the greenhouse is unattended for part of the day. Even so, inspect conditions routinely because seasonal weather, increasing plant mass and solar exposure alter the amount of ventilation required.
Unrestricted movement is essential for dependable roof-vent operation. Keep training strings, climbing shoots and hanging objects clear of both the sash and its hardware. When severe conditions are forecast, use the manufacturer’s directions for securing and operating the vents.
Preserve safe access to the roof vents and their operating parts for cleaning, checks and servicing. Deal with debris or encroaching growth before it limits movement. Useful inspection times include the approach to winter and the period before sustained hot weather.
Set glazing for each surface
Start by assigning a practical role to each glazed area. Strongly sunlit faces may benefit from solar-control glass; matt white glass can improve screening, while self-cleaning glass may simplify care of exterior surfaces. Mirrored glass has a pronounced visual effect. Let exposure and purpose drive the choices rather than insisting every face look identical.
Prepare a labelled drawing showing the selected glass on every side and roof section. It provides a final check that exposed, overlooked and difficult-to-clean areas have been treated as intended before the order is placed. The same drawing also makes the completed configuration easier to confirm.
From the principal windows and garden viewpoints, consider how adjacent glass types will meet. Surfaces chosen for practical reasons may appear quite different as reflections and daylight change. An elevation sketch can test the relationship between screening, solar protection and the overall design before choices become final.
Coordinate permanent decisions properly
Sequence permanent decisions logically. Foundation design establishes level and orientation; entrance placement defines the main approach; and glazing influences where crops will thrive. Only then set out irrigation and rainwater pipework, keeping it away from established circulation and working areas.
Floor and work surface
Watering, cleaning and repotting are easier on a robust internal surface. Match its finish and drainage to the way each zone will be used: work areas need reliable footing, while frequently irrigated sections need managed runoff. Choose a finish that stays practical when wet and tolerates cleaning with mild products.
Gravel, paving or another appropriate finish can be designed around the foundation and entrance threshold. Provide dependable drainage, lasting support and an even transition. Loose aggregates must stay out of the door track, while paved finishes require their final falls and junction heights to be established before construction.
Establish the completed floor level before installing fixed benches, irrigation or shelving. Account for cleaning, concealed service routes and comfortable working height. Adding height afterwards can disrupt the base and doorway, while a surface set too low may leave steps or places where water accumulates.
Irrigation
A deliberate water plan is especially valuable in the larger Prestige sizes. Keep distribution runs short and unobstructed, and decide where the supply will enter, branch and be isolated during winter. Avoid crossing walkways or complicating cleaning. Independently controlled zones can then serve plant groups with different moisture requirements.
By delivering water at each plant, a drip system can keep loose hoses out of circulation areas. Set emitter positions and operating times for the crop, pot size and season. Routine checks should identify blocked drippers and leaking joints before unnoticed discharge harms plants or leaves the floor persistently wet.
Place filters, isolation valves and connections where they are convenient for operation, cleaning and cold-weather protection. Lay out internal and external pipework so a fault can be traced readily. Drain or protect water-filled components as their design requires before frost, and avoid creating hidden low points where residual water can collect.
Maintenance access
Allow routine inspection and washing of the panels, glass, gutters, entrances and vents by retaining access around the structure. Select gentle cleaners and non-abrasive tools appropriate to each finish. Harsh scrubbing equipment may mark aluminium, damage coatings or scratch glass.
Fixed furniture, walls and dense hedging should not cut off access to the exterior or its working parts. Nearby vegetation needs room to be pruned safely without striking the glass. Suitable separation also helps with clearing gutters, checking fasteners and removing fallen material from around the base.
Keep a slim but usable service route permanently open around the greenhouse rather than treating it as storage. Confirm on the site drawing that less visible elevations—particularly those towards a boundary or away from the home—can still be reached. Otherwise, dirt, damage or encroaching growth may escape notice.
Future flexibility
Growing interests and plant collections often evolve. Leave one part of the interior free from immovable fittings so it can later hold large pots, extra propagation benches or temporary seating. The same open zone will also make occasional major cleaning and maintenance tasks easier.
A Prestige used first for vegetables might later accommodate citrus, ornamentals or a sitting zone. Any transition requires fresh decisions about irrigation, light and temperature. Choose the underlying construction for the use most likely over the long term, rather than optimising it solely for the coming season.
Fit movable benches, pots and shelving with castors or glides appropriate to the chosen floor, and provide a way to prevent unintended movement. Designate somewhere to park relocated items so they never obstruct the door, circulation routes or access needed to clean the glazing.
Before ordering
Confirm foundation, orientation and glazing before ordering
Confirm the footprint, site access, foundation area and any applicable setbacks or approvals before ordering. Ask the relevant state or territory authority and local council about the particular property and proposal where requirements are uncertain. Measure gateways, driveways and other restrictions as well, ensuring every component can reach the build site.
On a site drawing, plot where the most intense sunshine arrives and identify the elevations seen from neighbours, outdoor seating and living spaces. Add trees, eaves and other sources of shade. Use this information to resolve ventilation, glazing and screening, then draw in the entrance approach and primary path before confirming orientation.
Before construction starts, complete the stable level base and establish where collected rainwater will discharge. Verify dimensions, diagonals, finished levels and service points. A clear, accessible work zone lets installers move profiles and glazing directly into position while reducing repeated handling and contact with hard ground.
Plan further with Bloomcabin
Useful pages on choosing, ordering, warranty and product details
Frequently asked questions
Bloomcabin Prestige Premium Greenhouse: your questions addressed
How do I choose a model size for the way I plan to use it?
First allocate space for circulation, beds and benches, allowing for the mature dimensions of crops. Then compare that layout with the available footprint, greenhouse width and entrance arrangement. This approach tests both whether the model fits the garden and whether its interior will remain genuinely useful.
What clearance should I allow around the greenhouse?
There is no single suitable dimension without the site and installation information. Reserve a continuous, walkable maintenance route from which the glass, gutters, fittings and connections can be reached. The entrance also needs unobstructed room for people and for carrying pots or other bulky items.
How do the base panels affect planting?
Less lateral light reaches the area immediately beside the solid lower panels. Raise small sun-loving plants or set them further towards the centre. Benches, substantial containers and practical work zones are well suited to the enclosed perimeter.
Should glazing for every side be set before ordering?
Yes. Assess solar exposure, privacy, crop requirements and cleaning access separately for every roof and wall section. Replacing permanently fitted panes is involved, so document the complete glazing arrangement before placing the order.
Can roof and sides have different glazing?
Yes. Select appropriate glazing for the roof and sides separately during configuration. For example, high roof light can be combined with greater privacy or sun control on a particular side.
When is a double sliding door worthwhile?
Consider double sliding doors when large pots, broad trays or equipment will frequently pass through the entrance. Check the proposed opening against the bench positions, circulation routes and overall floor plan so the extra width remains usable.
Are automatic roof openers necessary?
No. Prestige includes manually operated roof vents as standard. Temperature-responsive openers are optional and may be helpful when rapid heating occurs in sunshine or the greenhouse is often unattended during the day.
Which documents should I keep?
Retain the order paperwork, assembly directions and product information for the life of the greenhouse. These documents record important requirements for its foundation, installation, operation and upkeep and can assist with later servicing or maintenance queries.
Bloomcabin Prestige Premium Greenhouse
Configure Prestige Premium for your property and intended use
Start with the size and entrance arrangement, then specify glazing for each roof and wall section before selecting equipment and frame colour. At the final review, compare the complete configuration with the foundation design, approach to the door and planned routes for water or other services.
Pre-order checklist
✓ Verify the footprint and ongoing maintenance access
✓ Select the position and map important views
✓ Assign glazing to the roof and each side
✓ Coordinate frame colour with house and garden
✓ Plan doors, vents and rainwater drainage
✓ Check foundation dimensions and finished assembly height
