


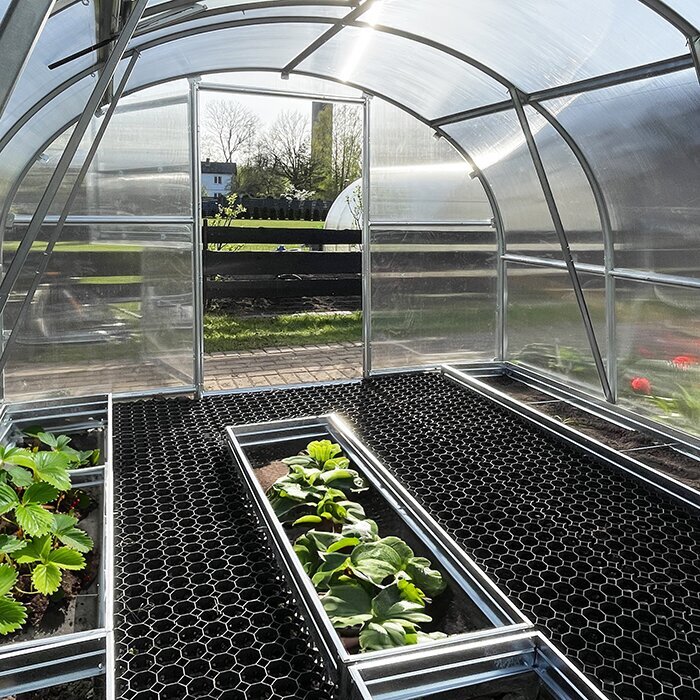

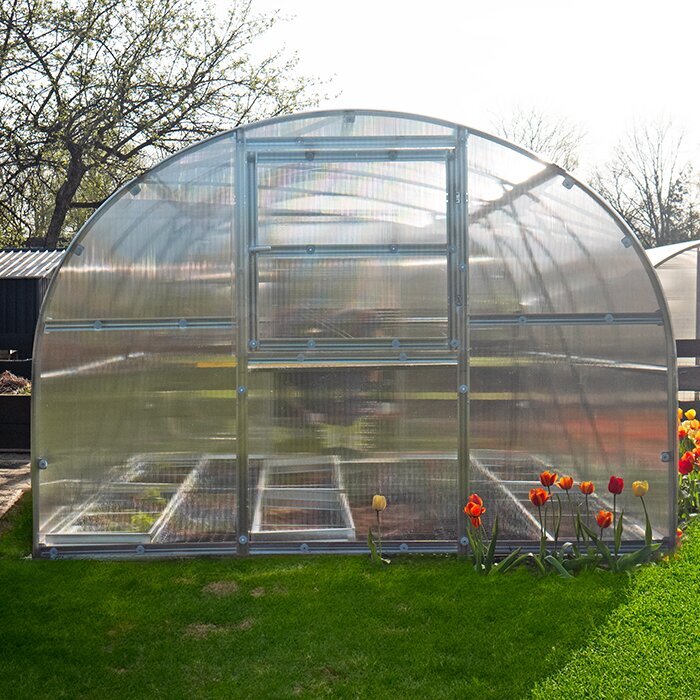




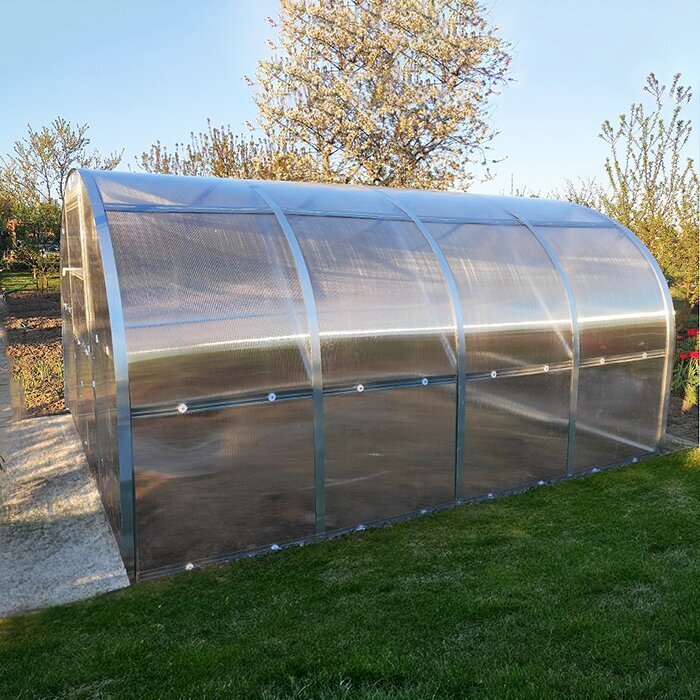
High tunnel greenhouse clad in polycarbonate
Sturdy crop shelter with ample room for vegetables and seedlings, helping extend the productive garden season
For gardeners, the Bloomcabin high tunnel greenhouse with polycarbonate panels provides a generously sized, permanently sheltered place for vegetables, seedlings and crops that enjoy warmth. The 3 m-wide tunnel accommodates beds, an access path and irrigation in a practical layout. Unlike a flexible film tunnel, it uses rigid 6 mm polycarbonate panels fitted to a galvanised steel frame.
The standard length is 4 m and compatible extension sections let the growing area follow your needs. Each arch of the galvanised steel structure anchors into the soil. Combined with the permanently fitted polycarbonate cover the frame forms a stable enclosure for growing. Browse the Bloomcabin greenhouse and conservatory collection or consult our practical guides for planning.
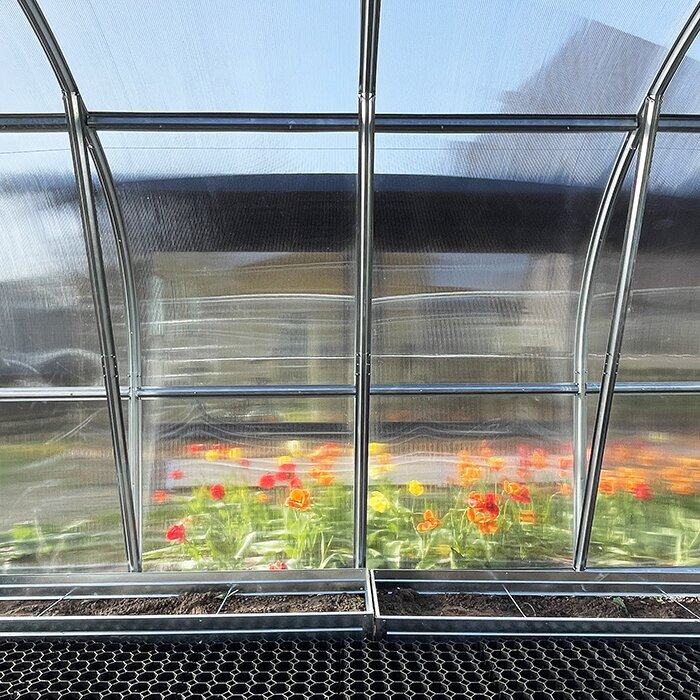
Stable construction in galvanised steel
How to assemble and line up the galvanised steel structure accurately
The tunnel’s supporting structure uses galvanised steel Omega profiles, 56 mm wide and 1 mm thick. Sort all parts completely and arrange them in assembly order before bolting anything together. You can then identify arches, longitudinal members and reinforcements in advance. Galvanising offers corrosion protection, but avoid needless scratches and unsuitable tools on these surfaces.
Space the arches at 1 m intervals, using the specified reinforcements to spread loads across the structure. Accurate alignment over the entire length is essential: an initial error continues through later extensions and can complicate installation of panels, door and windows. Check width, straightness and the even position of all arches once more before tightening the connections fully.
Set every arch about 35 cm into firm ground that permits this installation depth. Check beforehand for loose fill, concealed services and persistently waterlogged spots. Anchoring functions properly only with the whole frame assembled and the cover secured correctly. The greenhouse is designed for wind speeds up to 30 m/s when every specified component is used and the installation instructions are followed.
What does polycarbonate add to a high tunnel?
A tougher enclosure than basic film and more crop space than many small garden greenhouses
Gardeners who intend to cultivate vegetables and other plants regularly will find this model practical. There is sufficient space for established beds and access paths, while the choice of length lets the footprint reflect both the property and the area genuinely needed.
3 m width
Across this width, beds and an uninterrupted access path can be laid out distinctly, reducing the need to step on cultivated soil while tending or picking crops.
Modular extensions
Its starting configuration is 4 m long. Add 2 m sections to choose a total length appropriate for the site and the amount of cultivation you can maintain.
For every extended configuration, fit the complete set of specified framing, anchors and fasteners.
Polycarbonate, 6 mm
UV-protected cladding admits light and shields the crops from direct rain, creating an enclosed area for cultivation.
Rigid 6 mm polycarbonate rather than lightweight film
Installing, inspecting and safely washing the solid polycarbonate sheets
Conditions beneath the rigid cladding can change rapidly, including temperature and humidity. Monitor the interior and adjust the side windows when required. Condensation may collect on the inner surface of the panels when temperature and moisture levels differ; if it does, reassess both airflow and watering.
M5 screws and D40 plastic washers attach the sheets to the steelwork. Follow the specified panel direction and avoid placing the material under stress. Bring the fasteners up evenly instead of fully tightening one screw at a time. Finish by examining each point for omitted washers, angled screws or sheets that are not seated properly.
Routine washing generally needs only water with a soft cloth or non-scratch sponge. Avoid stiff brushes, edged tools and harsh cleaning products, which may harm the finish. Lift off soil, vegetation and early algae growth without scoring the sheets. Keeping the exterior clear supports light transmission, and clean junctions and fasteners are easier to examine.
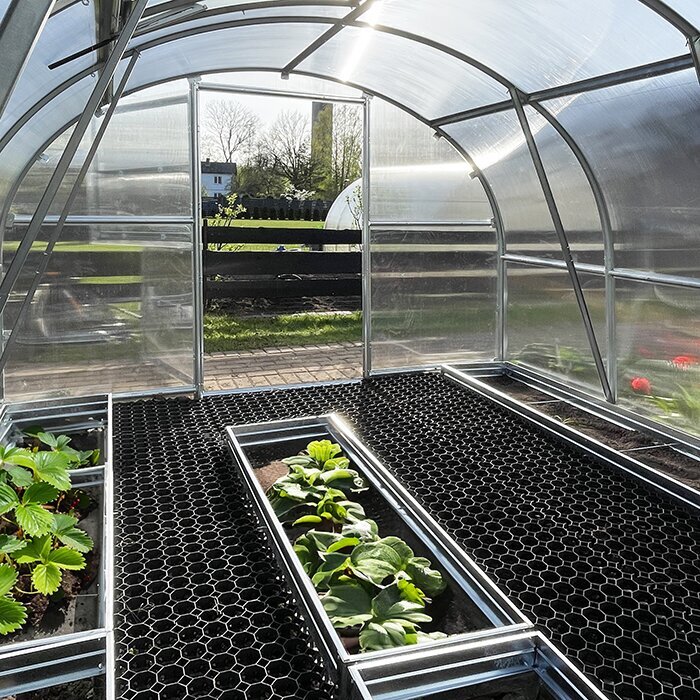
Technical data
Key specifications for the Bloomcabin high tunnel greenhouse
Width: 3.00 m.
Height: 2.10 m.
Length: Base model 4 m; extensions in 2 m increments.
Frame: 1 mm-thick galvanised steel.
Profile: 56 mm-wide Omega section.
Arch spacing: 1 m between arches.
Rated snow load: 210 kg/m².
Anchoring in soil: Each arch is set roughly 35 cm below ground.
Cover: 6 mm UV-protected polycarbonate.
Access: Single door at the front.
Ventilation: Two side windows provide adjustment of temperature and airflow.
Guarantee: 12 years under the applicable guarantee terms.
Ventilation and access
Entry is through the front, while two side windows help manage airflow and temperature
With its interior clearance, the tunnel supports upright tasks and taller crops, including tomatoes and cucumbers. Entry is through the front door. Leave an open landing just inside so you can move watering cans, produce tubs and tools without brushing against the plants.
Keep each side window reachable from outdoors and within the tunnel. Arrange crops, trellises and stored equipment so neither opening is restricted. Your bed layout should also allow the windows to be reached after the plants have attained their full size.
Test the door and both windows from time to time. Keep their travel areas clear of soil and vegetation. When something begins to bind, find and remedy the reason before applying more force.
Plan the interior around maintenance
Position crops for short routes and good access
Crop species are only one consideration when dividing the interior. Allow for mature height, how often each planting needs inspection and how frequently it will be picked, so all available space remains useful and every crop can be reached.
Plants with height
Train taller plants into the available headroom, placing their supports where they will not restrict the side windows or adjoining rows.
Place seedlings within view
Set seedlings together in an accessible position. Their development and moisture can then be monitored without repeatedly entering unrelated growing areas.
Crops picked often
Put vegetables that need frequent tending or harvesting close to the doorway. This reduces the distance that picking tubs must be carried within the structure.
Crops needing less attention
The rear suits plantings checked less often, provided the route remains open and neither maintenance nor harvesting requires other items to be moved.
Preparation before construction
Assess the location, soil conditions and intended use before building
Mark out the footprint for your selected tunnel length, then make the area as level as practicable. During construction, leave safe working clearance around the frame for handling arches and polycarbonate sheets. Consider where runoff from the solid roof will go as well; water should not pool along the edges or at the entrance.
Because the arches penetrate about 35 cm, locate buried electrical cables, water pipes and drains before starting. Deal with large rocks and similar obstructions during site preparation rather than while erecting the frame. If the terrain varies, level it sufficiently for the arches to align and reach their intended embedment depth.
Before work starts, decide how each component will travel from the drop-off point to the prepared site. Keep that route and the assembly zone free of soil, compost and equipment. Once built, the tunnel also needs exterior access along both long sides for checks and upkeep.
For more help with selection and preparation, visit our planning and ordering guides.
Comparing a high tunnel with a traditional greenhouse
Which situations favour a high tunnel over a conventional aluminium greenhouse?
Conventional aluminium greenhouses bring a crisp architectural shape and a range of styling choices, allowing the structure to contribute visibly to the garden design.
By contrast, this tunnel prioritises an expansive uninterrupted crop area, durable framing and the flexibility to add modular sections.
Select the tunnel when productive, sheltered growing capacity is the chief concern. Choose a conventional greenhouse instead when straight architectural lines and deliberate integration with the surrounding garden carry greater weight.
Australian growing conditions
Let local weather and the individual site guide operation and maintenance
Australian gardens encounter markedly different conditions across regions and properties, from humid coastal or tropical districts to hot inland areas and cool temperate locations. Wind and exposure also vary from one block to another. Manage the tunnel according to its observed microclimate rather than relying on one nationwide planting calendar.
Where spring sowing is appropriate, shelter can give early crops a useful start. As the season advances, warmth-loving crops receive less direct rain and wind on their foliage and fruit. In districts with a suitable autumn, production may continue while available light and temperature still support growth.
Keep notes during the first growing season on unusual temperature patterns, periods of high moisture and patches of poor development. Use those observations to improve the next season’s planting positions and maintenance routine for this particular site.
Selecting the right location
Look for sun while preserving clearance for ventilation
Sun exposure is especially valuable during spring and autumn in temperate regions. Check the proposed footprint at different times to see where trees, hedges or buildings create shade. Provide enough separation from obstructions for both side windows to exchange air effectively.
On an exposed block, identify the usual wind approach and avoid siting the tunnel in a channel formed by buildings. Distant natural screening may be beneficial, provided it does not leave the greenhouse in persistent shade or impede ventilation.
Future upkeep also matters when choosing the position. Ensure easy approach to the front entrance and retain exterior clearance on both sides for checking panels, windows and their fasteners.
Crop planning
Arrange tomatoes, cucumbers, capsicums and early salad crops across the 3 m width
Across the 3 m width, you can set out a centre path between two edge beds, or divide the floor into three slimmer crop strips. Position tomatoes, cucumbers and other tall plants where they will not cast avoidable shade. Arrange anchor points for twine or trellising before planting.
Spring space can go first to lettuces, kohlrabi, radishes, herbs and seedlings, then to summer crops that prefer warmth. Once peak harvesting has passed, return part of the tunnel to resilient leafy greens or herbs for the later season.
Label the occupied sections and record the crop previously grown in each. Those notes make the next rotation easier to organise without shifting the access route or areas needed for ventilation.
Ventilating in summer
Act ahead of hot conditions so heat and moisture do not become trapped
Under Australian sun, temperatures may rise rapidly inside a shut tunnel. If outdoor conditions permit, adjust the side windows before the crop displays heat stress. Prompt airflow limits the highest temperatures and carries moisture away from closely spaced foliage.
Tomato foliage in particular benefits from remaining as dry as practical, so avoid conditions that promote needless condensation. Mild weather can still provide a useful opportunity for air exchange. Following irrigation, allow moisture held around dense plants to disperse.
During a prolonged hot period, changing irrigation times or adding temporary shade may be useful. Base the response on the district, tunnel orientation and quantity of foliage.
Watering
Apply water at root level without dampening the entire enclosed space
With the polycarbonate roof excluding most rain from the beds, irrigation must be managed intentionally. A drip hose or other localised method is convenient because moisture reaches the roots while less water lands on foliage.
There is no single watering frequency: season, temperature, soil characteristics and the size and density of the planting all influence demand. Heavy earth retains moisture differently from sandy soil or a raised garden bed. Inspect the soil itself instead of watering to an inflexible weekly schedule.
Rainwater collected for the garden may also supply these beds. Locate tanks and irrigation runs where they will not narrow the aisles or interfere with the front entrance.
Select a practical length
Begin with 4 m, adding sections only where more cultivated area is justified
For many household gardens, the starting length accommodates several different crops. Extension bays are worthwhile when extra bed space will be cultivated consistently. This allows the structure to expand as vegetable production increases or the property is developed in stages.
Even so, consider the likely finished length before the initial build. Keeping one extension direction available makes it easier to position paths, watering pipes, compost storage and beds alongside the tunnel.
A longer layout may suit a small productive garden whose crop groups need separation. Add that capacity only when there is enough time and water to plant and maintain it properly.
Winter in Australia
Check steelwork and fasteners before winter and again following severe conditions
The mass of snow changes with its moisture content, temperature and wind-driven distribution, and roof accumulation may be uneven.
After major snow or storms, examine the structure from outside. Attend promptly to distortion, loosened attachments or snow loading concentrated on one side. Clear snow only by methods that protect both the sheets and steelwork. Never stand on the covering or use implements with sharp edges, and avoid shifting the load in a way that heavily weights one side.
Before colder weather, work methodically through the M5 screws, D40 plastic washers, two side windows, front door and ground anchors. Clear plant matter and clean each panel-to-frame junction, confirming that moving components close correctly. Position loose pots, tools and trellises where they cannot strike the cladding. Inspect from the entrance towards the rear so less visible points are not overlooked.
Rotating crops and closing the season
Prepare beds methodically for their next crop, using empty space to inspect the structure
Set the intended cropping order in advance. After harvest, each bed can then be prepared for its successor without disrupting plants nearby or obstructing the access aisle.
Once a section is harvested, empty it before installing the following crop. Take diseased material out of the tunnel, then condition the soil for what will be planted next. While that bed is open, inspect its irrigation parts and any supports.
At the season’s final clear-out, collect ties, labels and empty pots, then wipe down work surfaces. Test irrigation for damage and blockages. With foliage gone, inspect the frame, panel fixings and sheets carefully; the cleared interior exposes areas that are otherwise difficult to reach.
For household and community plots
Extensive protected crop space for home gardens and shared plots
This tunnel works in sizeable household gardens and on plots where efficient cultivation is valued above the ornamental presence of a conventional greenhouse. Its purpose-led profile gives priority to sheltered room for plants.
For a community garden, consult the site’s own requirements before building. Confirm any conditions governing dimensions, placement or clearances before committing to an extended configuration.
Because the width does not change, paths, growing beds and watering systems can follow the same orderly pattern when extra sections are added later.
Questions gardeners often ask
Bloomcabin high tunnel greenhouse FAQ
What needs attention before the greenhouse arrives and assembly starts?
Arrange a clear route for moving packages before delivery and nominate somewhere dry and protected to store them. Have the site ready before construction starts. Unpack, organise and verify every component against the documents supplied with the greenhouse.
Must the beds be designed before constructing the tunnel?
Yes. You may establish the beds after construction. Beforehand, however, map an unobstructed route between the front entrance and each side window. With those access points protected, you can shape the remaining beds around whichever crops you decide to grow.
Will the greenhouse remain frost-free through winter?
No. Although the sheets reduce direct exposure to the weather, they cannot ensure a frost-free interior. Use measured conditions to decide when vulnerable plants need protection, relocation or harvesting.
Does condensation on the inner panel surface indicate a fault?
Not in every case. Differences in air moisture and temperature can produce condensation. When it appears, review soil dampness, the amount applied during watering and available airflow. Keep leaves from remaining wet and provide ventilation through dense foliage.
Are the polycarbonate sheets left in place year-round?
Yes. These solid sheets stay secured to the structure through every season. Wash them without abrasive materials and routinely examine their edges, the plastic washers and each screwed connection.
How should access be maintained to the rear of an extended tunnel?
Reserve one uninterrupted aisle running from the front entrance to the far end. Set beds, watering pipes and climbing supports outside this route, ensuring that every planting can be tended and that the aisle and windows stay unobstructed.
What should I inspect when a door or window stops closing cleanly?
Begin by confirming that the steelwork is still aligned, then look for looseness in screws, washers and nearby sheets. Check the travel area for interference from foliage, plant supports or stored equipment as well. Remove the underlying obstruction or alignment problem before trying the moving component again.
What records should accompany a guarantee request?
Retain the purchase receipt together with the documentation for this product. Consult those papers for the applicable conditions, exclusions and process to follow when making a claim.
Bloomcabin high tunnel greenhouse
Choose a length that will remain manageable to build, enter and cultivate
Before purchase, compare the intended cultivation area with the space actually available. Account for moving the components to the site, keeping the front entrance unobstructed and retaining safe working clearance around the structure. Use this final checklist to confirm the arrangements.
See how this model compares with other greenhouse and conservatory options.
Pre-order and construction checklist
✓ Confirm your chosen tunnel length before placing the order
✓ Clear the delivery route through to the prepared site
✓ Inventory and organise every component against the supplied papers before construction
✓ Follow the instructed sequence for assembling the frame, sheets, door and windows
✓ Reserve a clear, adequately sized area for handling the panels
✓ Inspect all joints and operating components when construction is complete
Design your high tunnel