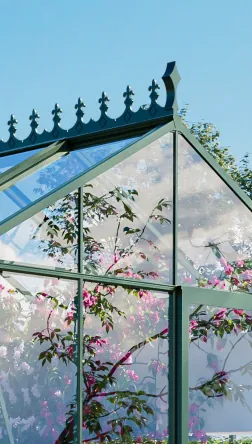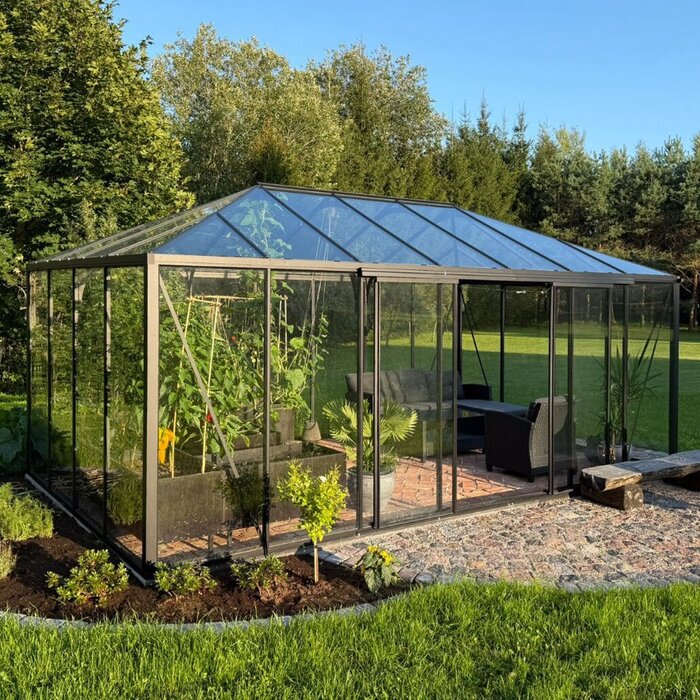


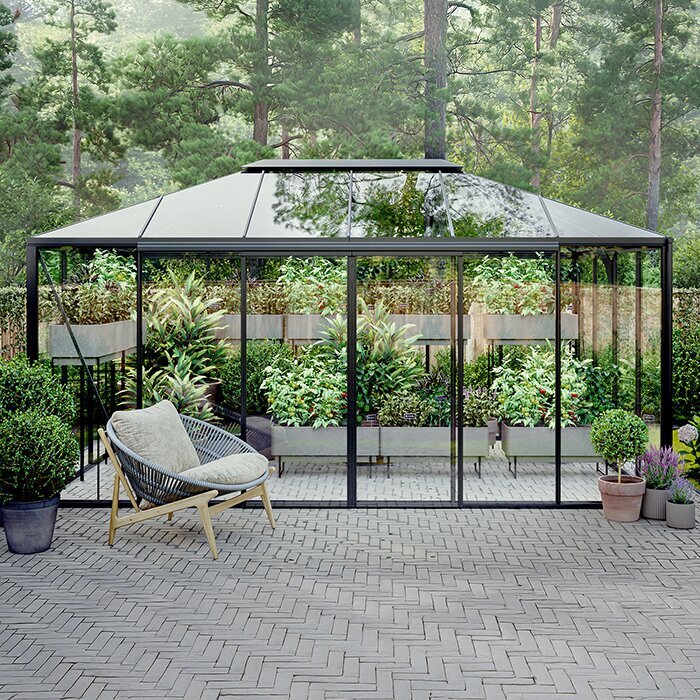


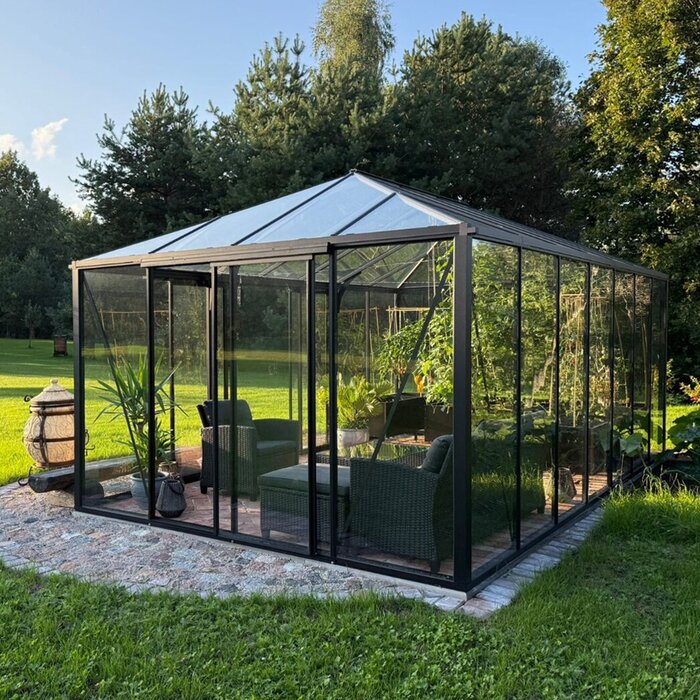





Bloomcabin Oasis pyramid greenhouse
Pyramid greenhouse with a striking roof shape, generous central height and versatile interior
The Bloomcabin Oasis pyramid greenhouse brings productive, sheltered growing into the garden as a strong visual feature. Roof sections climb symmetrically towards the middle, giving the impression of a compact glazed pavilion. Inside, there is practical room for raising, tending and harvesting plants. Oasis can stand near the house or among garden beds, paths and shrubs.
The current range includes square and rectangular footprints. Glazing, frame colour and door placement can be configured in several ways. Beyond defining the appearance, each selection influences usable floor space, movement, daylight and routine tasks. The technical overview explains the structure, rain gutters and integrated aluminium base.
Assess the sun’s path, views from the house, ground and access together when choosing the location. Effective ventilation during hot Australian weather, nearby water and an uncluttered approach to the door are also important. A scaled sketch helps identify the right footprint and reveals clashes with paths, beds or existing drainage before installation. Explore the Oasis pyramid greenhouse from Bloomcabin.
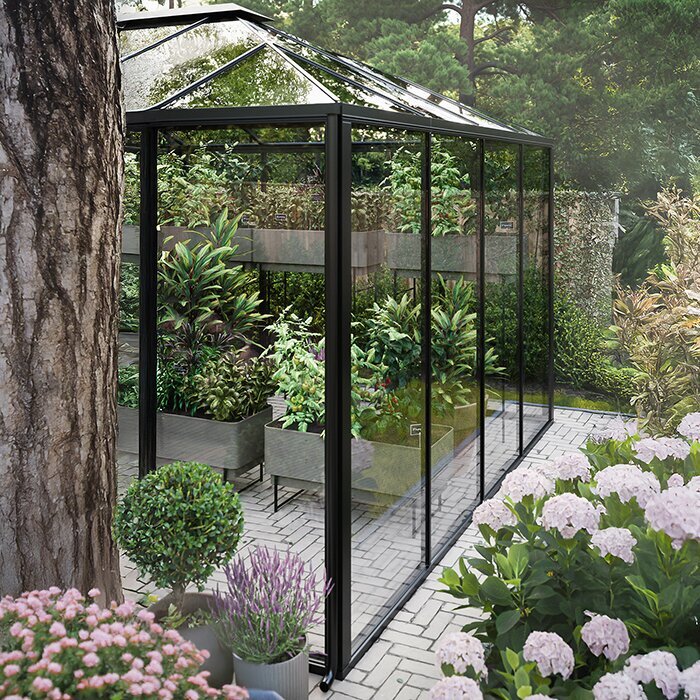
Pyramid geometry in garden design
How Oasis differs from a greenhouse with a continuous ridge
Several sloping roof sections converge at a single peak, creating the defining Oasis profile.
Its roofline remains prominent from different angles, making it particularly suitable for visible areas of the garden.
Within the greenhouse, the converging ceiling draws attention inward instead of creating a dominant lengthwise line.
Distinctive silhouette
The clearly structured form suits both formal, linear gardens and traditionally planted settings.
High centre
The greatest headroom is around the centre
Glazing flexibility
Polycarbonate or toughened safety glass
Wide colour choice
RAL colours for coordinating with the house and garden
Light from several roof planes
How the pyramid shape changes daylight through the day
Multiple roof orientations admit daylight at changing angles as the sun crosses the sky. The pattern of brightness consequently shifts more noticeably than beneath one uninterrupted roof slope. No planting zone receives identical light throughout the day. Before setting up, observe where the house, trees or hedges cast shade in the morning, around midday and later in the afternoon.
Toughened clear glass creates a direct visual link between plants and garden, keeping outlines, flowers and leaf textures clearly visible. Polycarbonate diffuses light differently and offers less direct visibility. Consider not only the exterior look, but also the intended crops, desired privacy and how visible shelves, pots and working materials should be from outside.
Base the glazing decision on the real garden rather than ideal sunshine. In Australia, north-facing positions, heat-reflective walls and protected courtyards can become very warm on clear days. Partly shaded sites instead call for careful allocation of crops. Review the glazing together with ventilation routines, possible shade measures and the proposed interior arrangement.
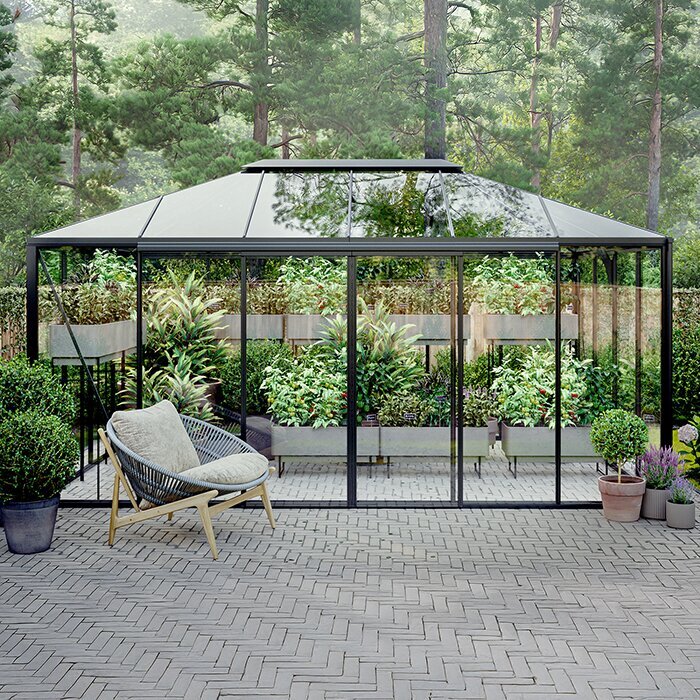
Choose a site suited to the pyramid form
Four points that matter when selecting the site
As Oasis is highly visible in the garden, good growing conditions and an appropriate position should go together.
01
View from the house
Outline the proposed footprint on the ground, then view the peak from rooms used often, the outdoor living area and important garden routes. An attractive outlook is worthwhile, provided it does not come at the expense of sunlight, practical entry or healthy plant growth.
02
Sun
Do not rely on orientation alone; watch how light crosses the position during the day. Deciduous plants alter their shade seasonally, while buildings and evergreen screening have a more constant effect. The crops intended for the greenhouse will also determine which location works best.
03
Door side
Choose the sliding-door position around the route used for carrying soil, pots, produce boxes and watering gear. Avoid awkward corners and keep the approach usable after rain. Provide enough unobstructed space at the entrance to handle loads, set items down and move comfortably.
04
Rainwater
Include every gutter outlet in the initial site measurements. Keep adjacent room for suitable collection storage or pipe runs while preserving access to the greenhouse. Coordinate the onward flow of water with the supporting base and the natural fall of the land.
Technical details
Key dimensions and equipment features at a glance
Size overview
14 sizes
Approximately 5.6–14.2 m²
Compact version
Approx. 2.35 × 2.35 m
Roof peak: 2.69 m; wall height: 1.93 m; door height: 1.85 m
Square version
Approx. 3.10 × 3.10 m
Roof peak: 2.64 m; wall height: 1.93 m; door height: 1.85 m
Rectangular version
Approx. 3.10 × 3.85 m
Large rectangular version
Approx. 3.10 × 4.60 m
Construction
Reinforced powder-coated aluminium
Integrated gutters, an aluminium base and a choice of sliding-door arrangements are included. During configuration, match the door type to the selected wall width and consider its connection to the principal walkway. RAL colour selection allows the powder-coated profiles to complement the façade, window frames and established garden features.
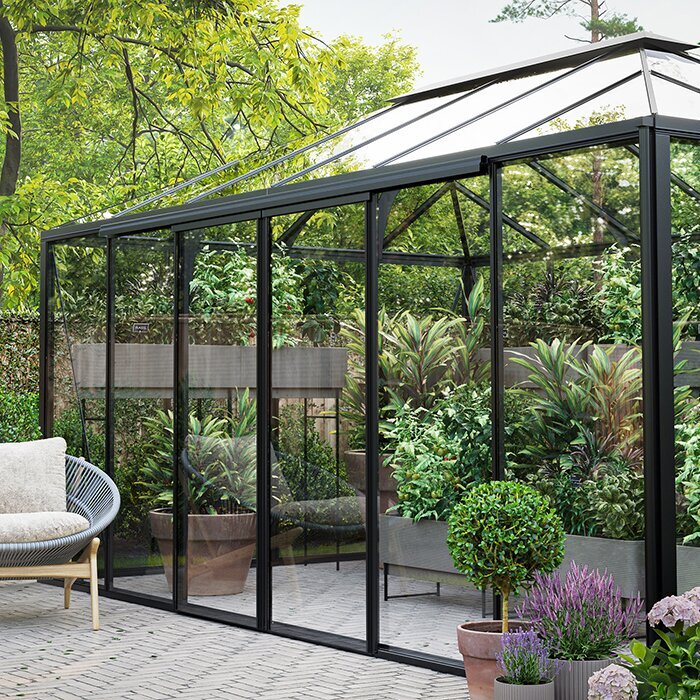
Use the height beneath the roof peak
The rising roof planes create particularly useful height in the middle
Map the interior as height bands running outward from the middle. Place taller plants and climbing supports where the roof leaves ample clearance; reserve the progressively lower side areas for compact crops or useful work surfaces.
Central positions may accommodate tomatoes, climbing crops or substantial citrus plants. Arrange pots and supports so the main aisle still gives access to fruit, new growth and watering points, without taller specimens continually shading their neighbours.
The relevant measurement is the clearance directly above each plant, not simply the height of the peak. On a cross-section, show tall plants together with their containers and supports. The sloping roof means that available vertical room becomes progressively lower towards each side.
Unite food growing with garden design
Four suitable ways to use it
01
Kitchen-garden focal point
Positioned centrally in a kitchen garden, Oasis can sit within easy reach of raised beds, herbs, compost and the water point. Grow warmth-loving plants under cover and leave hardier vegetables outdoors. Well-planned connections between these areas simplify moving picked produce, garden tools and plant trimmings.
02
Area for tall crops
The taller central zone gives climbers and large potted plants room to develop upward. Use the lower perimeter for compact crops, seedling trays or benches. Any supports should be secure and positioned so that neither the door nor ventilation openings are encroached upon.
03
Flowering plants behind glass
Clear glazing can turn flowers and plants with bold foliage into a display seen from the garden. Keep practicality in the composition: faded blooms, irrigation points and every side of each pot still need to be reached. Graduated heights allow smaller specimens to remain visible rather than disappearing behind larger plants.
04
Flexible spare space
Leaving one part of the interior uncommitted makes room for propagation, peak-season demands and cool-season storage. Seedlings, produce boxes or extra pots can occupy it temporarily. The greenhouse can then respond to seasonal needs without repeatedly dismantling established planting zones.
Airflow, access and seasonal use
Let the internal arrangement evolve as the planting changes. Install fixed features only where they will leave the sliding door and roof vents operational and will not limit seasonal rearrangement of benches, containers or growing areas.
Ventilate and shade
Glazed spaces may overheat quickly in bright weather even while conditions outdoors seem mild. Respond to the temperature inside when adjusting vents or temporary shade, rather than judging from the outside air alone. Good natural light remains beneficial, whereas deep shade maintained all day can restrict plant growth.
Warm air can escape through roof vents, with the sliding door helping draw in outdoor air. Keep these openings clear of tall crops and supports if the airflow is to work effectively. Monitor conditions regularly when the weather changes rapidly. If you will be away, make reliable arrangements for ventilation and watering beforehand.
Adjustable shade can respond to solar direction, the plants’ development and how the interior is being used. Its fittings and operation must leave roof vents unobstructed and avoid rubbing on frames or glazing. Seating may benefit from a separate shaded patch while fruiting vegetables retain stronger light.
Work routes and fit-out
Continue the primary walkway directly inward from the sliding entrance. Shelving, planting areas and controls should all be serviceable without leaning across fragile plants. At floor level, retain sufficient working room for turning, placing boxes and using either a hose or watering can.
Test benches and shelving in position with the pots and trays they will actually carry before settling the layout. Assess aisle width under working conditions as well as when empty, allowing for foliage that extends outward and boxes placed beside the work surface.
Any freestanding fitting should be stable on the finished surface and remain outside walking routes. Load benches and shelving with full trays or pots when checking their suitability. Allocate large, heavy containers an enduring position that can still be reached easily.
Seasonal change
During spring in temperate regions, spare bench space is useful for seed trays, pricking out and moving seedlings through successive stages. Group plants so that inspection and watering remain straightforward. Before larger crops take permanent positions, decide which tables can later be relocated or repurposed.
During the warmer growing season, prioritise ventilation, reliable watering and straightforward harvesting. Redirect vigorous shoots whenever they enter a walkway or obstruct an opening. Grouping plants with comparable water needs saves effort, while accessible hose fittings and valves prevent routine watering from closing the aisle.
As autumn approaches in temperate areas, the arrangement can shift to accommodate tender potted plants. Inspect them first so diseased foliage, pests and unnecessarily wet material do not enter. Mobile fittings free space, but selection still matters: reserve winter protection for plants whose dimensions and care needs suit the available interior.
Plants, containers and work surfaces
Organise the greenhouse according to how regularly each plant or task needs attention. Keep seedlings and frequently used tools close by. Large pots that will seldom move require firm support and clear room for tending them. This approach keeps the interior practical even when planting is dense.
Beds and containers
The choice between in-ground beds and movable pots depends on the crops and the desired adaptability. Dedicated beds suit long-term planting, whereas containers are simpler to rearrange. Decide their positions at the same time as the main walkway and watering system, before the greenhouse is furnished.
Give every pot a firm surface and manage its drainage. Place trays, drains and watering locations where escaped water is quickly visible and can be cleared. Persistent moisture must not remain under containers or beside the integrated aluminium base.
Usable space extends beyond the bare dimensions of the floor. Broad pots, spreading foliage and boxes opened during work all occupy extra width. Defining the growing areas separately from the central route makes tending, picking and cleaning easier across the season.
Caring for tall crops
Tall tomatoes, climbers and mature citrus require lateral working room as well as headroom. Leaves, stems and fruit must be accessible without forcing adjacent plants aside. Account for the eventual spread of each specimen while it is still young and easy to position.
Check trellises, ties and supports regularly so they do not constrict growing shoots. Put plants needing frequent pinching, pruning or harvesting in readily accessible positions.
Shorter plants may occupy the perimeter where light remains adequate, provided taller pots do not conceal them when they need watering.
Work area for sowing and potting
A small potting bench establishes one dependable place for sowing, pricking out and repotting. Select a depth and location that preserve the central passage and keep any pots stored below within reach.
Choose a washable surface with space for the tray, pots and tools needed for the immediate task. When work is finished, move surplus supplies back to dry storage that is convenient to access.
Using a mobile table keeps the room adaptable: move or remove it whenever mature crops or potted plants brought in for winter require the space.
Watering and equipment
Plan the tap or water source, hose path and tool station as a single functional zone. This reduces unnecessary movement across the greenhouse during watering and keeps operating points in view. Maintain independent access to openings, framing and gutters for cleaning and inspection.
Order in the work area
Assign ties, labels and hand tools a consistent storage point within comfortable reach. The bench remains uncluttered, and each item can be found promptly.
Make shelving, storage and gardening equipment stable without bracing anything against the glazing or narrowing the central route. Keep everyday items near the main work zone. Less-used pieces can be stored farther away only if they leave all maintenance points accessible.
Maintain a service gap around the structure so surfaces can be seen and cleaned, with enough room to clear away fallen leaves, spilled soil and other plant material.
Watering
For the larger layouts in particular, decide beforehand where water enters and how it travels through the greenhouse. Keep the connection accessible without shifting heavy pots. A hose reel or guide can prevent kinks and accidental damage to plants. Arrange electrical components separately from plumbing and use suitably qualified trades where required.
Divide drip irrigation into zones when crops have different moisture demands, such as deep tubs beside shallow planters. Route tubing where leaks can be spotted without leaving a tripping risk. Inspect emitters and outlets routinely because accumulated debris may otherwise make distribution uneven.
Locate filters, isolation taps and valves where they can be operated readily and any leak can drain harmlessly. Label multiple zones clearly. In Australian locations that experience frost, identify which water-filled parts require draining or insulation, following the directions supplied for each component.
Maintenance
Check glass or polycarbonate, gutters, roof vents and sliding doors at regular intervals for damage, deposits and smooth operation. Clear leaves from water channels and remove grit or soil from the door guides before either drainage or movement is affected.
Use soft implements and cleaners approved for the glazing and powder-coated aluminium. Abrasive cleaning may mark or damage both materials.
Cleaning thoroughly before a new group of plants arrives makes inspection simpler and removes old organic matter from corners that are otherwise difficult to reach.
Rainwater, floor and size selection
Sequence decisions about the supporting surface, captured rainwater and greenhouse size. Establish bearing capacity and drainage first, locate the tank and connecting pipes next, then test the selected footprint against the complete interior plan. This avoids fixed services interfering with the entrance or future maintenance.
Collect rainwater
Rain collected by the integrated gutters may be directed to appropriate storage for pots and vegetable beds. Keep the connecting runs short and easy to examine, and cover or enclose the store to reduce contamination. Before watering, consider whether the water quality is suitable for the intended plants.
Choose tank capacity by considering the roof area, rainfall at the property, actual demand and the room available. Oversizing is unhelpful if the vessel obstructs servicing or cannot be cleaned conveniently. Put the outlet where a watering can or irrigation line can be connected without closing the principal walkway.
Provide an overflow that carries surplus water safely away from the greenhouse foundation.
Floor
A durable floor with reliable grip simplifies watering, repotting and clean-up. It should remain secure beneath wet footwear while supporting movable benches and pots. Bare soil along the central route creates extra mess and may enter the sliding-door guide, so traffic and planted areas can use different finishes.
Possible finishes include paving, gravel and other fit-for-purpose surfaces that allow water to pass through.
Match the completed floor level to the entrance threshold without restricting the intended drainage path.
Choosing the size
Select the footprint from the planned number of plants, the real dimensions of tables and shelving, comfortable circulation and likely seasonal adjustments. Area alone overlooks wide pots, outward-growing leaves and boxes opened during work. Also decide whether every part will support cultivation or whether a modest place to sit is needed.
Draw the equipment to scale using its full external dimensions rather than relying on an approximate area figure. Add the entrance, central route, benches, large pots and water point. Test whether each location can be reached without shifting another object, and allow for the mature spread of the plants.
For square versus rectangular footprints, decide whether the interior will work best around a central area or along a longer axis.
Foundation and assembly
Accurate assembly depends on a firm base that is both level and stable
Although aluminium base sections are integrated, they still require a flat, dependable foundation. Design the support for the soil, local frost exposure and proposed drainage. Establish the outer dimensions and reference level accurately before starting. The final junction must not channel water towards the frame or prevent the sliding door from operating.
Because the roof sections converge above the middle, assembly begins with a precisely levelled base whose corners and diagonals are correct. Confirm those measurements before following the prescribed build sequence. Protect the glazing and components while stored on site, and plan safe access equipment plus sufficient assistance for every elevated task.
The design rating is 30 m/s for wind speed and 210 kg/m² for snow load. Achieving it requires correct anchoring and foundations suited to the property. Before assembly, ask the relevant council and certifier whether the site or project triggers particular foundation, setback or approval requirements.
Planning in four steps
1
Define the use
Begin with the plants that will remain inside, their likely mature height and whether a compact seat is part of the brief. Those decisions establish the necessary footprint, practical work zones and spare capacity for changes across the growing year.
2
Test the site
Observe the proposed position and note the periods of direct sun as well as shadows from the house, hedges and deciduous vegetation. At the same time, test access, the route for water and important views against the preferred entrance side.
3
Select equipment
Treat footprint, glazing, sliding-door type and RAL frame colour as one coordinated specification. Review the result from the house and compare it with established colours on the façade, windows and other garden structures.
4
Prepare the base
Resolve soil preparation, anchors, drainage and the rainwater route before construction starts. Precise groundwork helps the roof sections come together correctly and reduces the likelihood of difficult adjustments during assembly.
Frequently asked questions
Questions about the Bloomcabin Oasis pyramid greenhouse
How do I test a proposed footprint before placing an order?
Set out the chosen model’s external boundary on the exact garden position. Within that outline, indicate the central walkway, benches, large pots and unobstructed entrance zone using markers or actual items. Viewing the arrangement at full scale shows whether movement and working room will remain practical after plants fill the space.
What should I consider when orienting the door?
Orient the entrance towards the route used most often, aiming for a direct approach when carrying compost, pots or produce boxes. Keep an open handling area immediately outside. Inside, continue the main passage from the doorway without creating a narrow point.
Which glazing gives the clearest view of plants?
Toughened clear safety glass reveals the plants, containers and interior most distinctly. Polycarbonate spreads incoming light and reduces the view from the garden. Select between them according to the level of transparency wanted and the light conditions preferred by the planned crops.
Are double sliding doors possible?
Yes. Compatible wall sections approximately 3.10 m wide or more can accept double sliding doors. Confirm that the broader opening aligns with both the garden approach and the intended internal layout before choosing it.
How should a rainwater-storage overflow be planned?
Route surplus water from the tank in a controlled direction clear of the greenhouse support. Arrange the vessel and pipes without blocking access to gutters, glazing or service points.
Does the built-in aluminium base replace a prepared foundation?
No. The integrated aluminium section must sit on a flat, structurally sound and properly drained foundation. Exact alignment allows the sliding doors and frame to operate correctly and lets the roof sections join accurately above the centre.
Can the greenhouse include plants and a compact seating spot?
Yes, when the selected footprint leaves adequate room after planting and furnishing. Position a small bench or table where it will not narrow the principal walkway or restrict plant care, and choose an item that can be shifted when seasonal crops need more space.
Which guarantee applies?
Bloomcabin provides a 12-year commercial guarantee for the greenhouse structure. Review the applicable conditions, coverage requirements and exclusions before purchase. This guarantee operates in addition to rights that cannot be excluded under Australian Consumer Law.
Bloomcabin Oasis
A striking focal point for the garden
Oasis suits a garden where the greenhouse is intended to contribute visually as well as provide practical growing shelter. Coordinating the footprint, position, glazing, entrance and interior before installation produces a protected plant environment that remains convenient for routine use.
Before configuring
✓ Mark the chosen size’s outside outline at the site and add the clear door area
✓ Add morning, midday and afternoon shade to the site sketch
✓ Compare frame colour with façade and window frames in daylight
✓ Draw the full width of pots, benches and mature plants on the interior layout
✓ Set the position for rainwater storage and a controlled overflow
✓ Coordinate finished floor height, drainage and anchoring together