


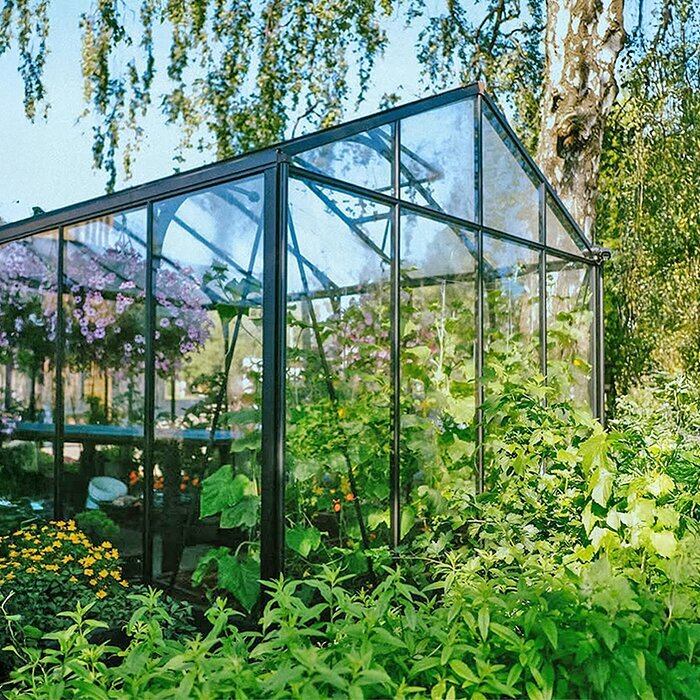


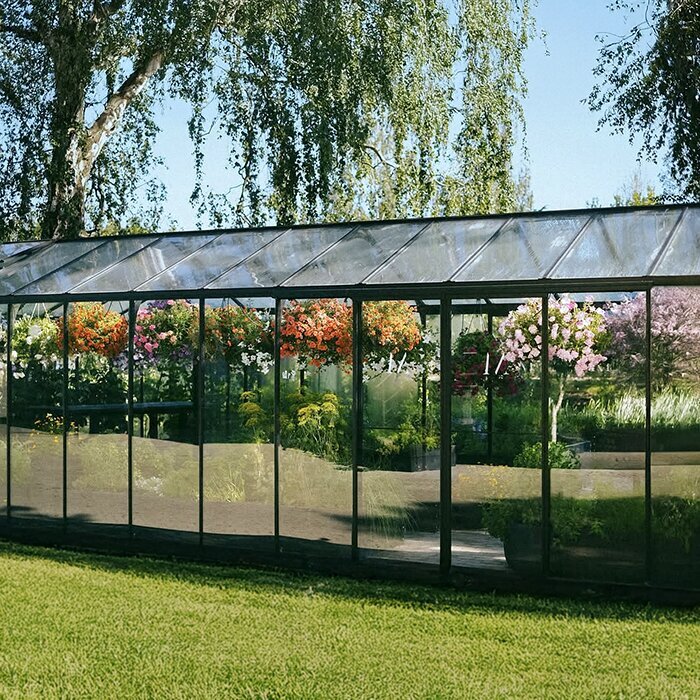
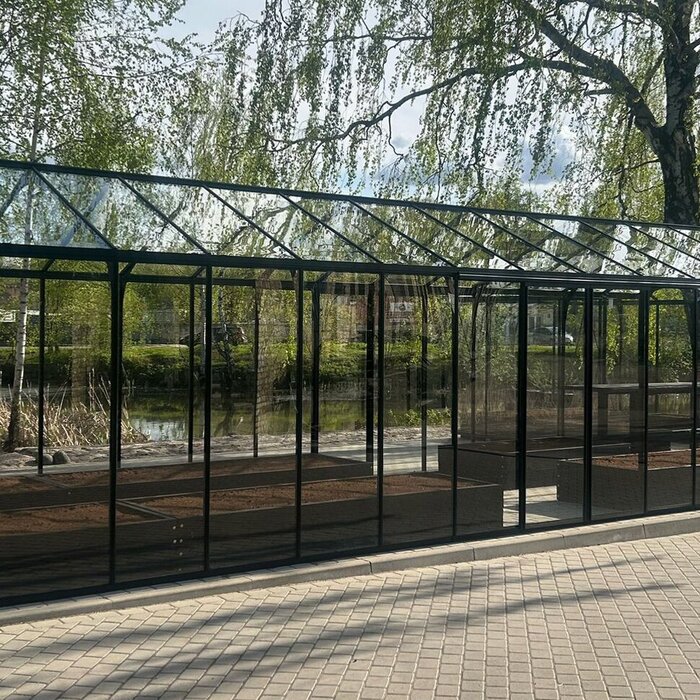
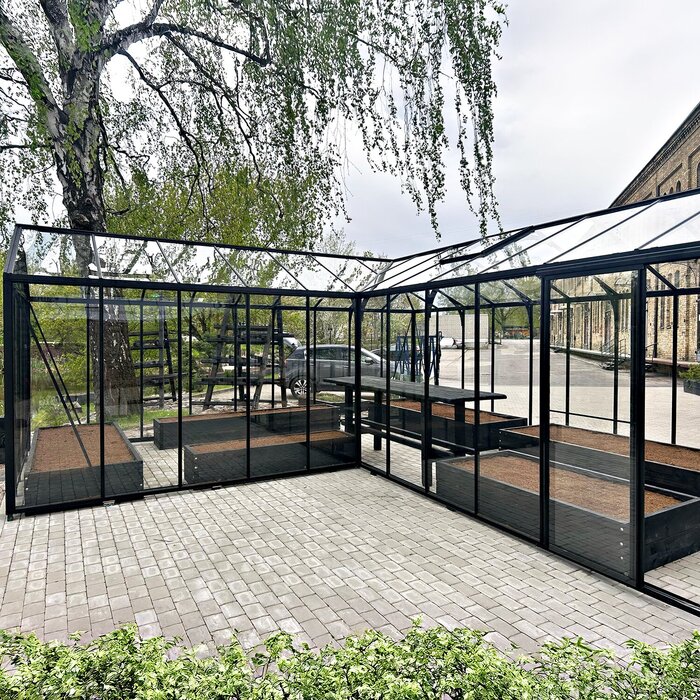









Bloomcabin Large Orangery
Bloomcabin Large Orangery: approx. 47–70 m² for plants, dining and flexible garden use
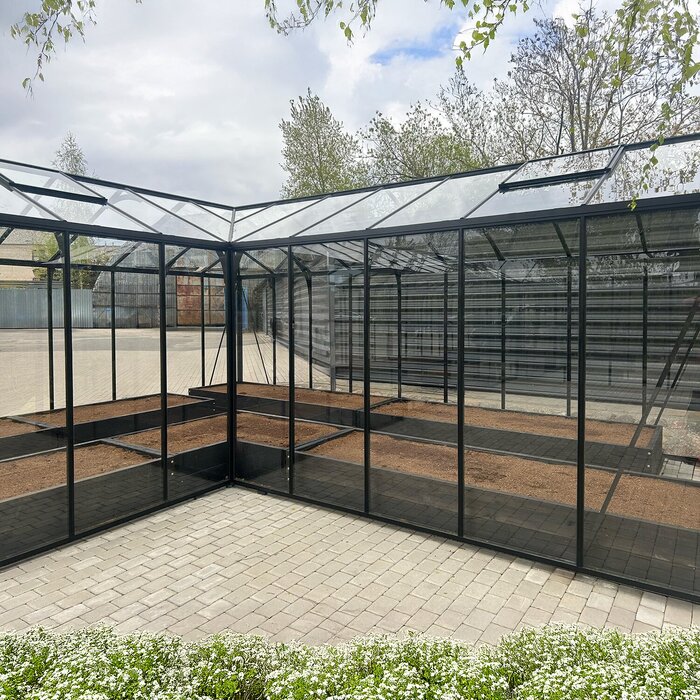
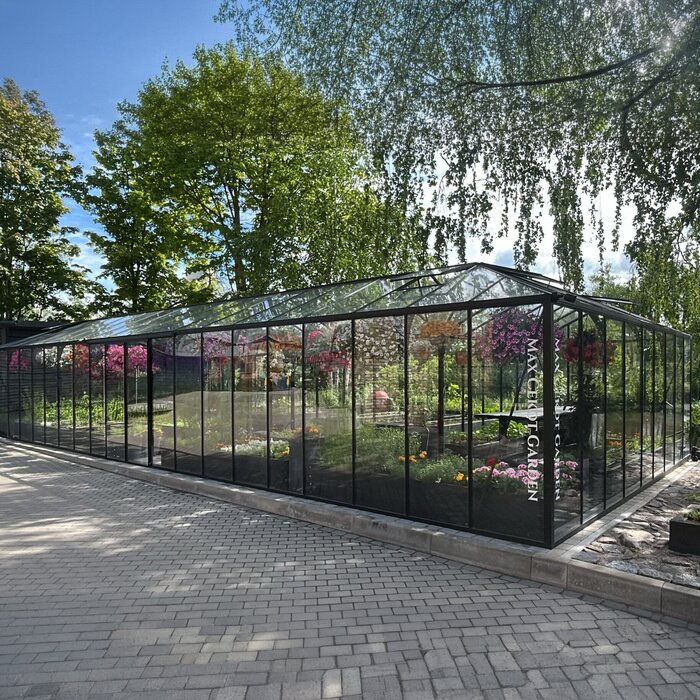
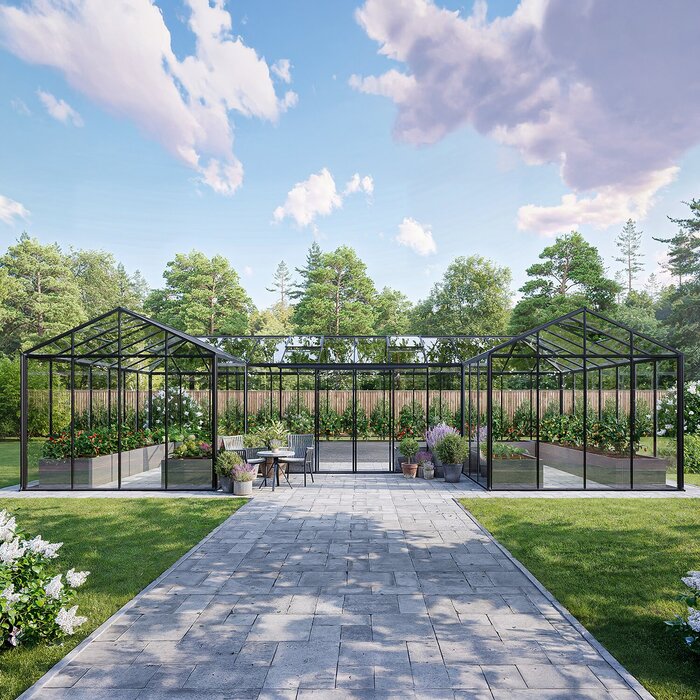
The Bloomcabin Large Orangery is designed for gardens where a greenhouse should protect plants while also serving as a genuine garden room. With around 47–70 m² the layout can include broad paths, substantial planting zones, container trees, work tables and separate seating.
A greenhouse of this scale offers far more planning freedom than a conventional design built around one central aisle. Permanent beds, practical workspace and seating can occupy distinct zones. Good planning goes beyond floor area: crops need light and moving air, tools and water belong within easy reach of the bench, and chairs should sit away from wet soil, splashes and heavily used paths.
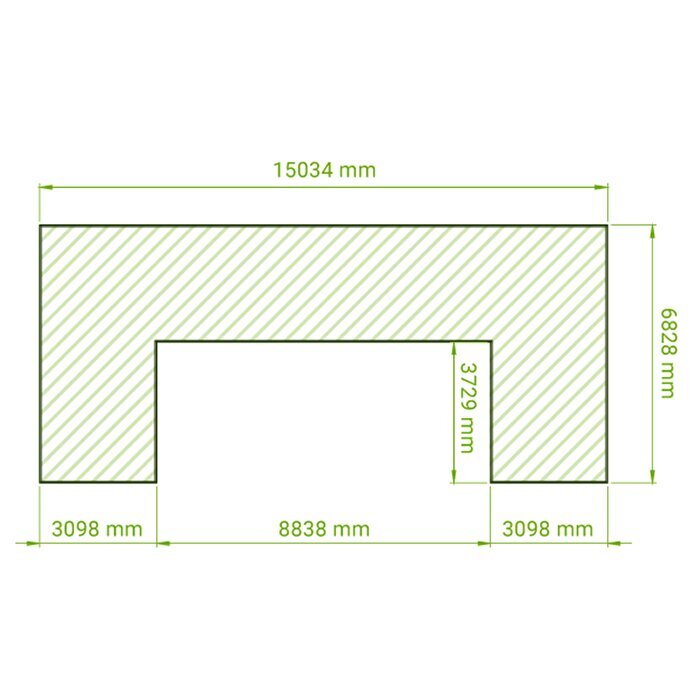
Set out the proposed external footprint before ordering, then watch how sun, shade and movement through the garden change during the day. This simple check shows whether the perimeter leaves enough room for work and cleaning, and whether components can reach the assembly area. Bloomcabin provides the dimensions and available versions. Bloomcabin.
An exceptional size class
What changes at around 47–70 m²?
Planting space and comfortable movement no longer need to compete. The greater task is organising the open floor area deliberately, so it does not become cluttered with randomly placed containers, equipment and furniture.
A generous seating zone can sit alongside wide paths and established beds. From the entrance, reserve an uncomplicated route to the workbench for moving heavy bags, planters and a garden trolley.
The remaining area can change with the seasons: propagation tables in spring, warmth-loving plants later on, then extra seating or overwintering containers after harvest. Movable tables and furniture make this possible without repeatedly rebuilding fixed beds.
01
47–70 m²
Generous open interior
02
Room to grow
Growing beds, pots, seedlings and climbing crops
03
Space to relax
Dining table, lounge or studio beside growing areas
04
Individual fittings
Doors, ventilation, colour and optional flue opening
Two key functions
Generous planting room with a comfortable place to spend time
Separate zones make everyday tasks easier to manage. Arrange growing media, spare pots and hand tools around the workbench, and keep demanding crops conveniently close. Place seating beyond the route used for watering cans and produce baskets. Even when garden work is busy, this arrangement helps the social area remain inviting and the wider orangery feel organised.
Versatile growing areas
Different crops can be arranged according to mature shape, watering and care demands, and expected harvest period. Give tall climbers positions where their shade is limited and their growth cannot interfere with doors or overhead vents. Put seedling benches and low beds beside practical working paths so routine checking, irrigation and picking remain straightforward.
✓ long beds and crop rows
✓ tomatoes, cucumbers, capsicums and climbers
✓ propagation and work tables
✓ citrus, container trees and larger collections
Garden living
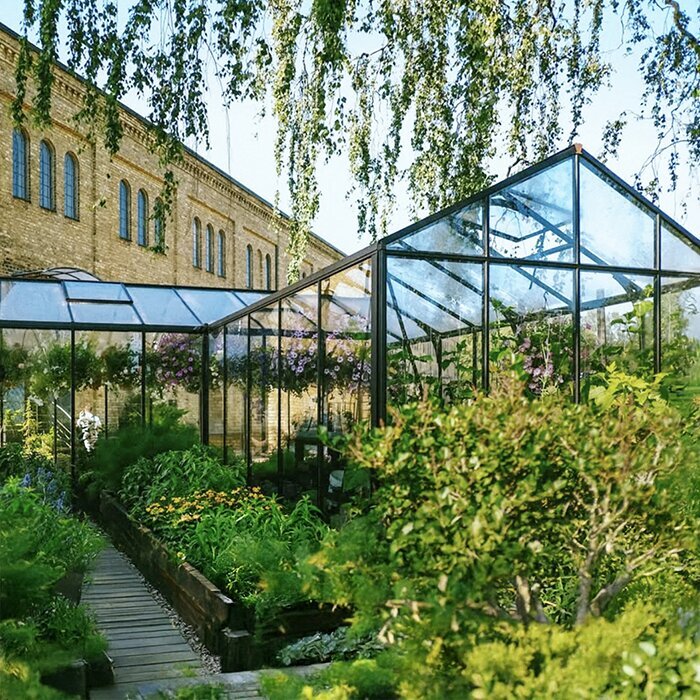
Meals, quiet time or creative work can have a dedicated zone while the space continues to function as a greenhouse. Keep this zone beyond hose runs and routes used for carrying damp soil. Easy-care finishes selected for humid growing conditions simplify maintenance. Choose furnishings and fabrics that tolerate strong sunlight, moisture and changing temperatures, or move them to dry storage when conditions demand it.
✓ large dining table
✓ lounge or breakfast area
✓ creative workspace or studio
✓ dining together and hosting small private celebrations
Materials and construction
Tough aluminium sections, integrated base frame and 4 mm toughened safety glazing
High-strength aluminium profiles form the structure, with 4 mm toughened safety glass providing clear views of the planting from the garden. During assembly, follow the specified alignment carefully so the frame and glazing meet without unwanted stress. Until each pane is installed, keep it upright, secure and protected from knocks, well clear of access routes. Transport and fitting require appropriate protective gear and a sufficient team of helpers.
At the ridge, the height is about 2.67 m; the doorway is approximately 1.85 m high. Taller crops and climbers can be accommodated, provided foliage remains clear of glazing and roof vents. Wall width determines whether a single or double sliding-door arrangement is available. Choose the doorway configuration with the intended circulation path and the positions of growing, working and seating zones in mind.
A base frame, rain gutters and roof vents are included in the structure, while a flue opening is optional. Incorporate each element when planning the footprint and services. Keep clear space around vent controls and airflow routes, direct gutter discharge to a suitable outlet, and prepare the ground correctly beneath the base. Where heating is proposed, the flue provision must be considered within separate specialist design work.
Technical overview
Bloomcabin Large Orangery at a glance
Interior area
Approx. 47–70 m²
Spacious interior for plants and relaxation
Height
Approx. 2.67 m ridge height; approx. 1.85 m door height
Space for tall crops; consider door height when moving large plants and furniture
Frame
High-strength aluminium profiles
Designed for the large glazed structure
Glazing
4 mm toughened safety glass
Clear safety glazing for high light levels and open views
Doors
Single or double sliding doors
Select single or double doors to suit the main route, large containers and furniture
Integrated features
Base frame, gutters, roof vents and optional flue opening
Built-in provisions manage ventilation and rainwater; separately designed heating may incorporate the optional flue opening
Climate & site
One uniform climate should not be expected across such a large orangery. Solar exposure, door and vent positions, moist beds and dense foliage produce distinct warm, cool and humid pockets. Use these variations deliberately: favour sunny positions for heat-loving crops, give vulnerable plants shelter where appropriate, and locate chairs away from persistent draughts. Once the greenhouse is operating, thermometer readings and regular observation will reveal its actual pattern.
Summer ventilation
Extensive glazing can gain heat quickly through long, sunny days. Good ventilation depends on an uninterrupted upward route for warm air towards the roof openings, with cooler replacement air arriving through the doorways. Site shelving and trained climbers so this circulation can continue. In particular, prevent foliage from closing into a thick canopy immediately below the ridge.
Natural airflow relies on the sliding doors working together with the roof vents. Keep controls and approaches usable after summer growth reaches full size. Air changes also serve another purpose: following irrigation, or where foliage is crowded, they carry away unwanted humidity. Do not, however, direct a sharp cold draught over young plants. Adjust each opening to suit current weather, the hour and the crops being grown.
Targeted shade during the brightest part of the season can reduce scorched foliage and improve comfort around the seating. Cover only the areas that need protection instead of leaving the complete interior dim. Movable or temporary systems can respond to crop changes and the sun’s path. Their attachments must protect both frame and glass, while leaving every roof vent free to operate.
Winter use
Find the minimum safe temperature for each citrus tree or sensitive collector plant before arranging winter protection. That requirement indicates whether simple frost defence will suffice or whether more warmth is necessary. Because heating a broad glazed enclosure can consume substantial energy, gather plants with comparable needs into one zone rather than warming every corner intensely. Clear away fallen foliage and empty standing water from saucers on a routine basis.
Design any heating around the crops requiring protection rather than around the seating alone. Furniture and closely packed foliage must leave controls accessible and allow warmth to circulate. For electrical equipment or wiring in this damp setting, engage appropriately qualified local tradespeople and confirm the requirements applying at the installation address.
Heating does not turn this glazed growing structure into a fully insulated home interior. Conditions may shift considerably overnight and can also differ between the floor and ridge. A brief coffee stop calls for a different comfort level from reliable frost protection for valuable specimens. Treating these aims separately allows plant positions and heating periods to follow genuine need, without assuming constant room-like temperatures.
Floor and broad paths
Gardening and seating both depend on a robust floor that stays level over time. Decide in advance where soil beds, hard surfaces and movable pots will go. Areas used for cultivation need finishes that cope with water and spilled soil; beneath tables and chairs, the surface must be even and capable of carrying the load. Coordinate the chosen materials and layers with foundation and drainage plans.
Generous circulation routes simplify the movement of potting mix, planters, furniture and equipment. Establish them before beds or service points are built. Door travel, corners and turning areas matter as much as nominal path width: mobile benches and sack trolleys require extra room when changing direction. A direct link to the work zone also reduces the amount of soil and irrigation water carried towards seating.
Specify a cleanable, secure-underfoot finish and prevent water collecting beside furnishings or the base. Where paved routes meet planted ground, form smooth transitions without raised edges that could cause trips. Assign proper storage or managed runs to hoses, leads and tools. This keeps door movement and circulation unobstructed during demanding gardening sessions.
Water, foundation & interior
Rainwater disposal, foundation levels and the interior floor all need one coordinated height reference. The final surface level governs the threshold, connections to beds and drainage falls for wash-down or irrigation. Outside, keep downpipes and outlets clear of both access and the foundation. Set the water and power connection locations before hard landscaping is finished.
Rainwater and garden watering
A substantial roof yields a large volume of runoff, so water planning must extend beyond placing a tank nearby. Trace the complete flow from the integral gutters to storage, include a managed overflow, and provide an outlet for periods when capacity has been reached. Runoff must stay away from main access routes and must not erode beneath the foundation. Serviceable joints make leaf and debris blockages easier to clear.
After commissioning, inspect the system during heavy rain: all junctions should remain watertight, the overflow should discharge freely, and water should not stand near foundations or paths.
Stored roof water may cover part of the garden’s irrigation demand. Position the outlet so either a hose or watering can can be used comfortably without narrowing an access route. A covered, suitable tank helps exclude larger debris. Regularly inspect its level, incoming flow and overflow. Before freezing weather, follow the component requirements for checking and, where needed, draining tanks, pipes and fittings.
Foundation for a large footprint
Minor errors become more significant over long wall runs. If levels, corners or diagonals are inaccurate, the frame may be forced under stress and sliding doors may fail to track correctly. Finish and verify the supporting base before any structural assembly starts. Corrections attempted while the glass is being installed cannot compensate for an imprecise foundation.
The full building footprint needs stable, level preparation matched to the selected size. Foundation construction, anchorage and frost measures should respond to the structure, soil and local site. Since those factors differ between properties, begin with the product documentation and obtain a competent assessment where appropriate. Place drains and service conduits so they do not compromise structural support or the zones reserved for anchors.
Establish one reliable datum, then verify wall lengths, corners and diagonals so discrepancies are found promptly. Repeat the measurements once the foundation has been completed and once more before erecting the frame; compare levels at several locations as well. Lay the kit out in its required assembly order only after both the plan geometry and the finished elevations have been confirmed.
Plan furniture to scale
The usable zone around a dining table is larger than the tabletop because chairs must move back and every place needs an approach. Show that complete occupied area on the scaled drawing. Where dining adjoins planting, leave room for maintenance too. With that allowance, pots can be turned, foliage inspected and loose soil collected without first dismantling the whole setting.
Keep lounge pieces away from circulation routes, door travel, overhead vents and working stations. Although low furniture can look visually light, its footprint may be surprisingly broad. Pieces that are modular or simple to relocate help release seedling space in spring and pot-storage room in autumn. Upholstery and fabrics need to tolerate the variable greenhouse environment; otherwise, provide dry storage elsewhere.
On the scaled plan, shade every clearance that must remain available under any furniture arrangement, particularly at sliding doors and operating controls. Reserving these zones prevents an apparently workable scheme from disabling important functions after installation.
Delivery, plants & use
Treat delivery logistics and the assembly process as separate preparations for a greenhouse this large. Glass, packaging and structural parts require protected, organised holding areas without consuming the working perimeter around the foundation. Set the final positions of major plants before furnishing. An open, firm route makes moving a weighty pot far easier than negotiating a completed interior.
Delivery and assembly-site preparation
Provide an unloading area large enough to inspect the kit and organise parts in assembly order without unsafe handling. Secure each glass element upright, away from impact risks, hard edges and any chance of toppling. Retain protective packaging until the relevant component has been identified and is ready for use. During delivery and construction, prevent children, pets and bystanders from entering the controlled work zone.
Walk the complete transport route ahead of the delivery date, including the driveway, gates, corners, steps and the approach to the foundation. Look beyond clear width: overhanging branches, fragile landscaping and restricted turns may also cause problems. If a vehicle cannot reach the site directly, decide in advance how lengthy or heavy pieces will be handled safely. Keep sorted materials dry until each stage of construction is ready.
Define and tidy the assembly zone so parts are not confused or damaged as work progresses. Keep profiles, fasteners and tools beyond walking lines. Follow the prescribed instructions and order of erection; unapproved changes to anchors, glazing supports or structural profiles may impair operation. For elevated tasks, use stable equipment suited to the job and postpone work whenever weather conditions are unsafe.
Citrus, container trees and plant collections
Both the clear floor area and interior height can accommodate sizeable feature plants and broad collections of pots. Allow for future crown growth, not merely today’s dimensions, because foliage may eventually crowd vents, glass, neighbouring plants or access. Sensible spacing improves cleaning, pruning and pest inspection. A specimen plant can provide structure within the layout, but it should never become a lasting pinch point.
Give every heavy planter a flat, adequately supported position connected to the entrance by the simplest route. Once filled with soil and watered, large pots are considerably less convenient to shift. Make their saucers accessible for inspection and emptying, avoiding persistent moisture against the finished floor. Maintain workable gaps between containers so each plant can be examined and tended from all sides.
Suitable wheeled stands let smaller pots follow seasonal changes between brighter and more protected positions. Select castors for the combined load and floor finish, and ensure they lock firmly. Mobile groupings also open space quickly and make deep cleaning less awkward. Placing crops with comparable irrigation needs together reduces overspray and runoff around furniture and paths.
Relaxation & long-term planning
Orderly storage is part of making the orangery comfortable for years. Pots, media and everyday tools should be convenient to the bench without encroaching on the floor or circulation. Allocate another permanent storage location for furnishings or propagation gear used only seasonally. Then the layout can change without equipment being left as a temporary obstruction beside doors or glazing.
Meals and small gatherings
Set aside a convenient surface for crockery and drinks during meals or modest gatherings, rather than turning the potting bench into a serving station. Seating may look towards the plants but should remain separated from irrigation points, exposed growing media and frequent condensation. Arrange lighting and electrical connections through qualified tradespeople using designs appropriate to a damp greenhouse environment.
Before guests arrive, relocate vulnerable plants, low seed trays and watering gear from the main circulation zone. Additional chairs and decorations need firm footing, and nothing should be fastened to or supported against vents, frames or glass.
Clean up food and drink spills soon after use to protect work surfaces and prevent slippery patches along the paths.
Long-term interior planning
Begin with elements that will govern the room for years: permanent beds, water points and substantial trees. At the same time, reserve access for maintaining glazing, frame connections, vents and gutters. Planting immediately against an awkward component can turn simple servicing into a difficult task. Strategic pockets of unallocated space generally offer more practical value than filling the entire floor with crops.
Use movable crop benches and furnishings around the permanent layout. A potting table needs convenient access and enough working surface to keep plant waste and soil away from seating. Shelves should not be fixed to the orangery unless specifically authorised; freestanding units must be secure and unable to contact the glazing. Before relocating any mobile unit, stabilise its pots, plants and equipment.
When a layout proves effective in daily use, add the successful positions and reserved circulation zones to the plan. After each seasonal rearrangement, benches, shelves and chairs can then be returned to practical locations.
For different garden sites
Plan for local summer heat, winter conditions, wind exposure and water movement
Assess reflected heat from light-coloured walls and paving as well as direct sunlight, because these surfaces can intensify warmth in particular zones. Trees, buildings and boundary walls create a different pattern, with shade shifting by hour and season. Observing the site before confirming the location provides a more realistic picture of where light conditions will vary strongly.
A lower winter sun can alter the interior light pattern substantially. Buildings and evergreen vegetation may then cover places that receive abundant summer light. Before choosing the final position, also confirm that the entrance and external maintenance zones remain practical during winter.
The design rating is up to 30 m/s wind speed and 210 kg/m² snow load. These specifications do not establish suitability for every Australian site. Local wind or cyclone classification, terrain, rainfall, frost and other requirements still inform the foundation and installation. Avoid positions where snow from taller adjoining roofs, walls or trees could add extra loading to the glazed roof.
Whole-project planning
1
Define the use
Identify the plants that will occupy the most permanent space, then define how and when the seating zone will be enjoyed. The resulting brief provides a consistent test for later choices.
2
Draw the routes
Map movement between entrances, planting beds, benches and chairs. Make sure people can tend crops, move supplies and use the seating concurrently without creating conflicting or blocked routes.
3
Coordinate services
Set out water, overflow, power, lighting, drainage and potential heating before building floors or foundations. Use appropriately qualified tradespeople for greenhouse services.
4
Retain flexibility
Reserve unobstructed access for servicing and keep permanent furniture or fixed shelving elsewhere. Assign seasonal items a known position or storage place so rearranging the room does not displace established growing zones.
Frequently asked questions
Common questions about the Bloomcabin Large Orangery
How do I find the right size for my property?
Draw the selected version on a scaled site plan using its real external dimensions. Include doorway positions, circulation, fixed items and the perimeter required for cleaning and construction. A decision based only on internal area will overlook important site constraints.
Can the seating area be used year-round like a living room?
No. This remains a glazed growing environment, so humidity is elevated and temperatures fluctuate. Dining and seating can be included, but fabrics and furniture must be suitable for those conditions or moved into dry storage whenever necessary.
How do I maintain the aluminium frame?
Wash the aluminium sections, connections and door tracks periodically with water, a soft cloth and a gentle non-abrasive product. Clear debris from the tracks without marking their finish. Do not drill the frame unless the product documentation specifically permits it, because holes may harm both coated surfaces and structural parts.
What is the best way to wash the safety glass?
Use water with a soft sponge or cloth and a glass-safe cleaner that contains no abrasive material. While washing, inspect the junctions around the frames and seals, and carefully clear any dirt that has collected there.
How do I keep growing plants clear of the vents?
Allow for the mature size of foliage and climbing supports when setting distances from each opening. Every sliding door and roof vent must complete its full travel, so reassess these clearances as summer climbers develop.
What must be settled before installing heating?
Plan the heater location, flue route, required clearances and professional installation beforehand. The optional flue opening is only a provision and does not replace this planning.
How long is the guarantee?
A 12-year commercial guarantee applies to the greenhouse, subject to its assembly, use, care and guarantee conditions. This guarantee does not exclude applicable Australian Consumer Law rights.
How can access accommodate bulky pots and furnishings?
Base the doorway choice and primary route on the largest object that will be moved regularly. Measure the item together with the space needed to turn it, then reserve an unobstructed path between the entrance and its intended position.
Bloomcabin Large Orangery
Plan a large garden greenhouse that suits plants, property and use over time
Consolidate the project decisions before placing the order. The same controlled document should identify the chosen version, show a dimensioned plan, allocate responsibility for foundations and connections, and set out delivery and erection. Formal sign-off helps stop drawings from different stages being mixed. Complete the checklist below as the final order review.
Project documents for ordering
✓ Reconcile the product, version, external dimensions and frame colour with the quote and plan
✓ Identify sliding-door locations and permanent clearance zones unambiguously on the drawing
✓ Record contacts and responsibilities for unloading, interim storage, foundation checks and assembly
✓ Document foundation-check results for side lengths, angles, diagonals and heights
✓ Verify water, power, drainage and potential heating information on one current plan revision
✓ Prepare the assembly documents, address, site-access notes and storage location before coordinating timing
