


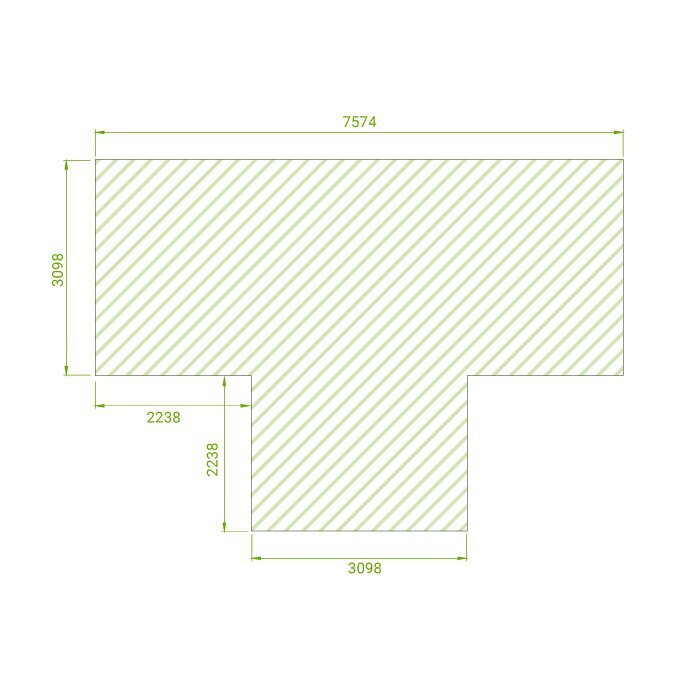





Masonry-base T orangery
A masonry-base T orangery combining a greenhouse with a garden room
This masonry-base T orangery stands independently as an aluminium and glass structure mounted on a custom-built base. It brings sheltered cultivation and flexible garden-room use together. The orientation can be chosen so its main run and side wing relate well to existing paths, the patio and important garden views.
Available ground area is only one factor when choosing a configuration. Before ordering, plot the plants, benches, furniture and circulation space at scale to test how the interior will work.
Its footprint provides an inherent division of space. Different activities can occupy the main run and side wing without adding partitions. Explore the Bloomcabin T orangery.
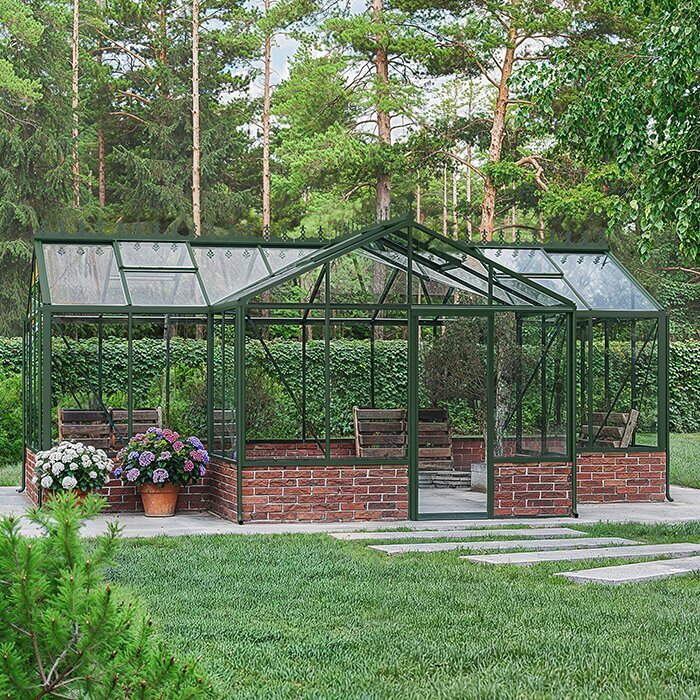
Organising the T-shaped interior
A separate activity zone forms within the side wing
Tomatoes, citrus, seedlings or workbenches may occupy the main run, leaving the side wing available for a table, lounge setting or displays.
This avoids forcing furniture, plants and work areas around one central aisle. A practical zoning plan can be established before anything is installed.
Assign each section according to the doors, available sun and the garden outlooks that matter most.
Key features
What defines the T model
The principal planning factors are its zoned footprint, locally constructed base, extensive glazing and freedom to select a suitable site.
T-shaped layout
Dedicated places for cultivation and leisure
Masonry base
Base constructed locally in brick, stone or concrete
4 mm glass
Clear toughened safety-glass glazing
Freestanding
No supporting house wall is required
Masonry base and architecture
Bring the base, frame finish and flooring together
Construct the base only from the dimensions confirmed for the selected greenhouse. Check every level, measurement and support face before fitting the aluminium frame.
Brick can echo the home’s façade, while stone may complement established garden walls. Rendered masonry or concrete produces a quieter, more contemporary character.
Across both wings, align the base top, door openings and completed floor to one precise level.
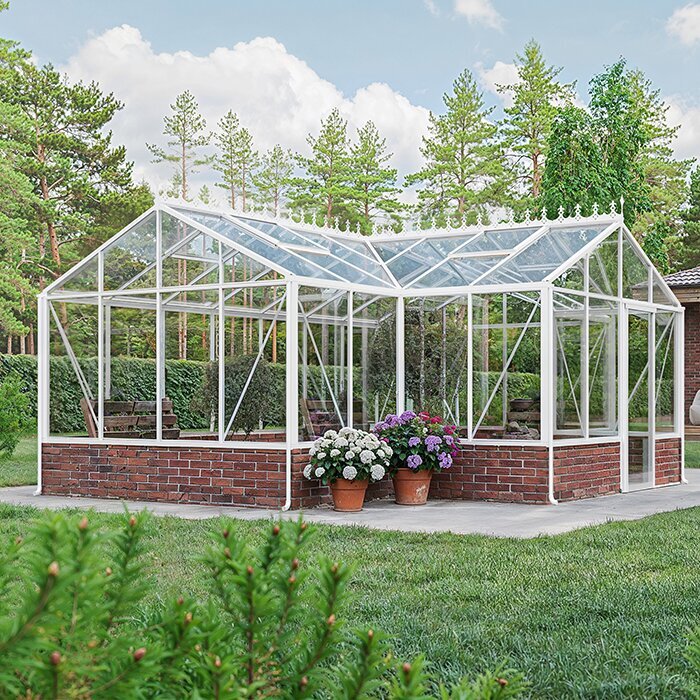
Technical details
Dimensions and inclusions for the T orangery
Area: approximately 16.5–30.0 m².
Main width: approximately 3.10 m.
Ridge height: approximately 2.67 m.
Door height: approximately 1.85 m.
Frame: powder-coated aluminium frame.
Glazing: 4 mm toughened safety glass.
Doors: one- or two-panel sliding doors according to the configuration.
Ventilation and drainage: integrated roof vents and rainwater disposal. Design ratings are 30 m/s for wind speed and 210 kg/m² for snow load.
Warranty: 12 years under the applicable terms.
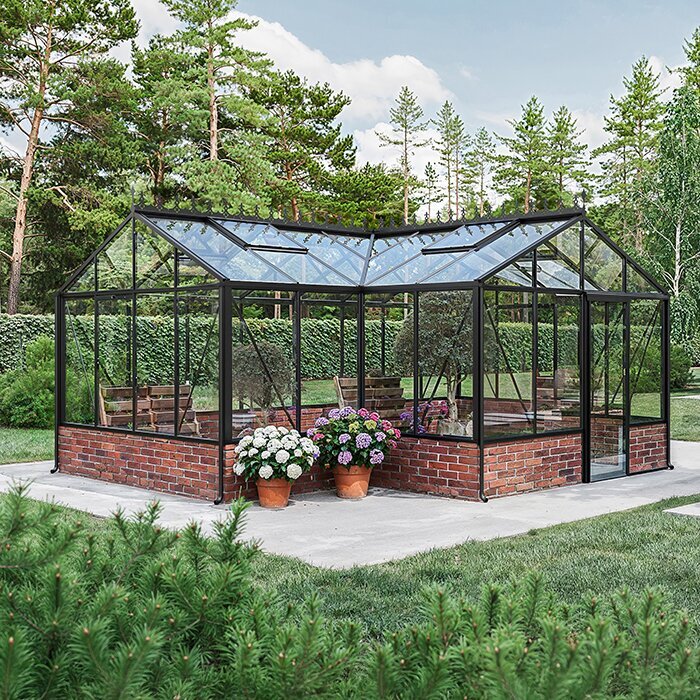
Planning the foundation in Australia
Consider soil capacity, frost risk, drainage and site conditions early
Design the footing beneath the masonry for the site’s soil, local frost exposure and the loads generated by the project. A sound aluminium frame cannot compensate for an inadequately designed or constructed foundation.
Compared with a rectangle, this plan introduces additional inward and outward corners. Detail those points so water neither ponds nor repeatedly flows against the masonry.
Resolve the foundation, drainage, base and adjoining paving as one system before the orangery goes up.
Set out before building
Use a single datum to verify the full T-shaped set-out
Mark the entire footprint on the site before laying masonry. Recheck its lengths, angles and door locations against the approved drawing.
A slight error in the wing can shift the alignment of the main run. Measuring every wall from one datum is safer than setting out separate sections.
Begin masonry only after confirming the complete outline, openings and final floor datum.
Shade and airflow in summer
Extensive glazing calls for dependable warm-weather ventilation
Sun can lift the temperature inside well above ambient conditions. Keep every sliding door and roof vent unobstructed so it can be reached and operated whenever required.
People seated in the garden room have different comfort needs from tomatoes or heat-loving citrus. The wing may benefit from seasonal shade even where the cultivation zone remains exposed to sun.
Maintain airflow through both sections by keeping furniture, climbing plants and tall containers clear of the connection.
Flooring by use zone
Choose finishes to suit each activity zone
For garden-room use, the wing may have stone, tile or another easily maintained surface. The cultivation section can instead prioritise the practical demands of routine plant care.
Even with different finishes, both zones must meet the sliding doors at a common datum. Include drainage, joints and thresholds in the base design.
Locate finish changes, joints and thresholds away from walking lines while keeping each zone straightforward to clean.
Use rainwater
Collect runoff from the complete roof form
Several roof planes feed the built-in drainage. Decide the destination of every outlet before completing the surrounding landscape.
A rainwater tank or larger store can supply some irrigation, especially where numerous pots or vegetable beds are kept inside.
Send overflow away from the masonry rather than discharging beside it, where repeated wetting or erosion could affect the base.
Plan furniture with movement space
Allow room around a dining table, not merely beneath it
When planning dining in the wing, include chairs in their pulled-out position and realistic walking clearances. The scaled layout will then reveal whether everyday use is comfortable.
Preserve an open route linking the entry, plants and seating, including while the table is occupied.
Test the sliding doors with diners seated to ensure nothing prevents their full operation.
Plan plant height
Use tall plants without compromising air movement
Figs, substantial citrus and trained climbers can frame selected views. Keep them away from door openings and beneath neither the access nor operating area of roof vents.
At the junction of the two sections, lower planting preserves visibility and makes movement easier.
The layout should account for mature canopy spread and climbing direction as well as current plant height.
Year-round use
Each season brings different requirements
Spring can be devoted to seedlings, early vegetables and tender container plants. As summer arrives, managing shade and airflow takes priority.
Autumn still allows sheltered garden-room use and protection from direct rain. In winter, suitable activities depend on the chosen plants and any heating strategy.
Without heating, frost protection is not assured, and this structure is not residential accommodation. Adjust its role and your expectations with the seasons.
Plan heating early
Heating or a fireplace shapes the floor plan and fit-out
Choose the location of any proposed heater or fireplace before setting out floors, furnishings and cultivation zones.
Have competent professionals determine suitable clearances, service connections and flue design for the selected system rather than improvising after completion.
An early decision allows the heat source to sit clear of doors, paths, plants and furniture.
Access for cleaning and maintenance
Preserve access around the entire structure
Set beds and shrubs back from the perimeter so the glazing, gutters, vents and frame junctions remain available for washing, examination and repair.
Hedges planted too closely may later block maintenance. Retain a workable access strip around the orangery.
Access is especially important beside the recessed T corners, where multiple panes and frame members converge within limited space.
Compare the T model
When is this plan preferable to a rectangular orangery?
For distinct cultivation and leisure zones, the T configuration separates activities more naturally than a single rectangular interior.
A rectangle may be simpler and use area more efficiently when the brief is limited to long vegetable beds without seating.
Because masonry emphasises the outline, this version also works well where the orangery will be a visible garden feature.
Coordinate the build
Set responsibilities and trade sequencing early
This Bloomcabin model relies on closely connected tasks: footing and masonry carry the frame, floor construction establishes the door interfaces, and landscaping directs runoff away. Nominate who sets dimensions, verifies levels and accepts the base before installation starts.
Give every contractor the confirmed model drawing as the common reference. Record revisions to openings, base height or floor build-up in the relevant documents. Fix the model, orientation and datum first; construct and inspect the foundation and base before mounting the frame.
Plan handovers between the bricklayer, landscaper, installation crew and any electrical contractor required for the site. At assembly, masonry and level support surfaces must be complete, with clear access and working room. Finish nearby dust-producing work before glazing begins.
Location and site access
Coordinate access, assembly room and permanent paths
Assess more than sunlight when selecting the position. Glass and structural components must pass through every gate, turn, step and level change between delivery and the site. Keep this route open for assembly, and postpone vulnerable nearby planting until the work is finished.
Assembly needs temporary workspace outside the eventual footprint for lifting, alignment and glazing. Stored components must not block entries, passages or recessed corners. Reserve storage and work zones before installing paths, edging or beds.
Once built, paths should serve both uses. Direct access to the plants simplifies moving soil, pots and tools; a clean route to the leisure wing lets guests avoid the work zone. Door placement determines the final arrangement.
Brick, frame and details
Coordinate masonry materials, finishes and junctions carefully
A masonry plinth is more visually prominent than the base of a fully glazed greenhouse. It can repeat house materials or provide contrast. Brick bond, joints, cappings and the paving junction all contribute, while untidy cuts become conspicuous around the numerous T-shaped corners.
View the masonry, pointing, floor and powder-coated aluminium samples together outdoors. Finishes that work alone may reveal different undertones or sheen in combination. Consider the base’s visible inner face too, as colour, brightness and texture influence both furnishings and interior light.
Appearance must not override the required construction interfaces. Provide a base top suitable for mounting the frame, and detail caps and joints so runoff is directed away from its fixing surface. Check decorative proposals against confirmed dimensions before building to avoid corrective grinding, packing or extra masonry.
Workflows in the growing area
Place water, tools and benches around routine tasks
Reduce unnecessary movement by arranging propagation, repotting, watering and short-term set-down areas in working order. Keep frequently used tools close without narrowing the principal aisle. Shallow benches may sit beside the base only if they impose no load on frame junctions and leave the glass serviceable.
A drawing must show working clearance as well as bench depth. Leave room for pots, bags and watering equipment and for carrying plants. Doors must stay usable throughout, so provide a temporary landing place beside each workstation.
Store soil, implements and irrigation accessories within the cultivation zone. Doing so reduces damp and dirt near upholstered seating in the wing, while organised storage keeps the link between the spaces open.
Ventilation in a T layout
Manage airflow across the two interior zones
Plant growth can cause the wing and main run to develop different temperatures and humidity. Leaves, large containers and furnishings redirect airflow, so monitor each zone on its own merits.
After watering and cool nights, note how rapidly moisture clears from each section. Thick foliage may stay damp locally, while the seating zone may become draughty first. Vary door and roof-vent openings in response.
No single ventilation routine suits every stage of the season. Review it as canopies fill out, climbers spread or activities in the wing change.
Glass and frame cleaning
Use gentle methods on glass and coated aluminium
Pollen, dust, algae and water splashes can dull clear glazing. Choose mild compatible products and soft implements, as harsh chemicals and abrasives may harm finishes. Clean one section at a time and rinse debris away from corners, joints and door channels.
Routine light cleaning is sufficient for powder-coated aluminium. At the same time, examine visible fasteners, joints and the frame immediately above the base. Use stable access equipment at height, never resting an unprotected ladder on glazing or aluminium.
Move or secure loose furniture and pots before working indoors. Wash upper panes first and finish with the base and floor so debris does not soil completed areas. Clearing the space also improves visibility when inspecting joints and framing.
Lighting, power and watering
Design services before completing the floor and base
Lighting supports evening tasks and provides illumination in the side wing. Locate any outlets according to actual equipment and activities. Positions hidden by deep furniture or large pots are impractical, while leads across circulation routes introduce avoidable trip hazards.
It is easier to conceal conduits before completing the floor and masonry. A suitably qualified professional should design, select and install the electrical system with regard to moisture, temperature variation and the metal-and-glass enclosure. Extension leads are not a substitute for a purpose-designed installation.
Map water movement indoors at the same stage. Keep the run from the tap or tank to the plants direct and clear of both the lounge zone and main aisle. Prevent surplus irrigation water from lingering around base junctions, and keep power, watering and drainage systems distinctly organised for easier operation and upkeep.
Winter use and roof checks
Adjust operation and maintenance for cooler conditions
Clear plant matter and leaves from roof outlets, gutters, vents and door channels before winter. Place movable containers where they will not obstruct doors or inspection routes. Group overwintering plants by their light and temperature needs, with vulnerable specimens away from regularly opened entries.
Moisture still needs an escape route during winter. Short periods of weather-appropriate ventilation may limit condensation, provided tender plants are sheltered from chilly air movement. The plan allows sensitive specimens to be positioned away from entrances, but circulation through the connecting zone must remain open.
Following unusual weather, examine the roof from below and confirm that runoff paths remain open. Never step onto the glazing. Where overhead access is unavoidable, engage an appropriate professional method that avoids concentrated loading on panes or aluminium members.
Regular inspection
Monitor junctions and operating components over time
Frequent visual checks can reveal deterioration while it is minor. Focus on masonry-to-frame interfaces, exposed fixings, sliding-door travel and vent action. Complete another full external inspection after strong winds.
Inspect masonry for failing mortar, flaking surfaces and damp that persists. Covering a symptom with an incompatible sealant may conceal rather than solve it. Trace the source, remembering that moisture can emerge away from its entry point, and assess gradients, outlets and adjoining junctions as one drainage system.
Keep dated photographs and notes of maintenance or unusual changes, together with drawings, installation papers and material details. This record assists later alterations and repairs. Replacement components and structural work must suit the installed system; avoid unapproved holes or extra loading on the frame.
Frequently asked questions
Questions about the masonry-base T orangery
Does the T orangery connect to the wall of a house?
No. It is an independent structure installed on a locally built masonry base, with no intended attachment to the dwelling.
What documents does the base contractor need?
Before work, provide the contractor with the approved drawing for the selected configuration. This controls the outline, dimensions, openings, base height and mounting edge. Enter any revision in the project documents before masonry begins.
How are sliding-door tracks kept clean?
Clear loose matter before it interferes with sliding action, using a soft tool suited to the track. Do not apply abrasive or harsh products to the track or nearby coated frame.
May the junction of the two zones be used for storage?
No. Treat it as circulation space. Arrange furniture, supports and large pots elsewhere so neither movement nor airflow between the zones is reduced.
Which points need checking on the masonry base?
Compare the completed work with the approved documents, checking the outline, corners, elevations, openings, flatness and uninterrupted mounting edge. These checks establish whether the aluminium structure will fit as intended.
Where should tall plants and supports stand?
Allow for each plant’s seasonal height and spread. Keep vents, door panels and the connection between zones accessible, and position supports where they cannot obstruct operation.
When should a heater or fireplace be planned?
Some configurations can accommodate a heater or fireplace. Select the solution before flooring, services and furniture are installed. Its clearances, flue and connections require planning by competent professionals for the specific equipment and site.
Who builds the masonry base?
A suitably skilled contractor constructs it locally from the approved dimensions for the chosen configuration. Geometry, levels, openings and all frame-bearing surfaces must be complete and verified before installation.
Bloomcabin T model
Fit the T orangery thoughtfully into the garden
Before placing an order, map the intended activities, plant and leisure zones, circulation routes and space needed around furnishings.
Those decisions guide the base, doors, floor finishes, water disposal and fit-out for the selected model.
Checklist before masonry work
✓ Verify the outline against the approved model drawing
✓ Set door openings and approach paths
✓ Design the foundation for local ground and frost conditions
✓ Determine where roof water will go
✓ Select the frame’s RAL colour
✓ Decide flooring and furnishings
Bloomcabin