
Design a greenhouse for easier access and everyday comfort
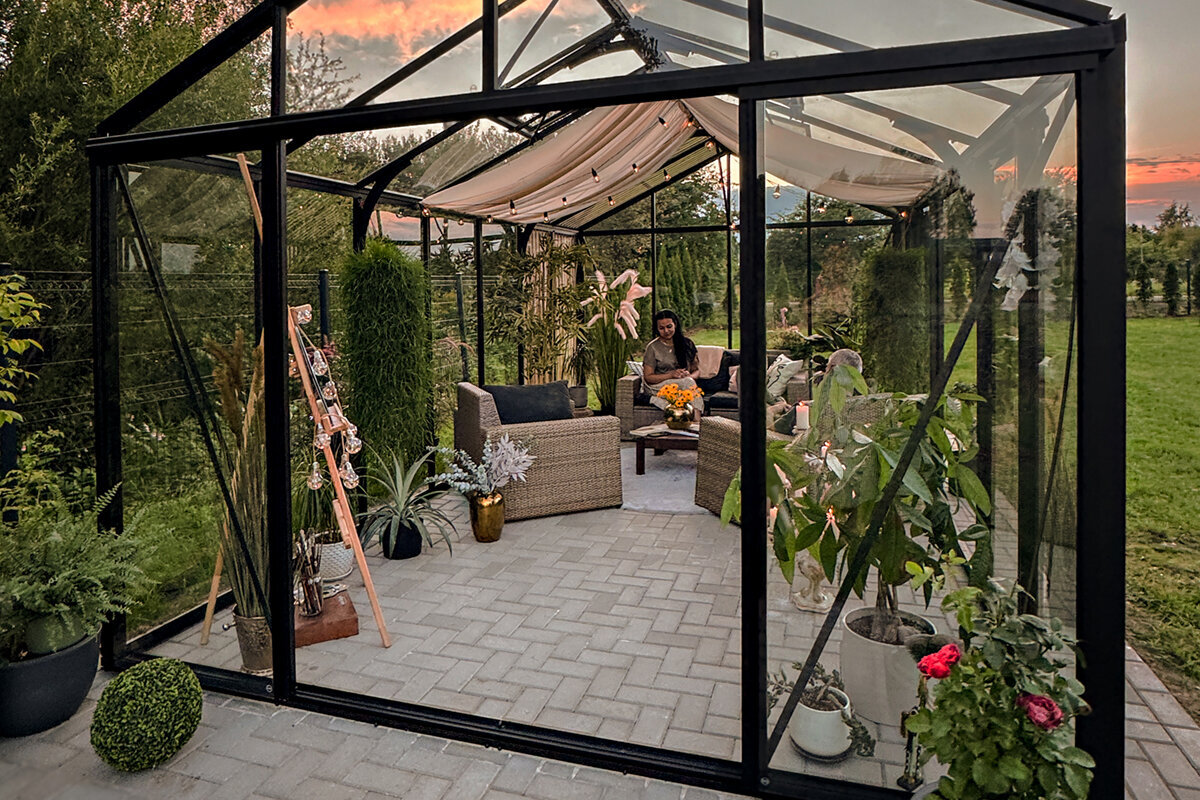

An accessibly planned greenhouse can support independent gardening, shared work and easier routines. The key is not one add-on, but how the site, entrance, circulation space, beds and work areas function together.
When planning a greenhouse, people often start with size, light and plants. For a genuinely comfortable interior, begin with use instead: who opens the door, carries soil or harvests, works seated or standing, and travels which routes each day? Those questions lead to a layout that works better over time.
Accessible planning does not mean one solution suits everyone. Some gardeners mainly need smooth transitions and wider passages; others value higher beds, easy reach or a place to set things down. Keep the design flexible enough to adapt to changing habits, aids and garden projects.
The surrounding area is part of the plan too. Comfortable access begins at the house, patio or garden path, not at the threshold. Consider surfacing, slopes, drainage, lighting and routes to compost, water and storage. That makes the greenhouse a practical work space rather than a lovely but inconvenient destination.
Layout · 01
Plan use before floor area
Start with routes, not beds. Sketch the interior and mark where you enter, turn, carry plants and keep water. A straight main path improves orientation and is easier to clean. Add side work areas only where they do not constrict the passage and keep important tasks within reach.
Think about company too: a second person may help, children may visit or a garden cart may be in use. These situations need more room than routine care alone. Leave intentional clear zones at turning points and in front of work areas. Movable shelving or sliding plant tables can make later reorganisation easier. Plan visibility and reach as well. Frequently used plants, labels and tools should be easy to find. Clear space beside the entrance helps when arriving with crates, setting items down briefly and continuing calmly.
- Mark the routes used most often between the door, water, work surface and beds on your plan.
- Reserve open zones at the entrance and end walls instead of permanently filling every area with plants.
For a flexibly arranged interior, a standard Classic greenhouse offers a clear basis for paths and work areas.
Entrance · 02
Make the door and landing comfortable
The door is the daily connection between garden and greenhouse. Choose an entrance that is comfortable to use with one hand, while carrying crates or beside another person. Outside the door, provide a level, stable landing where you can stand, set things down and orient yourself without stepping into soft soil or loose stones.
Avoid abrupt edges at the entrance where construction and drainage allow. A carefully planned transition reduces trip points and makes light garden aids easier to roll. Check the door’s opening direction against the route. An open door should not block access or take over an important internal movement area. Include the handle and any fasteners in your practical test. They should remain easy to reach while holding a watering can, basket or gloves. Clear space on both sides of the door makes entering easier without hurried sidestepping.
- Measure the required opening using the objects you regularly carry.
- Plan the outdoor surface so rainwater drains away from the entrance rather than forming a puddle.
Where access runs along a wall, a large regular Lean-To greenhouse can bring together the routes between house, door and work zone.
Paths · 03
Choose flooring and paths carefully
The interior floor affects comfort, cleaning and safety alike. Aim for a reasonably even, firm surface that remains easy to judge when wet. Choose a build-up suited to the site and intended drainage. Loose materials can look natural, but need careful edging and regular upkeep to keep the path clear and level.
Do not let the main path become a storage area. Give watering cans, harvest baskets, gloves and growing media defined homes so nothing sits in the passage. Contrasting edges at beds or steps can improve orientation without making the room feel busy. Pay particular attention to junctions and changes between indoor and outdoor surfaces. Consider cleaning when choosing flooring too. Soil, leaves and spilled water are easier to manage on a clearly organised surface that can be swept readily. Defined edge zones stop growing media from migrating into the path and creating unnecessary unevenness.
- Keep the main path clear throughout and move storage into clearly defined edge areas.
- After installation, test surfaces and transitions with wet shoes to see whether they feel practical and secure.
A Classic greenhouse with a standard layout can be planned effectively around a clear central path and side growing zones.
Beds · 04
Position raised beds ergonomically
Raised beds can make plant care much more comfortable when their height, depth and edging suit the individual gardener. Rather than following an ideal measurement, test how far you can comfortably reach and whether you mostly work seated or standing. A narrow bed accessible from both sides may be more useful than a broad planting area with an awkward centre.
Not every bed needs the same height. Combining ground-level growing areas, raised planters and a work surface supports different plants and tasks. Leave enough movement room between a bed edge and shelving. Watering should work without excessive stretching: locate water connections, hoses and cans where they do not cross the path. Consider seasonal care as well. Some crops need supports, while others require regular pruning or harvesting. Leave room to reach every side comfortably and avoid fixed elements that permanently limit access to plants.
- Choose bed depths for your real reach, not the greatest possible planting capacity.
- Keep one side of at least one bed free so care and harvesting can happen from different positions.
Against a house wall, a full-size regular Lean-To greenhouse can bring raised beds and a compact work zone together effectively.
Work area · 05
Work without unnecessary trips
A dedicated work area prevents sowing and potting from happening on improvised surfaces. Plan a stable bench with room for pots, soil and tools; easy-to-reach containers below can help maintain order. Its height should suit your preferred activity. People who mainly work seated need different knee clearance and access below the surface than those who prefer standing.
Arrange tasks in a sensible order: store materials, prepare soil, plant, water and label. Keeping these stations close together shortens journeys and keeps the area orderly. Avoid high, difficult-to-reach storage for everyday items. Less-used accessories can go higher or farther back. A small surface directly beside the work area can simplify routines further, holding seed packets, labels or a bowl for harvested plants. Ensure it does not narrow the passage and can be tidied quickly after use.
- Keep frequently used hand tools between hip and shoulder height near the workbench.
- Set up a chair or mobile seat before settling on the final working height.
For a well-organised planting and potting area, a standard-line Classic greenhouse provides an easy-to-read framework.
Reach · 06
Include ventilation, water and storage
Comfort does not end at the bed and bench. Windows, shading, water containers and shelves should be reachable without leaning over plants or shifting objects. Place frequently operated items along the main path and consider how they are used. When choosing accessories, check whether handles, catches and adjustment points sit within a normal working reach.
Storage is especially useful when it creates order rather than new obstacles. Open, shallow boxes keep contents visible, while heavy bags are best kept low. Do not leave hoses or cables crossing the path permanently. Consider where damp clothing, gloves or harvest baskets can be placed temporarily without blocking the work surface. Check accessibility as planting changes too. Lush tomatoes, supports or overwintering containers may occupy routes differently from an empty layout. Flexible shelving and storage let the space respond to the season without blocking essential controls.
- List every item you touch or adjust during a typical week.
- Store heavy materials low and near the entrance to avoid long carrying distances inside the greenhouse.
For a wall-side arrangement, a full-size regular Lean-To greenhouse supports short routes between storage, water and plants.
Outdoor space · 07
Plan the route to the greenhouse
A carefully arranged interior will not help if the garden route is hard to use. Follow the approach from your usual starting point in the conditions the property actually experiences—rain, snow or freeze-thaw periods where relevant. Check lighting, overhanging branches, leaf buildup, loose edges and places where water or ice collects. A direct route reduces effort and makes quick plant-care visits easier.
The area around the greenhouse needs clear functions too. Space for deliveries, empty pots or a small cart prevents items from gathering in front of the door. Deliberately plan routes to water, compost and storage instead of letting them emerge later between beds. The exterior can then remain as flexible as the interior and look cared for over time. Clear outdoor orientation further supports daily use. Consistent places to set things down, visible path edges and a tidy landing help gardening begin without lengthy rearranging. Check regularly whether plants or stored materials have narrowed access.
- Walk the proposed route at dusk and after rain before finalising surfaces.
- Keep seasonal containers, bags and stored tools away from the entrance.
A freestanding standard Classic greenhouse can be linked to a clear garden route and generous entrance landing.
Future · 08
Keep the layout adaptable
A greenhouse is often used differently after several years than on its first day. New crops, changing mobility or different family routines can make a revised setup worthwhile. Choose removable, movable or extendable elements where possible. An open layout at the beginning is often more valuable than dense furnishing that leaves little room for change.
After the first growing season, note which routes worked and where you repeatedly bumped into things or had to rearrange the space. Small changes to bench placement, lighting or storage can improve comfort. Before altering the site, ask the municipality about the approval route and have drainage and foundation needs assessed for the property. Keep observations from different seasons: shade equipment and dense summer growth may narrow routes, while spring sowing can require more room for supplies. Building the layout gradually lets you make practical improvements without giving up space for future needs.
- Keep at least one planting or storage surface adjustable so the interior can respond later.
- Note frustrating pinch points during the season and decide on permanent fittings only afterwards.
For a long-term adaptable solution against a wall, a large regular Lean-To greenhouse offers a well-structured starting point.

Comparison
Compare planning options
The right approach depends on your movement patterns, site and preferred way of working. This overview helps you consider key decisions as one connected comfort plan rather than in isolation.
| Planning area | Compact approach | Comfort-focused approach |
|---|---|---|
| Access | Direct route, simple landing | Level landing with generous movement space |
| Interior path | Narrow passage between beds | Clear main path with turning room |
| Beds | Rows of beds at one height | Different heights and reachable depths |
| Work area | Movable surface as needed | Dedicated ergonomic potting zone |
| Storage | Shelf at the edge | Low, clearly organised storage |
Access
Plan a firm, slip-resistant route to the door and sufficient clear area in front for opening, turning and setting things down.
Movement
A continuous main path matters more than maximum bed area. It connects the entrance, work zone and ventilation elements without needless pinch points or evasive movements.
Working heights
Combine different bed and surface heights. Plants can then be tended seated or standing without every task demanding the same posture.

5 steps to a comfortable layout
Plan use first, then equipment. A simple test with boxes, chairs or garden markings often reveals spatial routines faster than a drawing alone.
01
Identify users and activities
Note who will use the greenhouse and which tasks occur regularly: sowing, care, harvesting, potting, watering and storage.
02
Set the outdoor access route
Decide on the route from the house or garden gate, the landing and the set-down area. Check surface, slope and drainage at the site.
03
Draw the main path first
Lay out a continuous route from the entrance to key areas. Allow for turning, crates and possible garden aids.
04
Test beds and working heights
Simulate reach and posture using a temporary table or boxes. Then choose bed widths, heights and seating options.
05
Review the setup seasonally
Use the space flexibly at first and observe routines. Adjust shelving, storage and work surfaces based on early experience.
Checklist before ordering
Review these points at the proposed site. They help connect comfort considerations with size, foundation, access and furnishing early in the process.
01. The route to the greenhouse is direct and stable from the usual starting point, and works in different weather conditions.
02. There is enough clear space in front of the door for opening, turning, setting things down and possible company.
03. The interior has a clear main path that is not intended for permanent storage or planting.
04. Beds are planned at depths and heights that keep care and harvests reachable in your preferred working position.
05. A workbench or surface is included for sowing and potting, with storage arranged sensibly around it.
06. Water, ventilation and frequently used tools can be operated without reaching over beds or obstacles.
07. Surfaces, transitions and drainage form one coordinated plan for the interior, doorway and outdoor route.
08. Before installation, identify the province or territory and municipality, then confirm any zoning, permit and construction requirements for the specific site with the appropriate local authority.

Frequently asked questions about accessible greenhouse planning
What does accessible mean for a greenhouse?
Accessible describes a plan that makes entering, moving through and working in a greenhouse easier. It can include a usable route, simple transitions, reachable work areas and enough space for different movement patterns. The right arrangement always depends on the users and the particular property.
How wide should a greenhouse path be?
There is no universal width, because use, equipment and mobility aids all matter. Plan the route around the largest items that must regularly pass through it, allowing for turning and setting things down. A full-scale marked trial at the site quickly shows whether the passage works day to day.
Are raised beds useful in an accessible greenhouse?
Raised beds can be useful because they bring plants closer to the working position. Suitable height, reachable depth and enough room beside them are essential. Mixed heights often offer more flexibility than a uniform arrangement. Before building, try a temporary edge to find a position that feels comfortable.
Which door arrangement is especially practical?
A practical door has an opening suited to your usual transport routes and can be used comfortably from a clear, firm landing. Consider its opening direction and ensure the open door does not obstruct a main route either outside or inside. Always check details against the specific model.
Does an accessible greenhouse need approval?
Canada does not have one nationwide permit answer for greenhouses. Publishing a national model code does not make it automatically applicable in every province or territory. Identify your province or territory and municipality, then ask the local permit office which zoning, permit, setback, foundation and drainage requirements apply to the proposed site, dimensions and construction.
How can the interior stay flexible over time?
Use movable shelves, adjustable containers and clearly defined storage areas. Keep the main path clear and avoid built-ins that prevent every future change. After one season, you will usually know better which space is genuinely needed. You can then add, move or reduce equipment purposefully.
Explore greenhouses
A greenhouse that makes daily gardening easier
Accessible planning means taking ordinary garden routines seriously: carrying a watering can, potting at a bench, harvesting from a raised bed and checking on plants. When the entrance, movement space and working heights suit each other, the greenhouse becomes somewhere you will enjoy using regularly.
Take time to create a layout that suits your property and habits. Check measurements at the real site, leave room for later adjustments and resolve site-specific questions early. This creates a practical foundation for many relaxed hours under glass.
Find a greenhouse solution suited to your site, routes and personal way of working.
