
Growing Cauliflower in a Greenhouse
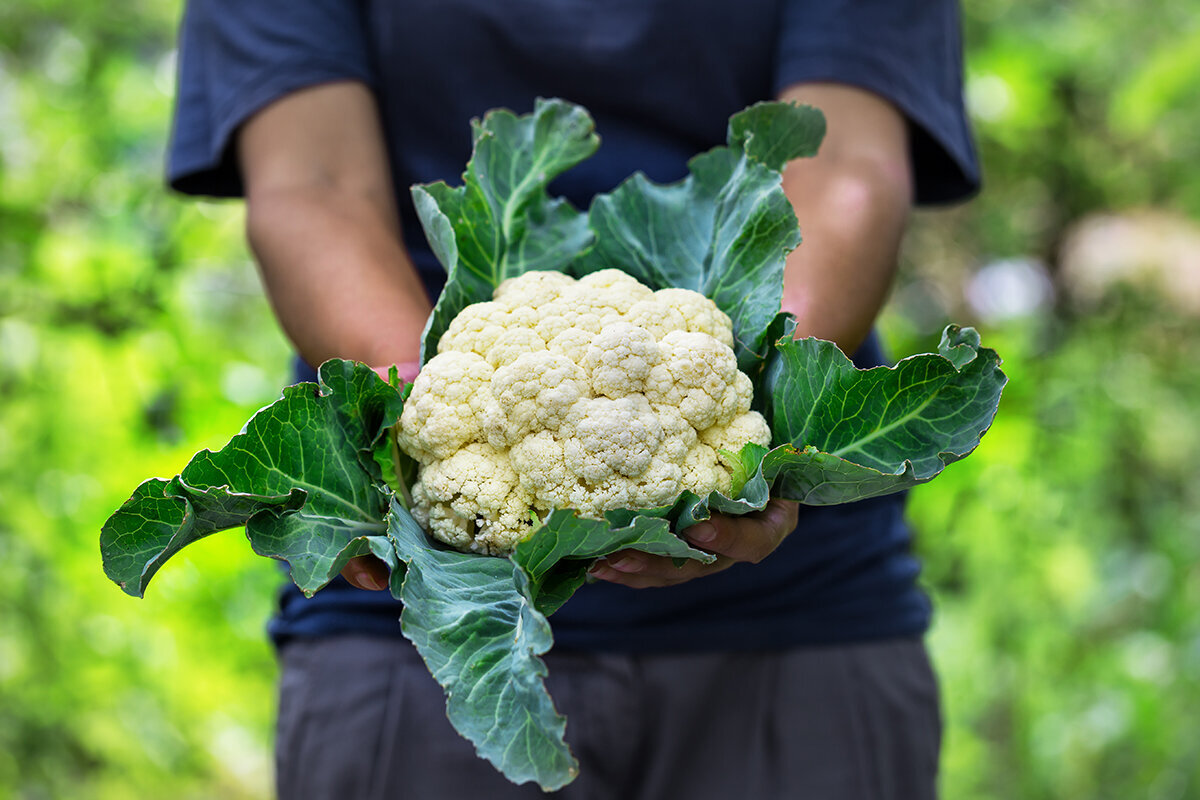
The Cool-Crop Atelier · T17
Growing Cauliflower in a Greenhouse
A well-finished cauliflower is built through steady care, not extra heat or good luck. Cool air, dependable soil moisture, vigorous foliage, working roots and uninterrupted growth all leave their mark on the harvested head.
Used thoughtfully, a greenhouse provides that steadier environment. Treat it as a ventilated cool-crop shelter: start plants earlier, carry an autumn crop longer, buffer rough weather and direct water precisely. What it cannot do is make a hot July behave like cauliflower weather.
Crop-planning noteMost promising periods: late winter into spring or late summer into fall, adjusted for the cultivar and local climate. Reserve room for full-grown foliage, plan how heat will escape and be ready to harvest the head in one timely cut.
If your plan needs room for broad brassica leaves, an unobstructed aisle and good air circulation, take a look at the Classic Aluminium Greenhouse.
01 / Set the harvest standard
“A pale, compact head tells the story of the whole crop: leaves established first, cool conditions maintained and protection added before the curd began to open.”
Cauliflower has less room for error than many greenhouse vegetables. A short dry spell may simply leave a tomato smaller, but stress while cauliflower is making leaves or initiating its curd can result in buttoning, a coarse surface, leafy growth within the head or premature opening.
This is where shelter earns its place. Irrigation can be deliberate, transplants avoid driving rain and wind, and ventilation remains under the grower’s control. Build a powerful leaf canopy first, then keep root moisture, fertility and temperature from lurching between extremes while the curd develops.
02 / Match the cultivar to the calendar
Arrange the crop so its curd develops during your most dependable stretch of cool weather.
Canada’s growing conditions vary widely, so there is no single national cauliflower calendar. In many unheated greenhouses, the useful windows fall around spring and fall: vent promptly during bright spring weather, or transplant as late-summer heat begins to ease. The structure can buffer cold nights, downpours and damp late-season weather. It is not frost-proof, so use floating row cover or another suitable safeguard when frost is expected.
Select a cultivar for its recommended planting window, time to maturity, regional fit, heat response and wrapper-leaf habit rather than the size shown in a photograph. Promptly maturing choices suit a short spring window; slower fall types work where cool conditions are likely to last through curd formation. On self-blanching white cauliflower, inner leaves naturally curl inward and reduce the amount of hand covering required.
Early variety / spring planting
Quick, compact, heat-aware
Choose this approach where the crop can be cut before sustained warmth. It is only practical if seedlings can be protected from chilling and the greenhouse can shed excess heat later.
Main-season variety / fall planting
Steady growth, cool finish
Where local weather offers a long enough cool autumn runway, this can be the easier fit: start plants during summer, move them into their final positions as heat retreats and use the greenhouse to buffer fall weather.
Self-blanching / white head
Naturally closing leaves
A helpful trait when daily visits are difficult, though the heads still need inspection. Wrapper foliage limits direct light; it cannot remedy overheated air, dry roots or inadequate nutrition.
03 / Starting seedlings
Aim for short, sturdy transplants with active roots and no pause in their development.
01 / Seed
02 / Cell
03 / Young plant
04 / Transplant
Begin with clean materials
Place one seed in each cell of fresh seed-starting mix. Maintain even moisture without waterlogging, and mark both the cultivar and the planned transplanting time at once.
Build roots, not height
Move emerged seedlings into strong light promptly and keep the air gently circulating. The useful result is a firm, compact plug rather than a pale plant stretched by indoor conditions.
Keep the young stage stable
Do not make cauliflower wait in crowded trays with depleted compost or tangled roots. Oversized transplants are particularly vulnerable to an interruption at this stage.
Plant out with a strong root ball
Move plants once they carry several true leaves and the root ball holds together. Keep the original planting depth, settle the soil without crushing it and finish with a thorough watering.
Seedling production is the crop’s first quality checkpoint. The German guidance behind this article notes that early sowing often starts in February; in Canada, treat that as a foreign example and set dates from local conditions and the seed packet. The Bavarian State Institute for Viticulture and Horticulture recommends 16 to 18 °C for germination of early cauliflower, followed by 14 to 16 °C while raising the plants. Prolonged cold, excessive time in a pot and other stress can trigger tiny premature heads. When the bed will not be ready in time, another small sowing is often preferable to keeping aging transplants on hold.
Introduce seedlings gradually to brighter light, moving air and cooler greenhouse conditions over several days. Do not let the root ball dry, and do not use cold nights as a hardening treatment. An overcast afternoon is a good time to transplant. The best move causes little visible reaction: no severe wilting, root injury or growth check that later shows in the curd.
04 / Space for the finished crop
Design the bed around the eventual leaf spread, not the size of today’s transplant.
50–60 cm plant spacingClear working pathDistance from glazingOpen ventilation route
Plant spacing
A useful range is 50 to 60 cm between plants and between rows, with the cultivar’s directions providing the final check. Put vigorous fall types toward the wider end so their foliage can dry efficiently.
Working path
Preserve a comfortable aisle. It should be possible to examine leaf undersides, test moisture and see the forming curd without compacting the bed or repeatedly rubbing against foliage.
Glazing edge
Keep the outer foliage clear of both glazing and solid walls. That open strip promotes circulation and reduces the effects of condensation and quick temperature changes beside the greenhouse skin.
Ventilation corridor
Leaves must not crowd doors, roof vents or other openings. The crop benefits from mild, continuing circulation rather than humid air trapped beneath an overlapping canopy.
Newly planted cauliflower can make a bed look underfilled. Resist adding more. The broad leaves that appear later power the curd, while packed foliage traps moisture and dries slowly under cover. Use two rows only where both can be reached without stepping into the cultivated soil during maintenance or harvest.
In a tight footprint, fewer well-tended plants usually outperform an overcrowded row. The Classic Aluminium Greenhouse can be considered where the plan calls for full-sized brassicas, organized seedling space and a central aisle that remains useful—not merely sheltered floor area for a cluster of pots.
05 / Balancing heat, air and light
Think of the greenhouse as a bright crop room that must stay on the cool side.
A greenhouse baking in sunshine offers cauliflower little advantage. Start venting while the interior is warming, before the atmosphere becomes oppressive. Temporary shade can take the edge off exceptional heat, but sound seasonal timing and generous airflow do the main work. Place a minimum-maximum thermometer near leaf level; its record is more useful than how the room feels during a brief visit.
What matters is a mostly cool, stable growing pattern. Strong sun can raise the temperature behind closed glazing even when outdoor air feels cool. Hot days and warm nights interfere with curd development and favour a looser texture. When frost threatens during a transitional season, add row cover overnight and remove it after morning temperatures recover so the crop and soil surface can dry.
Moving air also supports crop health. Irrigate the soil around the roots early in the day when possible, then let humid air escape. Avoid carrying wet heads and foliage into the night. A circulation fan should create a mild sweep through the plants, not parch one edge of the bed. Other controllable growing-space options are available among Bloomcabin’s aluminium greenhouses.
06 / Grow without stop-start swings
A disruption at the roots can still be visible when the curd is cut.
Avoid alternating waterlogged bursts of growth with thirsty intervals. A stalled planting cannot reliably be repaired by dumping on nitrogen late in the season either. When root conditions fluctuate, leaf production fluctuates too, and the developing curd carries that history forward.
01 / Root zone→
02 / Foliage→
03 / Curd formation→
04 / Finish
Maintain moisture throughout the depth occupied by active roots without saturating the bed. Before adding water, probe below the deceptively dry surface with a finger, dibber or small trowel.
Reliable moisture and proportionate feeding help the plant build a broad, healthy canopy. Those leaves collect the energy the crop needs before any curd can be seen.
With cool weather and uninterrupted development, the curd can begin after the plant has gained useful size. Stress early in the crop may instead trigger an undersized button head.
A calm growing rhythm favours a dense, fine-textured surface. Heat, dry soil or abrupt fertilizer use can produce a coarse, open or leafy result.
Water with a steady hand
Soak a greenhouse bed far enough for moisture to reach the working roots, then reassess the soil before the next irrigation. Rain does not reach a covered bed, and demand changes with soil texture, sunshine and plant size. Slow watering close to the soil or drip irrigation is preferable to repeated surface splashing. A clean, loose mulch layer can even out moisture loss, provided it does not hold damp material against the stem.
Base feeding on the soil
Cauliflower is a hungry crop, but indiscriminate feeding is not a plan. Prepare the bed with finished compost and an appropriate organic base amendment. If growth is weak or unusual, testing the soil gives better direction than adding fertilizer blindly. A measured top-up during canopy development may be useful, whereas a late rush of readily available nitrogen cannot guarantee either large heads or sound quality.
Where daily routines depend on controllable airflow, sturdy construction and reachable beds, the Classic Aluminium Greenhouse provides a greenhouse layout that can be planned around those needs.
07 / When the curd begins
Increase your inspections as soon as a pale centre becomes visible.
Once a light-coloured point emerges among the youngest leaves, examine each plant at intervals of two or three days. Avoid drastic changes now. Maintain dependable moisture and airflow, pull weeds, and remove only diseased or damaged leaves lying on the soil. Sound foliage stays in place to feed and eventually shelter the curd.
Direct, intense sunshine can mark a white curd, so healthy foliage serves as its built-in parasol. A generous canopy also indicates that the plant had enough resources to support head formation. Do not strip large leaves in an attempt to create air movement. Achieve circulation through sensible spacing, uncluttered paths and working vents instead.
08 / Leaf cover for white curds
Draw the foliage together as an airy shade, not a wet wrapper.
To blanch white cauliflower, use the plant’s outer foliage to shade the developing curd and retain its pale ivory appearance. Wait until a small, solid head can be seen. Calendar dates are not useful here because cultivar, weather and growth rate determine how soon cutting will follow. Once covered, the curd needs frequent inspection.
Self-blanching cultivars reduce the task, but their coverage may be uneven. Look from several sides for exposed patches. During humid or warm spells, keep gathered foliage particularly loose. Leaves pressed wet against the curd can encourage decay; the objective is filtered light with ventilation.
01 / Open
02 / Shade
03 / Secure
04 / Check
Open growth
Let the inner foliage remain open until a small, solid curd appears. Before that point, it benefits from light and free circulation.
First shade
Make a loose canopy with two or three healthy, dry outer leaves. Avoid sharply folding or snapping the thick central ribs.
Secure loosely
A soft clip or gently tied string can hold the leaves well above the curd if necessary. Leave a generous pocket of air around it.
Check regularly
Lift the covering briefly after heavy dew or humid weather and again before cutting. Look for a dry, firm surface, unwanted colour and concealed insects.
09 / What the curd is telling you
Interpret the surface before deciding the cultivar was at fault.
An irregular curd is not necessarily inedible, but its appearance can reveal earlier growing conditions. Record the clues for the next sowing instead of making hurried adjustments to a head that has already formed.
Compact
Buttoning
Graininess
Bracting
Soft rot
Firm and pale
The target is a firm dome with a pale, closely packed and even surface, without florets projecting from it. Harvest before that compact structure starts to open.
Buttoning
An abnormally early, undersized head commonly points to stress during establishment: aging transplants, cold, excessive warmth, dry soil, injured roots, poor nutrition or insects.
Graininess
The curd becomes coarse when florets lengthen and move apart. Heat or marked changes in growth often preceded the symptom. Cut without delay if the head is still suitable for use.
Bracting
Tiny green leaves within the curd may be a cultivar characteristic, though hot weather, drought and other disturbance early in head development can encourage them.
Discolouration or rot
For yellow or brown marks, review exposure to sun and protection from frost. Dark, moist or soft tissue also warrants a check of condensation, physical damage, sanitation and circulation.
Change for the next planting
Begin the next diagnosis with seedling temperature, transplant timing, root condition, airflow and irrigation. The current head is already set, but the following crop can be scheduled and handled differently.
Buttoning means the crop initiated its curd before producing the leaf area needed to support a full head. The triggering event may have happened weeks earlier, such as an overly cold seedling period, too long in the pot, root damage or drought soon after transplanting. Fertilizer applied now cannot reverse it. Pick the small curd while it remains firm and correct the earlier weak point in the next sowing.
A coarse surface or leafy bracts point especially strongly toward climate and moisture. Heat, drought and irregular development all favour these finishes. For the next crop, arrange head formation during cooler weather, begin venting sooner on sunny days and prevent the bed from drying out. Soaking parched soil afterwards cannot recreate steady growth.
10 / Scouting, disease and clean-up
Keep sightlines open and remove places where crop problems can hide.
A greenhouse does not keep all brassica pests outside. At least twice each week, examine leaf undersides and the youngest central foliage for eggs, aphids, caterpillars, chewing, webbing and frass. Hand-picking works well when only a few plants are involved. Fine insect mesh across open sides can reduce cabbage-butterfly entry, provided it does not restrict ventilation. If another control is needed, identify the pest before selecting a product. In Canada, use Health Canada’s registry to confirm that both the product and its intended use on edible brassicas appear on the current label, follow that label, and check for additional provincial or municipal restrictions.
Take clubroot symptoms seriously: plants may wilt even in moist soil, and their roots become swollen and distorted. Keep affected plants out of compost, remove cruciferous weeds and avoid returning brassicas to the site for years. Soil testing can assist when the diagnosis is uncertain. The same rotation group includes broccoli, kohlrabi, radish, mustard, arugula and many cruciferous green-manure crops. Irrigate close to the soil, clear diseased material promptly and encourage quick drying of the canopy.
Once harvesting is over, clear roots, leaves and spilled soil from the growing area. Wash knives, seedling trays, benches and paths, taking particular care after suspect plants. This is practical disease prevention, not cosmetic housekeeping: it interrupts movement from the finished planting into the next one.
11 / Picking, chilling and keeping
Choose the moment of greatest firmness, then move the cut head somewhere cool without delay.
Signs of readiness
Cut when the curd is pale, dense, firm and uniformly closed, before the florets pull away from one another. If warmth is approaching or the surface is turning coarse, do not hold out for the largest possible head. In the kitchen, a slightly smaller curd picked at its prime is preferable to an oversized one left a day beyond it.
With a clean, sharp blade, sever the stalk beneath the curd. Retain several wrapper leaves as a collar to limit bruising and moisture loss while carrying it indoors.
Cooling
Take the crop out of the greenhouse immediately after cutting. Refrigerate it unwashed in the crisper with its foliage loosely around it, and rinse only when preparing it. The leaf collar helps shield the curd from the drying air inside a refrigerator.
Store and preserve
Cauliflower is at its best soon after harvest, so plan to eat it within a few days. Inspect refrigerated heads and discard those developing dark or soft tissue. For longer keeping, separate the curd into florets, blanch them briefly in boiling water, cool them rapidly and freeze. Preserving surplus is better than postponing the cut until quality declines.
12 / Answers from the potting bench
Questions about greenhouse cauliflower
Is year-round greenhouse cauliflower realistic?
Only where a consistently cool environment can truly be maintained. Canada’s regional differences matter: spring and fall are often the practical greenhouse windows, but the useful period depends on local heat, frost and light. Summer overheating may prevent good curds, while winter brings both cold and limited daylight. An unheated structure lengthens suitable conditions without eliminating those seasonal constraints.
Does self-blanching cauliflower need extra blanching?
Often no extra covering is required because these cultivars curve their inner leaves around the curd. Inspect each one anyway. Where strong light reaches an exposed patch, drape a few dry outer leaves over it without tightening them. Never bind damp foliage closely around the head.
What causes an undersized cauliflower head?
The likely disorder is buttoning, where curd initiation happened before enough foliage developed. Contributing factors include transplants that were old or severely root-bound, cold or heat stress, drought, damaged roots, nutrition trouble and insects. Feeding late will not turn the button into a full head. Pick it while firm, then adjust the timing and establishment of the following crop.
How should I estimate capacity in a compact greenhouse?
Base the calculation on the width of mature foliage, not empty bed length. With 50 to 60 cm spacing, an open aisle and clearance from the walls, the final count may be smaller than expected. Maintain access to doors and vents, and make sure each plant can be inspected, irrigated and cut without repeatedly pushing through leaves.
Will cauliflower grow in greenhouse containers?
It can, although a deep bed is generally easier to manage. Choose a large, stable container with effective drainage. Containers warm and lose moisture more quickly than an in-ground root zone, making steady conditions harder to maintain. Position them away from the warmest glazing and assess moisture every day.
13 / References and next reading
Horticultural background for a more dependable crop
These specialist references provide background on transplant production, growing climate, crop health, curd disorders and preventive pest management.
More from Bloomcabin: “Plan a Greenhouse: Layout, Crops & Care” · weather and pest protection for crops in an aluminium greenhouse · “Growing Fresh Food Through the Year”
- Bavarian State Institute for Viticulture and Horticulture: Raise your own transplants or buy them
- Bavarian State Institute for Viticulture and Horticulture: Small greenhouses and early crops
- Saxon Garden Academy: Cauliflower in the home and small garden
- German Environment Agency: Plant protection in the vegetable garden
- North Rhine-Westphalia Chamber of Agriculture: Recognize and prevent clubroot
- Royal Horticultural Society: Cauliflower – Grow Your Own
- Bavarian State Institute for Viticulture and Horticulture: Cauliflower propagation notes and temperatures
A final crop check
Let cauliflower occupy a greenhouse that responds before heat builds.
- Timing: Place curd development within the coolest reliable portion of your local spring or fall growing window.
- Leaf room: Reserve 50 to 60 cm for every plant, along with a reachable aisle and clear space beside the glazing.
- Ventilation: Begin airing the greenhouse early, maintain steady root moisture and keep the covering foliage dry with room for air to pass.
Classic Aluminium GreenhouseBloomcabin aluminium greenhouses
