
Growing Peas in a Greenhouse
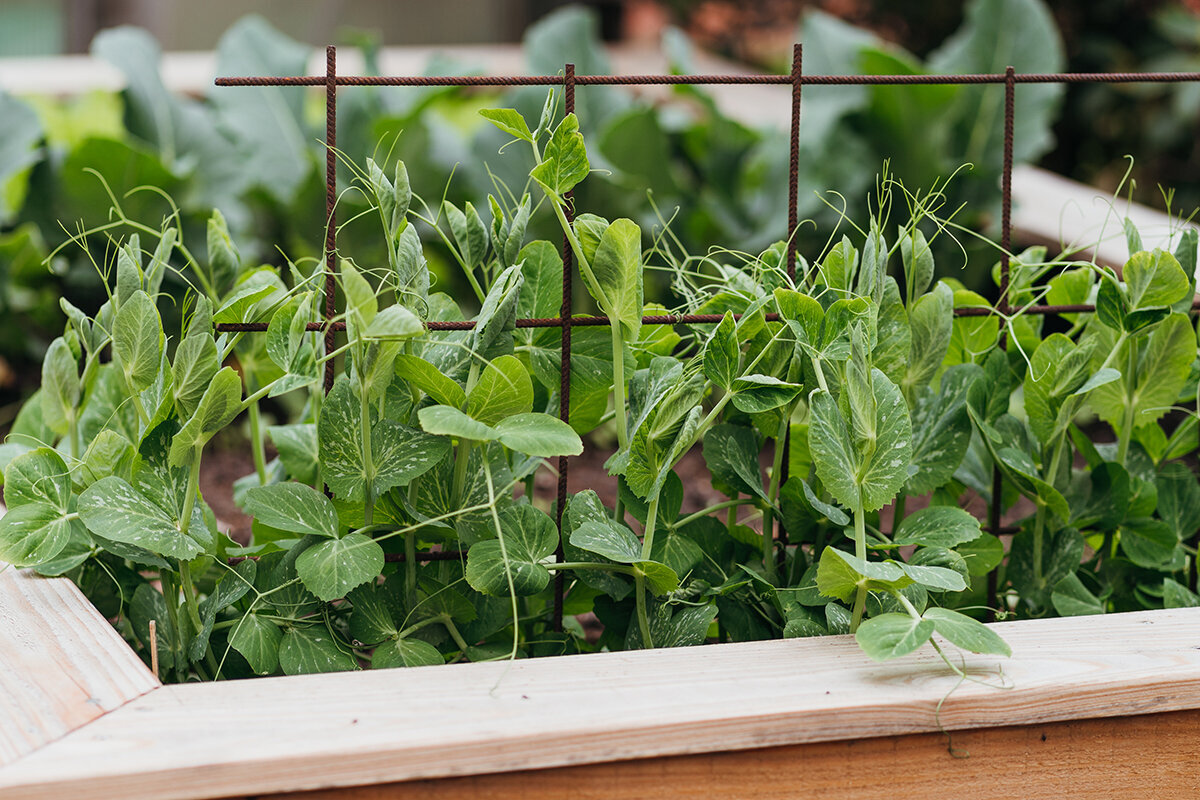
Greenhouse growing · cool season
Growing peasin a greenhouse
Shelter under glass can advance the pea season, but it cannot make this cool-weather crop comfortable in summer heat. Protected seed and soil get an earlier start, leaving more bright, cool growing time for tender pods.
I. Make room for the cool crop
Peas reward restraint rather than extra greenhouse heat. Give the roots cool, evenly moist soil with air in it; set supports before tendrils arrive; ventilate; and pick often. That combination makes productive use of the greenhouse before tomatoes, peppers and cucumbers take over.
Turn shelter into extra growing time
Canada does not have one pea-sowing calendar. In colder regions, outdoor beds may remain wet or unworkable well after protected soil can be prepared; milder regions may reach that point sooner. Use the greenhouse as a sheltered early bed, not a tropical room, and aim to finish the crop before persistent local summer heat.
Without added heat, the structure shields seed and seedlings from prolonged rain, surface crusting, wind and birds, and it gives you workable soil sooner. Bright sun can still raise the indoor temperature abruptly. Start airing the space as seedlings emerge instead of waiting for limp shoot tips.
Let roots begin where they will crop
Because peas establish substantial roots early, they usually do best when sown in their final position. A deep bed or roomy container with unobstructed drainage is preferable to a shallow plug tray. Install strings, netting or twiggy branches before the row is planted.
Mice, slugs or a bed that is not yet ready may justify a brief start in deep modules. Move the seedlings while small, keeping every root ball intact; do not allow roots to circle or dry. As soon as the permanent bed is workable, sowing there is the least disruptive option.
Design the handoff to summer crops
Think of peas as a scheduled bridge between seasons, not year-round greenhouse occupants. Good zoning lets the early row leave without competing with summer plants. One durable framework for that plan is the Classic Aluminium Greenhouse from Bloomcabin.
Give peas and early salad crops an airy edge that stays relatively cool. Keep the brighter central beds available for tomatoes, peppers or cucumbers when local conditions signal the seasonal handoff.
II. Choose by harvest and habit
Whether you choose shelling peas—including wrinkled- or smooth-seeded types—snow peas or sugar snaps, plan the space around the harvest.
They all belong to Pisum sativum , yet their harvests differ. Decide first whether you want edible pods or peas for shelling. Then compare mature height, support needs and picking access with the cool part of your greenhouse.
Shelling peasGrow these for the sweet peas inside. Gather the pods while rounded, well filled and still a lively green, then shell them without delay.
Snow peasPick these edible pods while they remain flat and glossy, before the developing peas show clearly. Their best texture lasts for a short period, so inspect the vines often.
Sugar snap peasEat the crisp pod as well as the peas. Pick it while plump, juicy and shiny, before the skin or seams become fibrous.
Dwarf varietiesShorter cultivars fit containers and low areas beside the greenhouse wall, and their crop often arrives within a tighter period. A low net, string or brushwood still helps hold them upright.
III. Set the sowing rhythm
Wait for soil that is cool, friable and able to drain freely.
Take the temperature where the seed will sit; a warm afternoon can disguise a cold root zone. A crumbly bed at about 8–10 °C that has drained enough to cultivate gives seed a sound start. Cold, slick soil slows emergence and raises the chance of rot. Containers also need fresh medium, ample volume and clear drainage holes.
Clear the bed and check drainage.
Set seed 4–5 cm deep, then water the row in.
Keep the soil evenly moist.
Finish the support and start ventilating early.
Optionally sow a short follow-up row.
Prepare the bed without loading it with fertilizer. Clear fallen foliage, loosen large clods and correct visible drainage trouble. Add mature compost sparingly. Soil that supported demanding summer crops may already contain plenty of nutrients, so omit fresh manure and routine nitrogen applications from the pea row.
Keep the direct-sown row consistent. Set each seed 4–5 cm deep and, depending on the cultivar, about 5–8 cm from the next. If you use paired rows, preserve enough space between them to reach the pods and move air through the foliage. Press the surface gently for seed-to-soil contact, then give the bed 1 thorough watering.
Allow cool conditions to govern the timetable. Seed may be slow to emerge in an unheated structure. Avoid disturbing the row after only a few days unless you see flooding, feeding damage or decay. The desired root environment is moist and oxygenated, never continuously saturated.
Build the support before tendrils need it. New tendrils quickly seek slender edges to grip. Netting or twiggy branches placed before planting protect the root area from later work and guide the young row immediately.
Add only a modest follow-up sowing. A short second row sown 2–3 weeks later can lengthen the picking period if cool weather is still likely. Stop there when the greenhouse may become hot before the younger plants can flower and develop pods.
Pea roots working nodules sugars from the plant
Compatible bacteria receive sugars from the root; the resulting active nodules first benefit the pea itself.
IV. The partnership around the roots
Legume does not mean that a pea row fertilizes the whole bed for free.
Compatible soil bacteria from the genus Rhizobium can form nodules on pea roots. The plant supplies energy-rich carbohydrates, while the bacteria fix atmospheric nitrogen that initially supports the pea. A strong nitrogen application is therefore unnecessary in ordinary, properly prepared garden soil. Healthy roots, pore space and even moisture without waterlogging are more important.
The essential point is that the living pea receives the first benefit. Plants beside it do not automatically gain a supply of readily available nitrogen during that growing season.
An excess of fast-acting nitrogen can produce soft, leafy growth and upset the crop's balance. Apply only a little mature compost and account for earlier feeding in the greenhouse bed. Potassium, phosphorus and micronutrients belong to general plant nutrition, but add them only when soil information or a visible need supports doing so.
If you want to inspect the nodules, lift a spare plant carefully after several weeks and examine the side roots. A lack of swellings does not call for an immediate nitrogen dose. Review drainage, compaction, moisture and plant health first; an aerated, active root environment is generally the more useful correction.
V. Supports that suit the tendrils
Offer plenty of slender, reachable edges.
A pea grips with delicate tendrils rather than wrapping a heavy stem around its support. A single thick post gives it little to hold. Narrow canes, twiggy branches, netting or closely arranged strings supply the finer contact points it needs.
Compact
Low-growing peas
Brushwood, twine or low netting.
Support
Put it in place when you sow.
Use mesh openings of about 10–15 cm.
Leave space from the glazing.
Climbing
Tall peas
Vertical netting arranged so the pods remain easy to reach.
Supporting compact cultivars
A compact pea may stand by itself at first, then spread under a heavy pod load, after watering or while reaching toward the light. Short branches, low mesh or 2 firm lines of twine are usually sufficient. Keep the plants upright without creating a solid wall, so pods hang cleanly and air can pass among the shoots.
- Use a front bed or a lower position along the side.
- Protect the aisle needed for frequent picking.
- Grow a wide block only if air can still circulate through it.
Rules for either growth habit
Attach mesh to the bed frame, stakes or a separate, properly supported frame—not to the glazing. Choose a setup that comes out easily after harvest. Space behind the vines makes cleaning and ventilation easier and lets you retrieve hidden pods without crushing the crop.
Supporting taller vines
Long-vined cultivars can use upright mesh or a pea fence reached from both sides. Arrange it so picking does not force damp leaves against the glass or require squeezing through foliage. A relatively cool side is suitable when it still receives adequate spring light.
- Do not let vines obstruct roof windows or their opening hardware.
- Use removable equipment to simplify the change to the next crop.
- Keep vigorous growth from closing off the greenhouse aisle.
Seasonal cropping is easier when the frame is sturdy and the roof vents can be used promptly. The Classic Aluminium Greenhouse combines an aluminium frame with roof windows, providing a practical setting for an airy cool-season bed.
Soak the root zone when needed, then air the greenhouse before leaves remain damp.
Moisture should remain reasonably even from bud formation through pod filling. Because rainfall cannot reach the greenhouse bed, judge the soil itself rather than watering by date. If it is beginning to lose moisture several centimetres down, irrigate thoroughly in the morning. Light, frequent sprinkling wets the surface but may leave deeper roots dry.
Apply water below the canopy with a drip line, a gently running hose or a watering can instead of wetting the leaves from above. Damp foliage and motionless air make trouble more likely. On bright mornings, operate the roof windows before heat accumulates and open the door when weather permits. Seek mild circulation without a strong draft against young vines.
After seedlings are secure, a light layer of clean mulch can slow evaporation in an in-ground bed and reduce splashing onto the lowest leaves. Leave a gap around the stems. For containers, use ample soil, unobstructed holes and saucers that are emptied consistently so moisture is buffered without pooling.
For a well-lit bed that remains easy to reach and ventilate, the Classic Aluminium Greenhouse offers a practical structure to plan around before installing netting or sowing the first row.
VI. From flower to edible pod
Pea flowers usually pollinate themselves; managing the protected environment is the larger task.
Because peas are predominantly self-pollinating, they generally do not require bumblebees or hand pollination. They can crop well under glass when both the air and the roots remain in balance. Once bloom begins, do not respond with unnecessary feeding. Concentrate on preserving the steady conditions that keep flowers attached and pods developing.
Flowering benefits from bright, cool weather, yet enclosed air can warm rapidly during a sunny late-spring afternoon. Use the vents and door before heat gathers. Temporary light shading may help under intense sun, and the roots should be watered before the vines show drought stress.
Circulation still matters even though pollination is largely self-contained. It shortens periods of leaf wetness, reduces humidity within dense growth and makes weakened leaves or early powdery mildew easier to notice.
How the harvest develops
1. Flower
Keep the air cool and root moisture even.
Keep the air cool and root moisture even.
2. Pod set
A slim young pod starts extending.
A slim young pod starts extending.
3. Flat pod
Pick snow peas at this point.
Pick snow peas at this point.
4. Filled pod
Pick sugar snaps or peas intended for shelling.
Pick sugar snaps or peas intended for shelling.
The stage at picking changes eating quality. Developing seeds make snow-pea pods more fibrous; sugar snaps become less crisp and sweet as the skin dulls and toughens; shelling peas gain starch when left too long. Timely harvesting protects quality and helps the plant continue setting pods.
During peak production, inspect the vines daily or at least every 2 days. Bright, warm weather can move a pod from ideal to overmature surprisingly fast. Remove only those that are ready, cool them soon and leave the small pods to develop.
VII. Respond when warmth takes over
Rising greenhouse temperatures are the signal to adjust the crop plan.
Cool to mildEven growth with pods that stay tender.
Warm middaysIncrease ventilation early and inspect moisture below the surface.
Persistent heatPlan to finish the pea crop.
Cool or mild conditions support uniform growth, steadier bloom and a tender pod texture when watering is balanced. When warm afternoons become frequent, operate the vents sooner, inspect deeper soil moisture and shorten the interval between pickings. Production may continue, but the plants have less resilience to additional stress.
Sustained heat makes dropped flowers, soft foliage and tougher pods more likely. Light temporary shade, fresh air and a deep morning watering can ease the strain, but cannot convert peas into a hot-season crop. If high greenhouse temperatures become routine, finish the planting rather than forcing it with fertilizer or saturated soil.
VIII. Pick for eating quality
Let pod development—not a fixed date—decide when to harvest.
Frequent, careful picking keeps peas productive. At peak harvest, visit the greenhouse with a small container every 1–2 days. Steady the vine with 1 hand while the other releases the pod; tugging can loosen shallow roots or pull tendrils away from their support.
Morning is a good picking time, especially ahead of a warm day. Sugars begin changing toward starch after harvest, so take the pods to the kitchen promptly or refrigerate them unwashed and, if possible, use them that day.
Snow peasChoose glossy, elongated pods that are still flat and show no rounded seeds. They should remain tender and break cleanly.
Sugar snap peasGather the pods while shiny, crisp and plump. Do not wait for a dull surface, pronounced bulges or fibrous seams.
Shelling peasPick rounded, full pods while their colour remains fresh green, and remove the peas soon afterward. Wrinkling or paleness signals increasing starch.
Pea shootsVigorous plants can spare a few tender tips early. Avoid repeated cutting if those same plants are expected to carry a substantial pod harvest.
A limited succession row: Add 1 small row 2–3 weeks after the first only when the local outlook still favours cool growth. Once warm afternoons become the norm inside, turn the space over to basil, cucumbers, tomatoes, peppers or another warmth-loving plant instead of pushing peas through summer conditions.
IX. Close the pea season well
Remove the top growth cleanly and prepare the bed for what follows.
As yields decline and heat becomes dominant, sever healthy vines close to the soil rather than wrenching up all the roots. Fine roots may stay in place and decompose gradually. Collect leaves and vine debris carefully; where fungi or heavy pest pressure are evident, keep affected material out of an unmanaged greenhouse recycling loop.
Before summer planting, examine and clean the netting, strings and irrigation equipment. Clear loose leaves from corners and disturb only the upper soil. Recurring disease is a reason to relocate peas; extra compost or fertilizer cannot correct poor drainage or an unsuitable rotation.
Answers for greenhouse pea growers
Common pea-growing questions
Will peas crop in a greenhouse without heating?
They can. The shelter gives peas a bed that becomes workable earlier without imposing the prolonged warmth they dislike. Sow in the final position after the soil has drained, become friable and reached about 8–10 °C at seed depth. Actual soil readings are more dependable than a fixed calendar date, especially across Canada's varied regions.
Is insect pollination necessary for peas under glass?
Generally, no. Most pea flowers pollinate themselves. Give priority to cool, stable conditions rather than hand pollination or bringing insects inside. Timely ventilation dries the canopy, and its mild air movement also shifts the flowers slightly.
When does a protected pea row need water?
Light, soil type, pot volume and ventilation prevent a universal daily schedule. Feel several centimetres into the bed; when drying has begun there, irrigate deeply in the morning. Consistency is particularly useful during bloom and pod filling, but the soil must not stay saturated.
Do peas need a nitrogen-heavy fertilizer?
Usually not. Peas can partner with compatible nodule-forming bacteria, while an abundance of readily available nitrogen favours soft leaves over balanced growth. Use mature compost sparingly, account for the bed's feeding history and correct an identified shortage instead of applying a nitrogen-rich general fertilizer by routine.
How should greenhouse sugar snaps be supported?
Provide upright mesh with openings around 10–15 cm, fine brushwood or strings close enough for tendrils to catch. Put the support in before or during sowing. It needs to remain firm during growth, come apart after harvest and keep leaves away from the glazing.
What makes pea pods lose their tenderness?
Delayed harvest, high temperatures and irregular moisture can all make pods tough. Pick snow peas while flat, sugar snaps while glossy and plump, and shelling peas when rounded but still fresh green. Repeated inspection protects eating quality as well as yield.
References and useful next reading
Continue with established horticultural guidance
More from Bloomcabin: harvesting fresh food in every season · starting a greenhouse in spring · planning a greenhouse layout that works
- Saxon Garden Academy – Growing peas in home and allotment gardens A German technical resource covering vegetable-pea types, site choice, crop management and use.
- LTZ Augustenberg – Field pea information Technical notes on seed establishment, root nodules, baseline nutrition and crop rotation.
- Bavarian State Research Centre for Agriculture – Peas: sowing German agricultural information about early sowing, planting depth and the moisture needed for germination.
- Royal Horticultural Society – guide to growing peas Practical advice on planting, spacing, support, care and repeated picking.
- Royal Horticultural Society – Ventilation and shading in greenhouses Advice on moving air, applying shade and limiting excessive heat beneath glazing.
- Saxon Garden Academy – Technical notes on pea growing German guidance on choosing pea types and managing the crop from sowing to harvest.
- LTZ Augustenberg – Field peas Additional German technical material on nodules, plant nutrition, establishment and rotation.
Before you sow
Give the cool part of the season its own bright, airy bed.
Peas ask for less warmth than the crops that follow them and reward good timing with pods that may be tasted before they reach the kitchen. Plan a seasonal zone with usable roof vents, open paths and a durable frame.
Use a relatively cool side for peas, preserve easy picking access and leave the warmest central beds ready for genuine summer crops.
