
Growing Potatoes in a Greenhouse
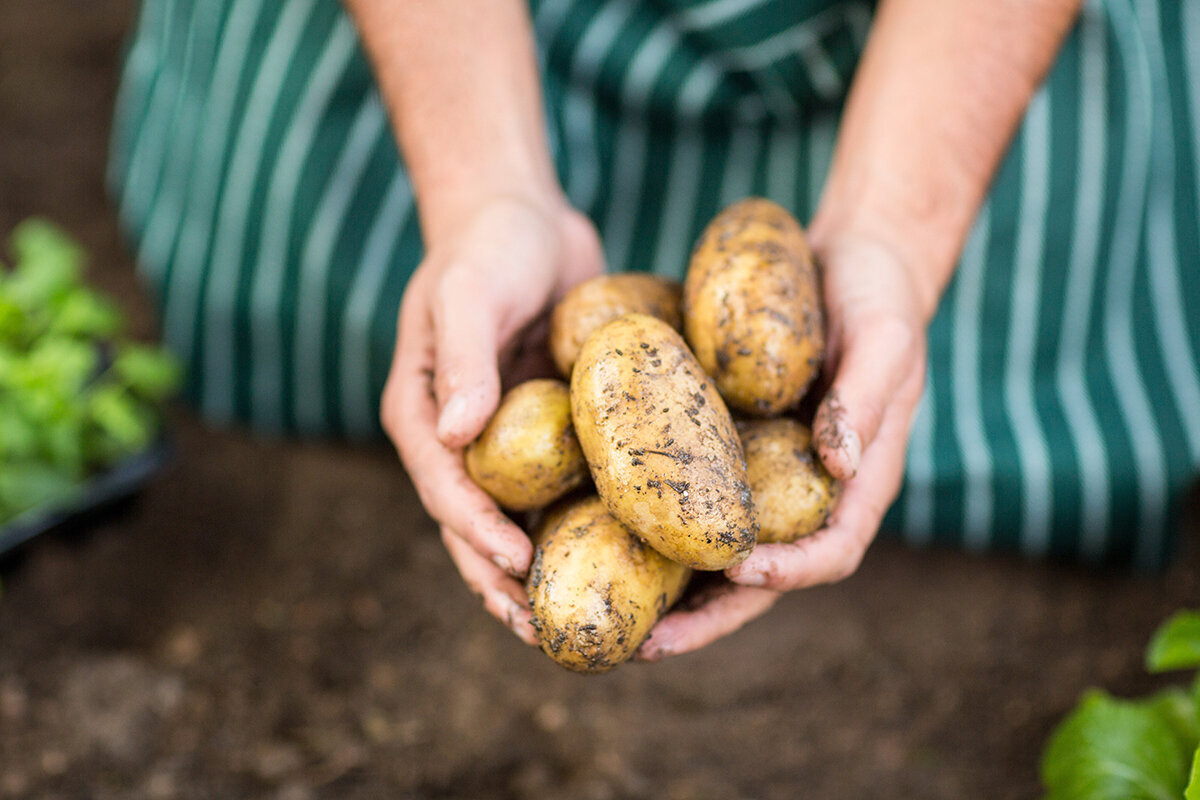
The underground crop plan · Greenhouse growing No. 09
Growing Potatoes in a Greenhouse
A potato crop is decided below ground as much as above it. Covered stems produce stolons in cool, shaded soil, and new tubers develop at their tips.
Under cover, you can manage the medium, irrigation, airflow, sanitation and the soil reserved for later hilling. Potatoes still need cool-season conditions rather than tropical heat. The real opportunity is a well-timed start: pre-sprouted tubers, soil that warms sooner and young growth protected while the crop develops before tomatoes or cucumbers need the space.
Folio 09 · Canada · From seed potato to storageDiagram A · How potatoes form
Chapter I · What is happening beneath the soil
The edible potato is a modified stem, not a root.
Most potato crops begin with planting tubers rather than botanical seed. Shoots emerge from the eyes and grow into stems. Covered sections of those stems produce slender side growth called stolons, with potatoes forming at the tips. That biology explains the basic routine: provide loose soil, protect the lower stems, add medium during growth and exclude light from every developing potato.
Hilling does practical work: it shades the tuber zone, re-covers potatoes close to the surface and, in loose soil, maintains a workable layer around the stems. The linked German federal agriculture guidance also describes tubers forming on underground side shoots and ridges shielding them from light. Do not fill bags or tall pots on day 1; reserve clean, friable medium for later additions.
Crop check — myth and reality.
Myth: simply piling on more soil guarantees a heavier harvest. In practice, useful soil volume must be supported by vigorous leaves, stable moisture and air in the rooting zone. A tall pot full of saturated medium is more likely to rot the crop than improve it.
Myth: simply piling on more soil guarantees a heavier harvest. In practice, useful soil volume must be supported by vigorous leaves, stable moisture and air in the rooting zone. A tall pot full of saturated medium is more likely to rot the crop than improve it.
Shelter alters the environment around the foliage without changing what the potato needs. A roof limits direct rainfall, pots can hold fresh medium, and vents release moisture after irrigation. Glazing can also trap heat quickly. Try to prevent a pattern of parched midday soil, heavy evening watering and humid, motionless air through the night.
Chapter II · Starting stock
Begin with planting material you can trust.
Sound planting material is a practical starting defence against crop problems. Potatoes sold for eating may have been treated to delay sprouting, and their health history may be unclear. When available, obtain certified seed potatoes from a specialist source. That precaution matters in a small, intensively used greenhouse where replacing failed plants is difficult.
01
Choose the purpose
Early · waxy · storage
Early cultivars are often the easiest match for a limited greenhouse slot because harvest can finish before peak summer heat and the next crops move in. Let intended meals guide the choice: waxy potatoes hold together for boiling and young potatoes, medium-starch types cover many uses, and floury ones mash well. Culinary category alone says nothing certain about yield.
02
Select seed tubers
Plant small whole · divide large only if needed
Egg-sized seed potatoes are easy to plant whole and offer several eyes with a useful energy reserve. Very large tubers do not always need cutting. If you divide one, use only firm healthy stock and a clean knife. Each piece needs several sound eyes. Cut surfaces increase rot risk and require careful handling.
03
Let cuts heal
Briefly dry in a protected airy place
Lay cut pieces in one layer somewhere dry, ventilated and out of direct sun until the cuts have dried. Never put freshly cut tubers into cold, saturated medium. Their stored reserves may rot before roots can establish.
04
Keep a growing record
Cultivar · where purchased · date planted
Write down the cultivar, supplier, planting date, emergence, first hilling and any unusual symptoms. In year 2, those notes reveal which choice matured early, remained healthy, had the texture you wanted and kept well. Also record bags that dried too quickly and positions that became excessively warm.
Chapter III · Prepare ahead
Pre-sprout tubers for compact, robust growth—not weak, pale strands.
Pre-sprouting gives seed potatoes time to make compact shoots before they go into the bed. You can skip it, but it may advance an early crop and makes inspection easy. Stand each tuber eyes-up in a shallow tray or egg carton. The Bavarian Garden Academy recommends bright conditions out of full sun at about 15 to 20 °C. Look for firm, pale-green growth rather than long, breakable shoots produced in darkness.
01 · Sort
Firm and healthy
02 · Position
Eyes upward
03 · Wait
Short, sturdy sprouts
04 · Plant
Ready for loose soil
- Sort Discard soft, mouldy, badly shrivelled or visibly damaged tubers before they enter the growing area.
- Position Set the tubers separately in a shallow tray. Bright, indirect light produces compact growth that withstands handling better than long, translucent shoots.
- Wait Robust sprouts measuring 1 to 2 cm are sufficient. Handle them gently during transport and planting so they remain attached.
- Plant For cut seed potatoes, check that the cut surfaces are dry and healed. Soil should be moist but never waterlogged.
Chapter IV · Building the protective ridge
Set low in the medium; build cover gradually.
In a greenhouse bed, place pre-sprouted potatoes about 10 to 15 cm deep and normally 30 to 40 cm apart, with the shoots facing up. For a roomy light-blocking pot, start over a free-draining lower layer instead of filling to the top. The remaining depth provides space for soil added later.
Stage 1 · Plant
Cover the seed tuber lightly
Stage 2 · First hill
Foliage reaches 20 to 30 cm
Stage 3 · Final ridge
Exclude light from every developing potato
- Plant Use loose, humus-rich soil with reliable drainage. Do not compact in-ground beds; in containers, use stable potting medium rather than heavy, sodden garden soil.
- First hill Ease loose soil around the stems to cover their lower sections while leaving healthy foliage exposed. Avoid firm pressure, damaged roots and bent shoots.
- Final ridge Top up again while the plants are extending. Once complete, the ridge should cover all developing potatoes while leaving the rooting area loose and aerated.
Plant spacing influences how the crop divides into different tuber sizes. When crowded, plants have less access to light, moisture and nutrients. A useful home-greenhouse starting distance is 30 to 40 cm. Keep an aisle beside the row so leaves can be checked, irrigation can reach the base and soil can be added without compacting the bed.
Chapter V · Making room for the crop
Select a setup that leaves room for later hilling.
The footprint alone is not the key measure. Include usable soil volume and the empty height that can later become a protective hill.
An in-ground bed in a roomy structure provides a consistent rooting area and makes hilling straightforward. Where floor space is tight, several substantial pots can use the area below the canopy without dedicating the entire greenhouse to potatoes. Remove them after an early harvest. Every setup still needs unrestricted drainage, darkness around the crop and convenient access for base watering.
For a purpose-planned potato area, compare the available floor space and venting of the Classic Aluminium Greenhouse. Its doors and roof vents, combined with an orderly interior, make it easier to respond as Canadian spring weather shifts.
| Growing method | Space per plant | Soil reserve | Main check |
|---|---|---|---|
| Bed row | 30 to 40 cm apart | Loose planting zone | Working access and crop sequence |
| Planting bag | About 40 l or more; 1 plant | Leave headroom | Dry outer edges |
| Roomy pot | About 35 to 45 l; 1 plant | Fill gradually | Drainage and planting density |
- Row in an in-ground bed. A bed gives several plants a consistent rooting environment, and spare soil beside the row is convenient for hilling. Preserve an aisle and plan what follows: where practical, avoid replanting that soil immediately with potatoes or their nightshade relatives—tomatoes, peppers and eggplants.
- Planting bag. Because it can be moved, a strong permeable bag works well over a paved floor. Budget at least about 40 l for 1 seed potato; a wider bag can support 2 plants if each has enough room and moisture. On bright days, inspect the perimeter first because it loses water fastest.
- Roomy light-blocking pot. Fit drainage openings and normally limit each pot to 1 plant. Pots divide a compact greenhouse neatly and can receive fresh medium between crops. Packing several planting potatoes into a small vessel mainly creates crowded tops, patchy moisture and undersized tubers.
For 1 plant, roughly 35 to 45 l of medium is a workable guide, and a grow bag should provide at least about 40 l. Light-blocking sides have a job: exposed potatoes green. Make sure drainage openings stay clear, and empty standing water from saucers.
Chapter VI · Avoiding sudden swings
Irrigate at the base, refresh the air and resist overdoing either.
Moisture
Potatoes perform poorly when the root area alternates sharply between parched and soaked. During tuber initiation and enlargement, aim for stable moisture without saturation. Each morning, feel 5 to 8 cm below the surface. If that layer is drying, irrigate slowly enough to wet it thoroughly; exceptionally dry mix may need 2 rounds. Allow all extra water to escape.
Nutrients
Mix mature compost or a restrained quantity of organic vegetable fertilizer into the soil before planting. Adequate nutrition matters, but an oversupply of readily available nitrogen can build abundant foliage while delaying potato development. Add more only if growth is clearly weak and the crop is still at an early stage. Testing long-term beds helps prevent accumulated excess.
Airflow and temperature
On sunny days, vent the house before trapped warmth becomes excessive. Shade may be useful during hot weather, and pots should sit back from sun-heated glass or walls. A closed, humid summer greenhouse is a poor place for potatoes: moderate root temperatures and circulating air matter more than added heat. Automatic openers can make routine venting easier.
Dry foliage
Direct a watering can, drip hose or gently running line at the growing medium. Irrigate early enough for accidentally wetted leaves to dry before night. Circulating air also clears condensation and reduces stagnant humidity. Use clean tools to remove yellow or suspicious foliage, and clear plant waste from containers and paths.
Greenhouse details earn their value when they make steady care easier. See the Classic Aluminium Greenhouse while laying out vents, shade, pot locations and routes you can reach easily. The aluminium greenhouses collection can help you compare layouts for pots, in-ground beds and an orderly sequence of seasonal crops.
Chapter VII · Troubleshooting log
Notice trouble early, before the underground crop is reduced.
Protection from rain does not prevent leaves from staying damp when watering and air exchange are poorly managed. At least 2 times per week, examine both leaf surfaces, the bases of stems and the top of the medium. Diagnose before responding: compare moisture, temperature and nutrition, then look for feeding damage or signs of disease.
Problem 01 · Late blight
Water-soaked leaf spots that turn brown quickly
Both potatoes and tomatoes can contract late blight, which advances rapidly on persistently wet foliage. Reduce risk with certified stock, base watering and reliable ventilation. Cut away suspect leaves promptly using clean tools, and keep seriously affected material out of compost. If symptoms are substantial, lifting early may be safer than trying to mature a storage crop.
Problem 02 · Rot in planting tubers and stems
Weak emergence, dark stem base, collapse
Cold saturated soil and compromised seed potatoes commonly cause early losses. Use healthy seed, allow cuts to heal and do not plant into sticky cold soil. Do not reuse questionable medium. Remove collapsing plants promptly from healthy ones.
Problem 03 · Potato scab
Firm potatoes with cork-like marks
Scab begins with conditions in the growing medium. The best safeguards are sound planting stock, clean mix for pots, an appropriate variety and planned crop rotation—not a late treatment. In a permanent bed, move potatoes and other nightshades to a different zone in later seasons. Supply water consistently without saturating the bed.
Problem 04 · Insects and viruses
Feeding damage, aphid colonies or curled leaves
Inspect beneath leaves for aphids, mottled pale patches and weak or irregular shoots. Brush off a small colony early, or dislodge it with a carefully aimed stream that does not soak the full canopy. Isolate or remove plants showing unusual symptoms. Once harvest is complete, clear away all crop debris so pests and possible pathogens are not carried forward.
Problem 05 · Heat and uneven irrigation
Wilting leaves, uneven or misshapen tubers
Wilting or misshapen potatoes commonly point to growing stress rather than a single insect or pathogen. Heat and uneven moisture can disrupt tuber initiation and bulking. Add ventilation or shade before conditions peak, and rewater containers gradually instead of taking them from powder-dry to flooded. A steady morning inspection makes correction easier.
Problem 06 · Potatoes exposed to light
Green colouring or a shoulder above the soil
Greening follows light exposure and signals increased solanine. Restore loose soil over visible potatoes immediately, then check after thorough irrigation in case the level has settled. Keep the harvested crop shaded as well. Cut away a small green area generously, but do not eat potatoes that are extensively green, bitter or heavily sprouted.
Chapter VIII · Finishing the crop
Lift in stages, allowing storage skins to mature.
New potatoes and keeping potatoes call for 2 different harvest decisions. Lift the first while skins are delicate and use them promptly. Leave a storage crop until the tops die back and the skins resist rubbing. That finishing interval is part of maturity; skipping it produces easily bruised tubers with poorer keeping quality.
1 · Early harvest
First new potatoes
2 · Foliage dies back
Let maturity show
3 · Skins firm
Lift dry and gently
4 · Storage
Keep cool, dark and ventilated
- First new potatoes With an early cultivar, open the side of the ridge gently and remove a few potatoes once they reach the size you want. Close the soil again so the rest remain shaded. Use these thin-skinned potatoes within a few days instead of putting them into storage.
- Foliage dying back If potatoes are intended for keeping, let the tops turn yellow and die, and taper off irrigation near the finish. Variety and soil affect the wait, but skins may take another 2 to 5 weeks to set. Test gently with a thumb: a mature skin should not rub away readily.
- Harvest Choose dry weather and loosen the crop carefully with a garden fork, or tip pots onto a tarp. Gently brush away soil rather than washing the potatoes. Set aside anything cut, bruised or soft, using sound but damaged potatoes first.
- Storage area Store only healthy, undamaged, unwashed potatoes in ventilated crates. The place should be dark, frost-free and cool; about 5 °C is a useful home-garden guide. Inspect regularly and remove soft or rotting potatoes. Keep apples away because their ethylene can encourage sprouting.
Chapter IX · A Canadian seasonal approach
Use protected shoulder seasons thoughtfully.
Canada’s planting window varies widely with local climate, elevation, short-term weather, the greenhouse itself and the temperature of its soil. Wait for friable medium; cold mud is not ready. Higher, colder and more northerly locations generally start later than mild coastal or southern areas. If frost remains possible, cover new shoots and let site conditions—not a national date—set the schedule.
Use the structure to gain useful time at the cool edges of the growing season, not to keep potatoes going continuously. In many locations, an early crop finishing by early summer leaves the house available for cucumbers or basil. Fall planting only makes sense where temperatures allow it, while an unheated house usually lacks sufficient winter light and warmth.
Rotation note
Think in plant families when planning the next occupant. Potatoes share the nightshade family, and some disease problems, with tomatoes, peppers and eggplants; where practical, do not put them back-to-back in unchanged soil. In a large house, move the growing zone. In a compact one, pots make it simpler to replace medium and shift the crop.
For help mapping an efficient early crop, consider the Classic Aluminium Greenhouse. Arrange bed space, pots, working aisles and the warm-season crop that follows, and then use the aluminium greenhouses overview to compare footprints and styles for a practical growing plan that can serve for years.
Seasonal principle: Consistency is the central rule for potatoes under cover. Extra fertilizer, extreme warmth or a huge late ridge cannot replace attentive care. Check the plants often and make small corrections before water, heat or airflow drifts too far.
Greenhouse potato clinic
Common questions for protected growing.
Is year-round greenhouse potato production realistic?
Not usually in an ordinary unheated backyard structure. Plan potatoes for cooler parts of the year, using the greenhouse to advance spring growth, reduce wind exposure and control how much rain reaches the crop. Summer interiors may overheat, and winter production would require suitable heat and supplemental light.
What is a sensible planting count for a 40-l container?
Begin with 1 plant. A light-blocking vessel containing about 35 to 45 l of medium, with free drainage and spare height, supplies both rooting volume and room for added soil. A substantially bigger bag can take 2 seed potatoes when they can be spaced and watered evenly. Crowding complicates irrigation and tends to leave many tubers small.
Are supermarket potatoes suitable for planting?
Prefer purpose-sold certified seed potatoes. Food-market tubers may be treated to slow sprouting, and their crop-health background is not traceable. Introducing a problem is especially costly in a small protected space, so specialist planting stock is the cleaner, more dependable choice.
When do greenhouse potatoes need water?
Let the medium tell you. Each morning, feel 5 to 8 cm beneath the surface and irrigate slowly if it is drying. Stable moisture matters most while tubers are forming and expanding, and bags or pots merit extra checks in bright weather. The aim is damp medium that drains freely, never a container that stays saturated.
What makes potatoes turn green under cover?
Light is reaching them. Restore a cover of loose medium at once and recheck after irrigation in case the level settles. Protect lifted potatoes from light as well. Discard any that are extensively green, bitter or heavily sprouted.
Sources and further reading
Background information for this guide.
More from Bloomcabin: Setting up a greenhouse: layout, plants and care · Water-wise greenhouse gardening · Summer greenhouse care
- LWG Bavaria — Chitting potatoes for an earlier harvest
- Federal Centre for Nutrition — Why potatoes are hilled
- LWG Bavaria — Pre-sprouting potatoes and sweet potatoes
- Berlin Plant Protection Office — Late blight in potatoes
- LWG Bavaria — Potatoes for garden and balcony
- North Rhine-Westphalia Chamber of Agriculture — Potato harvesting and storage
- Organic Farming NRW — Organic potato growing notes
Use the space below
Plan a crop beneath the visible canopy.
Beyond simply sheltering plants, a thoughtfully laid-out greenhouse can put the space beneath the canopy to work. Loose beds, roomy pots, reachable irrigation and adjustable ventilation create a practical setting for potatoes to form out of sight beneath a well-maintained ridge.
Classic Aluminium GreenhouseClassic Aluminium Greenhouse