
Install Windows Yourself or Hire a Professional?
Planning a window project in Canada
A window replacement is not simply a matter of lifting a frame into an opening. Measuring, wall interfaces, weather protection, fastening, sash adjustment and repairs to exterior and interior finishes need to work as one project. Homeowners with relevant installation experience, a sound understanding of the openings and adequate time for finishing may take on clearly defined tasks. Multiple windows, heavy units, uncertain reveals or renovation work in an occupied home are strong reasons to use a qualified installer. This guide helps you assess responsibilities, compare scopes of work and ask the right questions before placing an order. Canada’s National Model Codes do not automatically establish one rule for every property: determine which code the province or territory has adopted, then ask the municipality about permits, zoning and changes to the opening.
Make the decision for the whole project
A window is part of the wall assembly, not a piece of furniture that can simply be fastened after unpacking. It connects the exterior wall, living space, weather protection, insulation, sill, plaster or cladding. Start by identifying which tasks must be coordinated and who is responsible for each one. A replacement in a sound, square opening is very different from a renovation involving deteriorated reveals, new exterior insulation or a changed sill height. Access matters too: a ground-floor window with clear working space presents different challenges from a unit reached by stairs, scaffolding or an extension. Map the work from removal through restoration before deciding whether DIY work genuinely reduces effort or merely transfers risk to later stages.
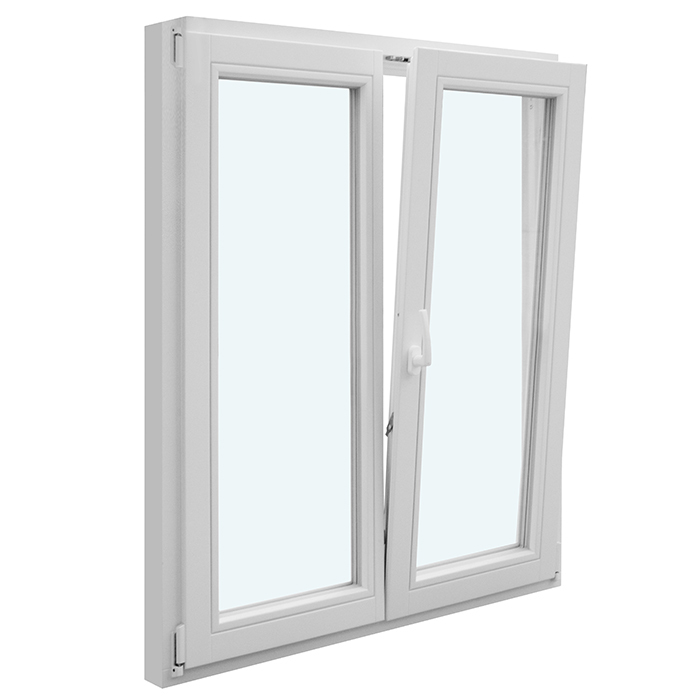
The selected configuration also affects the difficulty of installation. A compact, simple window has different demands from a wide, multi-sash or awkward-to-handle unit. With a 2-sash inward-opening window , the clearance for opening, safe transport, frame position and final sash adjustment must all be considered together. The product description identifies the design; it does not confirm suitability for your particular wall. Before hiring an installer or starting DIY work, check the existing opening, desired opening direction, furniture layout and future access. Plan for the period while the opening is exposed, including protection from weather, dust and intrusion, as well as how the room will remain usable. If you cannot reliably coordinate these points, professional installation offers more than labour alone.
Measuring is the foundation, not a final check
Many installation problems begin before delivery. One clear measurement is not enough, because reveals may taper, be uneven or hide older layers. Take width and height measurements at several points, check diagonals, and record precisely where each measurement was taken. Wall construction, the existing frame position, stops, sill, shutter guides and possible services are equally important. In older homes, removal may reveal the actual substrate only after work has begun. Ordering before these uncertainties are resolved can leave you with a unit that cannot be positioned or connected as intended. An installer can include the final survey in the scope; ask exactly which dimensions they accept responsibility for and what condition they expect at the opening.
Width and height are not the only choices: the installation plane also needs to be established. It affects how interior and exterior interfaces, insulation and the sill meet. Existing conditions can severely limit the options when no façade work is planned. Where exterior upgrades are expected later, avoid choosing a detail that will need to be opened again. Keep photographs, sketches and measurement records with the order. For unusual shapes such as a triangular and angled fixed window, standard assumptions are especially unreliable. Confirm the opening geometry, bearing points and junction with surrounding construction before ordering. Have uncertain existing conditions assessed by a suitable professional rather than drawing dependable dimensions from a photograph.
What professional installation actually includes
Setting the frame is only one stage. Existing components must be protected, old fixings removed and the opening prepared so the new frame can be installed level, supported and free from distortion. The frame is aligned and secured during installation. Perimeter gaps then need to be completed according to the selected interface design, with transitions to reveals, sill and exterior finish restored. Functional checks and, where necessary, adjustment of moving parts follow. A tidy visible joint does not show whether concealed connections have been completed correctly. Anyone installing a unit themselves should plan the materials, tools and order of every stage before opening the wall, rather than improvising during the work.
When reviewing an installer’s quote, ask for the work to be itemized in these stages. Confirm whether removal and disposal are included, who prepares the substrate, how adjacent finishes are protected, and who completes interior and exterior interfaces. Establish whether sills, sealing work and plaster or trim repairs are included or assigned to other trades. This makes quotes comparable even when totals differ. Installing a fixed window may require less sash adjustment, but accurate alignment, secure fastening and careful wall transitions remain full installation tasks. “Fixed” does not automatically mean “easy to install yourself.” Arrange a documented completion check covering operation, visible surfaces and the agreed interfaces.
Assess experience, equipment and helpers honestly
General DIY confidence is useful, but it does not replace experience with precise surveying and wall interfaces. The work calls for controlled handling of heavy, fragile components, permanent frame positioning and protection of operation after the joints are completed. Depending on the project, you may need accurate measuring tools, lifting and transport aids, fixing tools, safe work platforms, and materials for protection and finishing. It also matters whether everything will be ready on installation day. Borrowed specialist equipment without prior practice can slow the job rather than help it. Allow time not only for fitting, but also for unpacking, sorting, protecting surfaces, cleaning and restoring the area.
The number of people involved is not a minor logistics detail. An untrained helper without a defined role does not make an awkward frame safe. Decide who receives the unit, who measures, who aligns it and who protects the surroundings. A Patio Life lift-and-slide door is an example of a door assembly with a large moving component, making it essential to plan the carrying route, set-down area and controlled handling in advance. Product-page details do not replace checking the actual weight and delivery conditions. If you cannot explain how the unit will travel safely from the vehicle to the opening and be held securely there, leave that work to professionals. You can still contribute by clearing space, protecting finishes or completing agreed finishing tasks, rather than improvising a lift.
The wall interface can determine future costs
The joint between frame and building must perform several functions at once: it accommodates construction tolerances, holds the unit in its intended position and connects different materials in an exposed location. Interior, joint and exterior zones may therefore have different requirements. The right materials and details depend on the wall construction, installation position and adjoining layers. Specifying one sealant for every situation is not a plan. Interfaces hidden behind exterior cladding, sills or interior linings are particularly important. They may look neat when finished but can be difficult to investigate later without disturbing completed surfaces.
A qualified installer should be able to explain the proposed interface approach for your situation in clear terms. You do not need to evaluate every product yourself, but you should know where responsibility lies when exterior contractors, drywall installers and window fitters work in sequence. Ask about handoffs: What condition must the opening be in? What preparation is expected? Who connects to an existing exterior sill or new insulation? With a single-sash outward-opening patio door , the threshold is also the transition between the interior and outdoor surface. Its height, finishes and drainage cannot be decided separately from the door frame. The more interfaces involved, the stronger the case for continuous planning and one person responsible for installation coordination.
Operable units need adjustment and testing
A frame can appear straight while still creating stresses that become obvious only when the sash is used. Windows and doors need to open smoothly, close properly and remain in their intended positions. Check operation not only when the sash is first hung, but again after fixings and interfaces are complete. Pressure from installation or insufficient clearance can change how the unit performs. Test every opening position, handle, even fit and contact with adjacent surfaces. Record concerns immediately, before reveals, trims or paint make correction harder. DIY installers need a clear method and the relevant instructions for adjustment; random trial and error can conceal the real cause.
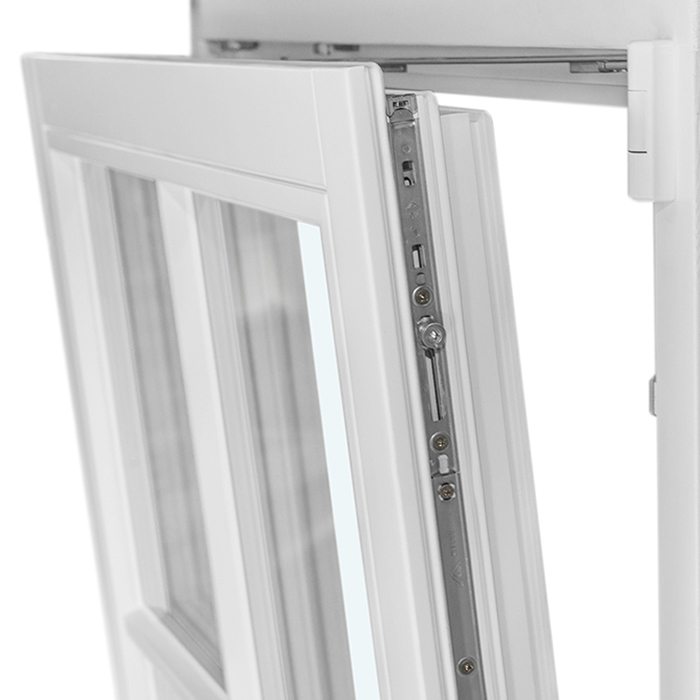
This also applies to less familiar operating styles. A top-hung outward-opening awning window requires different consideration of swing path, operation and access to the exterior than an inward-opening sash. Check handles, hardware and future fittings during planning. Curtains, insect screens, furniture or exterior components can obstruct use even where the window itself has been installed correctly. When hiring an installer, record the required opening direction and special use in writing. With DIY work, do not assume a later adjustment will solve a fundamental planning error. Fine adjustment is the final stage of careful installation only when the position, clearance and interfaces are already right.
Plan removal and protect an occupied home
Removing old windows is often less predictable than installing new ones. Trim, plaster edges, wallpaper, sills and fixings can be damaged during removal. Decide which finishes you wish to retain and what restoration is acceptable. Cover walking routes, provide a low-dust place for removed sashes and clear the work area generously. In an occupied home, sequencing matters: avoiding the opening of every window at once can make daily life and weather protection much easier. For several windows, consider one trial installation first. It can reveal the real workflow, interface details and effort before the same mistake is repeated throughout the home.
Historic or visually sensitive buildings need additional care. A heritage-style outward-opening “Kombi” casement window identifies a design and opening style, but it does not determine how the existing façade, reveal or interior lining should be treated. Document elevations, details and dimensions before starting. Establish which existing elements will be retained, repaired or replaced. A split scope may be sensible: professionals handle removal, installation and critical interfaces, while you organize clearing, protection or clearly defined cosmetic work only after approval. Where the existing condition is uncertain, an installer should state assumptions and possible additional work transparently in the quote. This helps prevent apparently low-cost DIY work from becoming a series of unplanned repairs.
Divide DIY work wisely instead of doing everything
The choice does not have to be all or nothing. A divided scope can combine cost awareness with technical confidence when the interfaces are set out in writing. Suitable owner tasks often include clearing rooms, covering furniture, removal only by agreement, disposing of agreed materials or completing painting later. Critical matters such as final measurements, frame installation, perimeter joints and functional sign-off should remain with a qualified installer. This works only if the sequence is clear: owner work must not alter the prepared opening or restrict installation access. Ask the installer what preparation they accept, what condition the site must be in on arrival and which tasks you should not undertake in advance.
Another option is to have one manageable unit installed professionally and use the process as a learning reference. That does not mean later openings will be equivalent. Different wall areas, window sizes and exterior interfaces can change the task substantially. A pivot roof window introduces its own conditions through roof location, access and the connection to the roof surface, so it is not directly comparable with a window in a vertical wall. For each unit, record who is responsible for measuring, installation, interfaces and finishes. A 4-column checklist is more reliable than a verbal promise that “we’ll do the rest ourselves,” and gives the installer a sound basis for an appropriate quote.

Compare quotes by scope, not just price
Do not compare quotes solely by a line called “installation.” A useful quote identifies the units, quantities, planned work, conditions and exclusions clearly enough to reveal differences. Look for surveying, site protection, removal, on-site handling, fastening, interface work, adjustment, disposal and surface restoration. Ask before ordering when language is unclear: Is an interface only prepared or fully completed? Is a sill included? What happens if damage is uncovered? Who coordinates work where plaster, windows and exterior details occur in sequence? A lower amount may represent a narrower scope, not the same work at a better price.
Rather than asking for a general promise of “professional installation,” request a project-specific description of the intended solution. Share photographs, measurements, known wall details and your removal requirements. For an outward-opening panelled entrance door, establish how the frame, access, threshold, exterior surface and any sidelights or canopy relate to one another. A product name alone does not define the details for your entrance. Also document who addresses issues at the boundary between trades. Sound planning is not a promise that every uncertainty will disappear; it makes assumptions, checks and possible additional steps understandable. That is what makes DIY and contracted work comparable.
Secure the order, timing and completion check
Order only once dimensions, opening directions, quantities, appearance and responsibilities have been agreed. Check the order confirmation line by line against your room list: Which unit belongs in which room, how does it open, and which face is inside or outside? Mark openings on a floor plan instead of relying on memory. Prepare vehicle access, interim storage and a dry, protected set-down area for delivery. Delivery is 4–6 weeks, subject to order confirmation. Use that time to prepare the site properly rather than beginning irreversible removal too early. Coordinate timing and workflow with every trade so new units do not arrive before the openings are ready.
Completion is more than a first look through the glass. Use the order to check quantities, visible configuration and opening directions. Test every moving sash and inspect frames, glazing, handles and accessible interface areas in good light. Photograph concerns, describe their location and function, and report them promptly to the responsible contract party. Keep the order confirmation, delivery note, installation information and project records together. Bloomcabin windows and doors carry a 5-year warranty. This commercial warranty does not replace a careful completion check or clarity about responsibility for installation work. A well-documented close-out makes it easier to distinguish later between a product question, an adjustment need and an interface issue.
Frequently asked questions
When is DIY window installation realistic?
It can be realistic for clear, accessible openings where you can competently plan the survey, safe handling, alignment and interfaces. You will need time for removal and restoration as well as reliable help. When wall condition, interface details or transport are uncertain, professional installation is usually the more sensible route.
Can I order the window myself and hire out only installation?
Yes, but agree this with the installer before ordering. Confirm who is responsible for the final survey, which product information the installer needs and what conditions apply at the opening. Transport, delivery inspection, installation scope and responsibility for interfaces should also be recorded in writing.
Which tasks are well suited to DIY?
Preparation and follow-up tasks are often suitable: emptying rooms, protecting furniture, covering routes or completing agreed painting after installation. Whether removal, disposal or reveal repairs are appropriate depends on the existing condition and the agreement. Do not take on frame fastening or perimeter joints without clear technical knowledge.
What should I tell an installer before requesting a quote?
Send interior and exterior photographs, measurements from several points, known information about the wall and sill, and your preferences for opening direction and finishes. Identify access obstacles, storeys, planned exterior work and the required scope from removal to final repairs. The more complete the starting information, the more clearly the work can be defined.
What signs after installation mean I should ask questions?
Ask promptly if sashes rub, do not close evenly, handles are difficult to operate or visible interfaces remain unexplained. Document damage to adjacent finishes, missing agreed work or differences from the ordered opening direction and configuration. Report observations to the responsible contract party before later work hides the details.
Next steps
Whether you install windows yourself or hire a professional should depend on responsibilities you can genuinely manage, not on doing the greatest possible share of the work. Start with the survey, wall interfaces, handling route, access and coordination with removal, exterior finishes and interior work. Even experienced DIYers benefit from a clear division of responsibilities when critical installation and interface work is completed professionally. If you hire an installer, compare scopes and handoffs specifically rather than accepting broad promises. If you contribute yourself, use a written task list and begin only once the sequence is agreed. This turns the installation decision into a manageable part of the complete window project.
