
Planning a Greenhouse for a Wind-Exposed Site
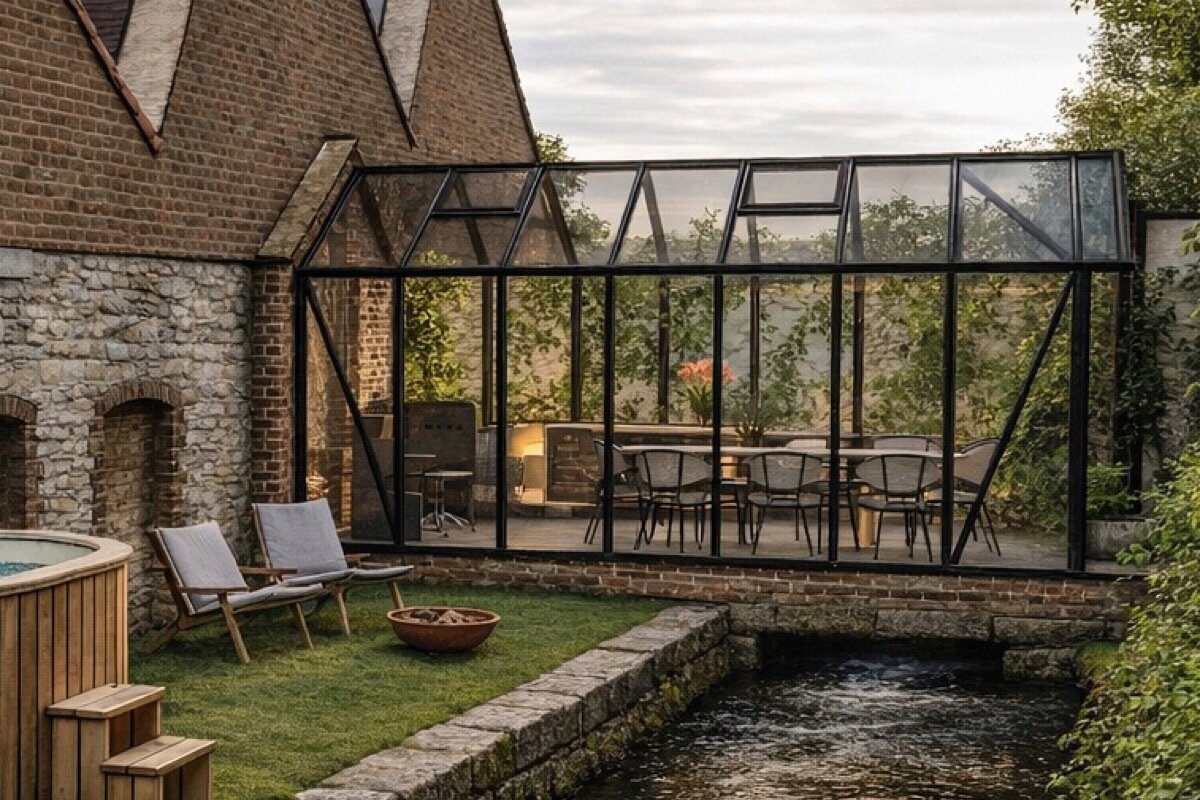

Start with the ground, wind and access
The first decision for a wind-exposed greenhouse is where it will stand, not which model appears in the catalogue.
A property beside open fields, on raised ground or among widely spaced homes presents different conditions from a protected courtyard. A useful plan begins by studying the site, identifying a dependable anchoring approach and matching the greenhouse form to its surroundings.
Wind does not meet a greenhouse as one steady force. Roofs, gable ends, doors, vents and glazing all receive it differently, while buildings and narrow passages can redirect or accelerate gusts. Revisit the proposed location in several seasons and, when safe, during unsettled weather. The direction of moving debris, recurring leaf deposits and existing shelter from hedges, fences or buildings can reveal patterns that a calm-day visit misses.
Treat the greenhouse as a complete assembly. An impressive frame cannot compensate for unsuitable ground, a weak base, incorrect fixings or poor alignment. Glazing also depends on correct seating within a properly assembled structure. Build the plan around the property’s terrain and everyday access rather than judging from a product image alone.
Use the following sections to turn site observations into practical buying questions. They cover greenhouse form, glazing, foundations, anchoring, ventilation, maintenance and safe access so that the finished choice responds to both the garden and its local weather.
01 · Read the property
Use garden clues to understand local wind
A regional forecast cannot describe every corner of a property. Slopes, open field edges, broad driveways and gaps between buildings can intensify wind, while a tall wall may produce turbulence on its sheltered side. Walk the garden under different wind directions and note repeated signs such as bent plants, moving screens and lines of twigs or leaves. These patterns offer a more useful site picture than a single quiet visit.
Mark several possible footprints, then compare drainage and access as well as sunlight. Keep clear of hazardous branches and areas where water stands. Hedges may filter airflow, but they should not create persistent shade or block maintenance. Near a house, also consider roof runoff, places where snow may slide and gusts turning around corners.
- A narrow gap beside a house, garage or tall boundary can behave like a wind tunnel. Avoid placing doors or vents there when recurring draughts show that gusts are being concentrated.
- Reserve working space around every accessible side. That clearance makes assembly and cleaning easier and lets you reach moving parts promptly when the weather changes.
For an open garden area that has been carefully observed, a classic freestanding greenhouse can provide a well-proportioned starting point for further planning.
02 · Choose the relationship to the site
Compare freestanding and lean-to forms in their real surroundings
A freestanding greenhouse offers flexibility in placement, but its orientation must balance daylight, access and prevailing wind. Study where the entrance and vents will face; openings on the most exposed side may be awkward to manage. Paths, beds and water access should also support convenient use over the long term.
A lean-to uses a building wall as part of its setting, which may create a calmer-feeling space without guaranteeing shelter. Confirm that the wall and attachment approach are suitable, and account for drainage, junction details and maintenance access. Where the wall condition or proposed fixing is uncertain, obtain project-specific professional advice.
- Include both gable ends in the assessment. Their orientation affects the greenhouse’s position in the garden and how approaching gusts meet the structure.
- Before fixing a lean-to position, trace roof runoff and check nearby windows, services and all wall areas needed for installation.
Where a suitable house wall gives the location structure, a large lean-to greenhouse can complement the garden functionally and architecturally.
03 · Think in systems
The frame is only one part of the load path
Wind forces pass through the roof, walls, glazing supports, connections and foundation rather than stopping at one frame member. Select a configuration that fits the site and install it without improvised alterations. Read the current documents for foundation preparation and for all supplied or required fixings; unassessed additions can change how the assembled greenhouse behaves.
Depending on product configuration, installation requirements and operating guidance, Bloomcabin greenhouses are specified for wind speeds up to 30 m/s. This does not replace site-specific planning: local gusts, terrain, surrounding buildings and the actual installation remain important. Read the documentation for your model in full, especially instructions on anchoring, alignment and moving parts. An unusually exposed site may warrant an individual assessment by suitable professionals.
- Confirm that the chosen footprint fits the prepared foundation and leaves the required property clearances. Do not rely on reshaping the site after the greenhouse has been selected.
- Keep the assembly instructions and a record of the fixings used. This information supports future inspections, maintenance and informed discussions with contractors.
For those who want an independent garden structure, a Classic garden greenhouse offers a form whose installation should be planned consistently from the foundation upward.
04 · Build from the ground up
A dependable anchor begins with a suitable foundation
The foundation transfers forces between the greenhouse and the ground while providing the level reference needed for accurate assembly. Soil, slope, frost movement, drainage and the selected structure all influence the appropriate design. Compacted aggregate, concrete and other approaches have different requirements; the correct choice is the one that follows the product guidance and suits the actual site.
Resolve the anchoring approach before installation day. Verify dimensions, diagonals and levels before setting components, and include earthworks and drainage in the plan for sloping land. Identify underground services before excavation. Because applicable codes and project requirements vary across Canada, confirm the province or territory and municipality, then ask the municipal permit office which zoning, permit, foundation or drainage requirements apply to the property. Seek qualified local help where the site or construction details remain uncertain.
- Grade or drain the surrounding area so surface water moves away from the foundation. Persistent wetness can undermine convenient access and make inspection more difficult.
- Choose fixings specifically intended for the greenhouse and its foundation construction. Any proposed departure from the documented arrangement should be assessed before work continues.
On an assessed, suitable building side, a regular lean-to greenhouse combines closeness to the home with a clearly planned foundation connection.


05 · Match the glazing to the complete assembly
Choose glazing for its use, care and installation context
Glazing influences light, appearance and daily use, but it cannot be assessed separately from the frame at an exposed site. Panels and retainers need to be installed in the documented sequence and seated without strain. Once assembly is complete, inspect the full installation and make the same visual check part of regular care, particularly where gusts are frequent.
Start with the intended use of the space. Plant propagation, display and seasonal garden-room use can lead to different priorities. Ask which glazing choices are offered for the exact configuration and how each is meant to be installed, cleaned and operated. Product-specific information is more reliable than broad assumptions about a material.
- Include seals, strips and visible retaining points in seasonal inspections. Address damage or missing components promptly and in accordance with the product guidance.
- Keep pots, watering cans and lightweight décor where an open door or sudden draught cannot carry them into the glazing.
For a garden room shaped by light, a freestanding Classic model offers a good foundation when glazing and installation are treated as one connected decision.
06 · Make weather checks part of operation
Plan a practical routine for doors and ventilation
Installation is not the end of wind planning. Review current conditions before leaving doors, roof vents or other moving parts open, and close or secure them as the product instructions require when wind increases. A simple routine can include morning ventilation, a forecast check, a final look at openings before leaving and removal of leaves or unsecured items as seasons change.
Manage the area immediately around the greenhouse as carefully as the structure itself. Overhanging branches, unstable supports, light furniture and loose covers can become hazards. Maintain a clear inspection route and examine the frame, glazing and foundation connection after significant weather. If damage or unexplained movement is visible, pause use until the cause and appropriate repair have been established.
- Return tools and accessories to a protected storage place after use. Clear thresholds and paths make it easier to secure the greenhouse quickly.
- Remove leaves from gutters, drains and adjacent surfaces before they obstruct water flow. Keeping these routes open supports drainage around the foundation.
For short trips between the home and plant care, a full-size lean-to greenhouse can be particularly convenient when its openings are deliberately included in the daily routine.
07 · Shape the surroundings
Soften exposure while preserving light, airflow and access
Shelter does not need to be a solid barrier. Layered planting and permeable fencing can soften airflow without enclosing the greenhouse in a dark, damp pocket, although performance depends on direction, spacing, height and density. Position mature hedges and shrubs far enough away to prevent rubbing and preserve maintenance access, sunlight and important views.
Do not improvise close-fitting screens or tarps around an installed greenhouse. They may trap water, obstruct cleaning or redirect air in unhelpful ways. Instead, develop the wider setting gradually with durable paths, well-spaced planting and site-appropriate shrubs. Respect property boundaries and verify local requirements before undertaking larger landscape changes.
- Leave clearance between planting and the greenhouse. The gap supports airflow, cleaning and inspection of the glazing, frame and foundation edge.
- Use stable path surfaces with an intentional drainage route. They provide more secure access in wet, windy conditions than loose materials that migrate underfoot.
As a calm focal point between planted areas and paths, a classic greenhouse can bring order to the design of a more protected garden area.
08 · Turn observations into a buying brief
Finish the comparison with a realistic site record
Before selecting a configuration, assemble a concise project file containing measurements, site photographs, observed wind directions, soil conditions and proposed routes for water, electricity and paths. Use it to compare product information and frame precise questions. Check every quotation against the documents for that exact configuration, and include future maintenance access in the final layout.
Plan beyond delivery. Decide who will prepare and inspect the foundation, complete the installation and reach components for later maintenance. Ask your insurer about the specific structure, location and desired protection because policy terms differ. Building, zoning and neighbour-related questions should be taken to the authority responsible for the actual municipality and province or territory rather than answered from a general Canadian summary.
- Look beyond the external dimensions. Door position, internal circulation, usable floor area and assembly clearance can determine whether the proposed location works in practice.
- Before purchasing, read the written commercial warranty for the selected configuration, including its scope and conditions; those terms govern that particular version and use.
Where the house wall, access and foundation concept work together, a large-format lean-to greenhouse can be a thoughtfully planned solution at the edge of an exposed garden.

Side-by-side view
How freestanding and lean-to forms respond to an open garden
Neither form is automatically the better windy-site choice. Use the comparison to identify which relationship to the property is more workable, then verify the selected configuration, installation documents and the suitability of the proposed ground or wall.
| Consideration | Freestanding greenhouse | Lean-to greenhouse |
|---|---|---|
| Relationship to the site | Needs a carefully chosen, calmer garden area with access all around for installation and maintenance. | Uses a suitable house wall as a reference point, but requires close assessment of the connection, wall and drainage. |
| Airflow | Wind reaches every side, so the orientation of doors and ventilation is especially important. | The building may provide shelter, but corners and roof areas can also create turbulence. |
| Foundation planning | Requires an independent, level and stable base in line with product guidance. | Needs an accurate connection between the foundation area and a wall side suitable for attachment. |
| Everyday use | Provides separation from the house and open garden views when paths are well planned. | Often provides short trips from the home when the entrance and rainwater management are well planned. |
| Design effect | Can serve as an independent centrepiece among beds, lawn and structural planting. | Links the extension more closely to a terrace, home garden or functional side area. |
A five-step route from site observations to a greenhouse plan
Work from property conditions toward the final structure. Recording each decision with current product documents, photographs and a simple site sketch helps prevent important questions from emerging only after an order is placed.
01
Record wind behaviour
Visit the area in more than one weather pattern. Mark exposed corridors, recurring gust zones, calmer pockets and hazards such as unstable branches or unsecured garden objects.
02
Lay out the working area
Measure the footprint and the space needed beyond it. Include door travel, assembly clearance, maintenance paths, separation from planting and access for future cleaning or repairs.
03
Choose the site relationship
Compare an independent garden position with any suitable wall location only after documenting the airflow. For a wall installation, include its condition, drainage and connection details in the decision.
04
Set the foundation brief
Record soil, grade, water movement and known services. Base the foundation and anchoring design on the requirements for the exact greenhouse configuration.
05
Plan the operating routine
Decide how doors, vents, irrigation and accessories will be handled in normal use and who will check moving parts before forecast storms.
Final pre-order review
Use these checks to test the plan against the actual property. Complete an item only when the answer is known for the intended location and selected configuration.
01. The prevailing wind directions and noticeable gust zones have been observed over a meaningful period and recorded in a sketch.
02. The chosen location is not beneath potentially hazardous branches and provides clear, safe access for installation, maintenance and closing doors.
03. The footprint, installation area and paths have been measured, including the true door position and required movement space.
04. Ground conditions, slope, drainage and possible underground services have been checked before deciding on the foundation and anchoring.
05. The desired form has been selected with light, airflow, access and long-term garden use in mind.
06. For a lean-to greenhouse, wall condition, attachment options, roof runoff and accessible connection areas have been resolved structurally or with professional advice.
07. The product documentation for the specific configuration, installation and operation of moving parts has been reviewed fully before purchase.
08. Any outstanding questions about local requirements, neighbours, insurance or professional work have been clarified with the relevant contacts.
Common questions for wind-exposed greenhouse sites
Does an open garden rule out a freestanding greenhouse?
No. What matters is the wind pattern at the proposed footprint and whether the base, anchors and installation can be planned for it. A less obvious, calmer part of the property may work better than the centre of an open lawn. Observe the location, follow the documentation for the selected configuration and obtain professional site advice when the exposure is unusual.
Is a house wall automatically the calmest location?
No. A wall may offer shelter from one direction while corners, roof edges and narrow passages accelerate or disturb airflow elsewhere. Confirm that the wall can accept the intended installation and that roof water can be managed. Choose a lean-to location from observed building conditions rather than assuming that proximity to the house solves wind exposure.
Why does the foundation matter at a windy site?
The foundation creates the lasting connection between the structure and the ground and provides the level reference for correct alignment. Soil, slope, drainage and the documented fixing arrangement all influence its design. Resolve uncertain ground conditions early rather than improvising changes during installation.
Can doors and vents stay open when the wind rises?
Follow the operating instructions for the selected greenhouse. Close or secure moving parts in the prescribed way as conditions become windy, and check them before leaving the property. Keeping pots, tools and décor away from openings makes a quick weather response safer and easier.
Is there one Canadian permit rule for greenhouses?
No single answer applies across Canada. The National Research Council publishes model codes but directs users to provincial or territorial officials to identify the codes and regulations that apply locally. Start with the province or territory and municipality, then ask the municipal permit office about zoning, setbacks, height, lot coverage, drainage, services, heritage considerations and any building permit required for the specific property and proposal.
What information should I take to my insurer?
Provide the proposed structure, installation location and the type of protection you are considering. Ask what documents are required, which events are covered under stated conditions and whether the policy specifies installation or anchoring requirements. Written policy terms and property-specific advice are more dependable than assumptions based on another greenhouse.
Review greenhouse forms
Bring a site brief to the product comparison
A useful windy-site plan begins with the garden’s actual weather behaviour. Terrain, buildings, planting, drainage and access should guide the form and position alongside growing and daylight goals. A suitable foundation, planned anchoring and installation to the product documents then connect those observations to the finished greenhouse.
Gather measurements, photographs and the current documents for any configuration under consideration. Bloomcabin models can provide options to compare, but the final selection must respond to the real property. Confirm construction, municipal and insurance questions with the appropriate Canadian authorities or qualified professionals before committing to the work.
Compare each greenhouse form against your site observations, foundation plan and the routes you will use for everyday garden care.
