
Set Realistic Harvest Expectations for Each Greenhouse Square Metre
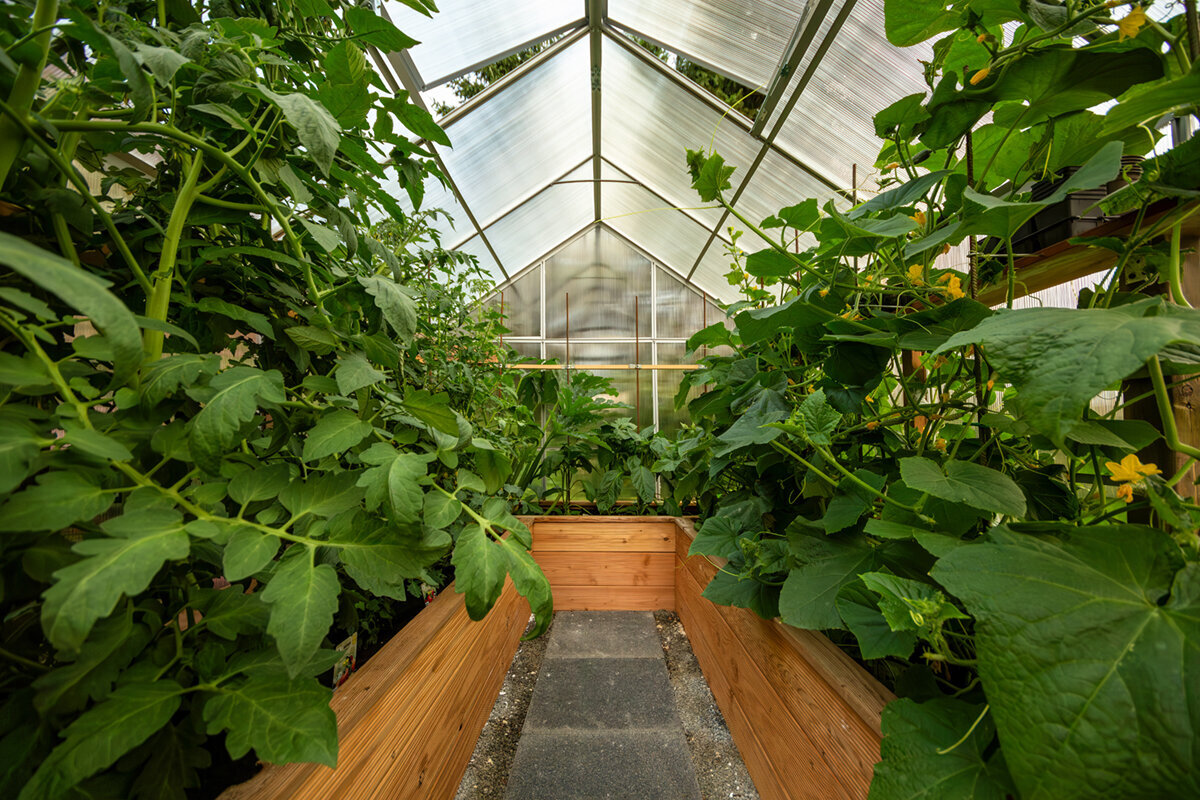

A greenhouse can extend the gardening season and shelter heat-loving crops, but floor area alone does not determine the harvest. Beds planted too tightly may look productive at first, yet poor airflow, shade and difficult care can work against the crop. Start with the conditions at your own site.
Space is especially valuable when it serves several parts of the season. Early salads may finish before tomatoes need their place, followed by later sowings or hardy fall crops. That sequence turns a summer tomato house into a versatile growing space.
Plan paths, water access and daily tasks as carefully as beds. Plants that are easy to reach are more likely to be checked and harvested on time. The practical question is which crops suit your routine, cooking and available light.
Stage 1: The starting point
Assess usable space, not just the footprint
For a dependable plan, separate exterior dimensions, circulation space and true growing area. Doors need clearance, paths prevent damage underfoot, and side beds must remain reachable. These areas are not wasted: they make watering, care and harvesting reliable. Draw beds and paths to scale before choosing seeds or young plants.
Height changes how much of the interior can work for you. Tall crops need ties or supports, and their foliage should not leave smaller plants in lasting shade. Reserve vertical zones for climbers and keep low crops where light reaches them. A simple zoning plan keeps the interior orderly and functional. Test your sketch against daily tasks too: where can the watering can, pruners and harvest basket rest without closing the path? A smooth workflow discourages tending beds from only one side for convenience. Mark room for tying, removing side shoots and picking before tall crops fill out.
Measure reachable bed areas inside and allow for door openings, water containers and harvest baskets.
Use edges for low, quick-to-harvest crops instead of filling them with difficult-to-reach plants.
For a dedicated growing area, a standard Classic greenhouse offers a clear basis for beds, paths and seasonal crop changes.
Stage 2: Read the light
Understand the site as a yield factor
Light helps determine which crops are worthwhile in a greenhouse. Watch over several days to see when nearby buildings, trees or fences cast shade. Gentle shade may be welcome in summer, but can slow growth in lower-light periods. Note where the strongest sun arrives so tall plants do not dominate smaller crops.
Compass direction tells only part of the story. Reflected light, seasonal foliage and distance from a wall can all alter the microclimate. A wall-side site may retain heat or receive less air movement than a freestanding position. Base crop choices and planting times on these observed conditions rather than an ideal layout. Record not only direct sun but also where shade falls and how long it remains: a bright morning area may become noticeably cooler beside a building later in the day. Keep observing as the sun angle and surrounding leaves change through the season.
Before the first season, make a simple light record for morning, midday and afternoon on several dates.
Reserve the brightest places for high-light crops and use quieter zones flexibly.
Where an existing wall suits the plan, a large regular Lean-To greenhouse can help incorporate building-side light into the layout.
Stage 3: Choose crops
Select plants for use and season
A useful harvest is not necessarily the greatest weight; it is food you will actually use. Tomatoes, cucumbers, peppers, eggplants, salads, herbs and seedlings all need different warmth, room and care. Begin with a small selection that regularly appears in your kitchen. You can then learn how your greenhouse behaves without overloading the available space.
Crop combinations work best when their growth rates and mature sizes are compatible. Fast leafy crops can occupy early gaps before larger plants need the room, but avoid pairings that later compete for light and air. Give every crop an expected clearing date or possible successor so future openings become visible. Consider how you cook as well: frequently picked herbs and leafy vegetables should be easy to reach, while crops intended for larger harvests may need a continuous block of space. A clear priority makes care easier and prevents conflicting needs from becoming crowded together.
Prioritize crops you eat often instead of filling every gap with seldom-used varieties.
Combine short early crops with later main crops, but clear transition areas promptly.
For a flexible mix of main and companion crops, a Classic greenhouse for a standard garden can be planned with clear bed zones and a manageable number of plants.
Stage 4: Leave room
Plant spacing protects productivity
Overcrowding is a common reason for disappointing results. Leaves dry more slowly after watering, disease checks become harder and fruit is less accessible. Follow spacing guidance for the selected variety and allow for mature width. A bed that looks sparse at planting may be exactly what plants need later.
Different crops occupy space in different ways. Climbers need height and firm support, while bushy plants require more side room. Low salads or herbs can temporarily grow among young main crops, but they should be cleared before competition begins. Treat this interplanting as a short-term use from the outset. Reassess spacing during the season because some plants grow more vigorously than expected or lean towards the light. Remove aging leaves only when needed, tie climbing shoots early, and keep paths and neighbouring plants open so the planned structure survives the rapid summer growth.
Mark planting positions with stakes or string before planting so spacing remains visible.
Allow for mature foliage and harvesting reach, not only the size of young plants.
For clear rows and support lines beside the house, a full-size regular Lean-To greenhouse can provide a suitable setting for airy spacing.
Stage 5: Manage the climate
Balance water, air and warmth
Productivity also depends on daily routines. Water at the root zone as needed and avoid keeping foliage wet. Check moisture below the surface before watering again, as the top layer and root zone can feel different. Mulch, suitable containers and thoughtful bed design may help maintain even moisture, but do not replace observation.
Ventilation is part of crop management, not an afterthought. The interior can heat quickly on warm days, while openings may need adjustment again at night or during changeable weather. Watch condensation, leaf condition and the temperature inside. Air movement supports a more balanced environment, but it cannot replace suitable spacing or regular checks. Water consistently rather than applying the largest possible amount: containers, soil areas and crop stages dry at different rates. The root zone and the plants themselves provide better guidance than a fixed routine. Early observation lets you adjust care before stress builds over time.
Pair daily watering with a brief check for wilted leaves, pests, ripe fruit and ventilation needs.
Adjust water volume to weather, growth stage and growing medium rather than a fixed calendar.
For gardeners who prefer compact care routes, a standard Classic greenhouse creates an orderly environment for beds and crop checks.
Stage 6: Use time well
Keep space active with crop succession
The most productive space is not necessarily full all year; it is well timed. Start robust early crops when conditions allow, reserve a defined handover date for heat-loving main crops, then use cleared areas for leafy vegetables, herbs or green manure. The right sequence depends on your site and available care time.
A growing calendar helps prevent conflicts before they start. Record sowing, planting, expected clearing and possible follow-up crops in a table or annual plan. Leave buffers for slower development, holidays and difficult weather. The calendar is a flexible tool for spotting vacant areas and likely bottlenecks, not a rigid program. Before replanting, clear crop remains, roots and any supports so the next crop begins with enough room. Record the actual clearing date afterwards; those notes reveal which sequences worked and help shape future plans around the time you truly have available.
Set a desired clearing date for every crop so the next plants are not left without space.
Keep compost, containers and seed ready during crop changes so vacant beds can be used promptly.
For staggered early and follow-up crops beside a building, a full-size regular Lean-To greenhouse can offer accessible space for clear seasonal sequences.
Stage 7: Guide the harvest
Harvest regularly and use observations
Harvesting is an active part of space planning. For many fruiting vegetables, regular picking supports continued fruit formation, while overlooked produce can burden the plant. Harvest at the appropriate stage and set regular inspection days. This helps reveal when a crop needs more room, water or support.
Keep a simple garden journal. Record quantity, planting date, variety, difficulties and how satisfied you were with the result. After a season, your own evidence will say more about suitable crops than record figures drawn from entirely different conditions. Keep the notes near the greenhouse or in an easy-to-open digital list, and add observations while details are fresh. Photographs can strengthen the comparison by showing when beds became crowded, which areas stayed empty and how the arrangement changed through the season.
Check plants several times a week in peak season so ripe produce and early problems are not missed.
Judge each crop by flavour, harvest timing and care effort, not solely by weight or quantity.
For everyday observation and harvesting, a Classic greenhouse as a standard model can become a clear focal point for the garden season.
Stage 8: Review the season
Improve your own benchmark each year
At season’s end, take an honest look at the results. Which spaces stayed empty too long, which plants were too close and which harvests were most welcome? Separate causes: a poor site, late planting and an unsuitable variety call for different changes. Adjust only a few points next year so you can see what truly helped.
Equipment and greenhouse form should support your routine. Check that you have enough working room, reachable growing areas and practical access to water or the kitchen. For a greenhouse beside a building, construction, drainage and setback questions require a site-specific check. In Canada, first identify the province or territory and municipality, then consult the appropriate local office and current product documents. Do not judge the season only by total quantity: a modest crop may be valuable because it was easy to manage and appeared often at the table, while a sprawling plant may demand disproportionate attention. Use that comparison to align next season’s layout with usefulness, care effort and your actual habits.
Compare your notes at the end of the season and choose no more than 2 specific improvements for the next one.
Check local requirements early for any construction project rather than relying on broad claims in forums.
If your routine points to a building-side solution, consider a full-size regular Lean-To greenhouse along with the local conditions that apply to the site.



Comparison
Which space strategy suits your growing plan?
The right approach depends less on an abstract yield figure than on your priorities. Use this overview to align crop mix, care effort and use of space.
| Strategy | Best suited to | Layout and planning note |
|---|---|---|
| A few main crops | Tomatoes, cucumbers or peppers | Allow generous spacing, clear support zones and comfortable harvest routes. |
| Staggered mixed planting | Salads, herbs and fruiting vegetables | Use short-term gaps and set handover dates for main crops in writing. |
| Sowing and propagation | Young plants and early batches | Allow for benches or work surfaces and later movement of plants. |
| Season extension | Early and late leafy crops | Watch the weather, choose robust varieties and reserve beds for follow-up crops. |
| Everyday harvesting | Vegetables used regularly | Limit crop numbers, keep inspection routes short and record harvest timing. |
Build a Growing Plan in 5 Steps
A simple pre-season plan prevents many space problems. Start with the available area, then choose crops and review results instead of placing plants wherever room happens to remain.
01
Sketch the interior
Draw beds, paths, the door area and water access. Mark especially bright, shadier or difficult-to-reach zones.
02
Prioritize crops
Choose vegetables you will genuinely use first. Add herbs, salads or trial varieties only afterwards.
03
Add mature sizes
Place plants according to mature space needs. Include supports and access for care and harvesting.
04
Schedule the sequence
Set early, main and follow-up crops in time. Note possible clearing dates and leave a buffer for changes.
05
Document results
Record what worked after each season. These notes support realistic choices for varieties, spacing and next year’s layout.
Checklist for realistic yield expectations
Use these points before planting and throughout the season to plan functional growing space around your real conditions.
01. I have recorded plantable bed space separately from essential paths.
02. I know the site’s light conditions at different times of day.
03. I select crops for household use, not only visual variety.
04. I allow for each plant’s mature size when planting.
05. I have arranged tall, low and climbing crops sensibly.
06. I plan clear transitions between early, summer and later crops.
07. I check water needs, humidity, plant condition and ripe harvests regularly.
08. I record successes and difficulties for next season.
Frequently asked questions about greenhouse yield
How do I calculate greenhouse yield per square metre?
First record only the area you can actually plant, then document harvests by crop through the season. A useful review also considers whether the produce was used and how much care it required. Compare your own results over several seasons rather than treating one general figure as a target.
Does denser planting automatically increase yield?
No. Plants set too closely compete for light, water and nutrients; foliage also dries less readily and care becomes harder. Follow variety guidance and allow for mature size. Space improves air movement, inspection and harvesting, often making the area more useful overall.
Which crops make particularly good use of a greenhouse?
That depends on the site and your kitchen. Heat-loving fruiting vegetables, early salads, herbs and young plants can use different seasonal windows. The best choices are crops you can harvest regularly and care for well, not supposed record producers.
Should every area stay planted all the time?
Not necessarily. Clear transitions make crop changes easier, prevent crowding and leave flexibility for delayed growth. Plan early and follow-up crops deliberately rather than overfilling beds. Temporarily open space can be more valuable for soil care, new sowings or clearing old plants than one additional plant.
How does a growing calendar help with space planning?
A calendar shows when crops need space and when they release it. Record sowing, planting, expected harvest and clearing. This prevents main crops competing with late plants. After the season, compare the calendar with your notes and improve the sequence for next year.
Do I need to consider construction requirements for a greenhouse?
Approval can differ with location, size, design and locally adopted rules. Before installation, identify your province or territory and municipality, then ask the municipal building or planning office whether zoning, a permit, setbacks, drainage review or structural documentation applies. A storage-shed exception published for one municipality should not be treated as a Canada-wide greenhouse exemption. Review property-boundary constraints and any applicable private property agreement before making a firm plan.
Plan the right greenhouse
Productivity begins with a suitable plan
Greenhouse yield per square metre is not a promise; it reflects many manageable decisions. By considering light, paths, plant spacing and crop succession from the start, you can create a growing area that is enjoyable to manage and suited to everyday garden life.
Begin with a manageable crop mix, document the first season and refine the plan step by step. Each observation can become a practical improvement, turning available space into a useful place for vegetables, herbs and experience.
Explore greenhouse options that suit your layout, crops and garden routine.
