
Replacing Condo Windows: Approvals, Appearance and Access

A Guide for Condo Owners
Replacing an individual window in a condominium calls for more than choosing width, height and glazing. The project reaches beyond the suite when a new unit alters the outside view, installation requires common space, or responsibility for the assembly is uncertain. Ordering first and checking the building’s documents, decision process and access route later can create avoidable rework. A better sequence is to document the opening, identify who needs to review the proposal, translate the exterior design into checkable details, and examine installation and daily operation before confirming the configuration. This guide gives condo owners a practical set of questions for building management, the condominium corporation, the measuring professional and the installer—without assuming the same process applies in every property or province.
01 / Record the existing condition
Treat replacement as a whole project
Inside the suite, a new window may be noticed mainly because it reduces drafts, closes more smoothly or is easier to operate. In a multi-unit building, however, it is also part of the exterior and must fit an existing opening. Begin with three comparisons: does the proposed exterior suit the building, will the sash work with furnishings and window coverings, and can installation proceed without unresolved changes to reveals, shutters, sills or exterior surfaces? Interior and exterior photographs, measurements of visible frame areas, and a sketch showing the opening direction make these questions practical. Note whether the window faces a balcony, loggia, street, courtyard or a difficult-to-reach side. This information is far more helpful to management, surveyors and installers than one rough-opening measurement.
Where several windows in a suite need renewal, they do not necessarily all need to be ordered at once. Still, windows on one visible façade should be considered as a group. One noticeably different replacement can stand out more than any change seen indoors. Set a clear design target: which units remain, which are being replaced now, and which details must be repeated in later phases? Keep the selected configuration, elevation drawings and colour reference in a usable record. If the immediate need is only one damaged window, have the opening assessed for unusual conditions as well. A suitable unit alone cannot correct an uneven reveal or a poor installation situation. This approach keeps options open until the order is confirmed.
Confirm documents and decision-making responsibility first
A catalogue cannot establish who is authorized to approve work at a particular condominium. Start with the current governing documents, bylaws or rules, prior written decisions and the property manager’s alteration procedure. Ask how the window assembly, outside appearance and repairs are treated for this building. Instead of requesting general “permission,” describe the existing unit, every proposed match or change, the suite location, affected exterior areas and expected work period. Request a written response identifying the decision-maker, required documents and any review or sign-off steps. A hallway conversation is not a project record. If authority or ownership of the assembly remains unclear, obtain legal advice for the specific property and province.
Send an elevation with your request, not only a product name. Identify frame colour, sashes, mullions, glazing bars, glass sections and the opening direction visible from outside. Recently updated neighbouring windows are only a reference unless they have been confirmed as the standard. Keep the written response with your quotation documents so that measuring and ordering are based on more than an assumption.
02 / Establish responsibility
Break the exterior design into verifiable details
“It should look the same” is too vague for a specification. Describe the existing window in details that a supplier and installer can check: overall form, number of sashes, proportion of fixed and operable sections, visible frame widths, transom positions, glazing-bar pattern, handle side and opening type. Photograph the full window line from a suitable distance as well as details with the sash open. A Fixed Window can suit a repeated elevation where an opening sash is not permanently needed; compare it with the existing division of the opening. What matters is not whether a solution is called modern or traditional, but whether it brings the agreed exterior and the room’s needs together.
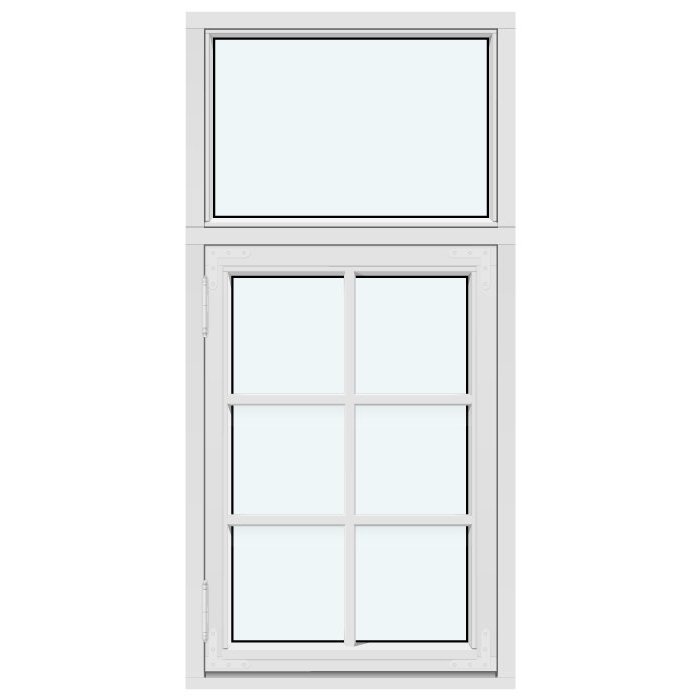
Glazing bars deserve particular attention because they strongly influence a façade and can be made in very different ways. Use precise terms in your notes: glazing bars, glass-dividing bars, or no bars. A daylight photograph helps avoid confusion about spacing and divisions. For a divided heritage window, also establish whether the pattern sits within one sash or separates several sashes. A historic appearance is not automatically required, but it may be a deliberate design direction. For an outward-opening option, one useful comparison is a Traditional-Style Kombi Outward-Opening Casement Window. Check the opening direction and installation conditions independently of its style. A product image does not replace design approval or site measurement for the actual opening.
Choose operation for the room and exterior space
Opening direction has a greater effect on daily use than the exterior may suggest. Inward-opening sashes need clear space inside for ventilation, so curtains, plants, radiator covers and furniture matter. Outward-opening sashes need an unobstructed swing area on a balcony, terrace or in front of the façade. Mark the sash movement on a floor plan and consider daily use: can someone pass on the balcony, will the sash meet an awning or railing, and is the handle easy to reach? A Single Inward-Opening Window is therefore more than a different hinge arrangement; it affects furnishing and operation within the room.
A wider opening may suit a two-sash arrangement, but that changes both operation and appearance. Establish which sash will be used daily, how both sashes can be reached for cleaning or rapid ventilation, and whether the central division matches the existing building pattern. A Double Inward-Opening Window offers a concrete comparison for this opening style, but it does not itself prove suitability for your opening. In a compact room, one fixed section plus an operable sash may protect circulation space; elsewhere, a broad clear opening may matter more. Do not choose solely by maximum opening width. Ask for the measurement visit to include hinging, handle height, projecting sill details and actual furnishings.
03 / Coordinate the exterior
Coordinate fixed panes, opening sashes and ventilation habits
Not every glazed section needs to open, but each room needs a practical ventilation and cleaning routine. Consider each opening separately: will it be used regularly for ventilation, must it be reachable from indoors, and who will clean the exterior side? A large fixed pane can provide daylight and a calm exterior appearance while an adjacent sash handles ventilation. This layout is worth assessing where a broad window is divided into fixed and movable zones. Do not decide from a façade drawing alone. A fixed pane in a hard-to-reach location may be straightforward or demanding in daily life depending on the real cleaning method.
For utility rooms or high-level openings, a top-hinged unit can offer a different operating logic from a conventional casement. A Top-Hinged Outward-Opening Window is a configuration to consider when the location and exterior clearance suit it. Check how it will be operated, secured and cleaned; a window that works well in a sample may not suit a deep reveal or narrow balcony. Also record which windows must be closed when leaving the suite and which are intended for daily ventilation. This practical description helps prevent unnecessarily complicated layouts and supports discussions where the external division should remain while interior operation changes.
Field measurement: record more than width and height
Reliable field measurement begins with the existing opening but does not end there. The installer needs to assess reveals, connections, interior and exterior sills, existing seals, any shutters or shading, and the sash movement on site. Do not use your own measurements as the basis for a binding order; use them only for early orientation. Take measurements at several points, since older buildings may have irregular openings and an apparently square frame can conceal a differently formed connection on one side. Record damage, moisture marks, cracks and places where plaster or cladding may be affected during removal. This allows the parties to discuss early which work belongs to the replacement and which needs separate planning.
Unusual shapes require especially careful documentation. A round arch, triangle or sloping top cannot be specified with rectangular dimensions alone. Photograph the full outline with a scale, locate any existing drawings and have the shape professionally measured. A Fixed Triangular and Sloped Window is a product category for non-rectangular openings, not a promise that every existing shape can be solved this way. The same principle applies to a circular opening and a Round Fixed Window. Ask whether any visible division must be repeated in neighbouring windows. For every special shape, first connect confirmed geometry with the agreed exterior design, then arrange manufacture. Later changes to the shape, division or hinging can substantially alter the planning basis and installation process.
04 / Check access and measurements
Plan access, transport and protection for common areas
Even a strong installation plan fails if the route to the window has not been considered. Walk it before appointing the contractor: building entrance, stairs, elevator, suite door, hall, room access and, where relevant, balcony or courtyard. Measure tight points not only for width but also around turns and at clear heights. Confirm with management and the installer whether floors, walls or elevators need protection and where removed units, packaging and tools can stand during the work. Do not treat shared space as automatic storage. A schedule that accounts for access and protection reduces friction with neighbours and gives the installation team a realistic basis for preparation.
When the window cannot safely travel through the stairwell, the exterior route becomes a separate planning issue. A balcony may provide access but may also be limited by railings, narrow doors or delicate finishes. Streets, courtyards, driveways and coordination with other parties should be discussed early, without expecting condo owners to prescribe technical methods. Ask the contractor what accessibility information is needed and what options can be proposed after a site visit. Share expected work and time windows with management once they are specific. Remember the interior as well: nearby furniture, electronics and delicate objects should be removed or protected in good time. Clear working space is not merely convenient; it is necessary for proper assessment of removal, installation and connections.
Prepare an installation sequence that works in an occupied suite
Window replacement normally disrupts everyday living. Discuss which rooms will be affected, when work will occur, whether windows will be handled one after another and what preparation you will do yourself. Clear sills, provide access to outlets, secure curtains and protect items that cannot tolerate dust or vibration. Early day planning is especially important for pets, young children or anyone needing a quiet environment. Ask the installer which work arising from unexpected reveal or connection conditions may fall outside the original scope, and how decisions will be made. A clear contact in the suite and an available management contact help avoid delays when a common area or access route is involved.
After each window or work stage, arrange a short inspection: do the sashes and handles operate, does the appearance match, are frame and glass undamaged, and are work areas tidy? Photograph reveals and adjacent surfaces before work begins so that questions can be addressed objectively. Installation brings together the unit, its connection, usability and the design agreed in advance.
05 / Confirm the order
Compare quotations using the same assumptions
Do not compare quotations only by one final total when their assumptions differ. Make a schedule for each window: location in the building, confirmed dimensions, number of sections, opening direction, fixed pane or sash, visible divisions, glazing bars, handle side, colour, removal, connection work, interior and exterior finishing, access and disposal. State what is expressly included, excluded or still subject to review. Only then can you see whether two quotations describe the same work. A lower figure may reflect a different exterior, a reduced connection scope or an unaddressed access assumption. Ask specifically about unclear items rather than assuming omitted work is included. Written confirmation of the configuration is especially valuable for a condominium project.
Technical values should also be considered in relation to the project. Tell the supplier whether you are planning one replacement, a row of matching windows or a broader renovation. If a Super Low Uw Outward-Opening Passive House Window is under consideration, its name identifies that stated orientation and opening type only; it does not automatically answer questions about dimensions, façade appearance, connections or suitability for a particular building. Request documentation available for the selected configuration and have the installation conditions evaluated by an appropriate professional. Compare confirmed complete configurations rather than product names alone. For a later phase, retain the same decision records so that the exterior and operating concept do not have to be reconstructed with each order.
Order, document and inspect after installation
Do not release the order until field measurements, the approved appearance and the decision path are complete. Check each line against your window schedule: room, quantity, dimensions, hinging, opening direction, divisions, glazing bars, fixed or operable sections and every agreed extra. Replace wording such as “similar to existing” with specific, verifiable details. Keep photographs, sketches, approvals, the quotation, order confirmation and installation arrangements together. Bloomcabin states a five-year commercial warranty for windows and doors, and the delivery time is four to six weeks, subject to order confirmation. Review the terms for your particular order; these headline details are useful for planning but do not settle its full scope.
Once installation is complete, carry out a calm function check in daylight. Open and close every sash, inspect handles and the agreed divisions from inside and outside where safe, and compare the visible design with the approved elevation rather than memory of the old window. Record questions promptly and report them through the agreed contact so the matter remains documented. The records are also useful for future owners or later replacement phases: they show what was installed and what coordination came before it. Completing a window replacement therefore means more than finishing installation; it also means keeping a traceable record that supports use, maintenance questions and a consistent exterior over time.
Frequently asked questions
Do I need approval for every new condo window?
No single answer covers every condominium or location. Check the building’s current governing documents and obtain a written response from the person or body authorized to assess your proposal. Separately, ask the local permitting authority whether the building type and planned work require public approval. Provide photographs plus an exact description of the exterior and installation; do not order on the strength of an informal comment or another suite’s replacement.
Which details matter most for a shared exterior appearance?
Record the window form, number of sashes, fixed and operable sections, visible frame widths, glazing bars, glass-dividing bars, colour, transoms and opening direction. Full façade photographs and detail photographs of the existing window complete the record. Request written confirmation of the features that should be retained for that particular building.
Can I choose a different exterior window if it works better inside?
A different interior use is a valid planning consideration, but it does not by itself decide the visible design. Balance the preferred operation against the agreed exterior. A differently divided section or hinge arrangement may resolve the conflict. Discuss departures with the responsible parties and installer before field measurement.
What should be prepared for installation access?
Check the stairs, elevator, suite door, hallways, room access and, where applicable, balcony or courtyard. Remove movable items by the window and confirm protection and any use of common areas with management and the installer. The installer should assess accessibility on site; your own measurements are preparation for that discussion only.
When should I order a window?
Only after field measurements are confirmed, the design is settled and the approval process is complete. Before ordering, check room assignment, dimensions, sash count, hinging, opening direction, divisions and agreed installation work. The stated delivery time of four to six weeks remains subject to order confirmation, so do not plan solely around an unconfirmed estimate.
Next steps
Treat a condo window as one coordinated file rather than separate product and installation decisions. Gather property documents, photographs and an opening schedule; define the exterior details; test operation in the furnished room; then have the opening, connections and access route assessed on site. Confirm both the building process and any local permit route before the order reflects the approved, measured configuration. Written responses and a careful handover make the record useful now and when another window is replaced later.
