
Set the Order Date for a Spring-Ready Greenhouse
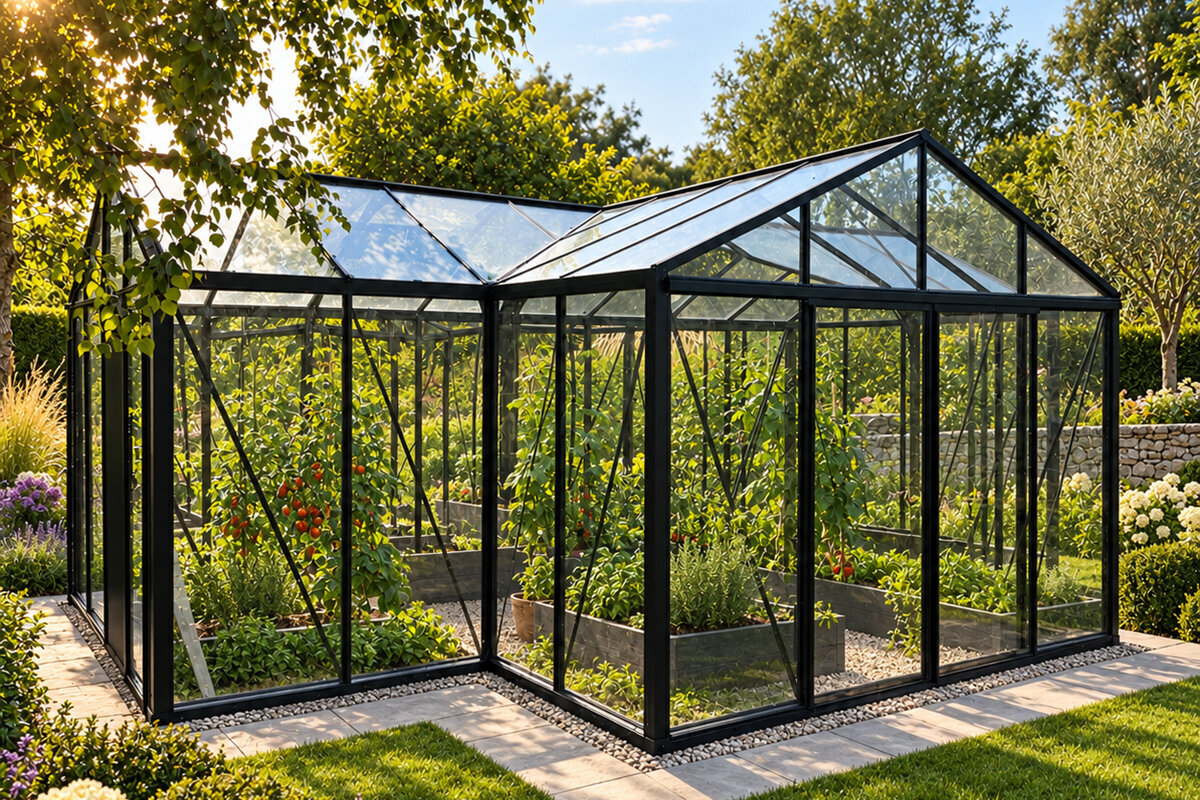

Spring Greenhouse Planning for Canadian Gardens
Build the project around the day you want to begin growing
For spring use, treat the first practical day inside the greenhouse as your finish line. Then arrange the site assessment, ground preparation, product choice, order and assembly as connected stages that lead to that goal.
First decide what “ready” means for you: sowing seeds, tending young plants or bringing container plants under cover. Spring conditions vary widely across Canada, so your intended use date is more helpful than a single national month. Working back from that date leaves room for decisions, questions and property work without forcing every task into the same rushed period.
The site can require more work than expected. Paths may need adjustment, the ground may need levelling or existing planting may have to move before the location is stable and accessible. Decide early how the components will travel from the delivery point to the site and where they can remain dry and protected before assembly.
Let project readiness—not a generic calendar date—determine when you order. Settle the dimensions, intended use and construction approach early enough to compare the available options carefully. Because applicable rules depend on the province or territory, municipality and property, confirm permit and zoning questions with the appropriate local office before committing to irreversible site work.
01 · Starting point
Define your intended spring start
A spring-ready greenhouse serves different purposes from one garden to the next. It might support early sowing, give young plants protected growing time or shelter tender container plants during unsettled weather. Define the first task it must handle and list everything that must be complete beforehand. That personal milestone is more useful than a vague aim to finish sometime during spring.
The timeline includes more than construction. Product comparison, ordering, reviewing documentation and preparing the property precede assembly; cleaning, arranging the interior and checking doors and ventilation follow it. Separating those tasks shows where you need flexibility and when the order should enter the sequence.
- Note the first intended use, such as propagation, overwintering or protected storage for container plants.
- Leave a time buffer for changing weather, site work and decisions that only become clear on location.
For a freestanding garden location, a standard Classic greenhouse for the garden can provide a starting point, with its size chosen to suit your use and available space.
02 · Site
The site determines the realistic schedule
A proposed site must work through the season, not simply look attractive. Observe daylight, nearby trees, paths and access from the house. Check soil and drainage as well: spring thaw or prolonged rain can make a location behave very differently than it does in midsummer. Comparing conditions at several times of day will give you a more useful picture.
Trace the route that greenhouse parts, tools, soil, plants and shelving will take. Measure gates, passages and tight turns rather than assuming they are adequate. For a lean-to location, inspect the wall, nearby services and available working room. Direct property-specific permit or building questions to the municipality responsible for the site.
- Measure the area, access routes and critical pinch points before narrowing down the dimensions.
- Observe shade, standing water and wind at the proposed location at different times of day where possible.
Where a house wall forms part of the plan, consider a full-size classic lean-to greenhouse only after the wall, foundation area and access have been assessed closely.
03 · Ground preparation
Plan the foundation and preparation early
Do not postpone the base decision until after ordering. The appropriate approach depends on the model, terrain, soil and current assembly requirements. A stable, level support and a plan for surface water are important. Seek qualified local advice where slopes, loose ground or complicated drainage make the solution uncertain.
Consider the order of work as well. Existing beds, shrubs, utility lines or paving may affect the schedule. Resolving these matters in advance helps avoid last-minute changes before assembly. Keep plans and measurements together; they make conversations with helpers or tradespeople easier. Your schedule becomes dependable only when the site can genuinely be prepared.
- Choose the base approach using product requirements, soil conditions and the local situation.
- Mark the proposed footprint on site to check clearances, doors and working routes in real space.
For a freestanding option, a standard Classic greenhouse helps make the required footprint visible early in garden planning.
04 · Selection
Choose the right configuration without rushing
Product selection should grow out of intended use, not simply an empty garden corner. Consider which plants you will keep, whether shelving or work benches are planned and how much room you need to move around. Door placement and routes between the house, water source and compost also shape day-to-day use. Selecting early gives you time to read documentation and ask focused questions.
Compare the complete working arrangement rather than external dimensions alone. A greenhouse set against a wall may shorten everyday routes, but it must be coordinated carefully with the existing structure. A freestanding model creates different placement choices. Before deciding, review the current product description, assembly guidance and any additions the selected configuration needs.
- Base the size and interior layout on plant volume, working habits and the routes you want to keep clear.
- Keep questions about the foundation, accessories and assembly in writing so nothing is missed when ordering.
For a location near a patio or house, a full-size classic lean-to greenhouse can be a suitable space solution when the building conditions have been checked.


05 · Ordering
Place the order with the project details settled
Once the model, site and assembly approach have been chosen, compare the selected dimensions, configuration and additions with your property sketch one more time. Enter contact and access details accurately wherever the order process requests them. Ask about anything unclear before completing the purchase instead of guessing what the process includes.
Avoid building the project around an unverified lead time. Request up-to-date information about the order, possible scheduling and delivery when you are ready to proceed. Meanwhile, prepare the site so the components can be handled methodically when they arrive. The order belongs within the project plan; it does not replace one.
- Match the model, dimensions, configuration and accessories to your site sketch immediately before ordering.
- Request current process information directly and retain enough organizational flexibility regardless.
For a freestanding garden solution, you can focus your choice on the season ahead with a standard Classic greenhouse for propagation that suits your own planting plans.
06 · Organization
Set up a workable delivery and assembly plan
Give the components a planned route and destination before assembly day. Reserve a dry, protected staging area if work cannot begin immediately, clear the access paths and keep vulnerable planting away from the transport route. Check the assembly documentation for required tools and the number of people needed at different stages.
Read the current assembly instructions from beginning to end before opening and sorting the packages. This helps divide the work into manageable stages and reveals where experienced assistance may be useful. If you are considering professional help, ask about availability for your location, price and timing rather than assuming it is included. Follow the applicable instructions and safety requirements, then reserve time to arrange the interior.
- Create a protected staging area and keep the routes between it, the site and the house clear.
- Review assembly documentation early for tool needs, work stages and tasks where help would be useful.
For a wall-side project, a full-size regular lean-to greenhouse should be assembled only after the wall area and working space are clearly prepared.
07 · Season start
Allow time to set up after assembly
Completing the frame does not make the greenhouse ready for its first crop. Clean the interior, then assign practical places for pots, seed, tools and watering equipment. Walk through the routine before filling the space: check where plants will sit, how you will reach them and whether a clear work area remains.
Spend the first few days learning how the greenhouse responds to local spring weather. Sun, temperature and moisture can change sharply between Canadian regions and from one property to another. Begin with a manageable group of plants, observe the conditions and adjust the layout or routine before using the whole interior.
- Arrange routes, storage and work surfaces before the first sowing instead of rearranging the interior later.
- Start with a few plants and observe conditions before filling the entire space.
For a flexible interior, a freestanding standard Classic greenhouse provides a useful basis for shelving, tables and seasonal plant spaces.
08 · Final checks
Close the local and practical gaps before spring
Finish with a property-specific review. Confirm that the measurements, location, base and access are documented, and decide who will assemble the greenhouse and protect the components beforehand. Canada’s national model codes do not create one permit rule for every property, so identify the province or territory and municipality. Ask the local office about applicable zoning, setbacks, height, drainage, lot coverage, heritage considerations and permit requirements.
Where the greenhouse connects with existing buildings or garden structures, consider asking your insurer how the particular addition would be treated. Request details for your own policy instead of assuming automatic coverage. Keep the order, product and assembly records together so they are available for future reference.
- Confirm possible local requirements with the responsible authority before carrying out irreversible work on the site.
- Discuss insurance based on your specific property and keep all relevant documentation accessible.
For a building-adjacent option, a large traditional lean-to greenhouse is best considered within an overall plan for the wall area, access and garden use.

Comparison
Which planning route suits your project?
Your best ordering point reflects how many project questions remain, not the name of a month. Use the situations below to identify what must be settled for your property before the order moves ahead. The table is a planning prompt rather than a promised schedule.
| Starting situation | Clarify now | Complete before ordering |
|---|---|---|
| Freestanding location | Light, dimensions, access and intended use | Mark the footprint and decide on the base approach |
| Location close to the house | Wall area, connections and working space | Assess the building structure and prepare the foundation area |
| Uncertain garden plan | Planting goals and preferred size | Make a sketch and measure routes and clearances |
| Site already prepared | Model, equipment and assembly arrangements | Review documentation and prepare a complete order |
| Spring start firmly planned | Interior setup and first crops | Schedule assembly, cleaning and moving in |
Build the timeline from the first working day
Picture the first day the greenhouse must be usable, then place each earlier task in sequence. This method gives the project structure without attaching it to an unsupported delivery period or universal calendar date.
01
Set the use date
Decide when you want to begin sowing, tending young plants or placing tender plants under cover. Set a clear, personal seasonal goal.
02
Sketch the use and size
Plan plant types, shelving, a work table and circulation space. Compare these needs with the available area and garden routes.
03
Assess the site on location
Measure the space and access points, observe light and drainage, and mark the footprint. Confirm local requirements individually where needed.
04
Prepare the base
Develop a stable, level foundation approach suited to the model and location. Organize required work before the project enters the assembly stage.
05
Organize ordering and assembly
Review your selection and documentation, request current order-process information and plan storage, tools, help and interior setup.
Pre-order checklist
When each item below has a clear answer, you have enough information to prepare the order responsibly and organize the work leading to your spring start.
01. The intended first use date and purpose of the greenhouse are written down.
02. The site has been checked at different times of day for light, shade, moisture and accessibility.
03. The footprint, routes, gates and other narrow points have been measured on site and noted on a sketch.
04. The selected size allows for plants, fittings, working routines and adequate room to move inside.
05. The base has been designed to suit the assembly requirements and actual ground conditions.
06. Possible local requirements have been checked for the specific property with the appropriate authority.
07. A practical arrangement, including protected staging, is in place for components, tools and assembly.
08. The model, configuration and desired additions have been carefully checked before completing the order.
Spring greenhouse ordering: common questions
When should I order a greenhouse for spring?
Order when the site, configuration, foundation approach and assembly responsibilities are clear enough to act on. Begin with the day you want to use the space and schedule the necessary work before it. This prevents the greenhouse from arriving while major property decisions are still unresolved.
Can I prepare the greenhouse site only after delivery?
Preparing only after delivery leaves less room to respond to weather or site problems. Settle the base, access route and protected staging area beforehand wherever possible. Components can then be stored and handled methodically, and assembly can begin when the property and conditions are ready.
Do I need a permit for a greenhouse?
There is no single Canada-wide answer based only on calling a structure a greenhouse. The National Research Council directs users to provincial or territorial officials to identify the codes and regulations that apply locally; municipal requirements can also affect a project. Identify the province or territory and municipality, then ask the responsible offices about your design, location, dimensions, setbacks, drainage, zoning and any permit requirements before starting irreversible work.
What should I consider for a site against a house wall?
Review the wall area, space for the base and assembly, and accessibility carefully. Light, water management and enough room for everyday greenhouse use are also important. Since every building differs, follow the product documentation and have structural questions assessed by a qualified professional where appropriate.
What is the best way to plan assembly?
Read the current assembly documentation beforehand, prepare tools and protected staging areas, and clear the route to the site. Divide the work into sensible stages. If some tasks exceed your experience or capacity, help from a suitable local professional may be the better way to organize the project.
Should I speak with my insurer beforehand?
For a new greenhouse, it may be useful to ask your insurer how your individual situation is classified and what coverage applies. Do not rely on general assumptions. Keep information about the site and configuration available, then retain order and product documents in an organized way.
Explore greenhouses
A calmer spring begins with a finished plan
The useful question is not which month everyone should order in, but when your own property and project will be ready to move ahead. Starting with the day you want to grow under cover lets you arrange the site, base, model choice and assembly in a logical order.
Concentrate first on decisions that are costly or awkward to change: dimensions, access, foundation and intended use. Once those points are documented, you can compare suitable greenhouse options and approach the order with fewer unknowns. Bloomcabin offers designs for different garden layouts and growing plans.
Explore a greenhouse that fits your measured site, planting goals and preferred beginning to the spring growing season.
