


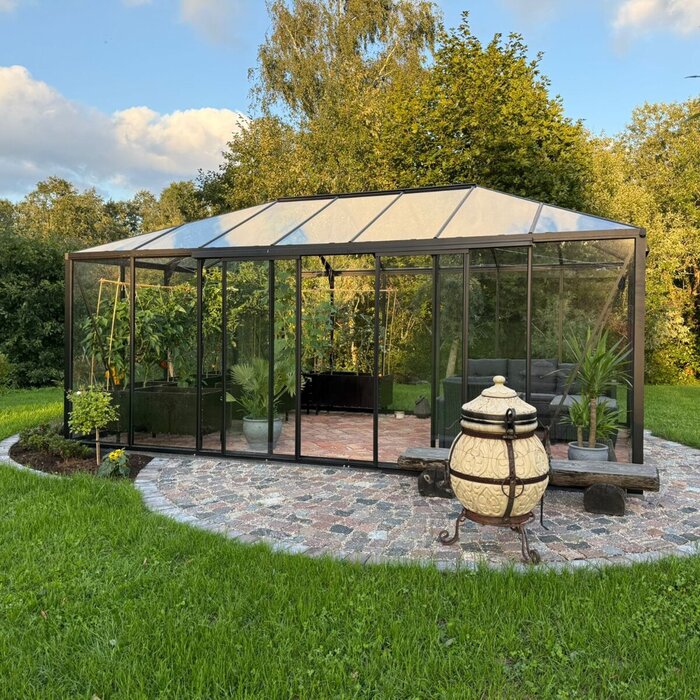

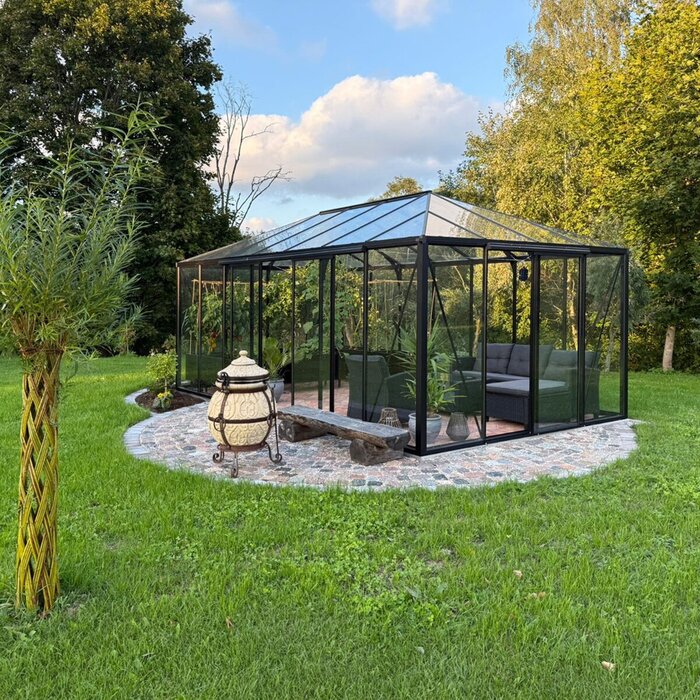





Bloomcabin Oasis Pyramid Greenhouse
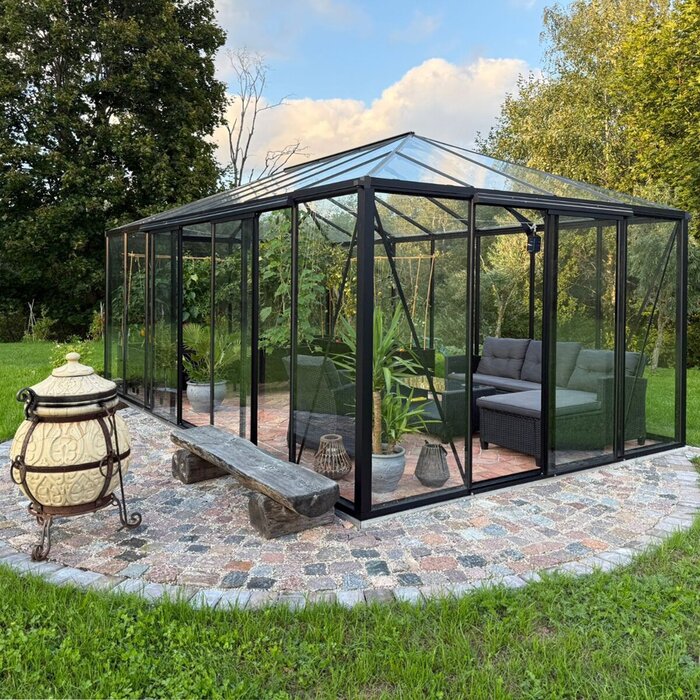
A pyramid greenhouse with a distinctive roofline, generous central height and adaptable interior
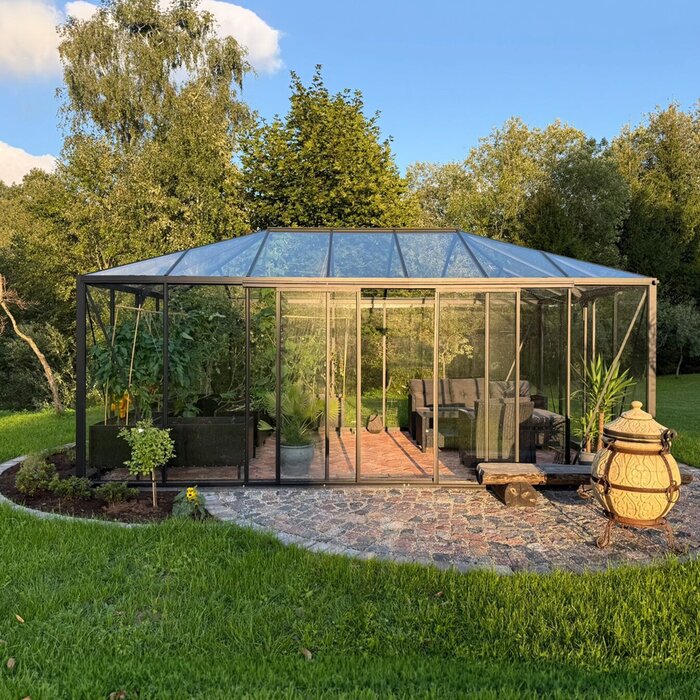
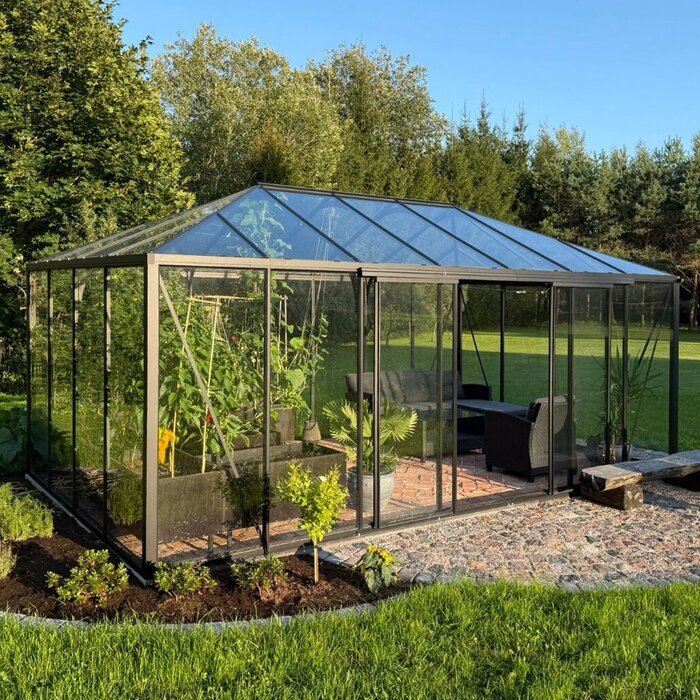
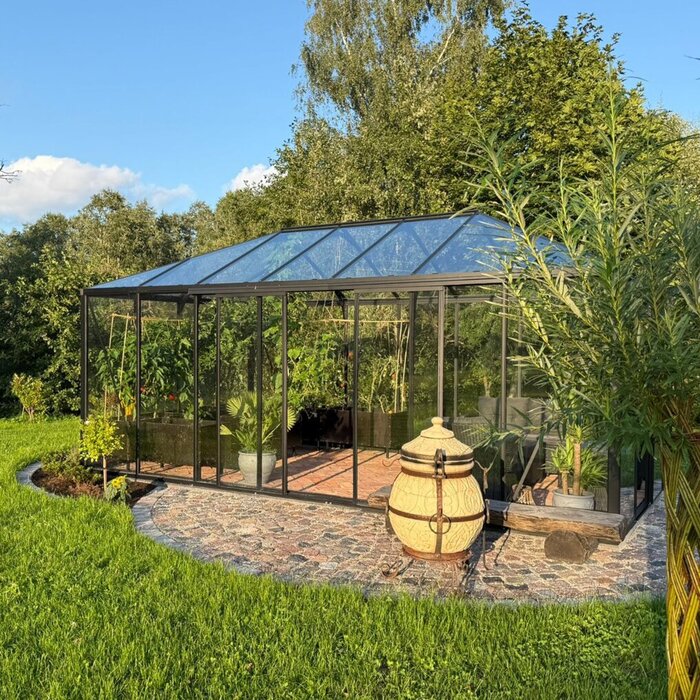
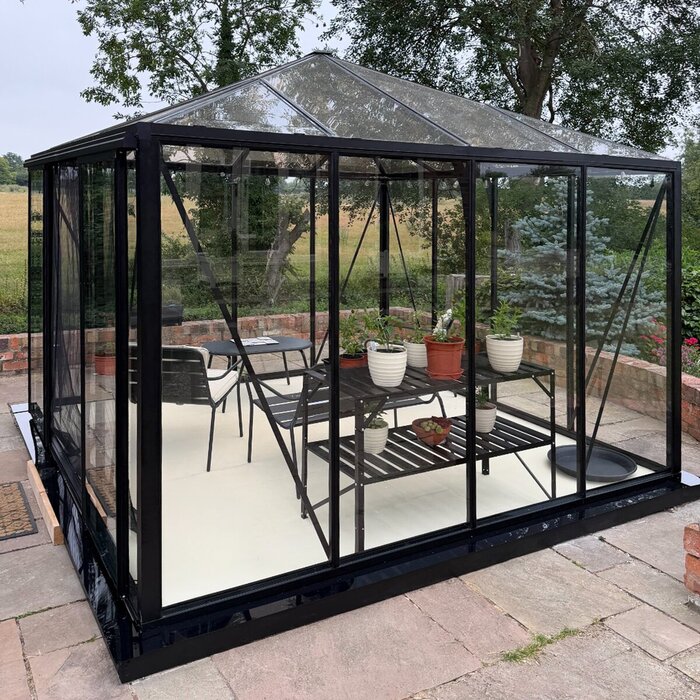
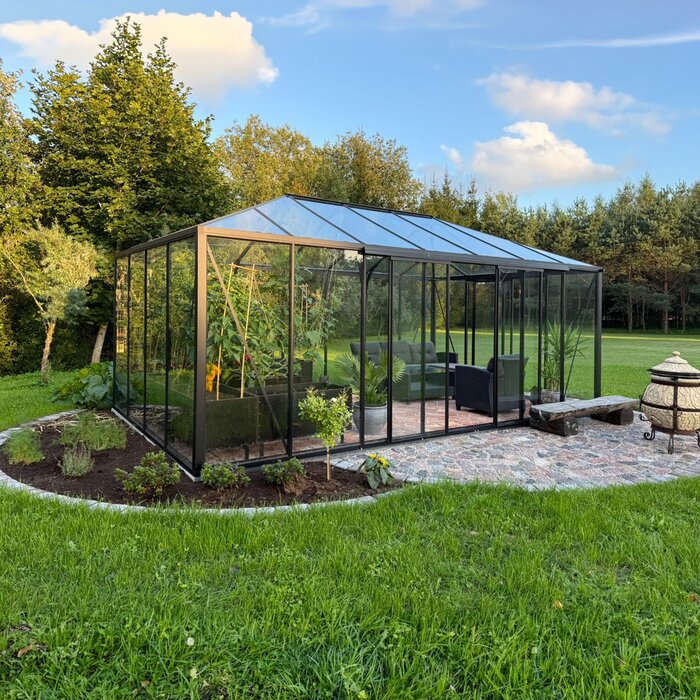
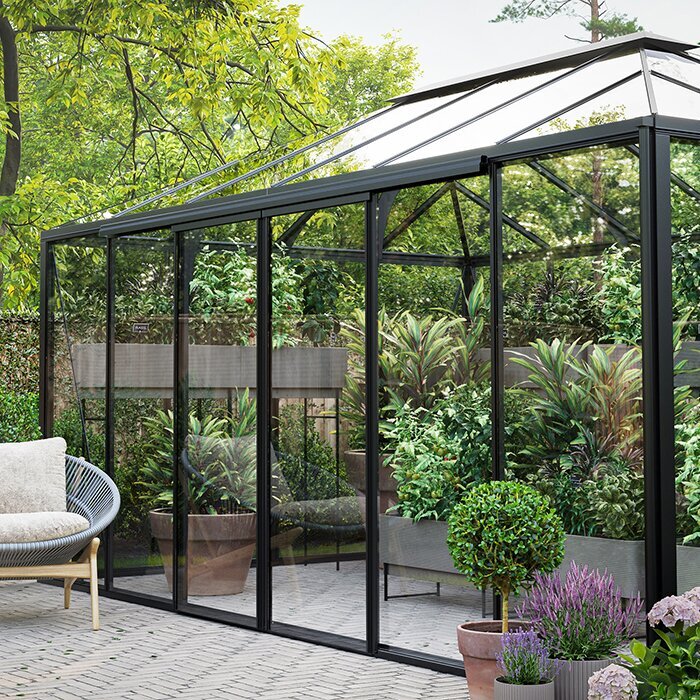
The Bloomcabin Oasis Pyramid Greenhouse pairs protected growing space with a striking garden feature. Its roof planes rise symmetrically to the centre, giving it the character of a compact glass pavilion while leaving practical room for propagation, plant care and harvesting. Oasis makes an impression beside the house or among beds, paths and shrubs.
The current range includes square and rectangular footprints. Several glazing, frame-colour and door-layout configurations are available. These choices shape more than the appearance: they affect storage space, circulation, light and everyday greenhouse work. See the technical overview for construction, gutter and aluminium-base details.
Plan sunlight, views from the home, ground conditions and access together. Effective summer ventilation, a short route to water and clear space in front of the door are equally important. A scale drawing helps identify the right footprint and reveal clashes with paths, beds or existing drainage lines early. Discover the Oasis Pyramid Greenhouse at Bloomcabin Canada.
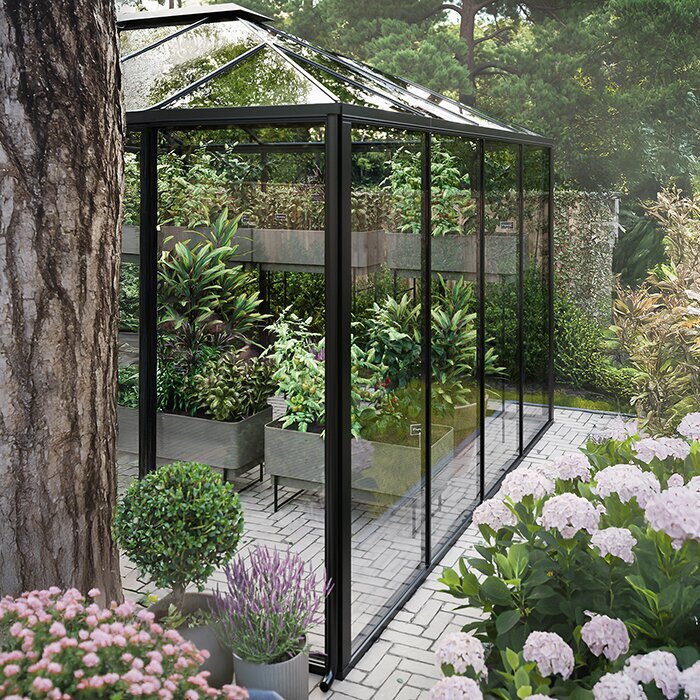
A pyramid form for the garden
How Oasis differs from a greenhouse with a continuous ridge
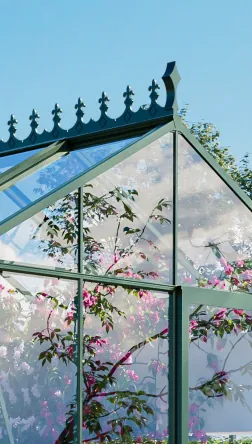
Roof planes rise from several sides to one peak, giving Oasis its unmistakable profile.
Its roofline remains distinctive from different viewpoints, making it well suited to visible parts of the garden.
Inside, the converging roof geometry draws the eye to the centre rather than emphasizing a long axis.
Distinctive silhouette
The clearly structured form suits both contemporary layouts and traditionally planted gardens.
High centre
More headroom at the centre than at the sides
Flexible glazing
Polycarbonate or tempered safety glass
Broad colour choice
RAL colours to coordinate with the home and garden
Light from several roof planes
How the pyramid shape changes daylight through the day
The angled roof planes receive daylight from changing directions. As the sun moves, interior brightness shifts more than it would beneath one continuous roof slope. Not every growing zone will therefore receive the same light at every hour. Before furnishing the greenhouse, watch for shade from the house, trees and hedges in the morning, at midday and later afternoon.
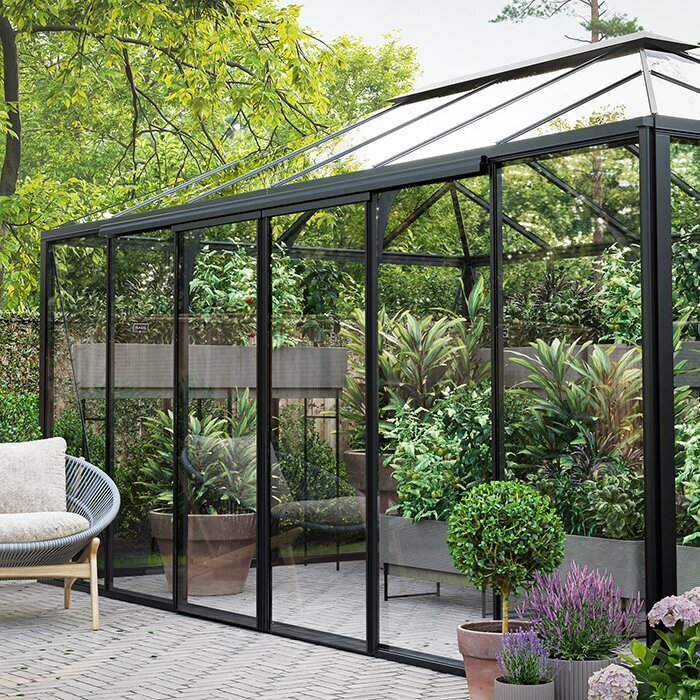
Tempered clear glass leaves plants, flowers and leaf textures easy to see from the garden. Polycarbonate scatters light differently and limits direct views. Weigh the outside appearance against the crops you plan to grow, the privacy you want and whether shelves, pots and supplies should remain visible.
Base the decision on the real site rather than an idealized sunny setting. South-facing areas, reflective walls and sheltered courtyards can collect considerable warmth on clear days. Partly shaded locations need careful crop placement. Assess glazing alongside ventilation habits, possible shading and the intended interior layout.
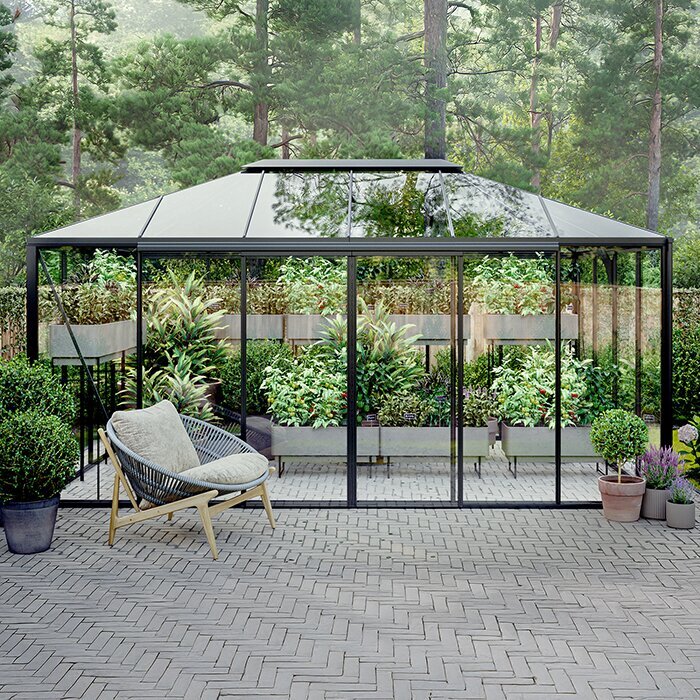
Choosing a site for the pyramid form
4 considerations for choosing the site
Because Oasis is a prominent garden structure, growing conditions and visual placement should work together.
01
View from the house
Mark the proposed footprint in the garden first. Then check how the roof peak appears from frequently used rooms, the patio and key paths. A pleasing sightline is valuable, but should not compromise light, access or plant growth.
02
Sun
Look beyond compass direction and assess the actual light pattern at different times of day. Deciduous trees change their shade across the year, while buildings and evergreen hedges block light consistently. The best location also depends on the plants you intend to grow.
03
Door side
Position the sliding door so soil, pots, harvest crates and watering equipment can be moved without tight turns. The route should remain easy to use in wet weather. Leave enough open space at the entrance for opening the door, setting items down and manoeuvring.
04
Rainwater
Record the gutter-outlet positions when measuring the site. Allow room beside them for pipework or suitable storage without blocking access to the structure. Plan downstream drainage with the base and site gradient.
Technical details
Key dimensions and equipment at a glance
Size overview
14 sizes
Approximately 5.6–14.2 m²
Compact version
Approx. 2.35 × 2.35 m
Roof peak: 2.69 m; wall height: 1.93 m; door height: 1.85 m
Square version
Approx. 3.10 × 3.10 m
Roof peak: 2.64 m; wall height: 1.93 m; door height: 1.85 m
Rectangular version
Approx. 3.10 × 3.85 m
Large rectangular version
Approx. 3.10 × 4.60 m
Construction
Reinforced, powder-coated aluminium
Equipment includes integrated gutters, a built-in aluminium base and different sliding-door options. When configuring, check which door solution suits the selected wall width and planned main path. Powder-coated profiles can be coordinated with façades, window frames or other permanent garden features through the RAL colour choice.
Making use of the height beneath the roof peak
The rising roof planes create especially useful height at the centre
Divide the floor plan into height zones from the centre outward. This allows trellises and taller crops where the roof geometry provides clearance, while lower areas remain available for compact plants or work surfaces.
Tomatoes, climbing crops and larger citrus plants can suit central zones. Position containers and supports so fruit, shoots and watering points remain reachable from the main aisle, without permanently shading nearby crops.
Plan around the available height at each actual plant position, not only the roof-peak measurement. Draw tall crops with their containers and supports in a cross-section; usable clearance decreases toward the sides with the roof slope.
Bringing growing and garden design together
4 practical ways to use the space
01
Centrepiece of a kitchen garden
As the focus of a kitchen garden, Oasis can create short links to raised beds, herbs, compost and a water point. Heat-loving crops can be concentrated inside while hardy vegetables grow outdoors. Clear paths make it easier to move harvests, plant waste and garden tools between areas.
02
Zone for tall crops
Climbers and large containers can be arranged beneath the roof centre so height is not restricted too soon. Edge zones remain free for lower crops, seedling trays or work surfaces. Use stable plant supports that do not intrude into door or ventilation areas.
03
Flowering plants behind glass
Flowering and textural plants can form a garden display visible through clear glass. Presentation should not make care difficult: spent blooms, watering points and the backs of containers must stay accessible. A graduated arrangement prevents larger specimens from completely obscuring smaller ones.
04
Flexible reserve space
A deliberately open zone makes it easier to move between propagation, peak season and overwintering. It can temporarily hold young plants, harvest crates or extra containers. The greenhouse remains adaptable without constantly rebuilding permanent growing areas.
Ventilation, paths and seasonal planning
The Oasis layout should be able to change with the plants. Fix permanent elements only where they do not hinder use of the door and roof vents or seasonal rearrangement.
Ventilation and shading
On sunny days, temperatures behind glazing can rise quickly even while the outdoor air feels pleasant. Set ventilation and, where needed, shading according to greenhouse conditions rather than outdoor temperature alone. A bright site is valuable, but constant heavy shade reduces the light plants need.
Roof vents let warm air escape at the top, while the sliding door supports incoming air. Tall plants and supports must not block these openings if effective air exchange is to occur. Regular checks matter particularly when weather changes sharply within a day. Before being away, decide how ventilation and watering will remain dependable.
Adjustable shading can be matched to sun angle, growth stage and current occupancy. Install and operate it so roof vents work freely and nothing rubs against the glazing or frame. A small seating area may need a different shade zone than light-hungry fruiting vegetables.
Working routes and furnishing
The main aisle should run directly from the sliding door into the greenhouse. Growing areas, shelves and controls need to be reachable without leaning over delicate crops. Leave floor-level room to turn, set down crates and work with a watering can or hose.
Test shelves and potting tables with the intended pots or trays before fixing their final positions. Check the remaining aisle with overhanging plants and stored work crates, not only when the workspace is empty.
Freestanding equipment must stand securely on the chosen floor and stay out of circulation routes. Check shelves and worktables with filled trays or pots in use. Give heavy containers a permanently accessible position from the outset.
Seasonal change
Spring arrives at very different times across Canada. When seed-starting gets underway, keep open work surfaces for trays, transplanting seedlings and gradually moving young plants on. Group plants by growth stage so watering and checks remain manageable. Before larger crops take up permanent positions, decide which tables will be removed or reassigned.
In summer, air movement, water supply and harvest access become priorities. Regularly guide vigorous shoots away from walking and ventilation areas. Watering is easier when plants with similar needs are grouped and valves or hose connections can be reached without blocking the aisle.
In fall, rearrange the space for sensitive container plants. Keep diseased leaves, pests and unnecessarily damp materials out when moving plants inside. Movable equipment creates room, but not every plant belongs in the winter setup: choose those that fit the available space and care routine.
Plants, containers and work surfaces
Arrange plants and work areas according to how often they need tending, watering or moving. Sensitive seedlings and regularly used tools belong in accessible zones; larger, permanent containers need stable support and clear care access. This keeps the space functional when plants are at their fullest.
Beds and containers
Whether to grow in beds or containers depends on the crops and desired flexibility. Fixed beds suit long-term planting, while pots and tubs are easier to rearrange. Set the division before fitting out the greenhouse, together with the main aisle and watering arrangement.
Containers need stable support and controlled drainage. Place saucers, drains and watering points so escaped water can be noticed and removed quickly. Do not allow lasting dampness to collect beneath containers or directly against the aluminium base.
Free floor area is not the only consideration. Overhanging leaves, wide containers and open work crates all need extra space. A clear separation between growing zones and the main aisle makes care, harvesting and cleaning easier throughout the season.
Caring for tall crops
Tomatoes, climbing plants and larger citrus specimens need side access as well as height. Shoots, leaves and fruit should remain within reach without pushing aside neighbouring plants. Allow for their eventual width when positioning young plants.
Check trellises, ties and supports regularly so they do not constrict growing shoots. Plants that are frequently pinched out, pruned or harvested belong in easy-to-reach places.
Lower crops can use edge zones if they receive enough light there and are not hidden behind tall containers when watering.
A seed-starting and repotting station
A compact potting bench provides a dedicated surface for sowing, transplanting seedlings and repotting. Choose its depth and position so the main aisle stays clear and containers stored below remain accessible.
The work surface should be easy to clean and offer sufficient room for trays, pots and the tools currently in use. Return unused materials afterwards to a dry, accessible place.
A movable table preserves flexibility and can be removed or shifted when mature plants or overwintering containers need more space.
Watering and equipment
Treat the water connection, hose route and tool storage as one work area. This reduces repeated crossings while watering and keeps controls visible. Gutters, frames and opening elements still need clear access for inspection and cleaning.
Keeping the work area organized
Store small tools, ties and plant labels in one fixed, accessible place. Work surfaces stay clear and essentials are close at hand.
Shelves, containers and garden tools should stand securely, not lean against glazing and not project into the main aisle. Keep frequently used items near the work area; less-used items can go farther back if maintenance access stays open.
Leave enough space between equipment and the structure for cleaning and visual inspection. This also makes it easier to remove leaves, soil and plant debris.
Watering
Especially with larger versions, decide in advance where water will be drawn and distributed. The connection should remain accessible without shifting heavy containers. A hose guide or rest helps prevent kinks and protects plants from damage. Keep electrical components separate from water lines and have both planned by qualified trades for the site.
Separate drip zones can supply crops with different needs more precisely, for example where large tubs sit beside shallow containers. Lines should remain visible enough to spot leaks without becoming trip hazards. Check drippers and outlets regularly because debris can cause uneven watering.
Place filters, valves and shut-offs where they can be reached and where escaping water cannot cause damage. Clear labels simplify operation where several zones are used. Before frost, check which water-carrying components need draining or protection, following the instructions for the components used.
Maintenance
Inspect glazing, gutters, sliding doors and roof vents regularly for dirt, smooth operation and visible damage. Remove leaves from gutters and soil or small stones from door tracks before drainage or operation is affected.
Clean glazing and powder-coated profiles with suitable products and soft tools. Abrasive methods can damage surfaces and glazing.
A thorough clean before bringing in a new collection of plants makes inspection easier and helps prevent old plant debris from remaining in hard-to-reach areas.
Rainwater, flooring and choosing a size
Coordinate floor construction, rainwater use and size selection in a sensible order: establish stable ground and drainage first, then place storage and pipe routes, and finally check the footprint against the complete layout. This prevents permanent fittings from conflicting with the door area or maintenance access later.
Collecting rainwater
Integrated gutters can lead rainfall to suitable storage for vegetable beds and container plants. Short, inspectable pipe runs are easier to monitor, and closed or properly covered storage limits contamination. Before use, check that water condition suits the plants' needs.
Storage size depends on roof area, local rainfall, available space and actual use. A very large tank is not automatically the best choice if it blocks maintenance access or is difficult to clean. Position the draw-off point so watering cans can be filled or lines connected without obstructing the main aisle.
A suitable overflow directs excess water away from the foundation in a controlled manner.
Flooring
A durable, slip-resistant interior floor makes watering, repotting and cleaning easier. It should provide secure footing with wet shoes and support movable tables or containers steadily. Loose soil in the main aisle increases cleaning work and can enter the sliding-door track, so growing and circulation areas may use different finishes.
Depending on the intended use, stone paving, gravel or other suitable permeable surfaces may work well.
The finished floor build-up must align with the door threshold and must not obstruct drainage.
Choosing a size
The right size follows from planned plant numbers, shelf and table dimensions, required room to move and possible seasonal changes. Comparing square metres alone can underestimate the space needed for wide containers, overhanging leaves and open work crates. Also decide whether the room is solely for growing or partly for sitting.
A scale drawing using the true external dimensions of the equipment is more informative than a rough area estimate. Draw in the door, main aisle, potting tables, water point and large containers. Then check that each zone remains accessible without moving other items. Include the expected width of mature plants.
When choosing between a square and rectangular footprint, consider whether the layout will be organized around a central zone or along an axis.
Foundation and installation
A level, stable base is essential for accurate assembly of the whole structure
The built-in aluminium base does not eliminate the need for flat, stable supporting ground. Prepare it for the soil, local frost conditions and intended drainage. Establish the external dimensions and finished levels carefully before work begins. The completed floor and base must not direct water toward the structure or obstruct the sliding door.
Because several roof planes meet above the centre, a precisely level and square base is especially important for assembly. Check level and diagonals first, then assemble in the specified sequence. Store components and glazing safely during the work. Plan suitable access equipment and enough helpers for work at height.
The structure is designed for a wind speed of 30 m/s and a snow load of 210 kg/m². Proper anchoring and supporting ground suited to the site are required. These product figures do not replace a site-specific assessment of snow, wind, anchoring and the base. Before installation, ask the municipal or local permit authority which zoning, setback or permit requirements apply, and have a qualified local designer confirm the adopted provincial or territorial code requirements.
Plan in four steps
1
Define the use
First decide which plants will live there permanently, their expected height and whether you want a small seating area. This establishes the required footprint, suitable work zones and enough reserve for seasonal changes.
2
Test the site
Record when direct sun reaches the proposed area and where buildings, hedges or deciduous trees cast shade. At the same time, check whether access, water route and views work with the selected door side.
3
Choose the equipment
Select the footprint, glazing, suitable sliding-door version and RAL frame colour as one coordinated configuration. Consider the view from the house and existing façade, window-frame and garden colours.
4
Prepare the base
Resolve ground conditions, anchoring, drainage and rainwater routing before assembly. A precisely prepared base makes the roof planes easier to join and avoids difficult corrections during installation.
Frequently asked questions
FAQ – Bloomcabin Oasis Pyramid Greenhouse
How can I check the footprint in my garden before ordering?
Mark the outer outline of the preferred version at the proposed site. Then sketch or set out the main aisle, potting tables, large containers and clear door area within it. This gives a better sense of whether paths and work areas remain adequate once the greenhouse is planted.
What should I consider when orienting the door?
The door should face the main garden route and allow soil, pots and harvest crates to travel as directly as possible. Leave clear space outside for opening, setting things down and manoeuvring. The internal main aisle should connect without a pinch point.
Which glazing gives the clearest view of plants?
Tempered clear glass provides the clearest view of plants, containers and furnishings. Polycarbonate diffuses the light more and gives the greenhouse a more enclosed appearance from outside. Choose according to the transparency you want and the light conditions preferred by the planned crops.
Are double sliding doors possible?
Yes. Double sliding doors are possible on compatible wall sections approximately 3.10 m wide or wider. Before choosing them, check that the wider entrance suits the planned garden route and interior layout.
How should an overflow from rainwater storage be planned?
The overflow should carry excess water away from the greenhouse sub-base in a controlled way. Position storage and pipework so gutters, glazing and maintenance areas remain accessible.
Does the built-in aluminium base replace prepared supporting ground?
No. The integrated aluminium base still requires level, load-bearing and properly drained supporting ground. Careful alignment is especially important so the sliding doors, frame and roof planes meeting at the centre can be assembled correctly.
Can plant growing be combined with a small seating area?
Yes, provided the selected footprint leaves enough room after furnishing. A small bench or compact table should not obstruct the main aisle or plant care and should be easy to move when seasonal space is needed.
What warranty applies?
Bloomcabin provides a 12-year commercial warranty on the greenhouse structure. Review the applicable warranty terms for its scope, conditions and exclusions before purchase.
Bloomcabin Oasis
A striking focal point for the garden
Oasis is particularly suitable when a greenhouse is intended as a deliberate part of the garden design, not simply a functional structure. When the footprint, site, glazing, door side and furnishing are planned together, it becomes a protected growing space that works well day to day.
Before configuring
✓ Mark the outer outline of the selected size at the site and add the clear door area
✓ Add morning, midday and afternoon shade to the site sketch
✓ Compare the frame colour with the façade and window frames in daylight
✓ Include the width of containers, potting tables and mature plants in the interior plan
✓ Choose locations for rainwater storage and a controlled overflow
✓ Coordinate final floor level, drainage and anchoring together