
Should you assemble your pergola or use an installer?
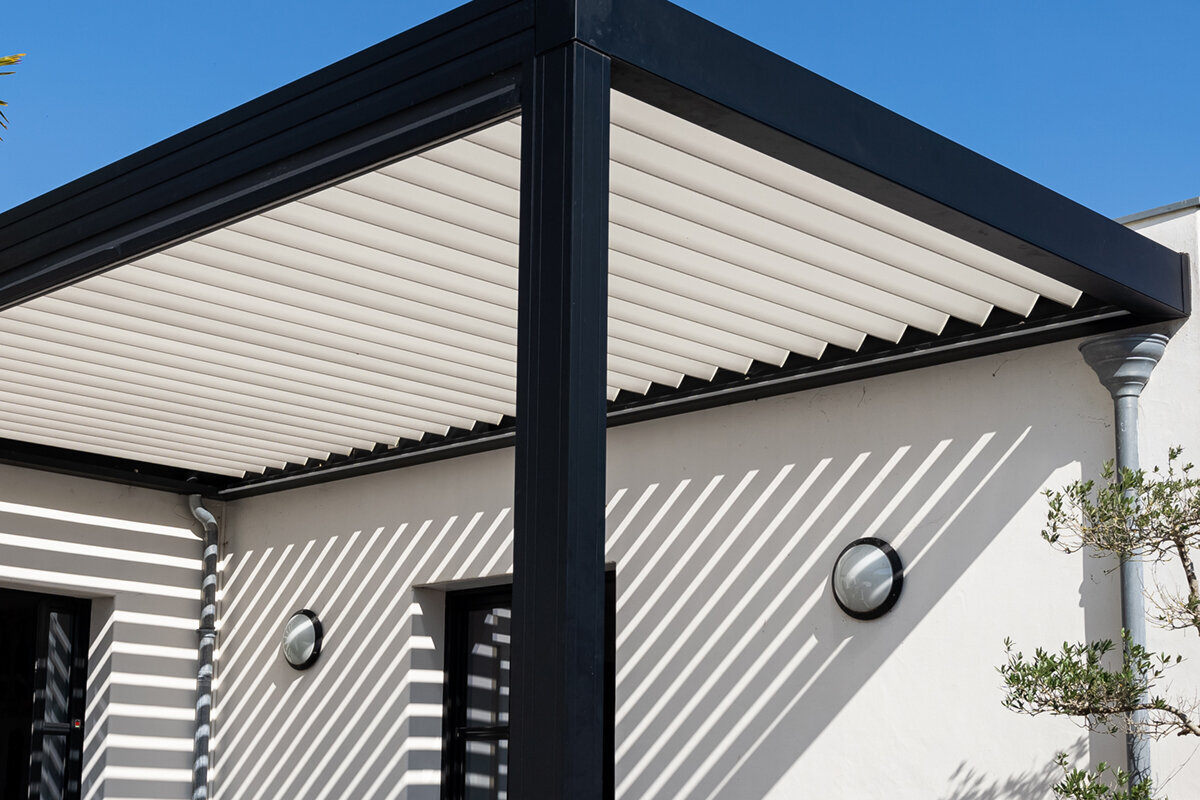

A new aluminium pergola permanently changes how an exterior area works. The choice of home assembly or specialist fitting rests on practical competence, foundations, setting-out, heavy components, assistance and potential electrical tasks.
Taking on the build means managing both the groundwork and the erection process. Although the product manual establishes the order of work, you must still investigate the supporting surface carefully. Correctly located posts, dependable foundations and measured setting-out affect the eventual appearance, geometry and stability of the pergola.
Bringing in an installer is worth considering for uneven ground, awkward access or a job involving several trades. Existing patio finishes, water run-off and powered accessories can all complicate the sequence. A specialist may organise these stages, although the physical site requirements still need resolving before work starts.
Compare the options by task rather than instinct. Consider honestly which jobs you can carry out safely, what support is available and when outside expertise is appropriate. That turns the wish for a pergola into a manageable project with clear responsibilities.
Decision · 01
Assess the installation scope realistically
The parts of a bioclimatic aluminium pergola must meet and operate with precision. Read the complete documentation, inventory the delivered pieces and rehearse the order of operations before work begins. Assess whether you can reproduce setting-out marks, store finishes without damage and keep each stage controlled—not merely whether you can operate the tools.
Allow properly for movement and storage around the property. Roof pieces, uprights and long sections need unobstructed ground space, with enough people to raise them under control. Build checking pauses into the programme. Sketch the sequence or trace it across the site, identifying protected storage and unobstructed carrying paths. Packaging, surface protection and fittings should have a dry, orderly location. Hunting for parts after work has begun, or manoeuvring them across obstacles, invites surface damage, wrong selections and loss of accuracy. If the handling method, support or any stage remains doubtful, consult an experienced installer.
Test the proposed operation before choosing the home-assembly route, using either a drawing or markings on the site. Identify protected holding areas, clear paths for the longest sections and stable positions for each helper. Provide dry, organised storage for wrapping, protective items and fixings. Thoughtful site preparation limits disruptive stops. Parts that cannot be located promptly, or must be manoeuvred around obstructions, are more easily scratched, confused or positioned inaccurately.
Assign responsibility for reading each measurement and for stabilising every piece before work starts. Named roles keep dimensional checks from disappearing amid movement, setting-out and fastening.
- Study the full documentation first, highlighting dimensions, anchoring locations and each inspection point in the sequence.
- Secure enough assistance to carry and position the parts; working alone informally can cause surface damage or poor alignment.
Where movable roof louvres form part of the proposal, review bioclimatic aluminium pergolas and their installation requirements.
DIY work · 02
When DIY installation can work well
Home assembly of a regular aluminium pergola is most manageable on an uncomplicated site. Look for level, reachable working space, an unambiguous post layout and a resolved anchoring method. Familiarity with levels, measurement and controlled fastening is useful, but the instructions for the particular product remain decisive.
Do not squeeze the build between unrelated commitments. Accurate work calls for attention, good light and ample room. Arrange fixings logically, cover finished faces and photograph or note key stages. Inspect edges, joints, steps and perimeter details that could displace a post. Trace how water arrives from neighbouring surfaces as well. Resolving a constraint during preparation is far easier than discovering it after anchors are set. Ask a competent specialist about anything you cannot settle.
A hard-feeling surface does not prove that it will accept the proposed anchors. Determine whether every anchoring location can receive a lasting detail and whether the layout can be set out consistently. Inspect nearby edges, joints, level changes and margins for conflicts with the uprights. Follow the route taken by water from adjacent areas too. Dealing with a constraint before drilling is generally calmer than correcting installed anchors. If the evidence is inconclusive, obtain a site assessment.
Set the intended post grid against the real site before work begins. Existing borders, gullies and changes in level may then reveal conflicts with the proposed sequence.
- Check that every assembly area is accessible without obstruction and that ladders or work equipment can be used securely.
- Protect sufficient time for setting-out and verification; do not lock down anchors simply because the schedule is tight.
With a clear, straightforward plan, standard aluminium pergolas offer an understandable starting point for DIY assembly.
Groundwork · 03
Confirm foundations and fixings first
Treat the foundation as the starting point of the decision, not a secondary detail. An existing patio might work, but its build-up, condition and anchoring possibilities require investigation. The visible paving does not establish what supports it. Falls, proximity to edges, water management and hidden utilities must be considered before any hole is made.
Do not settle the post grid until the foundation dimensions and reference lines are clear. Work from a measured setting-out drawing, using diagonal readings to establish square geometry. Where the concrete, underlying build-up or anchor selection is uncertain, have a competent person inspect the site. Review tools, access steps and circulation space around the frame too. Pause the job whenever conditions, visibility or reduced assistance prevent deliberate, controlled work.
Use the manual to create a brief pre-start inventory of materials and equipment. In addition to the main tools, provide items for layout marks, cleaning and cushioned storage. Inspect ladders and steps, then preserve enough room to move safely around the frame. Avoid improvised arrangements if a piece cannot be restrained or a work position cannot be reached securely. Preparation also includes suspending the task when the weather, available light or number of helpers undermines concentration.
Add every unusual site feature to a working drawing as soon as it is found. Reference lines, clearances and obstructions shown there make discussions easier and give helpers or advisers a dependable record for later stages.
- Investigate how the present surface is built and whether it is sound before choosing anchors or laying out holes.
- Recheck reference lines and diagonal readings; modest errors may become conspicuous once the roof frame goes together.
For a carefully planned outdoor canopy, bioclimatic pergola solutions depend on an accurately prepared base.
Equipment · 04
Prepare tools, helpers and safe working
Pergola erection usually demands more than a basic tool case. Select measurement, drilling and fastening equipment for the particular installation, together with stable access aids and protection for eyes and hands. Charge batteries beforehand, and verify that spanners, bits and drills match both the anchors and supporting material. The wrong equipment can spoil fastener heads or send holes off line.
Organising the people is equally important. Nominate one person to read and confirm dimensions while the others steady or fasten each piece. Agree lifting calls, and support every component whenever it is upright. Follow the same geometry check each time, moving from floor references to uprights, beams and cross-corner readings. Write the readings down rather than judging by sight. Before any final torque is applied, another helper should review the joints; rotated sections and displaced reference lines are then easier to catch.
Repeat one documented alignment procedure after each major stage. First verify the floor marks, then inspect uprights and beams before taking cross-corner measurements. Keep a written set of readings instead of accepting what looks straight from one position. A fresh visual inspection by another helper is valuable before fasteners receive their final tightening. It can reveal rotated profiles or movement away from the set-out marks. Maintaining this discipline also simplifies later components, as every subsequent part starts from dependable geometry.
Separate carrying paths from measuring and assembly stations. Helpers can transport long sections without disturbing layout marks, protected surfaces or containers of sorted fittings.
- Lay out the measuring kit, correct drills, stable steps and personal protection before any component is raised.
- Give each person a defined role so supporting, checking and fastening are coordinated rather than improvised together.
If you organise the build yourself, check the documentation for classic aluminium pergolas especially carefully for tool and helper requirements.
Alignment · 05
Precision shapes the finished result
Straight uprights and accurately related beams give a pergola its composed, well-finished appearance. Leave final tightening until you have verified the principal geometry. Take readings more than once, progress section by section and view the frame from several positions. On a broad installation, minor errors can otherwise travel through later components and remain noticeable in both appearance and operation.
Specialist fitting is especially useful when the site demands close adaptation. Changes in level, limited working room and junctions with established exterior features all affect the order of work. A home installer should pause at the same point: add further pieces and complete the fixings only after checking dimensions, verticals and junctions against the manual. Decide on controls, lights and accessories early, then brief the electrical contractor so cable provision and mechanical details are resolved before the visible finishes are closed.
Start electrical discussions with the intended activities beneath the pergola. Map sensible positions for switches, lights and other accessories, while identifying the parts that must stay reachable for use or maintenance. Give this information to the electrical contractor before mechanical work advances, allowing routes and mounting details to be coordinated. Late decisions can leave cable penetrations, covers or brackets in inconvenient positions after the main surfaces are complete. Early coordination is therefore a way to protect the finished aluminium pergola from avoidable alteration.
Before applying final torque, walk around the normal viewing positions across the patio and garden and inspect the result again.
- Take different kinds of readings: verticality, line, reference spacing and cross-corner measurements each reveal a separate error.
- Where the product manual allows, complete final tightening only after the entire interim inspection has been signed off.
For accurate roof and post geometry, bioclimatic aluminium pergola models require precision from the outset.
Electrical planning · 06
Consider electrical connections separately
Lighting, controls and other powered accessories introduce an interface between structural and electrical work. Establish likely cable routes and equipment locations early to avoid makeshift visible solutions. You may undertake suitable non-electrical preparation, but a Registered Electrical Contractor should determine whether the proposed work is Restricted Electrical Works and handle any work and certification that fall within that scope.
Ask the contractor what information and site preparation will assist the electrical design. Useful details include the proposed location, expected equipment, existing supply and preferred method of control. This conversation matters even when an installer manages the whole pergola build, because the structural and powered elements must be coordinated. Supply photographs, access notes and information about the present surface. Record who owns each handover among foundation, erection and electrical tasks so responsibilities remain unambiguous.
Give an installer a concise site brief before arranging attendance. Photographs, entry constraints and information about current paving or finishes can expose problems at the outset. Ask which preparations must be completed for the agreed date and where delivered components should be stored. Document the boundaries between foundation work, pergola erection and electrical tasks in plain language. This lets you organise the visit without personally making technical decisions that belong to the relevant contractor.
Support the discussion with a basic drawing of intended equipment locations and available approaches.
- Resolve likely wiring paths and connection locations ahead of erection, avoiding later cuts, detours or reopening of finished components.
- Ask a Registered Electrical Contractor to assess the connection work, complete anything within the required scope and provide applicable certification.
Where the overall exterior layout has already been resolved, standard aluminium pergolas allow electrical requirements to be incorporated before erection begins.
Professional fitting · 07
What a specialist installer can cover
Engaging an installer need not mean paying only for component assembly. The agreed package might cover sequencing, dimensional setting-out and orderly erection over a ready foundation. Ask for a detailed boundary of service before appointment: does it include surveying, foundation preparation, site access, disposal of wrapping or liaison with another trade? Written inclusions and exclusions make competing proposals meaningfully comparable.
The owner still makes essential choices when specialists are involved. State the intended position, use and accessories, and provide reliable site information. Record utility routes, falls and restrictions on access as early as possible. Questions about Irish planning or other local requirements should go to the relevant authority, not be answered by copying a neighbour's project. Divide the job into work you can manage, unresolved matters and specialist tasks. Lack of a dependable approach to a critical stage is a sound reason to seek help.
Sort the project into three practical groups: activities you can control safely, matters still requiring investigation and specialist-only stages. Include preparation, delivery movement, dimensional verification and likely remedial tasks as well as the erection itself. Then test whether your available people and equipment really support that division. An unresolved critical stage indicates that assistance is warranted. A combined arrangement may be efficient, with you completing agreed preparatory items and tradespeople taking responsibility for the difficult interfaces.
For a shared-work arrangement, identify every transfer of responsibility well ahead of the installation date.
- Obtain written details of the service boundaries, site prerequisites and responsibilities for the agreed installation visit.
- Describe property constraints in advance: entry routes, finishes, falls, utility locations and restricted work zones all matter.
At demanding locations, professional fitting for bioclimatic aluminium pergolas can support an organised installation.
Decision · 08
Select an installation approach that fits the job
Choose by reference to the job, the site and the resources genuinely available. There is no requirement to build it personally, while hiring an installer says nothing about your competence. Clear site information, relevant skills, dependable equipment and assistance may make home assembly realistic. External expertise can instead protect time and reduce exposure at the most demanding stages.
Reach this decision before placing the order if possible, rather than first confronting it during unpacking. Note every unresolved matter concerning the base, work area, assistance, equipment, electrics and ownership of tasks. A competent site visit before erection can prevent far more disruption than corrective work midway through the job. File the product manual, component information and notes about unusual site details. Before anyone uses the pergola, verify that the planned operations are finished and remove tools, wrapping, protective film and unattached items. Good records make later alterations or professional discussions easier.
Continue the disciplined approach after the structure has been erected. Retain the manual, a record of installed items and notes about exceptional site details in one accessible file. Inspect the completed area before use, confirming that all intended operations have finished and removing tools, wrapping, protective sheets or unsecured pieces. Record any question that was not settled during the build instead of forgetting it. This information prepares you for later adjustments and for conversations with the relevant specialists, whatever division of DIY and contracted work you selected.
Shortly before work begins, confirm the allocated tasks with every participant once more.
- Let the real site and work stages guide the choice, rather than past DIY success or assumed savings in time.
- Where interfaces are unclear, choose a mixed approach in which specialists undertake critical work and you contribute preparatory tasks.
For clearly planned outdoor spaces, traditional aluminium pergolas can provide a suitable basis for your individual installation plan.

Comparison
DIY and professional fitting compared
Both approaches can succeed when the conditions and division of work are understood. Use the table to organise common project considerations, while remembering that the actual foundation and property still require their own evaluation.
| Criterion | DIY | Professional fitting |
|---|---|---|
| Requirements | Practical experience, helpers and prepared area | Agreed scope and accessible installation location |
| Foundation | Assess yourself and prepare to plan | Clarify responsibility and assessment in writing |
| Alignment | Measure repeatedly, check and adjust carefully | Established processes for assembly and alignment |
| Tools | Provide and use suitable equipment yourself | Equipment usually organised by the installer |
| Electrical work | Prepare mechanics; have connections completed professionally | Coordinate the electrical contractor early |
Build it yourself
Best where access and levels are uncomplicated, the foundation method is resolved and you can set out and fasten accurately.
Choose professional fitting
Useful for demanding anchoring, uncertain load-bearing capacity, difficult access or where several connections and trades need coordination.
Consider a mixed approach
Tradespeople may address the foundation and powered connections, leaving agreed preparation and structural assembly for you to organise.

Prepare your installation decision in five steps
A brief preparation exercise shows whether home assembly is credible and where outside expertise adds value. Record each finding, then settle unresolved matters before fixing an attendance date.
01
Survey the location
Record dimensions, clearances and routes into the site. Mark falls, surface changes, obstructions and any utility paths already identified.
02
Assess the base
Identify the layers beneath the surface, their ability to support the work and the available anchoring methods. Seek specialist advice if uncertain.
03
Read the assembly sequence
Work through the complete manual. Arrange the operations, parts, equipment and assisting people into an achievable order.
04
Define interfaces
Allocate ownership of the foundation, erection and any powered elements. Define each transfer of responsibility so nothing is omitted.
05
Start safely
Choose a suitable working day with a clear area, adequate light and time for measurements, breaks and final checks.
Installation checklist
Use these checks to weigh home assembly against an installer for the property in question. An unresolved item does not end the proposal, but it calls for more preparation.
01. The site, dimensions, entry route and component storage space are recorded in sufficient detail.
02. The supporting build-up and proposed anchor locations have received an appropriately competent review.
03. Upright locations, reference lines and clearances are set out carefully before holes are drilled.
04. Someone has studied the complete manual and verified that the delivered components are all present.
05. Enough helpers are available for safe lifting, holding and alignment.
06. The correct equipment, personal protection and stable means of access are ready for use.
07. Powered accessories and proposed wiring paths are resolved, with the connection work assigned appropriately.
08. Responsibility for the foundation, erection, inspections and any remedial tasks has been expressly allocated.

Common questions on installing a pergola
Is home assembly realistic for an aluminium pergola?
It can be realistic if the property has been prepared, you can apply the product manual methodically and reliable assistance is on hand. The support must be suitable, the setting-out accurate and the working method controlled. Bring in a competent adviser if anchoring or structural conditions remain unclear.
Which foundation details deserve the closest attention?
The structural support must be compatible with the intended anchors and the particular property. Look beyond the top finish to the underlying build-up, its condition, falls and utility routes. Where that information cannot be established confidently, arrange an appropriate inspection before erection starts.
Do I need several helpers for assembly?
Assistance is usually prudent because uprights, beams and other sections need controlled support while they are positioned. The appropriate team size varies with the specific model, work sequence and property. Provide people for checking dimensions and stabilising pieces, not merely for moving them.
May I wire the electrical accessories personally?
You can discuss routes and coordinate suitable mechanical preparation. In Ireland, a Registered Electrical Contractor should decide whether the connection is Restricted Electrical Works and must carry out and certify work within that scope. Agree locations and responsibilities early so the structural and electrical stages meet cleanly.
Could planning approval be required for my pergola?
The answer varies with the property, dimensions, design, earlier development and how the proposal is classified. Experience from a different garden is not a dependable guide. Ask the relevant Irish planning authority before committing where the position is uncertain, including questions about earlier structures and site constraints. Where relevant, consult the landlord, owners' management company or another party whose consent may also be needed.
Which details should precede an installer appointment?
Ask for written confirmation of both the included tasks and the preparations assigned to you. Address the foundation, entry to the site, working room, setting-out, electrical interfaces and unusual property features. Precise service boundaries make the eventual attendance easier to organise.
Plan your pergola
Plan safely, install confidently
Project conditions should determine whether you erect the aluminium pergola or appoint an installer. Properly prepared support, dependable dimensions, controlled methods and resolved handovers outweigh a rushed choice. An honest assessment of skills and resources gives the work a stable starting point.
Use the planning process as a decision aid: what can you complete safely yourself, and where are experience or specialist knowledge needed? Bloomcabin can help you compare different pergola types calmly against your outdoor space and installation plan.
Browse aluminium pergola options, then assess what their installation would demand on your property.
