
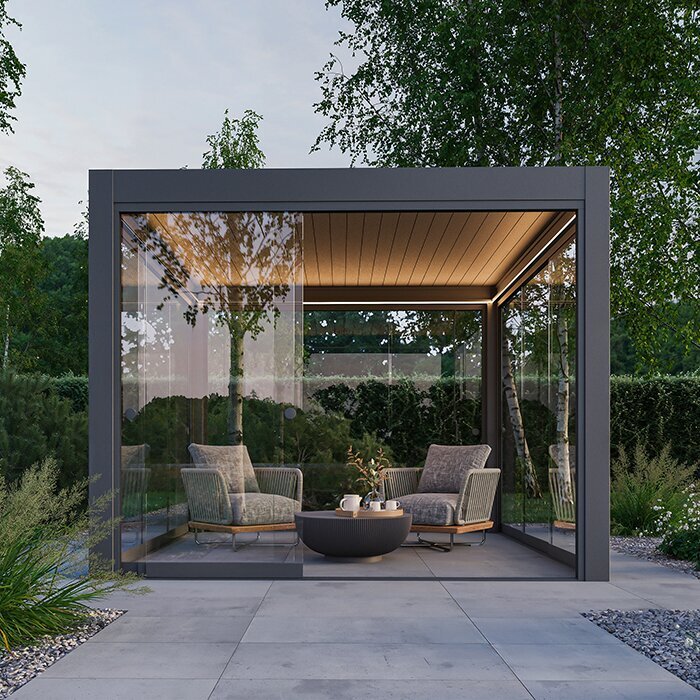





Bloomcabin bioclimatic pergola
Adjustable aluminium louvres manage sunlight, shade, ventilation and wet-weather cover
The Bloomcabin bioclimatic pergola works on terraces where a permanent roof would restrict how the area is enjoyed. The aluminium roof blades move through open, angled and shut positions as light and weather change. Instead of committing the terrace to a single overhead arrangement, you can keep it airy, cast shade where needed or increase shelter during rain. That range is valuable when the same terrace hosts breakfast, daytime relaxation and evening meals.
The current range covers 9–24 m² with an approximate overall height of 250 cm. Its design brings together premium aluminium sections, concealed rainwater management and a selection of RAL finishes. Automation and side components are optional, allowing the arrangement to reflect the required convenience, privacy, solar screening and lateral shelter.
Begin with a close survey of the terrace. Map how sunlight crosses it, identify the side most exposed to weather, and note entrances, windows, drainage and the floor area required by furniture. Where motorisation or LED illumination is planned, settle the electrical feed and wiring path before completing the paving and nearby finishes. Bloomcabin Denmark.
Control light and air above your terrace
Moveable louvres let the terrace respond to changing conditions throughout the day
A solid pergola covering has one fixed arrangement; this aluminium roof can instead be opened, angled or shut. Opening the blades brings in light and reveals more sky. An angled setting cuts direct glare while keeping part of the roof open. Shutting them increases overhead shelter. The best position will vary with temperature, solar angle, time and the activity taking place below.
Leaving the blades partly open casts shade while giving rising warm air a route out. Dining and sitting areas can consequently feel less enclosed during mild weather. Closing the roof increases cover against rainfall and strong sunshine. It is still an exterior structure, however, so furnishings and other moisture-sensitive belongings need storage appropriate to outdoor conditions.
Motorisation can make frequent roof adjustments more convenient. With compatible configurations, the powered controls may also operate certain optional side components.
Moveable louvre roof
Balance daylight, cooling air, shelter and shade as conditions change
9–24 m²
Several configurations for terraces of different sizes
Optional automation
Powered control of the roof and compatible side features
Outdoor options
Choose from LED lighting, screens, side panels or glass walls
Premium aluminium construction
Strong aluminium sections, concealed drainage and a crisp appearance
Premium aluminium sections give the pergola a precise architectural form without demanding complicated upkeep. Some care is still necessary: inspect finishes, joints and mechanisms periodically and clear contamination promptly. The site layout should also preserve practical access to channels, louvres and side fittings for future cleaning and attention.
Water travels through channels inside the frame, avoiding exposed guttering that could interrupt the overall form. This built-in system does not, by itself, deal with water once it reaches the property. Planning must identify the discharge point and a safe onward route that protects walls, footings, paving and busy walkways. Integrating that outlet with the site’s drainage strategy forms part of the preparatory work.
The available RAL finishes can relate the frame to doors, glazing, exterior walls, pool surrounds or paving. Echoing nearby metal finishes gives a restrained result, whereas a contrasting colour turns the structure into a stronger visual feature. Do not rely on a small swatch alone. Changing daylight, nearby materials, shadow and the pergola’s scale can make the completed finish seem lighter, darker or more prominent.
Roof louvres and side features
Decide the roof arrangement before choosing side screening
Moveable louvre roof
Roof angle controls both overhead daylight and the upward movement of warm air. Start by defining the terrace’s main purpose and the periods when shade will matter. Then review each edge of the structure to see where extra screening against sunshine, views or wind would provide a worthwhile benefit.
Outdoor options
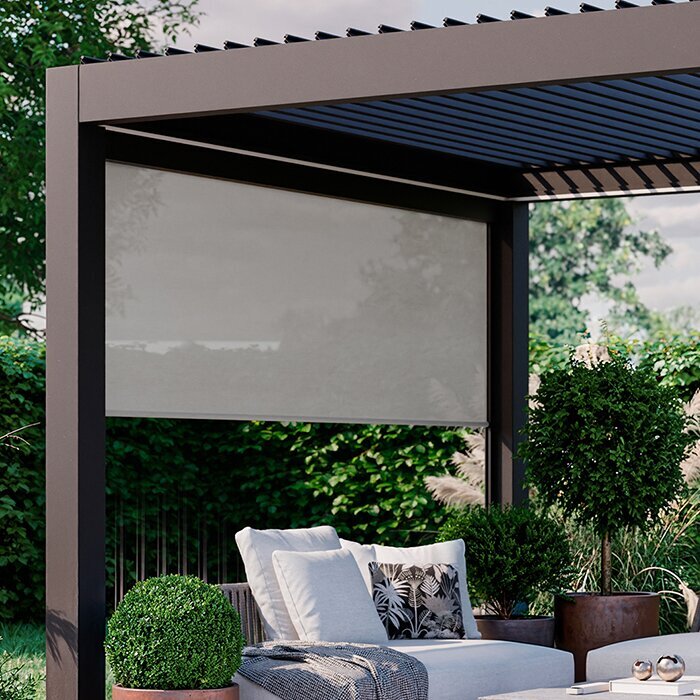
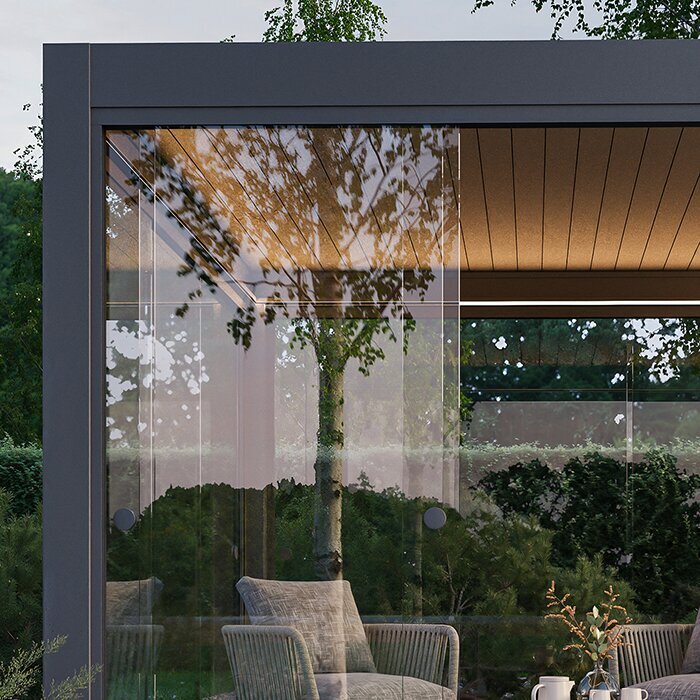
Screens, solid panels and glazed walls each address a different requirement. A screen gives retractable privacy and solar control; glazing keeps an outward view while potentially moderating crosswinds; panels produce a more enclosed edge. Each choice changes brightness, outlook, ventilation and movement around the structure. Assess the four sides independently rather than assuming that a matching treatment everywhere will work best.
Product data
Key technical details of the Bloomcabin bioclimatic pergola
Area
9–24 m²
Available configurations
Overall height
approx. 250 cm
Height information for site planning
Construction
Premium aluminium profiles
Architectural outdoor frame with straightforward upkeep
Roof
Moveable aluminium louvres
Open, angle or shut
Drainage
Integrated gutter system
Allow for discharge into the site drainage system
Warranty
12-year warranty
As set out in the relevant warranty terms
Managing the roof during daily use
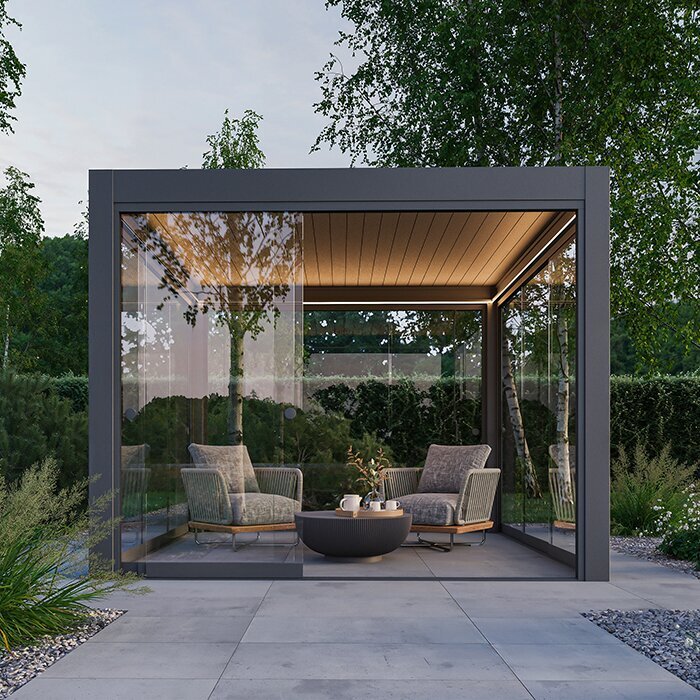
Match the blade angle to the activity and weather
Open the blades widely when abundant natural light and a broad sky view are wanted. If sunshine later reaches the chairs, angling them can soften the direct rays while retaining an upward escape route for warm air.
The blades may be shut when a shower arrives. If low-angle sunlight, unwanted views or crosswinds cause discomfort, add screening only on the affected edge rather than closing off every side.
Although it makes the terrace more versatile, the pergola is an uninsulated exterior setting in every roof and side configuration.
Ways to use it
Four ideas for a flexible terrace area
01
Dining area
Arrange a dedicated dining space with adjustable shade and optional LED illumination.
02
Garden lounge
Use low lounge furniture, changing the roof angle as daylight and weather conditions develop.
03
Wellness area
Add suitable side screening around a hot tub or quiet retreat.
04
Terrace for gatherings
Plan adaptable shade above dining and seating for sociable meals and easy-going evenings.
Site, weather and orientation
Base orientation, screening and blade settings on observations from the terrace itself. Record when sunshine crosses the chairs, the usual approach of wind-driven rain, and any outlook worth preserving. Pale exterior walls and broad panes of glass may also reflect additional light into the area. A site-specific review reveals more than selecting a layout from compass direction alone.
Changeable weather
Ireland’s Atlantic influence often brings mild but variable conditions, with cool, windy winters and comparatively gentle summers. In spring and autumn, roof adjustments can respond to passing sunshine or showers without moving a separate canopy. An exposed edge may benefit from focused screening, but surrounding the entire structure is not necessarily helpful. Local exposure should always be assessed.
Orientation also needs to account for entrances, tall glazing, eaves and the routes normally taken between the home, garden and terrace. Locate columns and screens so that key passages and valued views from living spaces are not compromised. Beside a building, verify the full swing of doors and windows and retain access to exterior surfaces that will later need attention.
Give every side component a defined purpose. Shelter may take priority on the edge facing prevailing weather, privacy beside a neighbouring boundary, and glare control where low sunlight enters. Keeping other edges deliberately unobstructed maintains convenient movement, visual contact with the garden and passive ventilation.
Terraces facing south or west
For a south- or west-facing position, design around the hours when people are most likely to sit outside. Watch how light crosses furniture and nearby glazing through morning, afternoon and evening. Those observations show the roof angle needed to shade occupied places and whether low sunlight calls for screening along one edge.
Review more than the area directly beneath the roof centre. As solar height shifts, chairs, the tabletop and walking space may each receive different amounts of light. Judge the arrangement by the comfort of the places people actually occupy, rather than by a uniform blade setting across the canopy.
Assess the view from adjoining rooms as well. Shading the chairs does not prevent sunlight from striking tall windows or producing indoor glare. Check conditions both outside and from the rooms used most often before finalising roof orientation and the location of side features.
Power connection and LED lighting
Choose the supply point and wiring route for powered operation and built-in lighting during the early design stage. Their location must correspond with the final equipment and column positions, avoiding exposed cabling laid across completed paving afterwards.
Keep joints and electrical interfaces available for future checks even when cables are discreetly concealed. Fix their locations in relation to footings, water discharge, side fittings and furniture before exterior wall or terrace finishes are completed.
Arrange any outdoor electrical connection through a competent professional under Irish requirements. Restricted Electrical Works may be carried out and certified only by a Registered Electrical Contractor, who should decide whether the proposed circuit falls within that category and what completion certificate is required.
Drainage and ground conditions
With the blades shut, water passes through routes contained in the frame. Planning should follow its journey from the roof channels to the final outlet and onward into an appropriate soakaway, terrace drain or other prepared means of disposal.
At the proposed outlet, inspect paving falls, bed edges and anything that could impede flow. The discharge must neither collect there nor return towards the building or pass through a busy walkway. Establish its onward destination before assembly begins.
The structure requires a flat fixing base capable of supporting it. Finished paving gives no assurance about the construction below. Confirm the build-up, levels and anchoring locations, together with buried services and drainage features, before deciding exactly where installation holes will go.
Configuration and comfort
Consider dimensions, furnishings, side fittings and powered equipment as one layout. A large footprint may still seem crowded if screens, open doors, chairs and walking space overlap. What counts is the clear area available among columns, movable components and furniture, rather than the outside measurement alone.
Furniture at the right scale
Beyond the table footprint, provide clearance for chairs to slide out and for someone to walk behind them. Deep lounge seating occupies floor space differently and changes the preferred circulation pattern. Include the serving path from the house, the garden route and room to use any screen or wall. Furniture should function freely without striking columns, glazing or fabric screens.
Drawing to scale will show whether chairs have room to move, passages stay open and doors or screens work freely. Mark not just each furniture outline but also the extra floor area occupied while it is being used. Potential clashes then become apparent while the pergola dimensions can still be adjusted.
Record permanent planters, a barbecue and storage pieces alongside the table, chairs, lounge furniture or hot tub. Include anything intended to stand beneath or immediately outside the structure, then reserve clear approaches to the house, garden and serviceable equipment.
Consider solar height as well as orientation
The roof chiefly moderates light arriving from overhead. Early or late sunshine can enter below its outer edge and fall on chairs or nearby rooms. Account for the location and direction of the seating, the desired outlook and the hours of genuine terrace use, rather than relying on compass position by itself.
Roof blades and vertical screens solve separate problems. Adjusting the canopy controls overhead shade and ventilation, whereas a side screen tackles glare or unwanted views arriving horizontally. Combining the two selectively is preferable to shutting the canopy for long periods merely to manage brightness from one side.
Study sunlight during the hours when the terrace is normally occupied. Photographs taken at several points through the day can document reflected glare, sideways rays and moving shadow lines. This evidence helps place a screen on the edge where it provides a real benefit while leaving a preferred outlook unobstructed.
Screens or glass walls?
A screen can be raised or lowered to manage privacy and sunshine. Glazed walls continue the outlook and may temper a crosswind, although they remain in place and require cleaning access. Weigh the desired degree of shelter against visual openness, upkeep and the relationship between garden and terrace.
Different edges need not match. Privacy might matter beside the road or neighbour, while the garden-facing edge of a sheltered site could remain unobstructed. Check that any added component respects the main walkways, valued sightlines and the ventilation you want to retain.
Make a brief for each edge: identify the difficulty, the occasions on which it arises, and whether the answer should be fixed, clear or retractable. That provides a rational basis for comparing panels, glazing and fabric screens without duplicating equipment for one requirement.
Motorisation and controls
Operate a powered canopy from somewhere that gives a clear view of the moving blades. Plan illumination around the activities below: a focused source above a dining setting has another role from broad, balanced light throughout the covered terrace.
Settle the division between powered and hand-operated components ahead of purchase. The electrical preparation can then follow the final specification. Treat automated side fittings, illumination and roof movement as parts of one coordinated control arrangement.
Position switches or controls where occupants can reach and identify them conveniently. Their approach must stay clear when chairs, screens or doors are in use. A sensible final location therefore depends on completing the furniture and circulation plan first.
Planning for later years
Footings, water disposal and service access are far less convenient to revise than décor or furniture, so resolve them at the outset. Preserve working room around roof blades, channels, finishes and side fittings for uncomplicated examination, cleaning and servicing.
Keep drainage inspectable
Pollen, leaves and airborne material may gradually restrict concealed water routes. Provide reachable channels and outlets and examine them periodically, particularly where nearby trees shed debris. Clearing loose material promptly is simpler than removing compacted deposits after flow has slowed.
Watch the actual path taken after discharge. Paving seams, gradients, kerbs and shallow hollows may divert water from the designed route. Detail the outlet transition to limit wall splash and prevent lingering dampness around anchors and columns.
Use appropriate wet weather after installation to confirm that disposal follows the planned route. Future alterations to beds, edging or terrace finishes may redirect flow, so their drainage consequences should be reviewed before work proceeds.
Maintenance access
Provide practical reach to glazing, screens, water channels and roof blades for routine care. Select non-abrasive cleaning techniques compatible with coated aluminium, avoiding equipment that might mark the finish. Never apply force to a mechanism that will not move.
Do not let bulky seating or weighty planters occupy service zones permanently. Reserve working clearance beside columns, below outlets and along screens for intermittent maintenance. This requirement belongs in the furniture layout from the beginning.
Periodic observation can reveal foliage or residue accumulating along drainage routes and near the moving parts of side fittings or roof blades. After exceptional loads or a long idle period, inspect the mechanisms once more before returning them to normal operation.
Check the configuration before ordering
As a final check, relate the intended position to the outside measurements and clear area within the columns. Add furniture, posts and operational clearance to the plan alongside the canopy outline. The drawing should confirm that the required terrace is covered without narrowing garden routes or entrances.
Review the selected arrangement against every immovable site feature, including walls, openings, eaves, paving boundaries, electrical feeds and drainage. Resolving a discrepancy prior to purchase is considerably easier than revising prepared foundations or finished ground afterwards.
Create one schedule covering finish colour, roof controls, illumination, automation and all side components. Keeping those decisions together helps coordinate appearance, preparatory work and practical use instead of treating each optional feature as a separate project.
Allow for future changes
How a terrace is furnished may evolve. Leaving an orderly, uncrowded floor plan gives scope to swap dining furniture for lounge seating or accommodate extra chairs in future. Whatever the arrangement, do not sacrifice the routes required for movement and maintenance.
Where the selected equipment accommodates different furniture layouts, do not position power connections and lighting solely for one item of furniture. A flexibly usable floor area supports later changes between seating and dining without altering the pergola structure.
Fixed glazing deserves more detailed thought than furniture that can be moved. Examine how it changes circulation, outlook, ventilation and cleaning access. Retractable screens adapt readily when glare or privacy requirements vary, though their function is not identical. Select each element according to the issue present on that particular edge.
Continue planning with Bloomcabin
Guides to size, foundations, comparing pergolas and ordering
Frequently asked questions
FAQ – Bioclimatic pergola
Why is this described as a bioclimatic pergola?
The name refers chiefly to a roof whose blades can change position. Their angle affects direct sunshine on the terrace and the amount of open space available for rising air. Shutting the blades increases cover during showers or strong sun. It does not turn the terrace into a conditioned interior; it remains an exterior structure with an adaptable overhead element.
How should I decide on a pergola size?
Measure the terrace and map the intended furniture first. On a scale drawing, include open doors, columns, extended chairs, circulation space and the operating area of side fittings. Select the version that accommodates all of those zones comfortably without clashes.
What should I consider beside the house?
Identify every wall opening, eave, exterior lamp and normal passage linking the terrace and home. Preserve unrestricted door and window operation. Location planning must also make room for the electrical feed, water disposal and future care of the building and pergola.
Can the roof be motorised?
Yes. Powered operation can be specified for the roof and certain compatible side components. Decide the electrical supply, concealed wiring path and control position before adjacent ground and wall finishes are completed.
Must every side have the same equipment?
No. Allocate glazing, panels or screens according to the requirement on each edge. Privacy, sunshine, views and crosswinds will rarely carry equal weight on every side. Leaving one edge unobstructed may provide better circulation, outlook and ventilation.
What needs planning for on-site rainwater drainage?
Internal channels carry water only as far as the site outlet. Beyond that point, the design must provide an appropriate route following the available fall and drainage arrangement. Discharge should avoid walls, anchors and busy paths, while the channels and exit points need to remain reachable for routine checks.
What care do the aluminium frame and roof blades require?
Clear foliage and surface dirt at suitable intervals with non-abrasive methods intended for coated aluminium. Use the opportunity to examine water channels and moving mechanisms. If a blade or screen sticks, look first for ice, debris or another blockage rather than forcing it.
What details should I gather before requesting advice?
Prepare terrace measurements, opening locations, a furniture layout and observations about sunshine and prevailing weather. Note the preferred side components, RAL finish, electrical feed and intended discharge point. Site photographs and an accurately scaled drawing will support a more productive discussion about the configuration.
Bloomcabin bioclimatic pergola
Give the terrace adaptable overhead cover with moveable aluminium louvres
Bloomcabin’s bioclimatic pergola pairs an architectural aluminium frame with a roof of moveable blades. Adjust their angle to manage sunshine, ventilation and passing rain.
Before ordering
✓ Choose a suitable size within 9–24 m²
✓ Plan furniture to scale
✓ Match screens or glazed walls to specific needs
✓ Prepare level, load-bearing ground for installation
✓ Confirm the RAL finish and chosen automation
✓ Plan LED lighting and power supply early
