
Growing Cauliflower in a Greenhouse
The Brassica Atelier · T17
Raising Cauliflower Beneath Glass
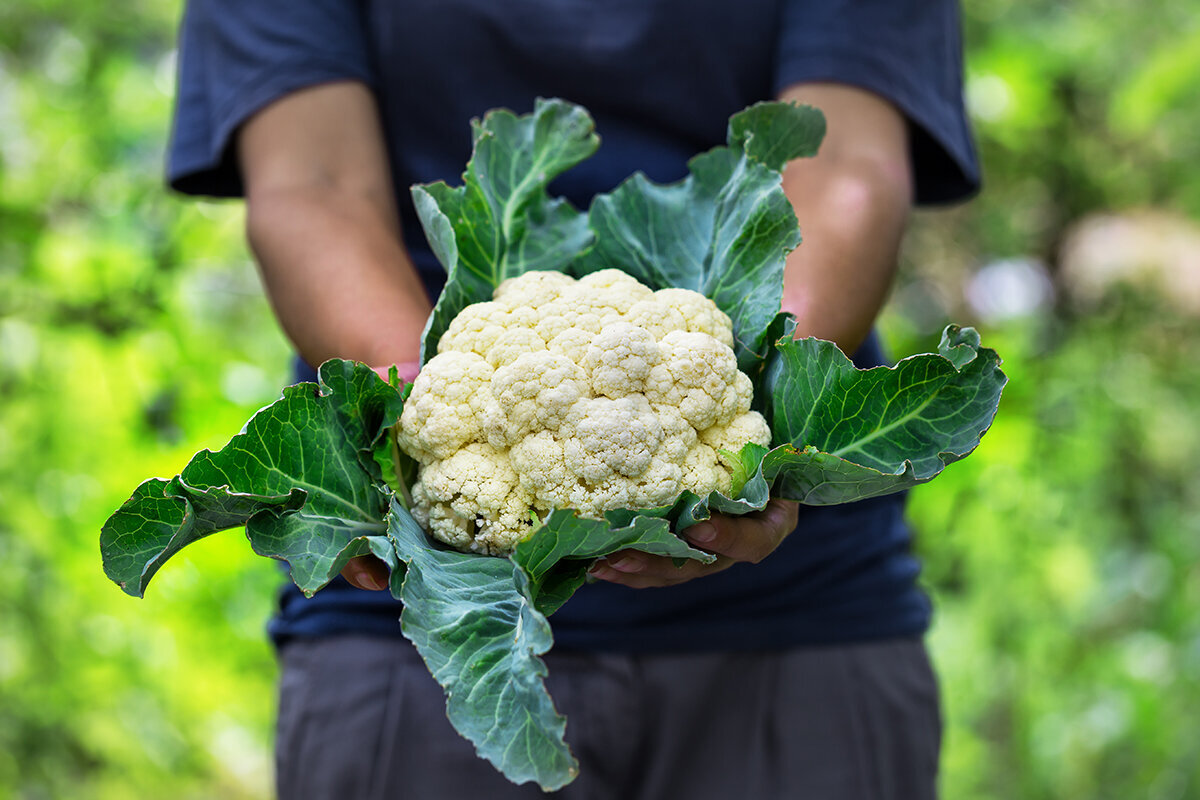
Neither chance nor abundant warmth produces a flawless cauliflower. A good curd records a different balance: cool air, evenly damp earth, strong leaves, active roots and uninterrupted development.
A greenhouse offers closer control when it is treated as an airy, cool-season refuge rather than a heat store. It permits an earlier start, can carry harvesting further into autumn, shelters plants from Ireland’s changeable weather and makes watering precise. Even so, July heat remains unsuitable for quality curds.
Crop-planning noteBest periods: from late winter through spring, or from late summer through autumn, depending on cultivar and location. Allow for full leaf spread, cool ventilation and a single harvest made at exactly the right stage.
Leafy brassicas need generous spacing, a clear air path and dry access; one suitable option is the Classic Aluminium Greenhouse.
01 / The finish to aim for
“A pale, tightly closed curd reflects the care given throughout the crop: build vigorous foliage, maintain a cool growing phase and add protection before making a clean, timely cut.”
Compared with many crops grown under cover, cauliflower leaves little margin for inconsistency. A tomato might resume growth after brief dryness and merely produce a smaller fruit. The same interruption during leaf or curd development may leave cauliflower with a button head, rough grain, internal leaves or a curd that loosens early.
Protected culture is valuable because cauliflower reacts so readily to disruption. You can control water, shelter transplants from wind and cloudbursts, and direct the movement of air. First establish a vigorous plant with broad leaves; afterwards keep moisture, nutrients and climate even enough for one firm, clean curd to form.
02 / Timing cultivars for maturity
Schedule curd development for the coolest stretch of your gardening year.
For an unheated greenhouse in Ireland, cauliflower generally fits the milder transition periods. Vent promptly on bright spring days. A late-summer transplanting for autumn may prove calmer as daytime and overnight warmth recede. Cover helps shield the crop from heavy rain, chilly nights and lingering autumn damp. Irish weather varies with place and year, however, so use fleece or another suitable safeguard whenever local frost is expected.
Choose with regard to sowing and planting season, maturity speed, local suitability, heat tolerance and the way the enclosing leaves behave. A large curd pictured on the packet is not enough. Early, fast-finishing cultivars suit spring; slower ones can serve autumn if heading falls in cool conditions. White self-covering types naturally arch their inner foliage over the curd, reducing manual blanching.
Early cultivar / spring crop
Quick growth before warmth
Choose this route only where cutting can finish ahead of warm weather and where young plants can avoid chilling before the greenhouse begins accumulating excess heat.
Main crop / autumn finish
Measured growth into cooler days
This often suits Irish gardens well: raise the transplants during summer, move them as excessive warmth subsides and let the greenhouse buffer the crop into autumn.
Self-blanching / pale curd
Natural foliage cover
Useful when daily visits are difficult, but every head still needs checking. Enclosing leaves reduce strong light; they cannot correct overheated air, thirsty roots or inadequate nutrition.
03 / Producing transplants
Aim for short, firmly rooted young plants whose development has never stalled.
01 / Seed
02 / Seed cell
03 / Young plant
04 / Plant out
Begin clean and organised
Put one seed into every cell of fresh, clean seed compost. Maintain steady moisture without waterlogging, then mark the cultivar and planned planting time straight away.
Prioritise roots over height
Give newly emerged seedlings abundant light at once and provide slight air movement. The aim is a sturdy, low transplant with cohesive roots, not a soft plant stretched by indoor conditions.
Avoid checks while plants are young
Never leave the plants congested, short of nutrients or tangled with roots while the bed remains unavailable. Oversized cauliflower transplants react particularly badly to an interruption this early.
Move a cohesive root ball
Plant once several true leaves are present and the root ball is stable. Match the depth used in the cell, firm the earth carefully and water thoroughly.
Treat propagation as the opening quality test. German source guidance says early batches are commonly sown from February, while Irish timing should follow the site, weather and seed-packet instructions. For early cauliflower, Bavaria’s LWG gives 16 to 18 °C at germination and 14 to 16 °C afterwards while transplants develop. Plants held too long, kept excessively cold or otherwise checked may make tiny heads too soon. When the bed is delayed, resowing a modest batch can be better than retaining overmature plants indefinitely.
During the days before transplanting, introduce brighter light, cooler moving air and greenhouse conditions gradually. Keep moisture in the root ball and protect the plants from cold nights rather than using frost as a hardening method. Choose an overcast period or late afternoon where possible. A successful move causes barely any reaction: avoid severe wilting, injured roots and a growth check that later appears in the curd.
04 / Allowance for mature foliage
Allocate space for the leaves at maturity, not today’s small root ball.
50–60 cm plant spacingUnobstructed access aisleClearance beside the glazingAirflow kept open
Spacing the crop
Allow a practical range of 50 to 60 cm both between neighbouring plants and between rows, subject to the cultivar directions. Place vigorous autumn types towards the wider end so foliage dries efficiently.
Access aisle
Keep a comfortable working aisle. Inspect leaf undersides, soil moisture and the curd’s base without treading on the growing area or continually touching foliage.
Greenhouse edge
Do not let the outer leaves touch glass or greenhouse walls. A definite gap improves circulation and reduces trouble from condensation and abrupt temperature changes next to the cladding.
Air passage
Foliage must not crowd a doorway, roof window or any other vent. Mild continuing circulation is preferable to humid, motionless air trapped under overlapping leaves.
At first, a newly set row can look unnecessarily sparse. Keep the gaps: broad mature leaves supply the energy for a substantial curd. Crowded foliage also creates damp pockets that linger beneath glass. A pair of rows works only where both can be reached, with no need to stand on the bed or roots during care and harvest.
Where floor area is tight, several plants grown exceptionally well are worth more than a crowded line promising higher output. Also assess the Classic Aluminium Greenhouse as a place for mature brassicas, tidy propagation and a properly usable middle path, rather than merely covered parking for individual containers.
05 / Managing warmth, light and air
Maintain a light-filled house without letting it become hot.
Cauliflower gains nothing from being baked behind glass. Open doors and roof vents as morning warmth starts to build; waiting for heavy, hot air is too late. Shade may help during an exceptional spell, though it cannot replace good seasonal scheduling and effective ventilation. Keep a thermometer that records daily minima and maxima at foliage level, rather than judging conditions from a moment spent inside.
The overall pattern should stay cool and even. Sunshine can drive temperatures up rapidly behind closed glass even on an otherwise mild Irish spring day. Excessive daytime warmth and balmy nights interfere with heading and may loosen the curd. When frost threatens during a shoulder season, lay fleece overnight, then uncover in the morning so leaves and soil can shed moisture.
Ventilation is also part of preventive plant care. Apply water to the root area in the morning and afterwards vent away humidity; foliage and curds should not remain wet overnight. If you add a fan, set it to circulate air gently across all plants without drying one edge of the bed. Bloomcabin’s aluminium greenhouses.
06 / Keeping growth uninterrupted
Checks in growth remain visible at harvest.
Do not alternate waterlogged surges with thirsty intervals. Nor will dumping nitrogen onto a stalled crop late in its development reliably restore it. Fluctuating root conditions disturb leaf production, and the forming curd carries that uneven history forward.
01 / Root zone→
02 / Foliage→
03 / Curd formation→
04 / Finish
Keep the soil evenly moist down through the active rooting layer. Before adding water, test below a surface that only appears dry, using your finger, a dibber or a little trowel.
Regular water and balanced feeding produce wide, healthy foliage. Those leaves collect the energy the plant needs before the first sign of a curd.
With cool weather and development free from checks, the curd can initiate after the plant reaches a useful size. Early stress may instead produce an undersized button.
Steady development encourages a solid head with fine grain. Heat, drought or abrupt doses of fertiliser may instead leave it open, coarse or threaded with leaves.
Irrigate calmly and thoroughly
Water a soil bed deeply enough to wet the active roots, and check its condition again before irrigating. Covered ground receives no rainfall, while sunlight, soil type and increasing plant size keep changing demand. A drip system or slow delivery at ground level is preferable to frequent surface splashing. Loose, clean mulch can even out moisture loss, but it must not hold constant dampness against the stem.
Let soil condition guide feeding
Cauliflower is hungry, but simply adding more feed is no plan. Incorporate mature compost before planting and provide an organic base dressing appropriate to the soil. Where growth is weak or abnormal, analysis offers better evidence than guesswork with fertiliser. A modest top-up during leaf building can be useful; heavy, fast-release nitrogen does not by itself deliver either larger curds or dependable quality.
For an orderly growing area with effective ventilation, a robust frame and beds you can reach, the Classic Aluminium Greenhouse can underpin a carefully planned layout.
07 / As the curd starts
Increase inspections when the first light-coloured centre comes into view.
When a light point becomes visible between the newest inner leaves, revisit every plant every two or three days. Major corrective action at this stage is counterproductive. Continue even watering and airflow, remove weeds, and cut away only diseased or injured leaves that lie on the soil. Retain all sound foliage because it feeds the developing curd and later forms its protective screen.
Strong direct sun can discolour a white cauliflower. Its canopy has two roles: it shades the curd and shows that the crop produced enough healthy leaf area for good development. Large leaves should therefore remain in place, not be removed in the name of ventilation. Create airflow by spacing plants properly, keeping passages free and opening the greenhouse vents.
08 / Blanching white curds with leaves
Bring leaves over the curd like shutters, without sealing it in.
Blanching means shading a white cauliflower with its own outer leaves so the surface keeps its pale ivory colour. Start only after a small, firm curd is clearly present. There is no fixed timetable: cultivar, weather and speed of growth decide the interval to harvest. Once hidden by foliage, each curd needs regular inspection.
Types described as self-covering do some of this naturally, but individual plants may still leave part of the curd exposed. Check from more than one angle. In warm or humid weather, arrange the leaves with extra freedom. Wet foliage touching the head raises the risk of rot; the aim is filtered sun plus airflow, never a soggy seal.
01 / Open
02 / Shade
03 / Secure
04 / Check
Before covering
Keep the centre uncovered until the first firm curd is visible; earlier, the young inner leaves still require light and freely moving air.
Add the first shade
Make a loose canopy using two or three dry, sound outer leaves, taking care not to fold sharply or snap their thick ribs.
Fasten without compression
If fastening is needed, use a soft clip or loose loop high above the curd, always leaving ample ventilation between foliage and head.
Inspect beneath the cover
After dew or humid weather, and again near harvest, lift the shade briefly to check firmness, dryness, colour changes and hidden pests.
09 / Reading curd condition
Judge the visible finish before faulting the cultivar.
A departure from the ideal does not always make cauliflower inedible. It does, however, reveal what happened earlier in the crop. Record that evidence for the next planting rather than trying emergency remedies on a head that has finished forming.
Tight
Premature button
Coarse grain
Leafy bracts
Wet decay
Pale and tightly packed
Look for a pale, firm dome whose grain is close and regular, with no separate florets protruding. Harvest while the whole surface remains closed.
Premature buttoning
A very small early head usually follows establishment stress: old transplants, cold, heat, drought, root injury, inadequate nutrition or pest attack.
Coarse or grainy curd
As florets extend and pull apart, the surface loses its fine cohesion. Heat or pronounced fluctuations in growth often occurred beforehand. Cut promptly while the head remains suitable for use.
Leaf intrusion
Green leaflets among the florets can be a varietal trait, but warmth, water shortage or another check during initial curd formation may encourage them.
Discolouration or decay
Yellowing or brown areas call for checking sunlight and frost precautions. With tissue that is dark, wet or soft, investigate condensation, wounds, hygiene and airflow too.
Adjustments for another crop
Check propagation temperature first, then planting date, roots, ventilation and watering. A formed curd cannot be rebuilt, although the next batch can receive better timing.
Buttoning occurs when the curd starts before the plant has grown enough leaves. The initiating setback is often several weeks earlier: propagation that was too cold, a transplant left pot-bound, root damage, or dryness immediately after setting out. Extra feed later will not enlarge that head. Cut it while small and firm, then remove the original cause before raising the next batch.
Graininess and leaves within the curd chiefly suggest that climate control needs attention. High temperatures, lack of water and stop-start growth all favour an open or leafy finish. Plan the following batch to head in cooler conditions, ventilate earlier whenever sunshine strengthens, and keep root-zone moisture predictable. Flooding a bed after it has dried cannot restore the lost continuity.
10 / Pest checks, disease prevention and hygiene
Keep clear sightlines through a clean crop room.
Growing under cover does not exclude brassica pests. At least twice weekly, turn leaves and inspect the centre for aphids, eggs, caterpillars, feeding holes, silk and droppings. Pick off caterpillars where numbers are low. Snug insect mesh over open sides can deter cabbage whites, provided air still moves freely. If more control is needed, identify the pest first. In Irish gardens, use only a product authorised for amateur use in Ireland, check that its label permits treatment of edible brassicas and obey all label directions.
Clubroot deserves particular care. Warning signs include wilting in moist earth and roots enlarged into irregular knots. Do not compost infected plants; also clear cruciferous weeds and avoid growing cabbage-family crops in that ground for several years. If symptoms are uncertain, soil testing may help. The rotation includes cauliflower, broccoli, kohlrabi, radish, mustard, rocket and many cruciferous green manures. Direct water onto the soil, remove sick debris quickly and help the foliage dry without delay.
After the final cut, remove roots, discarded leaves and spilled earth. Clean knives, propagation trays, benches and paths thoroughly, especially where a plant looked unhealthy. Hygiene is practical prevention: it breaks a possible route from the finished crop to its successor.
11 / Cutting and cool storage
Choose peak firmness, then move the harvested curd somewhere cool promptly.
Signs of readiness
Harvest while the head is light-coloured, firm, close-grained and evenly sealed, before separate florets start to spread. Do not wait for the largest possible size when warm conditions are due or graininess has appeared. In cooking, a slightly smaller curd taken at perfect condition is preferable to an overgrown one cut a day too late.
Cut through the stem below the curd with a clean, sharp knife. Keep several wrapper leaves around it; this protective collar reduces bruises and drying between greenhouse and kitchen.
Chilling after harvest
Take harvested cauliflower out of the greenhouse at once. Place it, still unwashed, in the refrigerator’s vegetable drawer with the leaves loosely enclosing it, and rinse only before cooking. That natural covering slows moisture loss in the dry refrigerated air.
Keeping and freezing
Flavour is best soon after harvest, and the cauliflower should be eaten over the next few days. Check stored heads often, removing any that develop soft or dark patches. For longer preservation, separate the florets, blanch them briefly in boiling water, cool them quickly and place them in the freezer. This avoids delaying harvest beyond the curd’s best stage.
12 / Advice from the potting bench
Common questions on protected cauliflower
Can cauliflower be harvested all year under glass?
Only when consistently cool, even conditions are genuinely achievable. Under Irish glass, spring and autumn are usually the practical seasons, with adjustments for exposure, region and the year’s weather. Summer heat can undermine curd quality; winter offers too little light and may bring frost. An unheated greenhouse broadens the opportunity but does not abolish those seasonal constraints.
Must self-blanching types be covered by hand?
Usually no: their inner leaves naturally curve over the head. Still inspect every specimen. Where fierce sun reaches an uncovered area, drape a few dry outer leaves loosely above it. Do not fasten wet foliage tightly against the curd or leave it enclosed indefinitely.
What explains an unusually small curd?
Buttoning is the usual explanation: curd formation started before enough leaf growth had been made. Causes include overmature or badly root-bound transplants, chilling, excessive heat, drought, root damage, poor nutrient balance and pest pressure. Late fertilising cannot make that small head large. Harvest while it remains firm and schedule the next planting more carefully.
Estimating plant numbers for a compact greenhouse
Calculate from the width of mature foliage, not simply the available bed length. With 50 to 60 cm between plants, sufficient wall clearance and a usable path, fewer may fit than expected. Doors and vents must remain operable, while each cauliflower needs to be reached for inspection, watering and harvest without constant contact with the leaves.
Will cauliflower crop in a container under glass?
Yes, though a deep greenhouse border usually gives steadier results. The container needs generous volume, firm footing and free drainage. Potting medium both heats and dries faster than border soil, making consistency harder to maintain. Keep pots away from the hottest glazed edge and check moisture every day.
13 / Reference material and related guides
Technical reading for a better cauliflower finish
These expert resources expand on propagation, climate, plant health, curd quality and preventive protection.
Explore more Bloomcabin guidance: “Arranging Your Greenhouse: Beds, Plants and Care” · using an aluminium greenhouse to shelter crops from weather and pests · “Raising Fresh Food Across the Seasons”
- LWG Bavaria: advice on raising or buying young plants
- LWG Bavaria: small greenhouses and early-season crops
- Saxon Garden Academy: home-garden cauliflower
- German Environment Agency: responsible crop protection in vegetable gardens
- Agriculture Chamber of North Rhine-Westphalia: preventing clubroot
- RHS: its Grow Your Own cauliflower guide
- LWG Bavaria: cauliflower propagation temperatures and guidance
One final crop review
Give cauliflower a greenhouse that reacts before heat accumulates.
- Timing: Time heading for the coolest dependable part of your local spring or autumn.
- Leaf room: Allow each plant 50 to 60 cm, plus glazing clearance and an aisle you can use.
- Ventilation: Vent early, water the rooting zone consistently, and keep protective leaves dry, loose and well aired.
Classic Aluminium GreenhouseBloomcabin aluminium greenhouses
