
Growing Microgreens in a Greenhouse
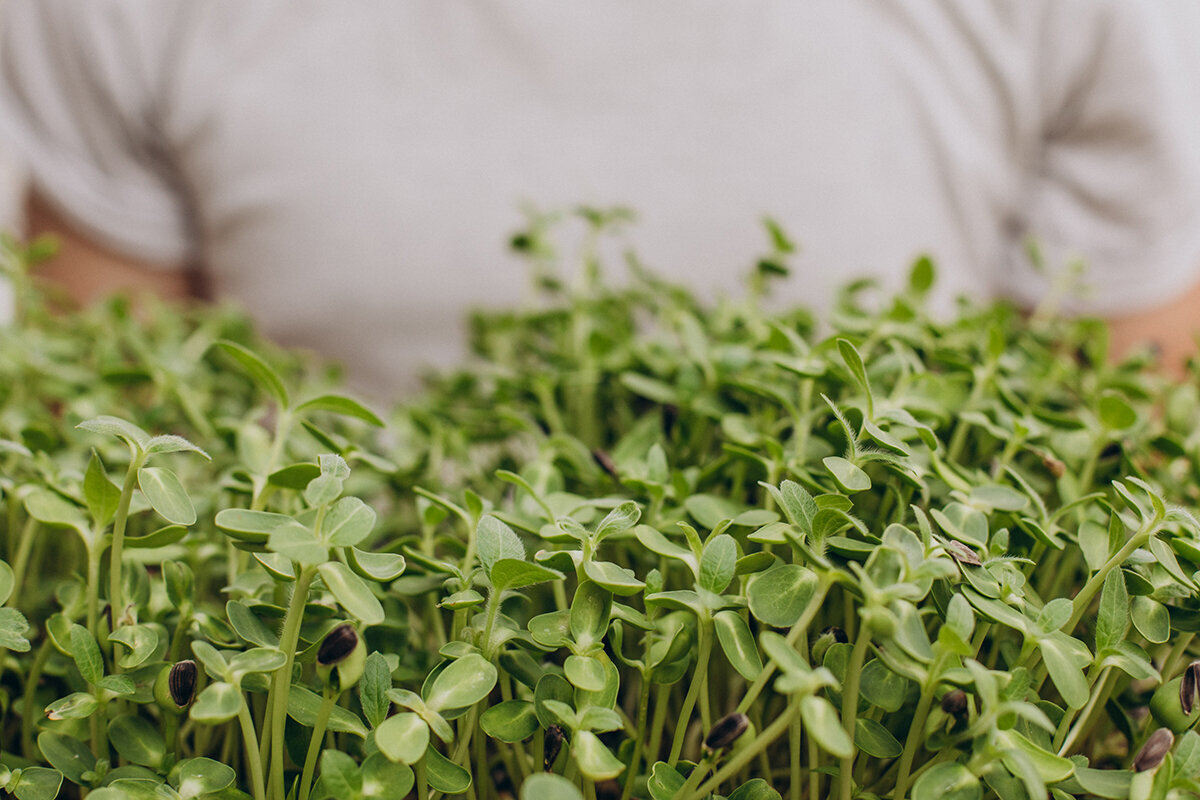
Greenhouse growing notes / 27
Raising Microgreens Under Glass
The quickest greenhouse crop needs a precise routine: suitable seed, even density, a controlled dark phase, tempered light and prompt chilling.
Classic aluminium greenhouse7–21 days Usual cutting period, depending on the crop
1 tray per crop Keep germination behaviour comparable and traceable
Clean → cold Hold post-harvest quality
The growing principle
Not miniature vegetables, but short, disciplined crop cycles.
Microgreens are edible seedlings cut after germination, once the seed leaves have unfolded. The exact point varies with the species and the finish you want: it may fall just before true leaves appear or as they begin. Sprouts differ because microgreens generally stand in a shallow medium or purpose-made mat. Make the cut just clear of the surface, leaving hulls, roots and medium behind in the tray.
This changes the job assigned to a greenhouse bench. Tomatoes value room, warmth and months of growing time; microgreens demand consistency instead. Their seed-to-cut cycle moves quickly, so minor lapses become obvious. Heavy sowing leaves a tray damp, comfortable morning conditions may become excessive by afternoon, and an unclean pair of scissors can spoil a batch that was handled carefully at every earlier stage. That speed rewards an orderly routine.
Precision should reassure an enthusiastic home grower, not put them off. Starting requires no large installation or elaborate nutrient schedule. Choose one dependable tray size, limit the initial crop list, use drinking water, prepare a surface that cleans easily and inspect everything at much the same hour each day. Use the opening month to tune the process. Log the crop and seed lot, sowing weight, any soak, when it was covered, when light began and its harvest condition. A record tailored to your bench beats any single promised harvest date.
Microgreen quality begins before sowing—and is protected through to chilling.
01 / Seed behaviour
Let growth tempo guide you, rather than colour.
For the opening trial, pick a species whose seed dimensions and emergence are easy to judge across a single tray. Small brassica seed soon produces a low, tight cover of leaves. Peas and sunflowers give chunkier shoots, yet ask for extra room, more attentive watering and rigorous cleaning. Leave blends until later. You can combine harvests intelligently after learning each species’ germination pace, water demand and the point at which its texture or height no longer suits you.
Buy clearly labelled, untreated seed expressly intended for eating as sprouts or microgreens. Keep supplier, germination and batch details, and label every tray with crop and sowing date. This helps you isolate a weak run, repeat a successful routine and notice when a batch grows more slowly than usual during a cool or dull greenhouse week.
Fine seed / quick
Broccoli
- Soaking: Usually not needed.
- Dark phase: Short and controlled.
- Character: Mild, fresh and delicately savoury.
- First tray: Ideal for practising even sowing.
Fine seed / colourful
Radish
- Soaking: Usually not needed.
- Dark phase: Short; uncover as seedlings rise.
- Character: Pepper heat, crisp texture and vivid colour.
- First tray: A sound beginner choice, provided sowing remains measured.
Bold seed / vigorous
Pea shoots
- Soaking: Often useful; drain thoroughly afterwards.
- Dark phase: A light cover can support rooting.
- Character: Sweet and juicy, with plenty of body.
- First tray: Its progress is easy to judge; steady airflow matters.
Bold seed / resilient
Sunflower
- Soaking: Commonly used, with clean drinking water only.
- Dark phase: Remove the cover in good time as growth increases.
- Character: Nutty, crisp and full-flavoured.
- First tray: Best once hygiene routines are secure.
Use untreated seed intended for microgreen or sprout production and for eating. Treated, coated or ornamental-plant seed has no place on a microgreen bench. At first, grow one crop per tray and combine different crops only after harvest, when their growth and cutting times are known.
02 / Density as a variable
Close enough to fill out. Spaced enough for airflow.
Sparse coverage
Working density
Too crowded
Aim for seed spread across the tray with few gaps or ridges. The cotyledons in a well-set tray eventually meet to create a cuttable cover, but stems should still lose surface moisture between drinks. Thick bands and clusters hold dampness where seed meets medium. They also encourage spindly, weak stems and a patchy crop.
Tray, medium and calculation
Take one measurement, then keep a consistent record.
For greenhouse growing at home, a shallow 30 × 50 cm tray is a useful size. It reveals differences in emergence and sowing density without becoming awkward to handle. Fit a perforated crop insert into a solid base tray for straightforward watering from underneath. The base holds water briefly while the medium absorbs it; it should not remain full.
Starting seed amount = tray area × proven crop rate.
Do not expect one gram figure to suit every tray. The correct amount changes with seed dimensions, cultivar, germination rate, growing material, available light and the finish required at cutting. Use the microgreen supplier’s recommendation as your first trial, weigh the sowing with kitchen scales, then compare coverage, drying at the surface and harvested quality before changing the rate. Trial each new seed lot separately.
Choose fresh, light propagation compost that keeps its structure and contains no raw animal manure, reliably sourced coir, or a mat made specifically for the crop. Dampen it evenly before sowing, stopping before saturation. Heavy garden earth performs poorly in such a shallow, brief growing cycle. Immature compost and unidentified materials should also be excluded because the harvested leaves are commonly served without cooking.
03 / Tray set-up
Separate the water, rooting layer and harvestable leaves by function.
Use a straightforward arrangement that can be cleaned fully whenever a batch finishes. Supply moisture to the roots from underneath, while giving the edible leaves enough ventilation and drying time between each watering.
Airflow around leaves
Uniform seed bed
Medium and root layer
Drainage insert
Reservoir tray below
Nest the perforated crop insert in a solid base. Water can then wick upwards through the medium before any remainder is tipped out. Keep the growing layer low, flat and consistently damp rather than sodden. Scatter the seed across the full area without ridges or heaps. Roots hold the plants in place below; above them, leave sufficient room for moving air to dry the foliage between drinks.
Food-safe contact surfaces Select sound trays with smooth, easy-clean surfaces and keep them solely for food crops. Cracks trap material and make dependable cleaning difficult.
Medium depth Most quick microgreen crops need only a slim, even bed. Pea and sunflower roots generally require a firmer hold than small-seeded brassicas.
Water path Pour into the solid base and wait while moisture travels upwards through the rooting layer, then tip away what remains. Do not leave the insert standing for extended periods with its roots below the waterline.
Airflow path Keep a clear gap on every side of each tray. Moving air must reach the spaces above and between them, rather than merely circulating elsewhere under glass.
04 / From dark to light
Darkness helps germination; it is not an inflexible routine.
During early emergence, certain crops respond well to an upturned second tray, a dome or modest weight. These measures encourage consistent dampness and close seed-to-medium contact, rather than prescribing the same blackout period for everything. Watch the species, temperature and vigour of the emerging plants to decide when uncovering is due.
Phase 01
Sow and settle
Even sowingPhase 02
Rooting
Check dailyPhase 03
Move into light
Filtered daylightPhase 04
Finish with airflow
Dry and uprightPrepare an even surface while the medium is damp, scatter the seed without clusters, then apply no more pressure than is needed to establish contact. Use a mister only to settle loose seed, never enough to leave standing pools.
Look over each tray daily. When roots begin raising the insert, or young plants push firmly upwards, ease the weight or take the covering away. An odd smell and warm air that does not move both signal trouble.
As the cotyledons prepare to unfold, transfer the trays to bright greenhouse conditions where temperature can still be moderated. Do not move them suddenly into fierce midday sunshine through the glass.
Feed water through the base when required, exchange the greenhouse air, and make the cut once growth is firm, balanced and at the planned developmental point.
Watch for warning signs: Do not continue or harvest a tray that smells musty or sour, shows fluffy growth or slime, stays wet, or has plants collapsing in patches. Move the suspect batch away and discard it. Wash the nearby working area, then reassess seed spacing, irrigation volume, heat and air circulation before the next attempt. Rinsing afterwards cannot restore the safety of visibly abnormal growth.
05 / Greenhouse management
Reserve the most stable greenhouse position for this rapid crop.
A greenhouse can shorten working routes by bringing natural light, water, equipment and cutting space together. For microgreens, however, enclosure creates the principal hazard: both heat and humidity can climb rapidly behind glass. More heat is not the objective. Seek stable, moderate conditions that let moisture leave the leaves promptly without exposing them to accumulated heat or harsh sunshine.
An initial working range of roughly 18 to 24 °C suits many familiar crops. Place the thermometer beside the trays, where it gives a better picture than a reading or impression at the entrance. Inspect conditions during the brightest period as well as on a cool morning. Following a cold night, act before forecast sunshine by opening the door and roof vents. Bright Irish spring weather can warm shallow trays surprisingly quickly. During summer, light shade cloth or a sheltered bench generally tackles heat more effectively than extra irrigation, which cannot reverse heat stress.
Irish spring and autumn daylight may support vigorous, quick crops where the site is unobstructed and the glazing remains clean. During dull winter spells, safely fitted growing lights can lengthen the useful day, but added heat cannot compensate for inadequate illumination. Use a small circulation fan for gentle movement around the trays without repeatedly drying the same edge. Guard against dripping condensation, chilly doorway draughts and stagnant pockets concealed by stored pots.
Classic aluminium greenhouseStore seed
Prepare
sowing
sowing
Manage
the crop
the crop
Cut +
chill
chill
Arrange the growing bench as a compact food-work area.
Keep a palm-width gap beside every tray, prevent hose ends and watering heads from touching the floor, and provide a hygienic landing area for scissors, markers and unused harvest tubs. Inside the Classic aluminium greenhouse , the space can be arranged as a compact, orderly growing room. Put its flexibility to work through wipe-clean stations, measured air movement, shade when the season requires it and efficient routes between tasks. Do not sacrifice those advantages to squeeze a further tray into an already busy corner. The bench works well when every insert can be inspected, irrigated and cut without shifting unrelated tools, before the full area receives a thorough clean.
06 / Food safety
Work consistently forward: dirty steps never return to harvest.
Because microgreens are regularly served uncooked, hygiene belongs within every growing task rather than being saved for the end. Obtain untreated seed clearly sold for eating as sprouts or microgreens. Drinking water should be used for soaking, irrigation and any necessary rinsing. Clean your hands before touching seed or harvested leaves. Keep pets, soiled gardening equipment, uncomposted animal manure and unfinished compost outside both the production area and the harvest station.
Washing and disinfection serve different purposes. Begin by lifting away medium, roots and every visible deposit with water and an appropriate detergent. A disinfectant suitable for food-contact surfaces can work properly only after that cleaning, and must be applied as its maker directs. Establish a closing routine for each batch: dispose of the contents and root mat, wash the equipment and trays, carry out any specified rinse, disinfect where appropriate, leave everything to air-dry, and store it apart from growing medium, hoses and footwear.
Stop: used trays, hose ends, substrate remains and garden shoes must not enter the cutting, packing and chilling area.
01Intake
02Wash
03Plant
04Tend
05Harvest and chill
Keep labelled seed in dry storage, separated from pesticides and other chemicals. Before anything touches food, wash the trays, cutting equipment and worktop. Confine work with seed and growing medium to a defined planting station. As the crop develops, irrigate through the base in measured amounts and clear discarded material promptly. For cutting, bring out hygienic, keen-edged tools and suitable containers, then move the produce to refrigeration promptly. Maintain one-way workflow so dirty equipment and medium cannot re-enter the hygienic packing or cutting station.
07 / Cutting window
Harvest by condition, not a calendar promise.
Seven, ten and fourteen days are guideposts rather than fixed promises. The true cutting point shifts with illumination, heat, cultivar, seed lot and the stem length wanted. Assess whether the stand is vertical and evenly coloured, the cotyledons are open, the surfaces are dry and unblemished, and the flavour remains fresh and characteristic. Whenever possible, cut while conditions are cooler and before substantial heat develops beneath the glazing.
Take a sanitised knife or pair of keen scissors and sever the stems a little clear of the growing layer. Keeping that separation prevents fibres or compost from being pulled through the crop and limits debris. Microgreens gathered clean and dry need not be rinsed by default, since wetting may reduce storage quality. When kitchen use calls for rinsing, choose drinking water and remove surface moisture thoroughly before refrigeration.
Pick only the volume that can be consumed, given away or packed while still excellent. Sowing one or two trays several days apart creates a modest succession and usually gives a household a steadier fresh supply than one large session that brings all trays to readiness together.
Radish
Firm cotyledons
Broccoli
Level green canopy
Pea
Soft young shoots
Sunflower
Robust paired leaves
For radish, look for unfolded, firm cotyledons and the familiar peppery taste. Broccoli is ready while its cover remains tender, level and green. Decide how long you like pea stems before their texture toughens. Take sunflower when its first sturdy leaf pair is established, ahead of excessive elongation or the point when clinging hulls and damaged foliage detract from its fresh, nut-like flavour.
Cold storage completes the cycle.
Carry the cut crop away from greenhouse heat promptly. Place it without compression in hygienic containers approved for food, then refrigerate it without delay. Keep harvested leaves separate from uncooked meat and vegetables that have not been washed. Quality is highest when there is little time between hygienic cutting and use in the kitchen.
08 / Diagnosis
Treat a poor tray as evidence; extra water is not the default answer.
Negative image
Long, pale stems
Long, pale stems
Stretched and leaning
Insufficient or uneven illumination is the likely cause, often combined with excessive time under cover or seed packed too closely. Remove the covering when emergence calls for it and provide strong, softened light. Check whether every stem is bending in the direction of one glazed wall. Raising the temperature cannot strengthen a pale, drawn canopy and may intensify accumulated heat.
Positive image
Dry and upright
Dry and upright
Surface stays wet
Use less water, supply it cautiously through the base and encourage mild circulation around the leaves. Review the spacing pattern as well: tightly packed fine seed can create a damp, felt-like surface despite general ventilation elsewhere under glass.
Negative image
Patchy emergence
Patchy emergence
Uneven germination
Begin by inspecting how damp the growing layer is and whether seed was spread consistently. A dry perimeter, saturated middle or dense seed clusters will produce a patchy stand. Prepare the medium with uniform moisture and a flat surface before sowing. Note for future batches whether this species responded well to soaking, gentle pressing or a brief period beneath a cover.
Positive image
Clean-cut, quickly chilled
Clean-cut, quickly chilled
Short shelf life
Harvest only dry, sound leaves with cleaned tools. Limit time in greenhouse warmth, do not pack wet cut produce and chill quickly. If keeping quality remains short, review the hygiene route as well as handling, pack moisture and temperature after cutting.
Questions from the workbench
Microgreens: common questions
Should greenhouse microgreens sit in full sun?
No. They benefit from abundant daylight, but strong sunshine passing through glass may heat a shallow tray rapidly and harm delicate foliage. Provide a bright location where heat can be controlled, ventilation is effective and seasonal shade is available. Growing lights are most relevant when Irish winter days are brief or extended dull weather limits natural illumination.
Do all microgreens need soaking and weighting down?
No. Pea and sunflower seed is frequently soaked, whereas the smaller seed of radish and brassicas generally needs no soak. Whether to add a cover or modest weight also varies with the species, temperature and lot. Consult the seed supplier, inspect progress each day and let actual emergence determine the timing instead of following one rigid blackout schedule.
Can I grow several crops in one tray?
You can, although a separate tray for each crop is more reliable while you learn. Species vary in seed dimensions, moisture demand, emergence rate and the best moment for cutting. Build records for them individually first. Combining harvested crops afterwards gives greater control and avoids forcing one component to wait while another catches up.
Do microgreens need fertiliser?
Seed reserves and an appropriate medium carry numerous microgreen species through this brief growth period. Do not assume they require added nutrients. First make emergence consistent, provide sufficient illumination, irrigate carefully from underneath and establish dependable hygiene. If your particular system later calls for feeding, use the species-specific directions supplied with its seed or equipment.
Can greenhouse-grown young plants be eaten raw safely?
Yes, when the whole routine is managed as the preparation of food. Use potable water, seed intended for the purpose, unused growing material, hygienic equipment and clean hands; exclude animals, maintain drying airflow and refrigerate the crop quickly. Rainwater should not be applied to this ready-to-eat produce unless its quality has been reliably established. The structure itself does not guarantee a safe batch—the daily handling routine does.
Sources and further reading
Develop your own production notes with sound evidence.
The following specialist references from Germany and international organisations support the advice about seed, sanitation, cultivation and how microgreens differ from sprouts. They provide context for assessing hazards, improving tray routines and recording informed choices about irrigation water, growing materials, greenhouse conditions and cutting.
More from Bloomcabin: Planning a greenhouse: layout, crops and care · Summer greenhouse care · More Bloomcabin garden ideas
- BfR: recognising and preventing STEC/EHEC food risks— Germany’s BfR explains foodborne STEC/EHEC hazards and measures that help prevent them.
- LAVES: sprouts and seedlings— Lower Saxony’s food-safety authority discusses sprouts, young seedlings and sanitary handling.
- EFSA: risk assessment of seed and sprouts— The European Food Safety Authority reviews hazards associated with seed and commercial sprout production.
- Virginia Cooperative Extension: greenhouse microgreen production— Practical guide to microgreens in greenhouses and controlled indoor systems.
- Penn State Extension: growing microgreens— Practical advice on sowing, medium, light, watering, harvest and common decisions.
Begin with one clean tray you can shade, then standardise each step.Classic aluminium greenhouse
