
Planning a pergola for a small or narrow terrace
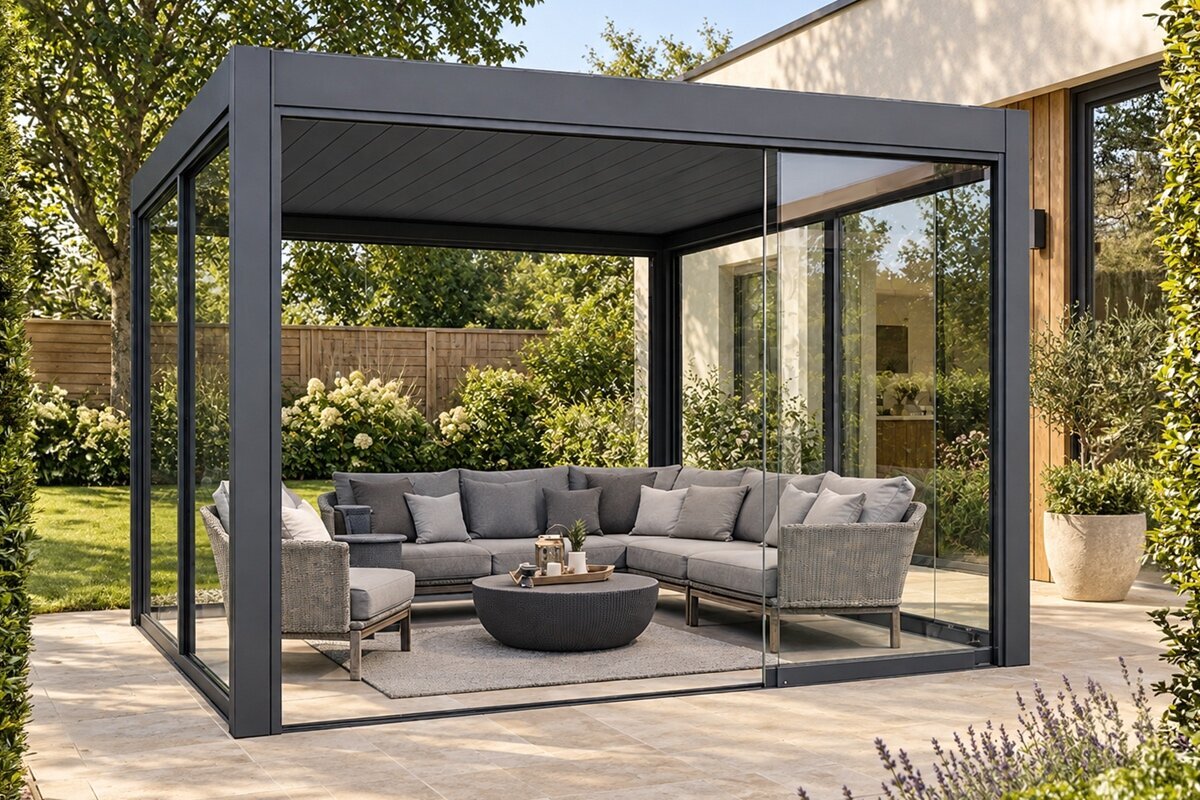

Floor dimensions alone do not decide a narrow terrace layout. Door swings, window openings, steps, railings, downpipes and your usual point of approach are equally important. The pergola should fit those habits instead of introducing a bottleneck. Map the ground you use in practice before treating any bare paving as available space.
A restrained layout usually serves a compact terrace best. Well-scaled furniture, uninterrupted views and breathing room at the perimeter create a calmer impression. An oversized structure may divide the outlook and leave the furnishings looking wedged into place. Balance the canopy with the house frontage, garden boundary and the way you normally use the area.
The sections below move from surveying the terrace and selecting a design to arranging the furniture. They explain how to test support locations, preserve comfortable movement and seek quotations on a comparable basis. Where planning status, foundations or boundaries require a definitive answer, contact the local planning authority and involve a suitably qualified professional when needed.
Stage 1
Read the terrace as a floor plan
Make a scaled sketch, even if squared paper is all you have. Include the house wall, doors, opening windows, steps, rails, containers and permanent fixtures. Take measurements at several points because tight terraces may be slightly out of square. Mark each door's swing and the clearance required by open windows as well.
Study the terrace during the periods when you expect to enjoy it. Your normal journey into the garden, outlook from the room and favoured orientation for sitting can reveal the sensible canopy limit better than a brochure photograph. Preserve useful strips beside the wall where you tend plants, move cushions or walk through an entrance.
Use masking tape to trace the likely perimeter. The taped outline makes it easier to judge whether the projection encloses the terrace pleasantly or feels oppressive.
Take pictures looking out from the room, back from the garden and across the space at chair height. Together, they reveal likely framing and interrupted views.
For adaptable shade in a tight footprint, assess bioclimatic aluminium pergolas with operation and space requirements in mind.
Stage 2
Let intended use determine width and depth
Begin with the full furniture footprint, then add the space people need for movement. A dining arrangement must account for chairs sliding backwards as someone rises, not just the table and occupied seats. Loungers also need legroom and an accessible passage. If movement feels forced beside the mock-up, matching exterior dimensions will not make the finished pergola comfortable.
A modest projection can suit an elongated terrace better than a canopy extending deeply towards the lawn. Space left uncovered may become a purposeful walkway or a light planting strip. Alternatively, the right span can bring order to a broad section of wall. Judge the resulting proportions instead of attempting to roof every last corner.
Reproduce the full outlines of the table, seating and loungers with blankets or cardboard. Practise taking a seat, rising and passing alongside them.
Preserve easy movement at the terrace door, gate and steps. These access points may influence sensible dimensions more strongly than your preferred furniture does.
For a defined, uncluttered terrace frame, explore classic aluminium pergolas in suitable footprint options.
Stage 3
Work support positions into the furniture plan
Supports directly affect both furnishing options and movement on a confined terrace. Put each proposed location onto the layout rather than treating it as a later technical detail. Pay particular attention to chair backs, the entrance from the house and any tight passage towards the planting. A slight adjustment on the drawing may decide whether everyday movement feels effortless or irritating.
Review their visual role as well. Supports can give the seating area useful definition when aligned with a wall edge, railing or planted border. Positions that ignore those existing lines may split the outlook awkwardly. Stand indoors to examine the composition, since that may be your most frequent perspective on the pergola throughout the year.
Avoid placing posts directly where chairs need to be pulled back. This is where the most frequent conflicts occur when dining and standing up.
Use stools to represent the proposed supports. Walk each doorway and rehearse ordinary tasks, including moving through with a watering can or serving tray.
Where space is tight and light preferences change, consider bioclimatic pergolas for terraces as a useful planning direction.
Stage 4
Protect access and circulation space
Good circulation on a tight terrace should feel instinctive. Avoid routing people from the terrace entrance around chair backs, containers or structural supports. A single generous movement zone is usually more useful than several thin gaps. It also simplifies serving food, cleaning the paving and tending beds that adjoin the terrace.
Account for everything that opens or operates beside the wall. Doors, window leaves and external blinds can temporarily occupy valuable room. Keep access available for work on wall finishes, drainage and outdoor fittings. At a rented property, within a managed development or near a boundary, ask the relevant landlord, management body or authority which approvals should be checked.
Choose a principal line of movement and leave it unobstructed. It should function immediately, without first relocating chairs, pots or decorative items.
Use planters as edge detail rather than obstacles. Movable pots remain flexible, but still need a safe position.
For a linear design along clear routes, look at traditional aluminium pergolas as a straightforward design reference.
Stage 5
Coordinate light, views and roof character
A canopy has a pronounced effect on how a small terrace and the adjoining room feel. Note the windows that provide an outlook and the points where natural light reaches indoors. Framing may strengthen the scene, provided important views remain open. Relate the structure's level and placement to architectural lines and the degree of openness you want.
Your priorities will also change according to the time of day: breakfast outdoors, midday shade and a cosier evening setting each suggest a different emphasis. Put these needs in order instead of presenting them all as equal. A clear hierarchy gives the adviser a better basis for discussing roof form and worthwhile optional equipment for this particular terrace.
Draw the sun's position during the hours you normally sit outside. Mark troublesome glare, privacy concerns and any garden outlook you especially want to retain.
Relate the frame colour to the window finish, paving and furnishings. In a confined setting, numerous strong contrasts can make the composition needlessly restless.
If you want to plan daylight in more detail, discover louvred-roof bioclimatic pergolas for the next stage of your planning.
Stage 6
Reduce furniture, retain comfort
A smaller scheme can still be welcoming. Give every item a useful role and sufficient surrounding clearance. Depending on your routine, an extendable table, stacking seats or a narrow wall-side bench may be effective. Allocate positions for storage, planting and serving at the design stage so none of them ends up occupying the circulation line later.
Set the main purpose before arranging the space: meals, relaxation, or a combination with one taking precedence. Squeezing a substantial lounge beside a modest dining set rarely improves either activity. A single coordinated group can provide greater ease and a calmer appearance. Mock up the measurements of your present furnishings before ordering replacements or settling the pergola footprint.
Favour furnishings that are visually light and simple to reposition. Wide plinths and generous armrests often occupy considerably more floor area than the seat itself suggests.
Assign storage for cushions, trays and maintenance items. Keeping these objects organised makes the terrace feel roomier and prevents avoidable obstructions.
For a restrained frame above a clear furniture arrangement, consider regular aluminium pergolas for your outdoor area.
Stage 7
Check foundations and surroundings early
Resolve ground conditions before fixing the final dimensions. Paving construction, finished levels, drainage falls and buried utilities may all shape the installation approach. Do not wait until assembly to investigate a rocking slab or an unknown supporting layer. If the build-up is uncertain, obtain a competent assessment of the preparation appropriate to the chosen structure and location.
Review features beyond the paving too. Eaves, rainwater pipes, planting at the boundary, awnings and exterior lighting can reduce the workable envelope. Leave sensible access for maintaining both garden and wall. Planning permission, separation from boundaries and exempt-development status have no universal answer; the proposal, property and relevant planning authority's assessment must be considered.
Photograph the surface, changes in level and any exposed fittings. Clear evidence helps make the early technical review and request for pricing more accurate.
Find out who holds utility drawings or construction details for the paving. Unverified guesses about anything hidden below the surface are inadequate for planning.
Where the structure is to stand on a carefully assessed site, view bioclimatic aluminium pergolas suited to compact terraces in the wider context.
Stage 8
Prepare a clear enquiry brief
An effective request covers much more than nominal dimensions. Supply measured information, photographs, a drawing of door movements, your proposed furnishings and notes on the supporting ground. Explain the activity that matters most and identify anything that cannot be covered or blocked. The resulting discussion can then address your own routine instead of relying on a standardised terrace example.
Judge each proposal by how well it resolves the layout you supplied. Review where the supports land, how the frame relates to the building and whether controls remain convenient within the confined area. Request details of the installation sequence, required site preparation and relevant written specifications. Ensure the quotation identifies the particular configuration being discussed.
Provide a photograph square-on to the wall and another taken diagonally from the garden. Put the key measurements onto a simple accompanying drawing.
Set out three priorities and three exclusion criteria. This helps prevent attractive extras from obscuring the key spatial issues.
For a focused equipment discussion, include classic aluminium pergolas in your shortlist.



Comparison
Which planning direction suits a narrow terrace?
This table is an organising aid rather than a verdict on an individual property. It brings together the concerns that matter most where terrace room is limited: preferred atmosphere, management of light, furnishing needs and the clearance required beside the frame and through circulation zones.
| Planning aspect | Bioclimatic design | Classic design |
|---|---|---|
| Spatial effect | Technical feel with a variable roof character | Calm, clearly defined frame |
| Light planning | Coordinate carefully for changing light preferences | Assess the roof effect early in the overall scheme |
| Furniture | Allow for the operating area in the layout | Align seating with fixed spatial edges |
| Narrow routes | Draw posts and access routes precisely | Keep a straight circulation zone particularly clear |
| Consultation | State times of use and operating preferences | Show the desired framing effect and furniture |
Choose the right size in five steps
Follow this order. Each decision builds on the previous one and prevents a preferred size from determining the real usability of a small terrace.
01
Survey the space
Check the width and projection at more than one point. Add doors, windows, steps, downpipes, railings, utilities and immovable planters to the drawing.
02
Define use
Choose whether meals, relaxation or flexible mixed use takes precedence. Record how many people will use it and their usual activities.
03
Lay out furniture
Recreate the table, seating or lounge footprint in cardboard. Practise moving chairs backwards, operating doors and travelling between the house and planting.
04
Simulate posts
Put stools at each suggested support location. From a chair, the adjoining room and the garden, judge whether movement and outlooks remain satisfactory.
05
Refine the enquiry
Assemble the drawing, images, ground information and priorities. Seek direct answers about site preparation, fitting arrangements and planning matters that remain uncertain.
Checklist before deciding
Work through the points below to decide whether you have enough reliable information to approach an adviser or request pricing.
01. Measurements taken in several locations, with slopes and any irregular corners recorded.
02. Opening arcs for each door and window marked on the drawing.
03. An unobstructed principal route designated between the dwelling, seats and garden.
04. Furniture measured accurately, including clearance behind chairs and through passages.
05. Possible post positions tested in relation to seating and access.
06. Surface construction, ground conditions and exposed fittings recorded for early review.
07. Important outlooks assessed in photographs or sketches from indoors and outside.
08. Local questions on requirements, boundaries and permission clarified in good time if needed.
Questions about pergolas for compact terraces
What dimensions suit a pergola on a compact terrace?
No single set of dimensions works for every confined terrace. Establish the usable footprint from the furniture, comfortable circulation and permanent features of the building. Tape the outline onto the paving, then rehearse opening doors, moving chairs and taking the usual route through the space. The proposed size becomes credible only when those actions remain straightforward.
Which positions work best for posts on a narrow terrace?
Look for locations that reinforce existing edges without interrupting routine movement. Entrances, stair approaches, the area behind chairs and tight passages towards the garden require particular care. Draw every support beside the proposed furnishings, then represent it physically on the terrace. Finally, inspect the composition from the adjoining room as well as outdoors.
Can good pergola planning make a compact terrace feel larger?
It can, provided the frame defines the seating without closing valuable views or perimeter space. Excessive projection or poorly related supports may instead make the setting feel smaller. Limit the furnishings, use a composed colour palette and establish an obvious circulation line. The sense of space depends on all these elements working together, not simply on adding shelter.
How should patio-door space be handled?
Leave enough room for the door to operate fully and for people to pass comfortably. Rehearse common situations such as carrying plates, controlling the door on a windy day and stepping over a threshold. Supports and furnishings should remain outside that working zone. Record the actual sequence of movements rather than relying solely on the nominal doorway width.
Will a terrace pergola require planning permission?
No single answer applies: the site, design, dimensions, property setting and relevant restrictions all matter. Before committing to an order, ask the local planning authority whether permission or a formal exempt-development declaration is appropriate. For rented or jointly owned property, check the applicable agreement or consent process too.
Which documents help with a quotation request?
Prepare a measured drawing, images looking both towards and away from the building, details of the paving and supporting ground, and the locations of openings and utilities. Show the proposed furnishings and identify priorities such as unhindered movement or preserving a chosen outlook. Specific, well-organised information allows each possible configuration to be discussed more productively.
Prepare your plan
Small terrace, clear plan
An aluminium pergola can bring order to a tight terrace when the design begins with ordinary routines. Establish how people move, how doors operate and where furniture belongs before choosing dimensions or support positions. This sequence helps the finished area stay visually appealing while remaining comfortable for meals, relaxation and access to the garden.
Draw the terrace as close to scale as practical and physically test every likely conflict. When you can provide reliable measurements, useful photographs and an ordered list of priorities, Bloomcabin can discuss pergola choices that respond to the available outdoor area and the way you expect to enjoy it.
Gather your dimensions, photographs and priorities, then begin a considered pergola selection.
