
Poolside Pergola: Shade, Privacy and Modern Design
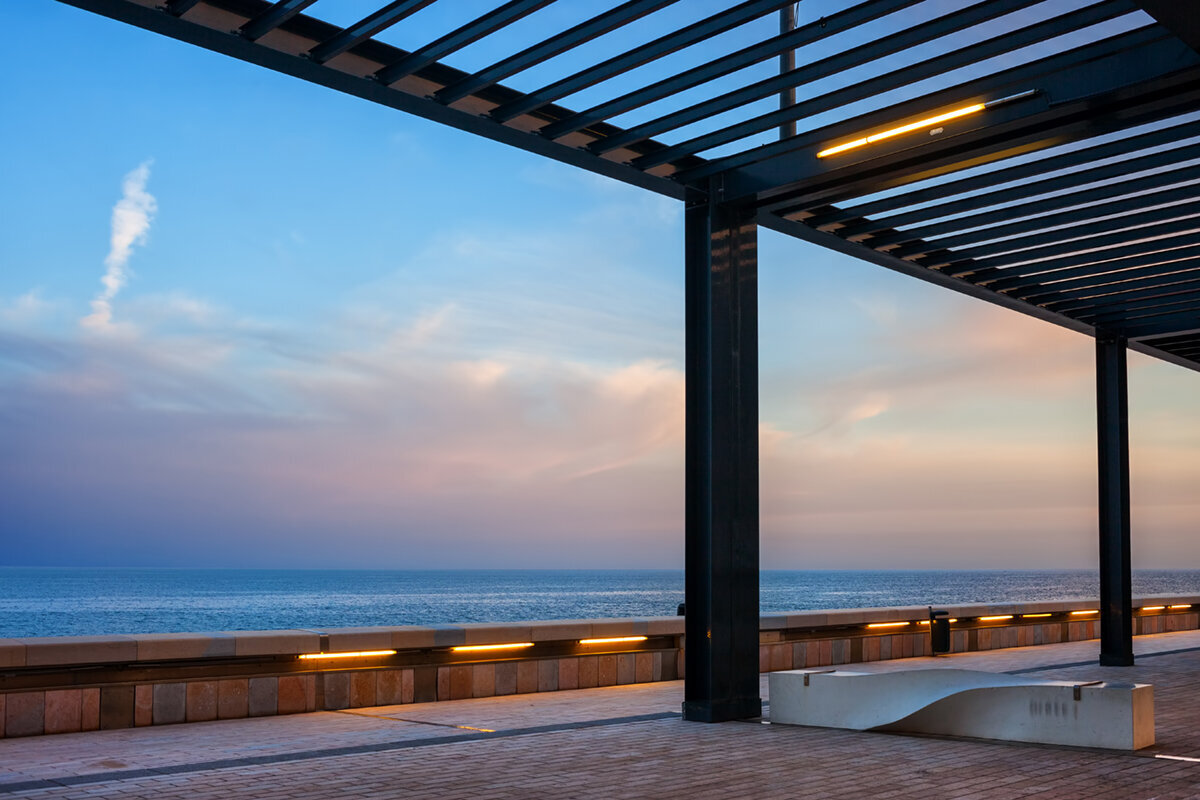

Pool surrounds frequently have to accommodate passing feet, sun loungers and a strong garden view. A pergola feels most convincing when it is designed into that mix, rather than added later purely for cover. It can give the lounge clear boundaries, lead the eye between home and water, and distinguish activities without clutter.
Judge the arrangement through ordinary routines. Note when direct sun reaches each lounger, which neighbouring positions overlook the site and how swimmers move while wet. Placed with care, an aluminium pergola can answer those observations spatially, creating somewhere comfortable to pause while preserving a generous view and an unobstructed pool perimeter.
Develop the dimensions, viewing lines, surface finishes and furniture as one composition. Decide as well whether the cover should remain consistent, respond to changing conditions or leave parts fully open. The sections below help turn the waterside pergola into a purposeful outdoor room and support a well-informed selection.
Step one
See the pool surround as a room
Visit the proposed position in morning, afternoon and evening before setting dimensions. Record shifting sun, shelter, wind and views from indoors, terrace and pool. Because Irish Atlantic conditions can vary by day and location, repeat the check in different weather. Give particular attention to barefoot routes and journeys made while carrying towels or serving trays.
Avoid letting the structure bear down on the water's edge. Entry points, maintenance tasks and repositioned loungers all require breathing room. The seats should nevertheless remain close enough to belong to the pool composition. Changes in paving direction, a narrow planted band or the alignment of furniture can mark that relationship without making it feel abrupt.
Use temporary chalk lines or string to test lounger footprints and circulation before confirming the location.
Look back from the living space and ensure the structure outlines the water instead of concealing it.
Where movable shade is important beside the pool, bioclimatic aluminium pergolas can form the organising structure.
Step two
Match cover to daily use
Different poolside activities call for different degrees of shelter. One swimmer may want immediate cover for resting afterwards; another may prefer an airy dining position that catches sunlight along one side. Map three distinct areas: deeper cover for lingering, exposed paving for sun loungers and a continuous waterside route. The terrace will then retain variety instead of becoming one uniform zone.
Comfort depends heavily on orientation. Track the lower afternoon light and note the shadows already made by the dwelling, mature planting or nearby buildings. Position the pergola to relieve the periods of exposure that cause discomfort, while avoiding unnecessary shade across parts of the terrace that are already cool or sheltered.
Position the table according to when you usually eat outdoors and need cover, rather than judging noon alone.
Reserve some open paving for sun loungers, giving bathers a genuine choice between sun and shelter.
For a cover with a strong, permanent outline, consider classic aluminium pergolas when arranging the waterside lounge.
Step three
Gain seclusion without closing in
Overlooking often feels particularly intrusive where people swim and rest in swimwear. A graduated response is generally more graceful than surrounding the water with tall, opaque barriers. Turn the pergola towards the troublesome viewing lines, then use containers, open-branched shrubs or a limited side panel at the specific points where extra cover makes a practical difference.
Preserve desirable outward views while dealing with unwanted ones. A glimpse of lawn, mature canopy or another attractive garden feature keeps the seating connected to its surroundings. Test every screen while sitting or reclining, as those eye levels differ from the view experienced while walking. This simple exercise usually produces a lighter, more precisely placed solution.
Map overlooking from adjacent windows, walkways and elevated terraces before choosing the screening positions.
Pair built screening with loose planting to soften its mass and bring seasonal change to the setting.
Where both seclusion and daylight need to change, louvred-roof bioclimatic pergolas merit consideration during planning.
Step four
Set comfortable scale and spacing
Read the pergola against both the volume of the house and the extent of water. Too little structure may look insubstantial alongside a broad pool, yet too much can overwhelm it. Begin with a measured furniture plan: sofas, chairs and occasional tables require space beyond their own dimensions for easy passage, comfortable use and an uncluttered appearance.
Protect the practical areas before settling the footprint. Covers must operate, cleaning points must remain reachable, and services, lights and pool edges still need maintenance. Confirm that the supporting surface meets the installation instructions and responds to conditions at the property. If its capacity or construction is unclear, obtain competent site-specific advice before fixing the position.
Draw the furniture arrangement accurately, then establish the outer pergola line around it.
Treat routes to the cover, cleaning points and pool equipment as furniture-free working space.
To give a linear seating arrangement a definite edge, conventional aluminium pergolas can sit comfortably alongside pool paving.
Step five
Build a coordinated material palette
Limit the pool setting to a disciplined palette and repeat each finish with purpose. Aluminium introduces a crisp architectural note beside masonry, timber-look surfaces or broad-format paving. Exact matching is unnecessary; harmony comes from related tones and textures. A window-frame colour, pale grout line or shade found at the pool coping can reappear as a quiet visual reference.
Texture matters wherever people walk barefoot or settle into seats. Fabric, timber details and softer surfaces temper the precision of an aluminium frame. Low furniture preserves long views across the water, whereas bulky storage and dense ornament can make the scene restless. A few connected choices generally produce a calmer place than numerous unrelated accessories.
Select one frame colour, then carry a supporting accent through cushions, containers or lighting.
View finish samples beside the water in daylight, as reflected light can alter their apparent colour and texture.
For modern spaces needing ordered structure and controllable daylight, consider bioclimatic aluminium pergolas by the pool to establish the overall composition.
Step six
Plan for meals, rest and everyday movement
Give the area one leading purpose before adding secondary uses. A sofa group supports reading and drying off, dining furniture makes outdoor meals comfortable, and a modest serving station helps when carrying food. Let the supporting functions follow the main one. This discipline prevents the footprint from becoming an awkward mixture of dining room, store and play area.
Choose furniture that can adapt without drifting into circulation routes. Small tables may shift towards loungers, and stackable or outdoor-suitable chairs make room for visitors. Keep loose pieces away from the journeys linking the house, water and lounge. Clearly legible paths are especially valuable when children are present or people are moving with wet feet.
Angle chairs towards the water and planting instead of automatically following the house wall.
Provide a sheltered landing place for towels, drinks and sun cream without reducing circulation.
To organise dining or lounging consistently along the water, standard aluminium pergolas work within many restrained garden layouts.
Step seven
Create a welcoming evening scene
Once daylight fades, reflected highlights animate the water, safe movement becomes more important and the structure forms a backdrop to conversation. Build the scheme from several modest layers rather than a dominant fitting. Low path markers, gentle light near the seats and a readable connection back to the house create depth while protecting the unhurried mood.
Evaluate every fitting from chair and lounger height. Neither bare lamps nor their reflections should distract someone looking across the pool. Softer, warm-looking illumination often sits more comfortably with planting and textiles than flat, intense brightness. Discuss outdoor circuits, existing supplies and any relevant protective requirements with an appropriately qualified electrical professional at an early stage.
Place illumination where people need guidance; allow the outer edges to remain visually quiet.
At night, view the scheme from pool and seats to spot glare, reflections or exposed fittings.
To anchor a softly lit lounge after sunset, bioclimatic pergolas beside pool terraces can give the scheme a coherent visual centre.
Step eight
Turn observations into a sound decision
Prepare an enquiry with evidence from the property: photographs, indicative dimensions, the supporting surface, intended activities and significant views. Include notes on drainage, coping and nearby buildings so the setting can be understood accurately. A precise description of the way you expect to use the space makes it simpler to assess appropriate dimensions, orientation and optional features.
Permission and building-control questions in the Republic of Ireland are separate and depend on the proposal and property. An exempt development remains subject to its conditions, so ask the relevant planning authority about classification, earlier works and site constraints. Consult your insurer separately where cover could be affected, turning the design idea into a properly investigated project.
Rank shade, privacy, dining and appearance in order, making any trade-offs easier to recognise.
Request the proposed installation documents, then have their suitability for the particular site checked.
For a pool zone intended to feel permanent, carefully consider classic aluminium garden pergolas while developing the shortlist.



Comparison
Choosing an approach for your pool
Pool terraces differ in scale, outlook and routine. Consider how you want the setting to feel from morning into evening, then relate that ambition to the garden already present. Use the comparison to identify the most important activity, degree of screening and architectural emphasis before committing to dimensions or equipment.
| Planning approach | Suitable when | Poolside strength |
|---|---|---|
| Open lounge zone | The garden should feel spacious and light. | Frames seating without feeling heavy. |
| Sheltered retreat | Views in mainly affect one side. | Concentrates screening on the relevant sightline. |
| Dining by the water | Eating outdoors is the central purpose. | Creates a clear home for table and guests. |
| Flexible shade zone | The need for light changes through the day. | Supports different moments beside the pool. |
| Architectural connection | House, terrace and pool should work together. | Repeats lines and gives the garden order. |
Five decisions for a better poolside pergola
Start with what happens at the property rather than immediately selecting a product. Follow these decisions in sequence to clarify the footprint, level of shelter and visual treatment, making the later comparison of suitable pergola options more straightforward.
01
Choose the priority activity
Identify whether sunbathing, dining, relaxed seating or a mixture will dominate the space. Select one activity as the priority so furniture sizes, circulation and the overall proportions can be resolved coherently.
02
Track sunlight
Make notes across several days showing where light and shadow fall on the water, paving and proposed seats. Include shadows cast by the house and trees, together with low late-afternoon sunlight.
03
Check sightlines
Occupy each proposed seat and record the intrusive viewing directions. Assign screening only to the sides that require it, protecting the most worthwhile garden outlooks.
04
Review ground and routes
Examine the mounting surface, water run-off and every connection to the dwelling, equipment and pool edge. Confirm the proposed fixing method against both the product instructions and circumstances at the property.
05
Prepare your enquiry
Assemble the dimensions, site images, drawings and ranked requirements. Contact the appropriate local authority before the design is final, and refer installation questions to competent technical advisers where necessary.
Checklist for your pool area
Work through these checks beside the water to judge whether the structure genuinely improves the setting instead of merely occupying and covering part of it.
01. One principal activity has been chosen, with furniture footprints plotted at credible dimensions.
02. The position preserves unobstructed access between the house, water and essential pool equipment.
03. Preferred-use times have been checked against the sun's path and shade already present.
04. Overlooking has been assessed at sitting and reclining height, not solely from the site's edge.
05. The pool, dwelling, paving and pergola share a restrained, recognisable palette of finishes.
06. The mounting area and its build-up are checked carefully against the product instructions.
07. The lighting concept supports safe orientation and atmosphere while controlling glare.
08. Resolve local requirements and insurance queries before giving the project final approval.
Frequently asked questions about poolside pergolas
Where should a pergola stand beside a pool?
Choose a position that defines the place to sit while leaving entry points and waterside circulation unhindered. Study changing sunlight, overlooking and the routes people actually take. A location set slightly back or to one side often keeps lounge furniture visually connected to the pool without narrowing its working edge.
What can improve privacy around a pool?
First locate the precise viewing directions that cause discomfort, whether they come from windows, raised ground or a shared route. Respond at those points with the pergola, selective side screening and plants rather than enclosing every boundary. Retain openings towards attractive planting or wider garden views so the result still feels generous.
Can an aluminium pergola work beside a compact pool?
Yes, if its scale and purpose are resolved together. On a tight terrace, assign the structure one clear task, such as covering a small seating group or a pair of loungers. Avoid bulky furniture and side panels that do not solve a real problem. Plotting the design accurately on a scaled plan exposes overcrowding early.
How much circulation space is needed around a pool?
Protect continuous movement between the dwelling, lounge, water entry and equipment. Allow for people carrying towels, movable chairs and cleaning tools, especially when surfaces are wet. Keep table corners, pots and recliners beyond those routes. Temporary tape or chalk on the paving is an effective way to uncover narrow points before installation.
Is planning permission required for a pergola by the pool?
Irish planning treatment turns on the precise property and design, so a general yes or no would be misleading. Ask the relevant planning authority whether the proposal needs permission or satisfies every condition for exempt development. Where a binding answer is required, enquire about the authority's formal declaration procedure rather than relying on experience from another site.
What is a sensible approach to poolside lighting?
Combine discreet route lighting with softer light by the seats, then test both viewpoints after nightfall. Keep fittings out of direct sight and avoid strong reflections. Any fixed outdoor electrical proposal should be assessed by a Registered Electrical Contractor, who can identify whether the work is restricted and which completion certificate is required.
Planning a pool area
A pool space made for real relaxation
Bringing order to the busy pool surround is one of a pergola's most useful design roles. Resolve shelter, seclusion, circulation and furniture as connected decisions, and the space gains an identity of its own. The finished arrangement can then belong naturally within the wider garden rather than appearing as a structure added without context.
Observe the property carefully and draw the activities you expect it to support. Only then compare pergola arrangements against the available ground, construction below and atmosphere you want to create. This preparation supports a reasoned choice and helps the waterside setting remain comfortable and appealing throughout Ireland's varied garden season.
Discover pergola solutions that can frame your poolside seating area with clarity and style.
