
Propagating greenhouse cuttings successfully
Bloomcabin Greenhouse Journal · Propagation Edition
Propagating greenhouse cuttings successfully
A cutting should not be treated as a tiny finished plant. This living piece must conserve water, initiate roots and learn to function independently, all within carefully regulated surroundings.
Greenhouse shelter turns propagation from windowsill chance into a routine that can be repeated and refined. Success comes from choosing a method for the species, preparing material hygienically, and coordinating a porous medium with softened light, suitable moisture and measured ventilation.
For a propagation area intended to stay in regular use, consider the Classic Aluminium Greenhouse Its defined interior, accessible roof vents and sheltered workspace can make everyday cutting work orderly and dependable.
Starting materialUse vigorous stock of known identity; reject any shoot showing stress, infection or pest activity.
PositionProvide softened, bright light, gently warmed media, steady moisture and regular ventilation; avoid keeping cuttings sealed in soggy air.
Growing onDelay potting until a network of branching roots can supply the cutting after it leaves its sheltered setting.
Heat is only one advantage of greenhouse cover. Rooting material is buffered from changing weather, while illumination, moisture, airflow and temperature can each be tuned.
Leaves continue transpiring immediately after a cutting is taken, although developed roots are not yet available to replenish that water. Its base also requires oxygen, the medium should stay evenly damp without becoming airless, and mild illumination must sustain activity without scorching tissue. Outside, afternoon heat, desiccating breezes, downpours and chilly nights can overturn that balance. Glasshouse shelter allows finer control of shade, vents and irrigation.
A hot, saturated atmosphere should not be maintained continuously. Too much heat accelerates drying; persistent droplets and waterlogged compost favour disease and decay. Instead, establish a restrained micro-environment around the bench within the main house. Keep it hygienic and sheltered, temper the light, and introduce ventilation whenever conditions require it. Protection should remain controllable, never hermetically sealed.
Check 01 · Starting material
The stock plant comes before the tools
Whatever affects the parent can carry into the cutting. Select a vigorous specimen showing the normal character of its variety, adequately hydrated but not made soft by a recent excess of feed. Reject parents with spotted foliage, distorted shoots, webbing, aphids, mites, chewed leaves, or blackened and yielding stem tissue. Forming roots will not cure an internal infection or erase problems already present.
Cool morning collection often suits herbaceous and partly ripened shoots, as their tissues are generally well hydrated then. Move each batch into shade immediately, prepare only manageable quantities and insert them without delay. Blossoms, unopened buds, fruit and developing seed draw on energy that should serve rooting, so these parts are generally taken off.
Select healthy shoots, free of pests, with characteristic growth and an unblemished, normally coloured canopy.
Collect only from correctly named plants after confirming that propagation is permitted.
Choose non-flowering material at a suitable maturity rather than showy shoots whose reserves are depleted.
Water the stock plant the previous day if needed; do not cut drought-stressed growth.
Check 02 · Choose a method
No single cutting method fits every plant
Method follows both the plant’s growth habit and how mature the chosen tissue is. Nodes are important in numerous shoot cuttings because leaf junctions contain tissues capable of initiating roots. By contrast, propagation from a leaf, cane, stem section or root succeeds only in species able to regenerate shoots and roots from that material.
Softwood
Young, flexible growth
Fuchsia, pelargonium, coleus and basil are among the plants commonly propagated from tender shoots between late spring and summer. Such cuttings may root fast, yet they dehydrate equally fast.
Part-ripened wood
Shoots that have started to mature
Suitable for rosemary, lavender, sage, many evergreens and ornamental shrubs, often in high and late summer. Leaf reduction and controlled humidity can help.
Mature hardwood
Leafless, dormant sections of fully ripened wood
Currants, willows and certain other woody plants can be propagated this way. Because the pieces carry no foliage, transpiration is lower; nevertheless, they must be collected in the suitable dormant period and their polarity marked clearly. Always distinguish the basal end from the upper end.
Leaf or cane material
Parts selected according to species
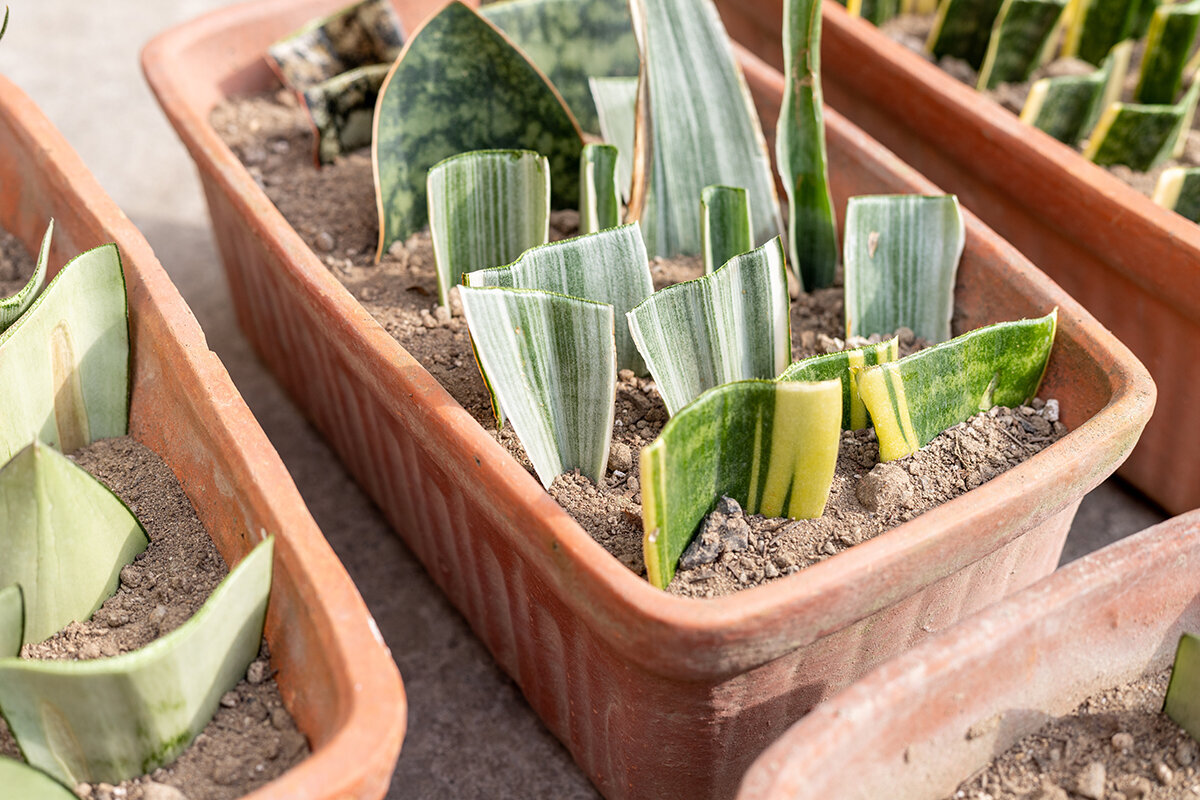
Leaves can generate new plants in African violets and numerous begonias, while Dieffenbachia and Dracaena are examples suited to cane sections. Root production by a detached leaf does not guarantee that it can also generate an entire shoot.
Root
Dormant potential below ground
Only certain perennials, including phlox and Oriental poppy, can regenerate shoots from pieces of root. Treat this as its own propagation technique rather than an alternative version of a stem cutting.
Succulent exception
Treat the wound by species
With some succulents, let the cut surface dry before inserting it. Constantly high humidity is often counterproductive for rot-prone species; follow reliable, species-specific guidance.
Check 03 · Precise cuts
Prepare cleanly, quickly and deliberately
Choose either sharp secateurs or a knife appropriate to the shoot; bruised tissue cannot provide a sound cut face. Wash the working surface and pots beforehand, then disinfect blades whenever you move to another parent or batch, particularly with valuable collections or material intended for sharing. Before insertion, open a planting channel in the damp compost using a pricking tool or pencil. The prepared channel protects tender basal tissue and prevents any applied rooting preparation from being scraped away.
01
Hygiene
Begin with freshly cleaned trays, markers, implements and hands, together with unused propagation medium. Dirty pots and soil dug from the garden should stay away from the bench.
02
Prepare a section
For an ordinary tip or stem cutting, choose a sound growing point or vigorous length of stem. Species requirements determine both node count and overall length, so avoid imposing one standard measurement.
03
Limit transpiration
Strip foliage from the portion destined for the medium, and take off blooms and fruit. Where broad leaves hamper spacing or place too much demand on a cutting, neatly reduce them by half while retaining useful photosynthetic surface.
04
Keep the orientation
Stem and cane sections must be inserted the correct way up. Different top and basal cuts can guide you with hardwood cuttings, but the method for the individual species remains decisive.
05
Insert and label
Insert whichever node the method requires, settle the compost lightly around it and water with restraint. Immediately note species, cultivar, date and technique, adding the parent identity or batch code when useful.
Base cut · lowest node · retained leaf · medium surface
Anatomy guide
Interpret each part before adapting the method
Use the familiar leafy shoot as an anatomical reference, not as instructions for every species. Consult guidance for the plant concerned before scoring woody material, covering nodes, trimming foliage or using a rooting preparation.
- Basal end: place this into already moistened medium, making a crisp cut without bruising the tissues.
- Lower node: is positioned below the surface in numerous standard shoot-cutting methods, while retained foliage remains higher.
- Remaining leaf area: feeds the cutting but increases water loss if the area is too large.
- Upper bud or shoot tip: remains clear of the compost and subsequently produces the visible growth.
- Insertion depth: insert far enough to achieve secure contact, while keeping leaves and tender stem tissue above the medium where they cannot decay.
Check 04 · Controlled climate
Create rooting conditions, not a wet chamber
Recently taken leafy material often needs a moister atmosphere because water lost through foliage cannot yet be fully replaced. That does not justify motionless air or continual dripping. Seek turgid foliage, a clean-smelling workspace and root media that remain evenly damp while retaining oxygen.
Filtered lightOffer strong diffuse daylight or modest shade. Through greenhouse glazing, intense summer sunshine may cook foliage enclosed beneath a clear lid.
Humidity coverClear lids and polythene tents slow dehydration. Increase venting or lift the cover when droplets linger instead of clearing.
Temperate mediumRoot-zone warmth may assist slow-rooting or heat-loving plants. Measure inside the medium and warm that zone as needed, rather than maintaining high heat throughout the greenhouse.
Air exchangeManage doors, ridge vents and any circulating air cautiously. Foliage requires renewal of air without exposure to a dehydrating current.
DrainageKeep trays above standing water, select pots with open drainage, and make sure the rooting mix never remains saturated for long.
Even in Ireland’s generally mild maritime climate, sunshine can raise the temperature of a shut greenhouse quickly while the night stays cool; inland sites may also see late spring frost. Inspect the bench around peak daytime warmth as well as early in the day. Summer covers still require both shade and ventilation. In cold weather, glazing reduces exposure but tender material may still need deliberate frost protection.
Check 05 · Rooting medium
Keep moisture and oxygen together at the base
Good rooting media are clean, stable in structure and freely drained. Their texture should suit the cutting while giving enough support to keep it vertical. Soil taken directly from a garden usually performs poorly in small pots: it packs down, wets inconsistently, and may carry pathogens, insects and weed seed. Evenly dampen the mix before use, then wait until excess water has escaped.
| Medium | Air pore volume | Water retention | Use and note |
|---|---|---|---|
| Perlite-rich mix | High | Medium | This airy option suits many indoor plants and tender shoot cuttings. Because water passes through readily, inspect small cells before the contents become thoroughly dry. |
| Coir with perlite | Medium to high | Medium to high | Useful where moisture should remain more even without losing pore structure. Use clean components and do not compress the medium heavily when filling. |
| Coarse sand with peat or coir | Medium | Medium | A classic mix where clean components of suitable grade are available. It provides stable support, but may be heavier and more compact when potting on. |
| Rooting in water | Little aeration around the base | Very high | Useful for a few houseplants that root readily. Water-grown roots often need careful acclimatisation when transferred into compost, and their water should be inspected and refreshed routinely. |
Check 06 · Root development
Distinguish callus, foliage growth and true rooting
Some plants produce callus ahead of roots; others initiate roots at nodes or from another suitable tissue. Stored reserves may fund fresh foliage even while the underground system is still poorly developed. Repeated tugging is therefore unhelpful. Look instead for steady new growth, resistance to an exceptionally gentle test, pale roots visible through a clear pot or at the drainage points, and a coherent root mass that has not become congested.
Wait until several roots have begun branching and are capable of maintaining the plant once the moist cover is removed. Move it into a pot only moderately larger, using a somewhat richer mix appropriate to the species. Water evenly, then return it to good light away from direct midday sun. Over several days, leave the cover open for successively longer intervals. This acclimatisation matters because rooting can finish before the young plant is ready for drier air and increased transpiration.
Stage 1Immediately after insertion: tissues contain water, although no new roots are yet functioning.
Stage 2First rooting: either callus or initial roots become visible; continue watching atmospheric and compost moisture closely.
Stage 3Branched roots: enough structure for gradual hardening off and careful potting on without unnecessary stress.
Check 07 · Troubleshooting
Read the symptom and change the cause
Discard any specimen with obvious decay or a coating of mould before the issue reaches neighbouring plants. Examine less clear failures methodically, remembering that different faults can produce the same appearance. Alter no more than one or two variables initially and note how the batch responds.
Problem A
Wilting despite wet compost
Water loss may be outrunning absorption, or damage may already have reached the base. Possible explanations include excessive warmth, unfiltered sun, too much foliage, incorrect insertion depth and the onset of decay.
Correction: Soften the illumination, examine the basal cut for decay, temporarily add moisture to the air, and keep the compost damp without saturating it.
Problem B
Dark, soft stem base
Excess irrigation, blocked drainage, dirty materials and an unvented cover laden with condensation all favour decay. A rooting preparation cannot rescue a base deprived of oxygen.
Correction: Remove affected cuttings, clean containers and tools, restart with fresh porous medium and provide controlled air exchange.
Problem C
Bleached or dry leaves
Glazing combined with a clear lid may amplify solar heating. Useful illumination is necessary, but exposed foliage can scorch before fresh roots are able to replace moisture.
Correction: Move to a bright place without direct midday sun, shade temporarily and check conditions on the warm afternoon.
Problem D
Mould, algae or no progress
Water left continually on surfaces, spent media, insufficient illumination, unsuitable warmth or wrongly matured parent material may all delay progress. Some species, however, genuinely take longer.
Correction: Increase cleanliness and separation, clear away dead foliage, verify the temperature, and consult dependable species guidance on timing and the chosen cutting technique.
Check 08 · Batch records
Each batch improves the next
Reliable propagation begins when each attempt is treated as part of an ongoing process. Keep notes beside the bench, or use labels that withstand damp conditions. A broad calendar is less informative than observations from your particular microclimate: shaded space facing north will respond unlike an open eastern position. Across Ireland, sunny April intervals, cool nights, coastal wind and changing summer weather can each alter the environment under glass.
Give unsuccessful batches the same attention in your notes as successful ones. Rather than chasing a flawless success rate, identify the parent plants, tissue maturity, media, bench positions and seasonal windows that repeatedly yield sturdy young plants.
Example bench record
BatchH-26 · rosemary, semi-ripe · eight cuttings
Parent materialPest-free lateral shoots without flowers, collected before midday
MediumDamp coir-perlite blend; sanitised cell tray
EnvironmentBright filtered light; ventilated cover; temperate bench without direct sun
ObservationDay 8: no wilting; day 18: firm hold; day 25: branched roots
LearningNext time: prepare a smaller batch of evenly sized pieces and trim broad leaves a little further.
Questions from the greenhouse
Practical answers
Treat these answers as an initial guide. Seek reliable advice for the species when material is rare, lignified, legally protected or reluctant to form roots.
Is a rooting preparation necessary for every cutting?
Not usually. Coleus, pelargoniums, pothos and many other easy-rooting herbaceous or indoor plants often succeed without one. A suitable product may help reluctant or slow-rooting material. Irish home gardeners must choose a product authorised for amateur use, follow its label and apply it sparingly. Put powder or gel in a separate clean dish; discard leftovers rather than returning them to the pack.
Must the humidity cover stay shut throughout the day?
No. A cover can slow the drying of newly prepared leafy material, but inspect and air it each day. If foliage stays wet with droplets, compost becomes waterlogged or fungus appears, extend each uncovered period and reassess illumination, irrigation and ventilation. Succulents and other decay-prone plants may need minimal covering, or none.
Can I put cuttings directly into greenhouse soil?
Fresh porous media in clean vessels are normally the safer choice. Soil from beds can compact, carries unwanted organisms and is difficult to moisten consistently. Using individual pots, modular trays or low pans also keeps batches easier to identify, examine, isolate and move around the greenhouse.
What determines the rooting time under glass?
It depends on the species, cutting method, season, condition of the stock plant and bench climate. Soft shoot cuttings can root relatively quickly, while woody material often takes much longer. Do not follow a fixed date; wait for several branched, supporting roots.
Which items matter most when setting up the bench?
Start with a flat washable worktop, dependable runoff, adjustable shade, temperature checks, ventilation and sufficient room to separate batches. The Classic Aluminium Greenhouse creates an enduring, accessible workspace that can be arranged differently through the seasons. The Classic Aluminium Greenhouse can be configured as an orderly working zone where airflow remains easy to regulate.
References and additional guidance
Trusted information for planning the rooting bench
More from Bloomcabin: Custom-sized aluminium greenhouse · Traditional aluminium greenhouse · Aluminium greenhouse with conveniently placed roof vents
- Julius Kühn Institute (Germany) – certification guidance for ornamental propagation material
- Intellectual Property Office of Ireland – plant breeders’ rights
- National Biodiversity Data Centre – invasive-species legislation and policy
- University of Illinois Extension – Propagation
- University of Illinois Extension – stem, leaf, root and cane cutting methods
- RHS – techniques for propagating plants
