
How to identify a quality aluminium pergola: 12 key features
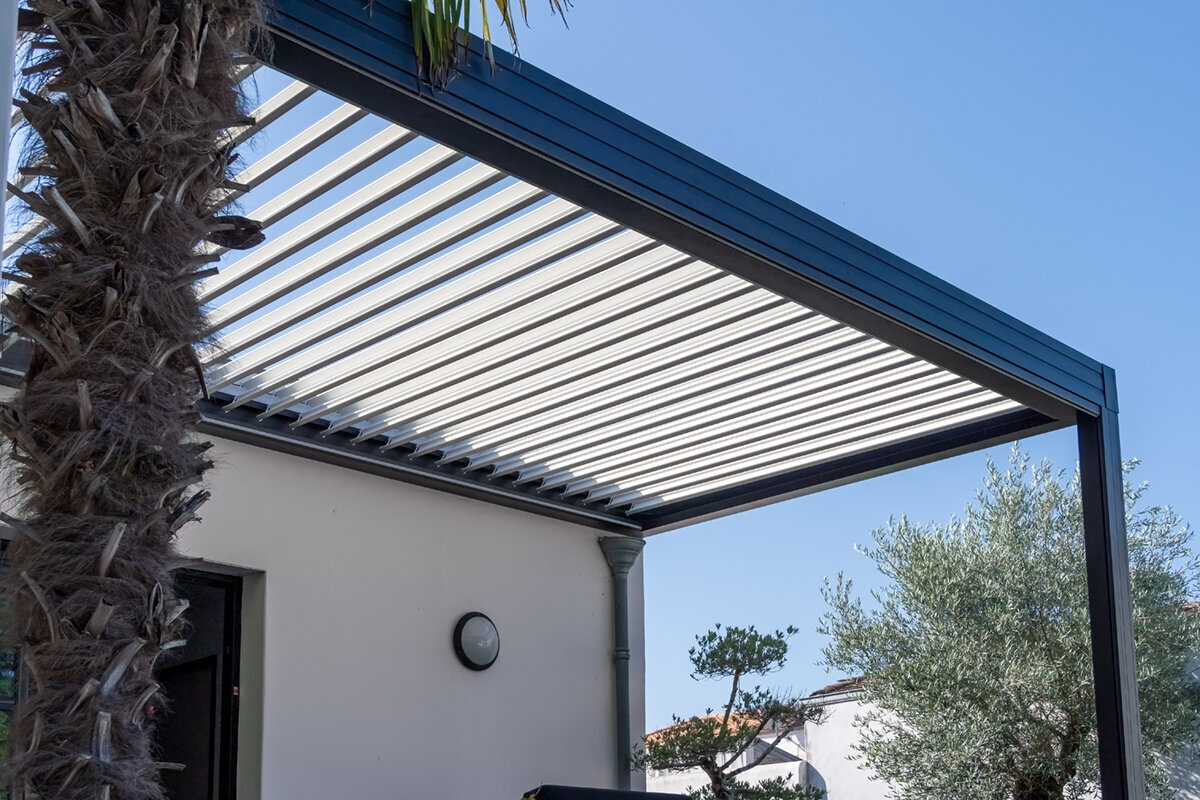

Positioned between a home and its garden, a pergola has a lasting visual presence. Brochure photographs therefore tell only part of the story. Better evidence lies in the way the structure transfers forces, channels rainfall and allows moving elements to operate in ordinary use. The sections below organise those details for closer review.
Define the job and setting before reviewing models. Will the structure shelter a dining table, frame a lounging area or mark the route from house to garden? The answer shapes the required footprint, clear passages, daylight and handling of rainfall. You can then judge the roof, frame and available extras against the real project rather than appearance alone.
No isolated specification proves overall quality. Profiles, joints, foundation preparation, roof engineering and usable documentation must support one another. Turn the points below into specific questions when seeking advice or quotations. Matters involving the particular property, planning position or insurance cover should also be checked with the responsible authority or insurer.
Stage one: check the structure
Look past appearance to the supporting frame
Every pergola depends on its underlying frame. Broad faces alone do not reveal whether cross-members, posts and perimeter sections are sensibly arranged. Find out how pieces meet around each corner and which details are hidden by caps. Exposed gaps should appear regular, while concealed work should be supported by a drawing or enlarged detail.
Aluminium can provide a long-lived starting point outdoors, although the shape and execution of each profile still count. Identify the members responsible for support and check how neighbouring frame bays line up. Plans that mark every post let you test walking routes, furniture placement and access into the garden before committing to a layout.
Feature 1: obtain a drawing that identifies profile shapes and structural members, including the route by which beams deliver forces into posts. Feature 2: study the corners on their own. Establish what joins the parts behind each cover and check that screws, caps and visible seams occupy deliberate, readily explained positions.
Compare post positions with doors, windows, terrace edges and planned circulation areas, rather than only with the roof plan.
Ask to see the corner areas and establish what connection sits beneath covers, where fixings are located and how visible joints are finished.
When controllable louvres are on your shortlist, examine bioclimatic pergolas built with aluminium louvres with particular attention to frame layout, corners and finishing details.
Stage one: examine materials and finishes
Surfaces must suit outdoor life
A consistent finish may create confidence at first glance, but sound engineering must sit behind it. Compare the colour across uprights, beams and added components, then inspect cuts and junctions for tidy completion. Request suitable maintenance instructions because pollen, dust, foliage and splashed rain are unavoidable outdoors. Upkeep should be realistic for the intended setting.
Consider colour in practical as well as decorative terms. Deep shades may give the architecture definition, whereas pale ones can reduce visual weight. What matters is how the choice relates to the façade, glazing frames and terrace material. Inspect physical samples outdoors during daytime to assess gloss, tone and the visual integration of any extras.
Feature 3 concerns finish consistency. In natural daylight, place several structural pieces and accessory samples together and compare both hue and gloss. Feature 4 concerns drilled, cut and joined edges: establish how they are protected, completed and maintained. These less prominent transitions often reveal whether the finish specification has been explained throughout.
Check finishes on edges, transitions and less noticeable areas; these often reveal workmanship most clearly.
Schedule suitable routine cleaning, using only products confirmed as appropriate for the material and avoiding harsh unapproved treatments.
Where the terrace is intended to remain open, compare traditional non-louvred aluminium pergolas for finish, profile character and compatible additions.
Stage two: understand the roof
Louvres need accurate guidance
On a louvred pergola, the manner in which each blade travels deserves close attention. Movement should remain smooth and predictable without distracting rubbing sounds. Observe the guides and lateral junctions, then view the closed roof as a whole for alignment. Before selecting options, establish the normal procedures for control, cleaning and inspection of its movable components.
Roof position changes daylight, the upward view and the character of the sheltered area. See the mechanism working if possible, or request clear illustrations of several blade angles. Identify where an opened system leaves furniture exposed above, then consider how the seating below will function. The chosen principle should support the way you intend to use the area.
Feature 5 is the guiding mechanism: observe a complete opening and closing cycle and note whether travel stays uniform. Feature 6 concerns lateral junctions and stopping positions. Check the blades in both states, identify the parts that can still be reached, and establish how routine attention is performed in those places.
Have the supplier demonstrate blade travel, stopping points, adjoining edges and the maintenance method for every reachable section.
Base the roof choice on ordinary routines, considering required shade, evening brightness, outward views and furniture arrangement before isolated optional features.
For seating that benefits from adaptable cover, review bioclimatic aluminium pergolas with adjustable shade by testing their controls and changing daylight beneath.
Stage two: control water
Drainage is never an afterthought
Rain landing overhead must have an intentional route away. On a well-resolved aluminium pergola, channels, junctions and discharge openings belong to the original design rather than being improvised afterwards. Ask for the destination of collected water and identify components that remain reachable. Plan this route early wherever paving edges, walkways or the house are nearby.
A crisp roof perimeter is meaningful only if the drainage behind it performs properly. Consider whether channels, outlets or vertical pipes could interfere with movement below. Debris and fallen foliage may obstruct flow, so safe reach for inspection and cleaning matters. Property-specific drainage arrangements and relevant constraints should be discussed with the appropriate local authority or competent adviser.
Feature 7 is a continuous drainage design. Request a diagram that follows water through the channel and junction to discharge, rather than relying on an external roof view. Feature 8 concerns serviceability: determine the positions from which channels and outlets can be inspected or cleared, and coordinate them with paving, routes and planting.
Ask for the complete water route from roof surface to the intended outlet or connection to be explained clearly.
Account for falling foliage, nearby planting and the terrace fall so the drainage route and points requiring attention stay practically reachable.
An open roof still calls for a review of traditional aluminium pergolas for terrace settings and how their posts meet existing paving and circulation routes.
Stage three: assess connections
Plan posts and fixings
Attractive engineering still requires an adequately prepared base. Each post delivers force into what lies below, meaning its position and anchorage must correspond with the terrace construction. Before design is finalised, identify the layers beneath tiles, boards or screed and determine which locations can provide support. Select the anchoring solution from those findings rather than installation convenience.
A location beside the house adds the façade build-up, openings, eaves and hidden services to the assessment. Measure accurately and plot each obstruction. Obtain competent advice where the existing construction is uncertain. Do not presume that planning permission is either required or unnecessary; ask the planning department serving the property how the particular proposal should be treated.
Feature 9 concerns the base: record its layers, elevations and structurally suitable zones before designing anchors. Feature 10 concerns the proposed fixing locations. Check each one against the edge of the terrace, the house construction and known services. A marked drawing tied to the actual property makes the reasoning easier to verify.
Record the substrate, construction depths, falls and known services before agreeing any footing or anchorage specification.
Check whether post locations could restrict doors, inspection access, outdoor sockets or your preferred furniture spacing.
With an adjustable roof solution, evaluate bioclimatic pergolas with precise post planning alongside ground conditions and drainage.
Stage three: use details well
Accessories should improve use
Screens, lights and other additions can adapt the space to familiar routines. Their value depends on thoughtful incorporation: they should preserve the intended lines and remain intuitive to operate. Begin with the practical issue to be solved, such as low-angle sunlight, privacy or evening illumination. That approach separates genuinely useful equipment from extras without a defined purpose.
Not every available extra belongs in the final scheme. Added parts alter appearance, installation work and maintenance, and must remain reachable after surrounding lights, furniture and plants are in place. A restrained selection based on clear needs often produces the most coherent result. Before purchase, obtain written confirmation that all chosen parts work with the proposed version.
Feature 11 examines how an extra is incorporated. For each item, identify its attachment location, confirm that controls and service areas stay unobstructed, and verify that the manufacturer provides it for the selected version. Written compatibility information keeps aesthetic preferences separate from the practical demands of the assembly.
Select each accessory to answer an identified practical need, rather than adding equipment merely to reproduce a fully dressed promotional image.
Verify reach to controls and service points wherever side components approach planting, boundary walls or built-in furnishings.
Where a simple open framework meets the brief, explore open-roof aluminium pergolas in classic designs and select only the equipment justified by everyday routines.
Stage four: read quotations
Documentation enables comparison
A useful quotation offers considerably more than a picture and total cost. It identifies the selected construction, measurements, colour, roof arrangement and equipment, together with preparation and installation considerations. This detail reveals whether alternatives are genuinely like for like. Query vague entries before settling format or extras, since omissions can produce conflicting assumptions later.
Read the supporting product information with equal care. Locate instructions for use and maintenance, site-preparation requirements and limits applying to the chosen version. Retain plans and correspondence so agreed connections and extras are traceable. Consider statutory remedies and any separate commercial guarantee according to their respective written scope, terms and conditions rather than treating them as interchangeable.
Feature 12 is documentary clarity. To support a fair comparison, the paperwork should identify measurements, roof arrangement, finish, post layout, chosen extras, site preparation and upkeep instructions. Reconcile the plan against the quotation line by line. Turn every absent or ambiguous item into a direct question before committing.
Review quotations line by line, keeping the structure, roof, extras, preparatory work and installation guidance as separately identifiable items.
Mark questions beside the relevant drawing detail so posts, drainage exits and side additions cannot easily be interpreted differently.
To compare quotations on a consistent basis, inspect configured bioclimatic pergolas in aluminium against one shared set of measurement and equipment questions.
Stage five: choose with future use in mind
Care completes the quality
The best long-term choice is one that accommodates normal upkeep. Decide how gutters and visible components will be reached, and include seasonal inspections in the plan. Clear loose dirt and leaves as the care instructions direct, while observing movable elements for unusual behaviour. If their operation changes, refer to the manual and seek suitable expertise when needed.
Allow for the garden to evolve as well. Mature planting, altered views or replacement furniture may change how people move through and use the area. Sensible spacing accommodates that evolution without closing important routes. Consider recurring life on the terrace across the seasons, not only its appearance on installation day. Construction, forethought and care together determine lasting satisfaction.
Create a seasonal schedule covering cleaning, visual inspection and removal of debris from the designed drainage paths.
Choose distances from planting and furniture so care, operation and your preferred terrace use remain possible over time.
For seating that may evolve with the garden, consider classic aluminium pergolas for adaptable outdoor areas in relation to location, upkeep and future patterns of use.



Comparison
Quality features compared directly
Use the matrix to interrogate a quotation, not as a substitute for assessment of the actual property. Read each row against the available space, underlying construction and planned activity. Any blank, unclear or conflicting entry should become a direct question before commitment.
| Assessment area | How quality is recognised | Planning question |
|---|---|---|
| Frame | Load-bearing profiles and corner joints are clearly shown in a drawing or detail view. | How are beams, posts and corners connected structurally? |
| Roof | Operation and transitions are shown clearly. | How does the roof alter light and usability? |
| Drainage | Water route, gutters and outlets are explained clearly. | Where will water be directed on your property? |
| Fixing | Ground conditions and connection points are considered early. | What construction lies below your terrace finish? |
| Surface | Colour and visible details appear consistently finished. | How will you care for surfaces through the year? |
Five steps towards an informed choice
Following a deliberate order keeps decorative extras and photographs from distracting from structural decisions. Begin with the place and intended activity, examine the technical proposal, and finish by recording the agreed details.
01
Measure the space
Record terrace dimensions, openings in the house, elevations and obstructions. Add walking routes, seating zones and the preferred direction of view.
02
Prioritise use
Rank the intended activities, including meals, relaxation, shade, evening occupation and the desired degree of architectural definition.
03
Choose a roof concept
Set open and adjustable designs against one another for daylight, upward outlook, maintenance demands and the character created below.
04
Check the technical details
Review the frame, uprights, anchorage and drainage as an integrated proposal, bringing in competent advice wherever the substrate or connections remain uncertain.
05
Complete the documentation
Ensure the final written record identifies the version, measurements, extras and unresolved prerequisites, then examine the relevant terms with care.
Checklist: features to tick off
Bring this checklist to a sales discussion, display visit or quotation review. It gathers all twelve assessment points from the article and provides prompts for requesting details that have not been supplied.
01. A drawing identifies profile shapes and the members that provide support.
02. Corner assemblies, caps and exposed seams have clear explanations.
03. Posts, beams and additions show a matching hue and gloss.
04. Drilled, cut and joined edges are complete, with suitable maintenance instructions supplied.
05. A demonstration covers the complete travel of the louvres and their guides.
06. Stopping positions, lateral junctions and maintenance reach around the louvres have been resolved.
07. The drawings trace rainfall through channels and junctions from the roof to discharge.
08. Inspection and cleaning points for channels and outlets remain reachable.
09. Substrate layers, elevations and structurally suitable zones are recorded before design.
10. Anchorage locations account for terrace layers, the house structure and known services.
11. Chosen accessories suit the configuration and remain operable and accessible.
12. Quotation and drawing clearly name dimensions, configuration, requirements and components.
Common questions when assessing an aluminium pergola
Does a visibly deeper beam prove better quality?
No. Visual depth by itself provides little evidence about structural execution. Examine how the profile shape, joints, upright locations and anchoring method operate as a system. Request drawings that identify the supporting members, then assess whether the proposal fits the pergola's dimensions, its setting and the activities planned beneath it.
Why does a pergola need carefully planned drainage?
Drainage determines where rainfall collected overhead travels and which parts of the terrace may receive it. The proposal should explain channels, discharge openings, cleaning reach and surrounding surfaces. Trace that path during design, with particular care beside the façade, circulation areas and property edges.
What indicates that a louvred roof is properly planned?
Ask for the operating principle to be explained and watch a complete cycle where possible. Inspect stopping positions, lateral junctions and access for both use and maintenance. The arrangement should respond to your usual activities and desired light, rather than relying on the appeal of movement alone.
Should the terrace ground be checked before buying?
Yes. The existing base affects both upright placement and the method of anchoring. Note its layers, elevations and any services during early planning, and obtain a competent inspection when details are unknown. This information allows proposed connection locations to be reconciled with the terrace and adjacent house construction.
How should accessories influence an assessment of quality?
An accessory earns its place by solving a stated need while fitting the structural scheme properly. Examine how it is operated, maintained and seen within the space. Quantity is not a quality measure; chosen elements should remain compatible with the property, furniture layout and ordinary patterns of use.
Is planning permission required for every pergola?
Do not assume either outcome. Treatment depends on the actual proposal, property and applicable planning conditions in the Republic of Ireland. Ask the planning authority serving the site how it should be classified and whether a formal declaration on exempted development is appropriate. Discuss any effect on existing insurance cover separately with your insurer.
Compare configurations
Quality is decided in the detail
No individual detail establishes the standard of an aluminium pergola. Instead, examine whether supporting frame, roof, drainage, anchorage and finish form a technically credible and visually balanced assembly. Applying the same organised questions to every candidate produces a more dependable comparison of models and paperwork.
Allow time to confirm measurements, the underlying construction and how the terrace will be used repeatedly. Recorded choices and precise questions make discussions with Bloomcabin or another supplier easier to verify. The selected arrangement can then respond to the house, garden and routines of the people using it.
Keep the checklist beside each quotation, resolving remaining structural and property-specific matters before approving the final version.
