
Raising Peas in a Greenhouse
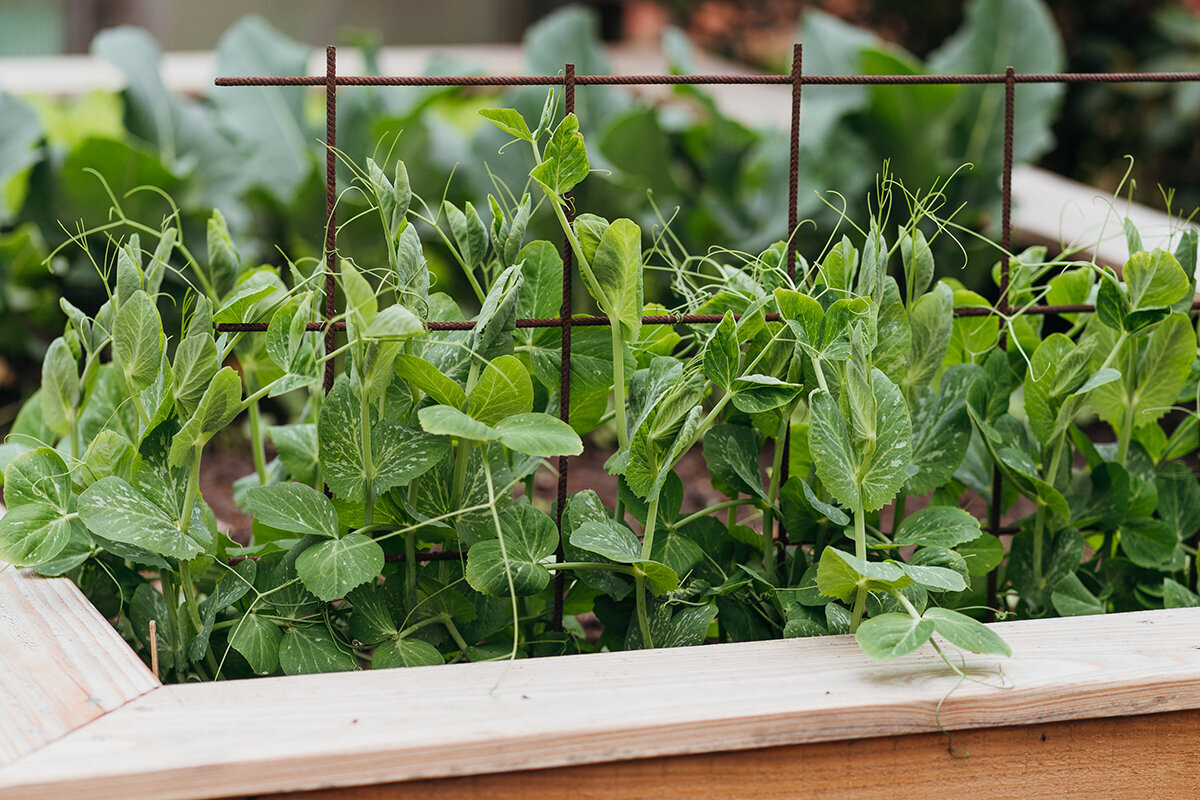
Protected pea growing · cool season
Raising peasinside a greenhouse
Shelter can bring the pea season forward, but it cannot turn peas into a warm-weather crop. Protected seed and soil gain an earlier start, extending the bright, cool spell in which tender pods develop.
I. Opening a place for a cool crop
Extra heat does not produce a fuller pea harvest. Success depends on restraint: cool roots, damp yet airy soil, supports waiting for new tendrils, softly moving air and regular harvesting. With that balance, peas occupy the greenhouse neatly while summer vegetables are still waiting.
Use shelter to lengthen the cool season
Across Ireland, spring varies with location, exposure and the year. Sowing under cover can start while outdoor ground remains cold, waterlogged or difficult to work. Aim for an accessible sheltered bed, not tropical warmth, so roots establish early and harvesting concludes before the greenhouse repeatedly overheats later in the season.
An unheated greenhouse lessens exposure to prolonged rain, surface crusting, wind and birds, while keeping the soil easier to prepare. Enclosed air may still warm sharply in sunshine. Start opening the vents when shoots emerge rather than waiting for wilted growing tips.
Let the roots begin in place
Because peas develop strong roots early, the cropping bed is usually the best place for germination. Use a deep greenhouse border or a generous pot with reliable water escape instead of shallow propagation trays. Whenever practical, install mesh, branching sticks or cords ahead of sowing.
Mice, slugs or unfinished bed preparation may make a short period of propagation elsewhere worthwhile. Choose deep cells and transplant very young seedlings without breaking their root balls. Prevent circling and drying of the roots. Direct sowing is still simplest once the permanent growing place is ready.
Plan the handover to summer
Treat peas as a planned transition crop rather than permanent occupants. Clear zoning allows the early row to depart before heat-loving crops need the room. A suitable base for that plan comes from Bloomcabin: Classic Aluminium Greenhouse .
Give peas and early salads a ventilated outer bed with less accumulated warmth. The brighter middle area then remains ready for cucumbers, tomatoes or peppers when it is time to change crops.
II. Choose by habit and harvest
Wrinkled shelling peas, smooth-seeded peas, sugar snaps and mangetout need different layouts.
Every one belongs to Pisum sativum but their harvests differ. First decide between peas for shelling and edible pods. Then ensure the mature height, support arrangement and route for harvesting suit the greenhouse’s cooler zone.
Shelling peasThese are grown for the sweet peas inside. Harvest rounded, well-filled pods while they are still lively green, then shell the tender peas promptly.
MangetoutTake the shiny, flat pods before the developing seed becomes prominent. Their finest texture lasts briefly, making attentive and frequent harvesting worthwhile.
Sugar snapsBoth pod and peas are eaten. Pick when juicy, plump and lustrous, before the outer skin and seams lose their crispness and become fibrous.
Short cultivarsCompact peas fit containers and lower positions beside a greenhouse wall, often producing within a fairly concentrated interval. Brushwood, low mesh or strings still help to keep them upright.
III. Setting the sowing pace
Sow only when the soil is cool, friable and reliably drained.
Measure temperature where the seed will lie instead of relying on one bright afternoon. A crumbly, workable bed at about 8 to 10 °C provides a dependable start. Cold, greasy wet soil delays emergence and increases the risk of rot. Containers likewise need fresh growing medium, ample capacity and drainage holes that remain open.
Remove debris and confirm that water can escape.
Set seed four to five centimetres deep, then water it in.
Maintain gentle, even moisture around the seed.
Finish the trellis and begin airing the house.
Add a small succession row only if useful.
Prepare without loading the bed with feed. Remove dropped leaves, break up coarse clods and correct visible drainage trouble. Work in mature compost with restraint. A greenhouse bed previously occupied by demanding summer crops may still contain considerable nutrients. Fresh manure and routine nitrogen feeding are unsuitable for the pea row.
Keep direct sowing orderly. Position seed 4 to 5 cm below the surface and, according to cultivar, approximately 5 to 8 cm apart. With paired rows, retain enough space between the bands for picking and circulating air. Press lightly so soil meets seed, then irrigate the row thoroughly once.
Allow cool conditions to dictate the pace. Seeds may take time to emerge in a greenhouse without heating. Avoid digging into the row after only a few days unless you see flooding, animal damage or rot. The desired root zone is moist and oxygenated, never continuously waterlogged.
Have the support waiting for the tendrils. New tendrils quickly search for slender edges. Netting or twiggy material fitted in advance avoids later work around delicate roots and gives the young row direction from its first stages.
Keep repeat sowing limited. One modest follow-on row, sown between the second and third week, can prolong picking if cool conditions are expected to continue. Do not add further batches when the greenhouse is likely to heat up before the youngest plants can flower steadily and form pods.
roots active nodules plant-made sugar
Roots feed compatible bacteria with sugars; productive nodules benefit the pea before anything else.
IV. Life around the root zone
Being a legume does not make a pea row free fertiliser for the entire plot.
Pea roots can form a partnership with suitable bacteria in the genus Rhizobium . Nodules develop through this partnership: the plant supplies energy-rich carbohydrates, and the bacteria capture atmospheric nitrogen for the pea’s immediate nutrition. Well-prepared ordinary garden soil therefore needs no heavy nitrogen application. Healthy roots, porous soil and steady moisture without waterlogging are more important.
Remember that this relationship nourishes the growing pea first. It does not automatically release usable nitrogen to neighbouring crops during that season.
Excess readily available nitrogen promotes lush, soft leaves and can unbalance the crop. Add only a little mature compost, taking previous treatment of the greenhouse soil into account. Potassium, phosphorus and trace elements belong in balanced nutrition, but should not be supplied routinely without a visible need or soil evidence.
To examine nodule formation, carefully lift an expendable plant once it has grown for several weeks and look along the side roots. Missing swellings do not call for immediate nitrogen. First review drainage, soil texture, moisture and plant health. An active, aerated root zone is usually the better priority under cover.
V. Supports shaped for pea tendrils
Offer many slender edges within easy reach.
Delicate tendrils provide the grip; pea stems do not coil firmly around thick poles. One broad stake therefore offers little help. Fine branches, slim canes, mesh or strings set close together give the plants the small contact points they require.
Compact habit
Short peas
Use low mesh, cord or twiggy brushwood.
When to fit it
Put the framework in as the row is sown.
Choose openings measuring about 10–15 cm.
Leave a gap next to the glazing.
Climbing habit
Taller peas
Provide upright mesh and uncomplicated access to the pods.
Supporting compact peas
Compact cultivars can look self-supporting at first, yet may open out under a heavy pod load, after watering or while reaching for light. Short branching sticks, low mesh or two firm cords will usually suffice. Avoid creating a rigid wall of leaves; keep stems upright, pods clean and air moving between shoots.
- Use a front border or a lower position at the side.
- Keep the picking route unobstructed.
- Create a broad block only where air can still circulate.
Principles shared by both habits
Fix the mesh to stakes, the border frame or another independently supported framework, never the glazing. It should come away readily after cropping. Leaving room behind the vines improves circulation and cleaning while allowing a hand to retrieve hidden pods without damaging stems.
Supporting long-vined cultivars
Long vines can use vertical netting or a fence that is reachable from both sides. Position it so harvesting neither pushes wet leaves against glass nor requires squeezing through the crop. The less warm side is suitable when it still receives enough spring light.
- Train foliage below vents and their opening mechanisms.
- Use detachable supports for an easier crop change.
- Prevent vigorous vines from closing the greenhouse aisle.
A sound frame and well-sited roof windows make seasonal management easier. Bloomcabin’s Classic Aluminium Greenhouse offers an aluminium frame and roof ventilation for a carefully arranged, airy cool-season growing space.
Soak the rooting area when needed, then ventilate before leaves remain damp.
Steady moisture is especially valuable from bud formation until pods fill. Because a roof excludes rainfall, judge the root zone rather than following the calendar. If soil several centimetres below the surface is beginning to lose its freshness, water deeply in the morning. Frequent shallow splashes seldom reach lower roots.
Apply water below the leaves with drip tubing, a slow-running hose or a can, rather than showering the canopy. Damp foliage and still air encourage trouble. On bright mornings, open roof windows early and use the doorway whenever outdoor weather allows. Gentle movement is useful; a strong draught can strain young tendrils.
After seedlings are securely established in a ground bed, a thin clean mulch can limit moisture loss and keep splashes off lower leaves. Leave bare soil around the stems. In containers, generous compost volume, unblocked drainage holes and regularly emptied saucers buffer moisture without allowing water to stand around roots.
For a bright, accessible growing area with controllable ventilation, consider Bloomcabin’s Classic Aluminium Greenhouse as a sound framework for the first trellis and seed row.
VI. Flowering and pod formation
Self-fertile flowers make greenhouse conditions more important than pollinator access.
Most pea flowers fertilise themselves, so bumblebees and hand pollination are not normally necessary. This habit suits protected culture when root moisture and air remain balanced. Once flowering begins, resist unnecessary feeding. Maintain instead the stable environment that prevents blossom loss and lets young pods develop evenly.
Flowering benefits from bright weather without excessive warmth, but late-spring sunshine can heat an enclosed greenhouse quickly. Open windows and the doorway in good time. Modest temporary shading may help in strong sun, while watering the root zone before it dries prevents stress from reaching the shoots.
Moving air still matters for a self-fertile crop. It limits prolonged leaf wetness and humidity within dense growth, while bringing weak foliage and the first signs of powdery mildew into view sooner.
Stages of the edible crop
1. Flower
Keep the air cool and root moisture steady.
Keep the air cool and root moisture steady.
2. Pod set
A slender young pod starts to extend.
A slender young pod starts to extend.
3. Flat pod
This is the mangetout picking stage.
This is the mangetout picking stage.
4. Filled pod
Gather sugar snaps or peas grown for shelling.
Gather sugar snaps or peas grown for shelling.
The correct stage makes a noticeable difference at the table. Mangetout turns fibrous as its seeds enlarge. Sugar snaps become less sweet and crisp when pods grow dull and tough, while overripe shelling peas accumulate starch. Frequent harvesting preserves quality and encourages further pod set.
At peak production, examine the vines daily or at least every other day. Following several sunny, warm days, a pod may pass its ideal stage quickly. Pick calmly and often, cool the crop soon afterwards and leave undersized pods to continue growing.
VII. Responding as warmth increases
A warming structure is the signal to revise the pea plan.
Cool to mildEven growth; pods retain tenderness.
Warm midday conditionsIncrease ventilation and inspect deeper soil moisture.
Heat that persistsBegin preparing to finish the planting.
Cool or moderate weather supports uniform growth, steadier flowering and tender pods when moisture remains balanced. As warm afternoons become frequent, open vents earlier, test the soil below its surface and harvest more often. Peas may continue cropping, but their tolerance of additional stress diminishes.
Prolonged warmth increases the likelihood of dropped flowers, soft leaves and coarse pods. Light temporary shading, ventilation and deep morning irrigation can ease stress, but cannot make peas a summer crop. Once the greenhouse is regularly hot, end the planting rather than forcing production with more fertiliser or permanently wet soil.
VIII. Harvest for the best texture
Let the pod’s condition decide when it leaves the vine.
Repeated, attentive harvesting gives the best return. During the main flush, inspect the greenhouse every one or two days with a small bowl. Support each shoot in one hand and detach its pod with the other. Pulling hard may disturb shallow-rooted plants or tear their tendrils from the mesh.
Harvest in the morning where possible, especially ahead of warmer weather. Once picked, the sugars soon begin converting to starch. Take pods straight to the kitchen, or keep them cool and unwashed, aiming to prepare them on the same day.
MangetoutChoose long, shiny pods that remain flat, before the seeds become rounded. The casing should stay tender and break with a clean snap.
Sugar snapsPick them while shiny, firm and well filled. A dull surface, pronounced swelling or fibrous seams means they have been left too long.
Shelling peasTake rounded, full pods while they retain a lively green colour, then shell without delay. Paleness or wrinkling signals that starch is increasing.
Pea tipsEarly on, a vigorous vine may yield individual soft growing tips. Avoid repeatedly removing shoots from plants intended to produce plenty of pods later.
One short follow-on sowing: Only add a small row between week two and week three after the original sowing when the forecast still points to distinctly cool growing weather. Once warm afternoons become routine, use the bed for cucumbers, peppers, tomatoes, basil or another heat-loving crop instead of demanding a summer performance from peas.
IX. Closing the pea season
Remove the crop neatly and prepare for what follows.
When yields fade and warmth begins to dominate, cut healthy stems just above the soil instead of pulling up the whole root system. Fine roots can stay temporarily and break down in place. Gather foliage and tendrils carefully. Material showing substantial fungal disease or heavy pest pressure should not be returned thoughtlessly to a closed greenhouse cycle.
Inspect and wash the netting, cords and irrigation gear ahead of the summer crop. Clear loose leaves from edges and loosen only the soil surface. Move future peas when disease has recurred; neither extra compost nor fertiliser corrects poor drainage or an unsuitable rotation.
Protected-pea questions answered
Common questions about peas
Can peas succeed in an unheated greenhouse?
Yes. Shelter makes the soil workable earlier without maintaining the high temperatures peas dislike. Sow directly once the bed has drained, become friable and measures about 8 to 10 °C at sowing depth. In Ireland’s variable local conditions, a soil thermometer is more informative than choosing a calendar date alone.
Must insects pollinate peas grown under cover?
Usually not. Most peas fertilise themselves, so a cool, settled environment matters more than insects or manual intervention. Opening the greenhouse in good time reduces dampness among the leaves and lightly moves the flowers.
When should a protected pea row be watered?
Light, soil, container capacity and ventilation all alter water demand, so a fixed daily routine is unsuitable. Test the growing medium several centimetres down and water deeply in the morning when it starts drying there. Even moisture matters during flowering and pod filling, but saturation remains harmful.
Do peas require a nitrogen-heavy feed?
Not as a routine. Peas may partner with suitable bacteria that make root nodules, while an excess of soluble nitrogen produces soft foliage rather than balanced growth. Use mature compost lightly, remember earlier bed feeding and address demonstrated deficiencies instead of automatically applying a nitrogen-rich general fertiliser.
What support works for sugar snaps under glass?
Use vertical netting with openings of roughly 10 to 15 cm, fine branching sticks or closely spaced cords for the tendrils. Install it by sowing time. The support should stay firm, come away when cropping ends and prevent foliage from resting against the glazing.
What causes pea pods to lose tenderness?
Late picking, high temperatures or uneven watering may toughen pods. Harvest mangetout before it fills, take sugar snaps when glossy and rounded, and gather shelling peas when full but still strongly green. Checking often preserves both tenderness and continued production.
References and useful further reading
Plan further with trusted horticultural sources
Elsewhere at Bloomcabin: planning fresh harvests across the seasons · preparing a greenhouse for spring · organising a practical greenhouse interior
- Saxon Garden Academy – Peas for home and allotment plots A German specialist note on pea groups, site choice, crop management and use.
- LTZ Augustenberg – Technical material on field peas German information about establishment, nodule bacteria, baseline nutrition and sensible rotation.
- Bavarian State Research Centre for Agriculture – Pea sowing German agricultural notes covering early sowing, planting depth and germination moisture.
- Royal Horticultural Society – Advice on growing peas Practical guidance about sowing, spacing, supports, routine cultivation and successive harvests.
- Royal Horticultural Society – Greenhouse shade and ventilation Guidance on exchanging air, using shade and controlling excess warmth beneath glass.
- Saxon Garden Academy – Specialist guidance on growing peas German advice on pea categories, suitable sites and care from planting through harvest.
- LTZ Augustenberg – Field-pea resources Additional German material about root nodules, plant nutrition, establishment conditions and rotation.
Closing note
Set aside a bright, cool growing space for spring.
Compared with the summer crops that follow, peas prefer a cooler greenhouse and repay accurate scheduling with pods often sampled en route to the kitchen. Provide a bright seasonal space with practical roof vents, open paths and a durable frame.
Grow peas along the less warm side, keep the route open for frequent harvesting and reserve the sunniest central ground for genuine summer crops.
