
What does a pergola kit include – and what may cost extra?
Outdoor buying guide
Pergola kit essentials: separate the standard package from project-specific additions.
A pergola kit may appear straightforward at first. Yet important differences can lie between the supporting structure, roof design, drainage, controls and assembly accessories. Checking the specification point by point helps you compare offers objectively and plan suitable equipment for your patio, garden and everyday use.
Quick answer: a kit needs a clear scope
Begin with an itemised statement of the load-bearing pieces, roof parts, connectors and fixings supplied in the package. It must also explain the requirements of your chosen arrangement and identify options, work provided on site and any separately offered assembly service.
Side panels, lights, powered controls, sensors, foundations and assembly may all sit outside the standard specification. This need not make an offer unsuitable. Clear separation of these items lets you understand the full project and judge which additions your plan requires.

01
Check the core
Verify posts, beams, roof construction, joints, drainage details and named fixings against the needs of your installation.
02
Assign options
Match screens, louvre accessories, glazing, lighting, heating and controls to a defined product line, not a general equipment description.
03
Separate services
Ask separately about surveying, ground preparation, assembly, electrical connection, inspection and disposal, as these jobs are not automatically kit components.
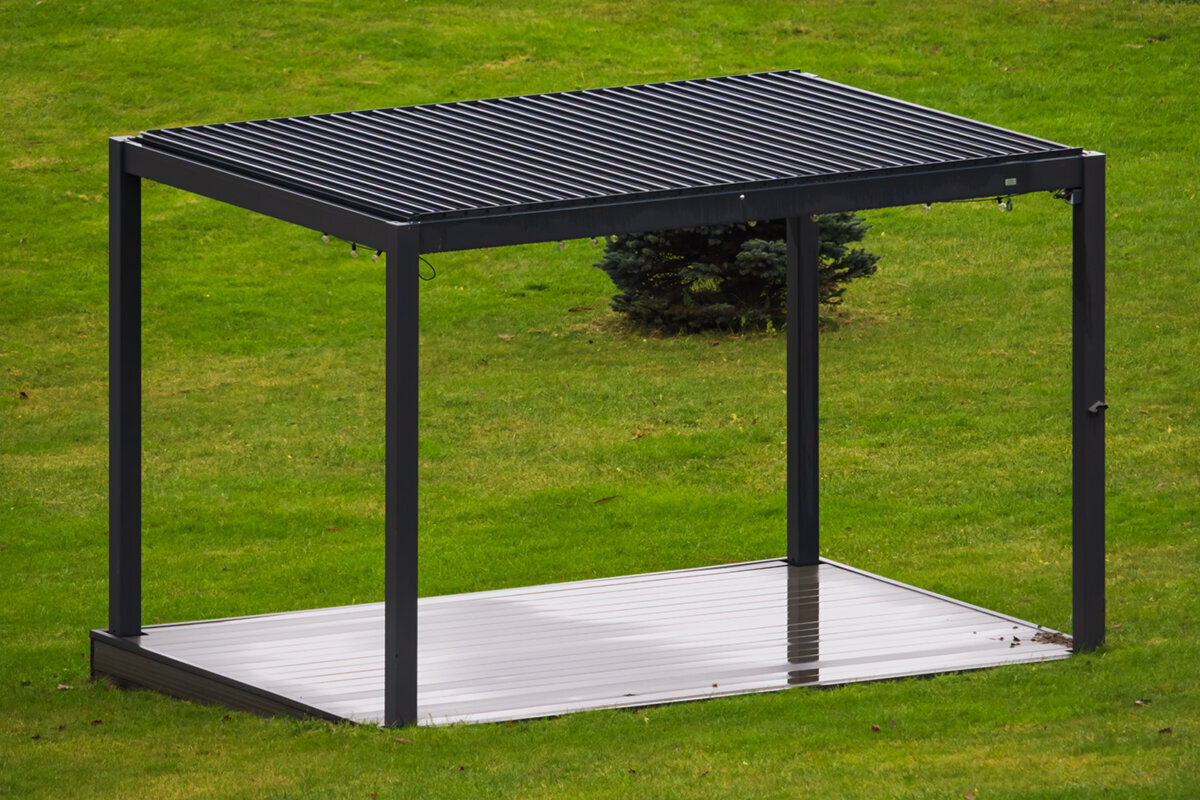
A methodical site record for an aluminium-pergola project.
Naming a frame and roof does not fully answer the question of what a pergola package contains. Compare the structural package, convenience features and services in separate groups. You can then tell whether the quotation provides the basic built form or reserves significant elements as additions.
The right specification for an aluminium pergola depends on the setting, the intended activities and the existing construction. A simple sitting area differs from a dining place used on many evenings. Adjoining walls, available anchoring surfaces, the build-up beneath the patio and desired side shelter will influence what deserves priority.
Use this as a planning and specification checklist rather than a comparison of prices. It sets out the component, accessory and assembly questions to resolve ahead of purchase. Read the technical material, product details and latest quotation together instead of treating photographs or a broad product name as proof of scope.
Inspection 01 · Check sheet 01
Identify the supporting structure clearly
Structural members form the essential base of the package. These will generally comprise posts, cross-members, the roof frame and connectors made for that system. Look beyond the terminology: the quantities, dimensional version and form must correspond to your intended footprint. A picture based on an illustrative size does not confirm what accompanies the configuration you selected.
Give equal thought to how the structure meets the surface below. Supplied anchors may suit some bases without addressing them all. Concrete slabs, individual foundation pads, timber decking and paving over a supporting frame present different demands. Before purchase, establish the supplied hardware, the required substrate condition and the preparatory jobs left for you to arrange.
Establish whether the information concerns a self-supporting installation or one positioned beside a wall. The two arrangements may call for different pieces and junction treatments. Ask for a schedule linking every structural member to your selected form; omissions can then be found before planning the base, anchors and erection order. Review visible trims and finishing caps as well, since these may affect how complete the finished structure looks.
Photographing each proposed anchoring zone provides another useful reference. The images capture surface joints, edges and unusual details, giving everyone something specific to discuss before parts are chosen and purchased.
- Check the selected size against the specified posts, beams and connectors; a generic photograph is not enough.
- Record the substrate, slope and services before fixing details or individual post positions are decided.
To examine an adjustable roof arrangement, see bioclimatic aluminium pergolas for an outline of the underlying structure.
Inspection 02 · Check sheet 02
Treat the roof as a separate supply item
Because the roof shapes the way the space will function, it deserves more than a generic entry in the package description. Request a list of the roof pieces, their method of integration with the frame and any finishing profiles supplied. For fabric or fixed designs, covering material, tracks, tensioning hardware and protective trims might be quoted independently.
Consider the operating method in its own right. Hand operation, provision for guided movement and powered assistance represent distinct specifications. A photograph cannot establish that the motor, control equipment or connection accessories come with the order. Have the precise roof version, operating pieces and necessary electrical preparation recorded for the configuration.
If several roofs are available, require the quotation to name the one you have selected. Broad labels such as “canopy” reveal too little for a sound comparison. Establish which guiding, operating and finishing pieces form one system. Record separately how you expect to use the area in sunshine, light rain and after dark. These practical notes help relate a roof function to the project while exposing features that appear only in display photographs.
- Treat roof pieces, guides, finish profiles and operating equipment as separate entries, leaving no important item undefined.
- Confirm that the roof type suits both the location and the times when you expect to use the pergola.
For a simple canopy with an unambiguous specification, compare classic aluminium pergolas with a suitable roof specification.
Inspection 03 · Check sheet 03
Plan the drainage route and its connections
Compact specifications can give too little attention to rainwater disposal. Where drainage is integrated, consider the gutters, outlets, downpipes and joining pieces as one working arrangement. Go beyond confirming that a gutter is present: establish its discharge direction and check how this relates to the house, patio, planted areas and pedestrian routes.
Junctions require particularly close planning. For a pergola beside a dwelling, record the façade, eaves, openings and current rainwater arrangements. The proper meeting detail will vary with the existing building and cannot be assumed to come from the package. Put all relevant levels, measurements and your preferred discharge direction in the enquiry.
Your drawing should show existing falls together with nearby planting beds, walkways and places where people sit. Resolve rainwater disposal while the project is still being designed, rather than after erection. Showing the proposed discharge side clearly gives installers and other participants a shared reference. Confirm whether the selected package provides exposed pipes, covers or associated fittings. This keeps appearance and practical water movement within the same discussion.
Indicate every place where discharge would cause a problem, then assess nearby paths, occupied spaces and the proposed outlet together.
- Add the intended drainage path to your plan, showing the downpipe side and any proposed connection points.
- Review doors, façade junctions and drainage paths early, reducing the risk of later alterations to the patio.
For variants with movable roof elements, bioclimatic louvred-roof pergolas can help structure a drainage review.
Inspection 04 · Check sheet 04
Plan side protection clearly as an option
Adding sides gives an open pergola greater enclosure, although such pieces are commonly selected separately. Possible treatments range from retractable screens and solid panels to glazed sections and louvred walls. Each choice changes privacy, ventilation, outlook and entry. Record the chosen form, exact side, quantity and means of operation rather than relying on a general description.
Verify both the available attachment locations and whether the selected parts work together. Installing a side treatment might demand extra rails, adapted posts or a power feed. Determine whether it can genuinely be added afterwards or must be allowed for in the initial order. Set out access, furniture and important views before deciding to close an elevation.
Choose side protection according to its intended job, not appearance alone. Decide whether the aim is adjustable privacy, a defined boundary or an entrance that remains permanently open. Record the direction from which conditions most affect the area and consider how the proposed placement changes furniture arrangements, walking space and operation. A simple early drawing can expose conflicts with doors, preferred views or circulation before the chosen element becomes difficult to move.
- Identify first which elevation receives the strongest wind, unwanted views or low-angle evening sunlight.
- For each proposed side element, request details of its guides, operation, attachment method and any additional parts required.
For open patio spaces, standard aluminium pergolas provide a calm basis for deliberately chosen side protection.
Inspection 05 · Check sheet 05
Assess lighting and electrics separately
Good lighting can make the pergola more useful after dark, but it warrants deliberate planning. Confirm whether fittings, LED profiles, switches, handheld controls or control units appear in the specification. Placement matters too: the useful light for dining will differ from what suits relaxed seating or safe movement beside the patio.
Plan the electrical provision independently from the light fittings. Cable runs, connection with the dwelling and suitable professional work all need their own decisions. Even if a profile contains a cable channel, the order may exclude wiring, controls and final connection. Discuss the desired scheme early with the person responsible for assessing and completing the electrical work at the site.
Record the purpose and usual time of use for every lit area. Illumination that guides someone through an entrance has a different role from light over a dining table. List each switch, remote control or alternative operating method. Where other powered features are proposed, combine all required connections on one schedule. The structure, concealed routes and mounting locations can then be planned together, avoiding awkward visible additions afterwards.
One coordinated schedule also keeps the lights, controls and other powered features within the same plan. Everyone can then see the responsibilities and preparation required.
- Give the table, seating and circulation route their own lighting zones instead of expecting one fitting to serve everything.
- List concealed cable routes and identify every task that must be arranged separately from the supplied kit.
For evening patio use, bioclimatic pergolas for outdoor living can be coordinated early with a lighting concept.
Inspection 06 · Check sheet 06
Define the assembly scope realistically
The package might suit owner assembly, or assembly might be available under a separate arrangement. Either approach needs defined limits. Confirm the instructions, component schedule and assembly hardware provided, along with any tools, lifting equipment and extra people needed. Receiving the parts alone does not amount to receiving an erected pergola.
Several site preparations fall outside the product: taking measurements, examining the base, constructing foundations, lifting existing paving and preparing service routes. Allocate these interfaces in writing when more than one contractor or trade participates. A documented sequence makes coordination easier and identifies the preparatory jobs that need finishing ahead of the agreed assembly date.
Preparation should reconcile the drawing with what is actually present. Note steps, projecting masonry, planting, rainwater pipes and permanent features that could interfere with the work. Allow a safe circulation area and somewhere to sort the delivered pieces. Record outstanding decisions and settle them ahead of assembly. This distinguishes work associated with erecting the pergola from site preparations for which another party is responsible.
A shared visit before assembly is useful as well. It allows the proposed access, workspace and obstacles to be assessed in their real setting.
- Write down who handles the base, electrical provision, assembly, weather sealing and acceptance of the completed work.
- Before selecting DIY assembly or a service, assess access, component storage and any lifting assistance required.
For a clearly arranged structure, a traditional aluminium pergola can make assembly planning especially easy to follow.
Inspection 07 · Check sheet 07
Plan dimensions, accessories and daily use together
An accessory earns its place by supporting a defined activity. Consider the daily pattern first: dining, home working, relaxation or entertaining may dominate. The answer informs circulation width, furniture dimensions, barbecue position and storage needs. Generous space depends on keeping posts and added equipment from obstructing the routes people will actually take.
Even small additions should be checked for compatibility. These may include extra trims, brackets or solutions for curtains and privacy screening. Do not buy from a general accessory label; refer to the model, size and desired position. Keep configuration documents, as they simplify later additions and prevent confusion about matching parts.
Design the accessories as elements of the wider patio arrangement. Test curtain, screen and bracket positions against furniture and walking lines. Even a straightforward scaled drawing can reveal a narrow passage or awkward corner. Allow for changes through the year as furniture moves, doors see heavier use and activities shift between zones. Keeping this initial arrangement on file provides a dependable reference when selecting compatible additions later.
- Measure the furniture with chairs extended and allow for circulation, rather than recording only the table or sofa.
- Give each requested accessory a purpose and location in your notes so the quotation can identify it without ambiguity.
For flexible outdoor spaces, bioclimatic pergolas configured with compatible additions offer a useful basis for individual specification.
Inspection 08 · Check sheet 08
Finalise quotation documents systematically
Finish with one schedule that identifies every agreed component. Reconcile the named product, measurements, finish, roof choice, sides, operating method and assembly responsibilities with your plan. A phrase such as “as chosen” is meaningful only when the referenced selection is attached and unmistakable. Seek an itemised revision wherever doubt remains before committing to the order.
Matters outside the package also need attention. Planning permission and siting constraints depend on the proposal and property. In the Republic of Ireland, exempt development is conditional, so ask the relevant planning authority about your site before work begins. If the structure could affect existing building insurance, give your insurer the design and assembly details for review.
Compare your checklist with the completed schedule one entry at a time. Label each component or task according to whether it comes with the order, is an option or remains a site responsibility. Ask for broad descriptions to be unpacked whenever their parts or associated work are uncertain. Store the confirmed schedule beside your drawings and correspondence so the intended configuration and outstanding pre-installation decisions remain traceable after purchase.
Assign a deadline for resolving every outstanding question. Some answers are essential before an order is placed, while others may be settled during detailed preparation for the work.
- Keep the drawing, selected configuration and matching quotation together so every later discussion starts from an identical project record.
- Before work starts, consult the relevant authorities and insurer about the matters within their respective remits.
For a final check of scope, assess standard aluminium pergola kits using only the documented details for your own chosen version.

Comparison
Supplied, selectable or a site responsibility?
This table is a reading aid rather than a substitute for the specification attached to your quotation. Your chosen version governs the answer. Have each row marked to show what comes in the package, what can be added and what must be provided on site.
| Review area | Common core item | Often checked separately |
|---|---|---|
| Structure | Posts, frame and system-specific connectors | Substrate, foundations and special fixing conditions |
| Roof | Selected roof components and matching profiles | Motor, controls or alternative roof options |
| Water routing | System items for the selected roof solution | Discharge route, connection and work to existing fabric |
| Side protection | Only where expressly listed as an item | Screens, panels, glazing and additional guides |
| Lighting | Integrated fittings where specified in the configuration | Electrical connection, cable routes and installation |
Five steps to a reviewable kit
A concise record of the site turns a broad idea into an enquiry that can be answered precisely. Begin with the space and planned activities before choosing convenience features.
01
Survey the space
Record patio dimensions, levels, door zones and permanent obstructions. Include photographs and a drawing showing outlooks and proposed drainage directions.
02
Prioritise use
Set priorities for the way and times the space will function. Seating, movement, privacy and evening activity will guide your selections.
03
Choose the base system
Choose the structural arrangement and roof from the site plan, then note its dimensions, finish and intended location without ambiguity.
04
Add options individually
Place every side treatment, light and control at a stated location. The additions can then be distinguished from the core package.
05
Confirm interfaces
Clarify the ground, electrical work, assembly and local questions first. Then request a complete configuration-specific breakdown.
Checklist before ordering or assembly
Use the current quotation, specification and your own drawing while answering these questions. Each response must concern the dimensions and version you selected.
01. Does the schedule identify the posts, beams, roof frame and connectors for your chosen version?
02. Does it specify the supplied roof pieces, operating equipment and finishing profiles?
03. Has the design addressed drainage direction, the intended discharge side and nearby areas?
04. Does each side element have a stated type, quantity, location and operating method where relevant?
05. Does the documentation separate lighting from the electrical connection, cable routing and installation work?
06. Is responsibility allocated for base preparation, anchoring and any foundation construction?
07. Do post positions, routes and furniture space suit your actual patio routine?
08. Does the completed schedule distinguish additions, assembly services and work provided at the site?


Practical answers to common questions about pergola kits
Is installation automatically part of a pergola kit?
No. A kit primarily defines the pieces that will be delivered. Erection might be covered by a separate agreement or left for DIY assembly. Confirm who is responsible for building, anchoring and aligning the structure, completing preparatory tasks and arranging any electrical work, rather than presuming that one service covers everything.
Are side screens generally supplied in the standard package?
Regard screens as separately selected equipment unless the specification expressly names them. The relevant entry may need to cover rails, attachments and operating pieces as well as the screen. Decide which elevation requires shelter and mark any doorway or circulation route that has to stay unobstructed.
Must I select the lighting when placing my order?
Choosing early is often helpful, since the structure can accommodate planned fitting locations, concealed wiring and mounting provision. The feasibility of adding lights later varies with the selected construction. Request details of compatible choices and ask a suitable electrical professional to assess the proposed on-site work.
What matters when fixing to an existing patio?
The construction, load capacity and condition of the existing ground are decisive, along with any services below it. A surface alone does not answer these questions. Document the patio material, heights and particular features, then clarify with a competent person what preparation and fixing are required for your situation.
Why are product images insufficient for confirming the scope?
Images commonly present a dressed display version where screens, lights, furniture and other additions are visible. Their appearance does not establish that they accompany the basic package. For planning purposes, rely on the itemised specification for your selection and reconcile it with both the photograph and quotation.
Should I investigate local requirements before placing an order?
Yes. The planning position varies with the proposed design, location and characteristics of the property. In the Republic of Ireland, an exempt-development position is conditional rather than automatic, so seek site-specific guidance from the relevant planning authority. Also give the proposal to your insurer if the new structure could affect existing cover.
Review the configuration methodically
A good kit is above all clearly described
A useful decision record depends on clear boundaries, not on sheer length. Identify the structural package first, then the chosen roof arrangement, convenience additions and tasks to be completed at the property. Reviewing the quotation in that order reveals whether it corresponds with your intended project.
Use your area measurements, ideas for use and site photographs as the starting point. You can then assess Bloomcabin from a clear configuration, without confusing visible extras with the actual supplied scope. Request an understandable breakdown before committing to details.
Create one clear schedule covering the main structure, roof, side protection and chosen comfort features.
