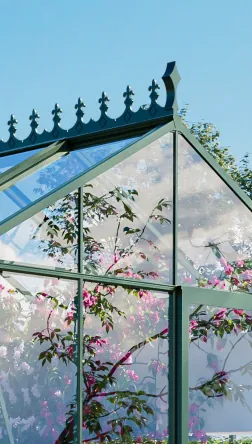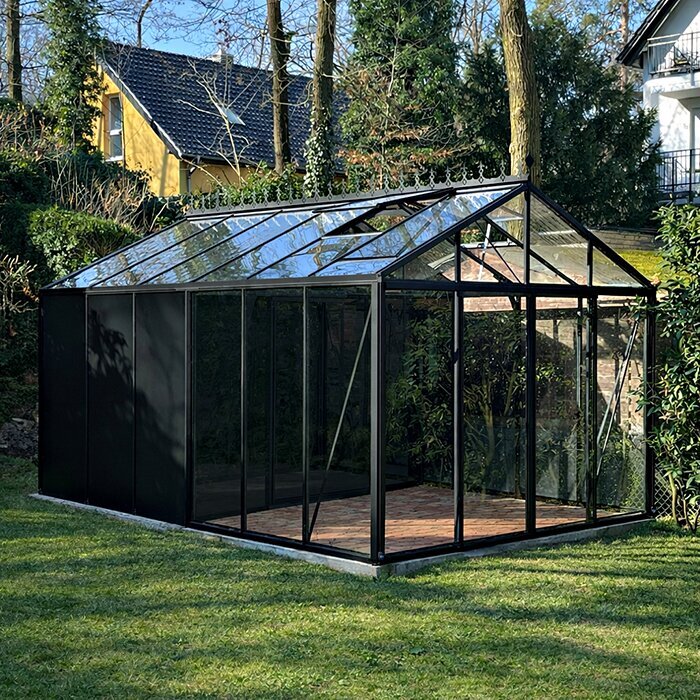



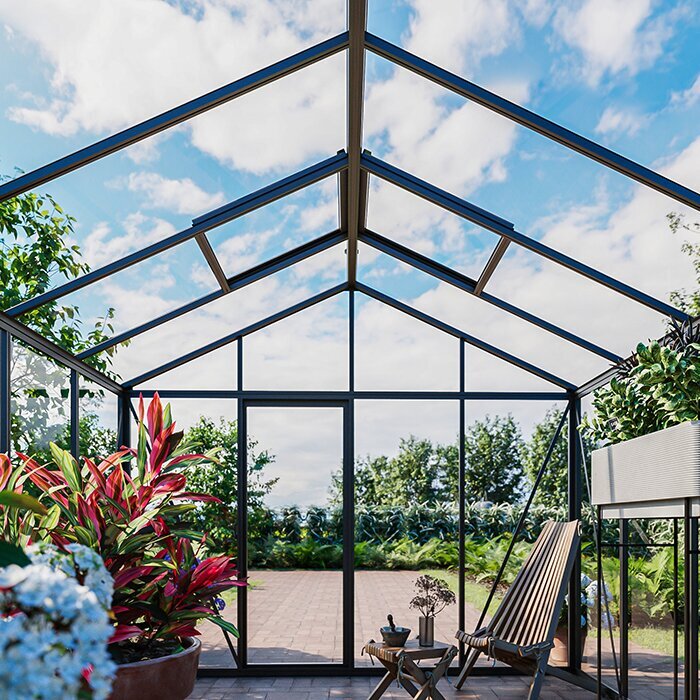


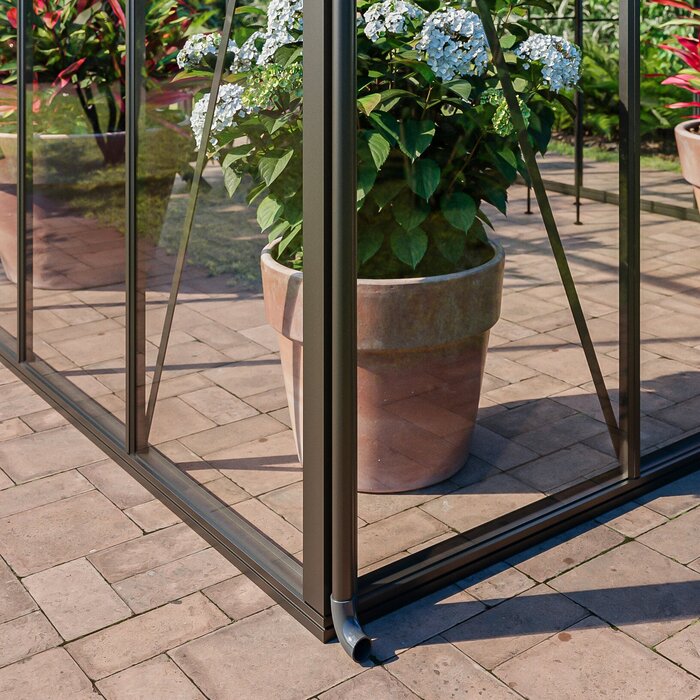




Aluminium greenhouse with built-in storage
A greenhouse and separate storage space within one aluminium structure
The Bloomcabin aluminium greenhouse with built-in storage brings a light-filled planting zone and a fixed, fully divided storeroom into the same structure. Pots, crops, gardening tools and irrigation accessories all have a place without equipment encroaching on beds or routes between plants. It is a practical choice for gardeners seeking greenhouse space without adding a second shed.
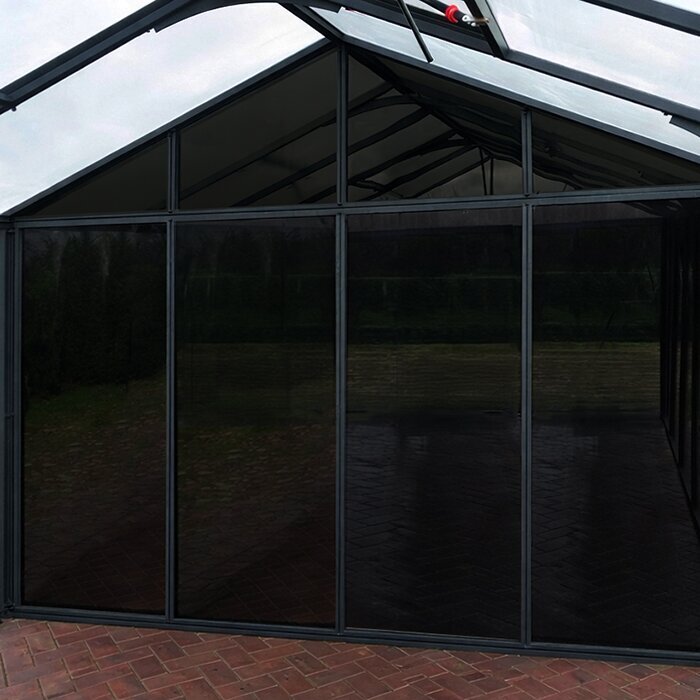
Choose from many versions for compact and larger gardens. Glazing in the cultivation zone varies with the version selected, while tinted panels conceal much of the equipment, pots and supplies kept in the storeroom. Although each area has its own purpose, the exterior reads as a single coordinated garden structure.
Look beyond the overall footprint when comparing versions. Work out the area required by beds, planters and comfortable circulation, then estimate the portion needed for equipment already owned. Sketching the proposed crops alongside the main tools provides a useful basis for choosing. Discover more Bloomcabin greenhouse models.
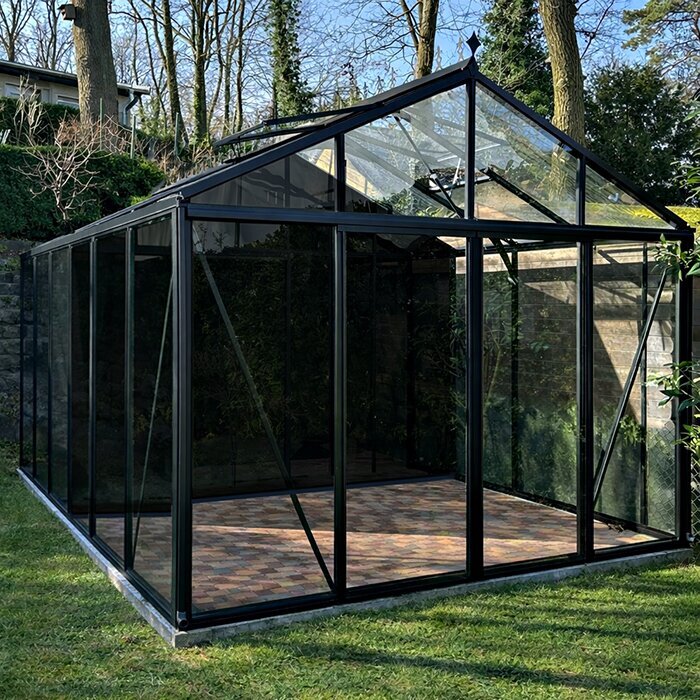
Growing space and storage beneath one roof
Two separate functional zones in one structure
Vegetables, herbs, seedlings and decorative plants occupy the clear-glazed section. Arrange staging, beds and pots so that natural light, vents and circulation routes complement one another. Although the storeroom claims some of the overall area, it removes equipment that has no need for growing light or the damp conditions created by watering.
Instead of crowding bench undersides or path edges, keep watering cans, canes, spare pots, growing media and hand equipment in the divided storeroom. Place everyday items near the opening into the plant section. Occasional or seasonal supplies can occupy the rear and upper shelf positions.
Combining the functions can save the two separate garden positions otherwise required by a greenhouse and tool shed. Even so, take measurements of awkward equipment before ordering and verify both the compartment dimensions and the proposed doorway clearance.
Keep gardening tools at the point of use
Short distances simplify repeated jobs from sowing to tidying
The benefit is particularly clear for jobs requiring several items in sequence. Compost, pots, labels and tools can be taken from storage, used at the workbench and put back afterwards. The growing area stays uncluttered while needed materials remain close at hand.
Flexible size choice
Options suited to gardens large and small
Separate storage compartment
Gardening equipment beside the cultivation zone
Tinted panes
Contents are less exposed to view
Guarantee
12-year guarantee under the applicable guarantee terms
Tinted integrated storage area
Tinted panes reduce visibility and retain the greenhouse’s unified appearance
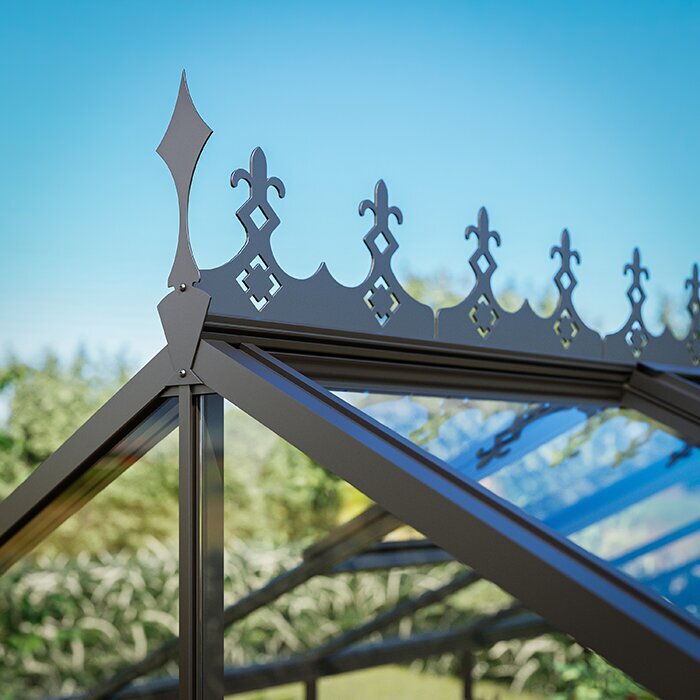
Only the storeroom uses tinted panels, giving it a different visual character from the clear plant section. A continuous roofline and shared framing still make the two parts appear as one structure.
Plan the site around every external measurement of the version ordered. Because the storeroom forms a permanent part of the greenhouse, both sections must occupy the chosen position together; it cannot be sited independently like a freestanding shed.
Dry, clean equipment is the best fit for this space, including pots, irrigation fittings, canes, ties and appropriate growing media. Any item needing controlled heat, moisture or another particular environment still has to be kept as directed on its label and in the maker’s guidance.
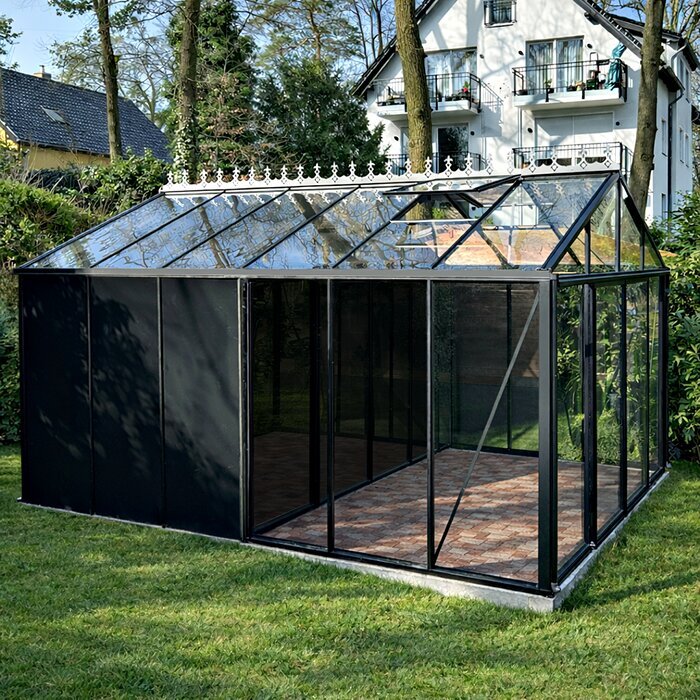
Technical data
Key measurements, glazing choices and included fittings
Available sizes: 22 versions from 3.77 to 28.08 m².
Models 2.35 m wide: Ridge height approx. 2.32 m; door height approx. 1.65 m.
Models 3.10 m wide: Ridge height approx. 2.67 m; door height approx. 1.85 m.
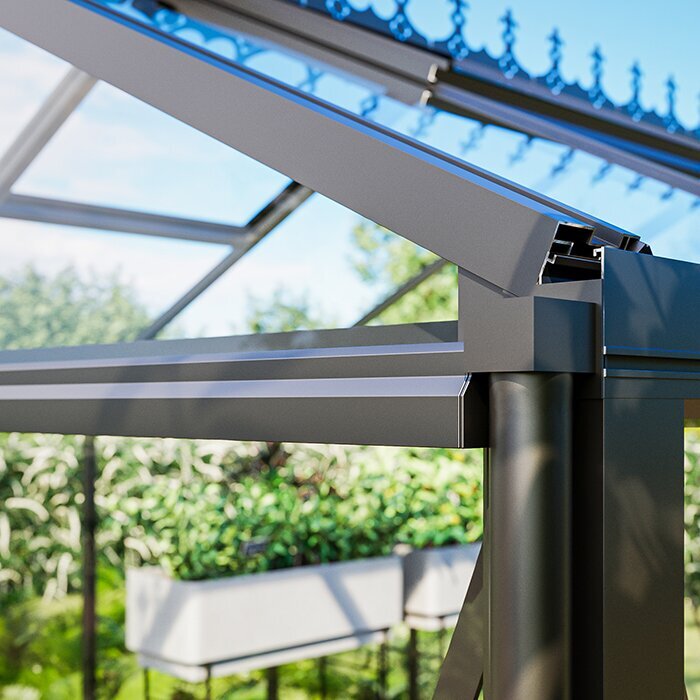
Frame: High-quality aluminium profiles.
Growing-area glazing: Polycarbonate or 4 mm toughened safety glass.
Storage-compartment panes: Tinted glazing.
Doors: Versions measuring 3.10 m across use either one or two sliding doors, according to model.
Equipment: Included fittings comprise opening roof vents, built-in rain gutters and an aluminium foundation frame. The stated design ratings are 30 m/s for wind speed and 210 kg/m² for snow loading.
Further details depend on the version selected.
Everything close at hand
Collect supplies, care for crops, then return equipment to storage
Sowing, repotting and changeovers between seasons call for several supplies close together. Sort pots, labels, ties and small tools according to the job they support. A modest group of everyday items within easy reach works better than leaving the bench continuously overloaded.
Movement around plants, shelving and irrigation is safer and simpler when the floor stays clear. Keep hoses, sacks and crates away from circulation routes. Establish an unbroken central passage before deciding where staging, pots and shelving will sit. This also preserves clear door access when carrying sizeable containers.
Air moves through the planted section via the roof vents, so tall crops, racks and climbing frames need clearance from their controls. Use wall hooks in the storeroom for lightweight implements, slim shelving for smaller pieces and low positions for weighty containers that stand securely.
Built-in storeroom or freestanding tool shed?
Deciding whether the compartment can take the place of another shed
An adjoining compartment works particularly well for equipment associated with cultivation, including canes, small implements, spare planters and irrigation pieces. A mower, bicycle or substantial outdoor furniture brings different needs for opening width, manoeuvring room and parking area, so assess those separately.
Inventory the equipment before placing an order. Identify what will genuinely be used here, record each item’s size and decide whether it will stand, lie flat or occupy shelving. The results indicate whether the compartment offers enough capacity and what proportion should be allocated to it.
Reserve some capacity for supplies that appear together at certain stages of the year. Seedling pots, canes and unused planters still consume room between jobs. Base the storage allowance on peak seasonal needs as well as the smaller collection used from day to day.
Starting the growing season
Prepare sowing and potting materials in good time
Seed trays, small propagation pots, markers and assorted implements tend to come out together as a new growing period begins. Inspect everything ahead of use and arrange it by activity. Discard damaged or empty packs so existing supplies are visible and shortages can be spotted early.
Separate dirty pots and tools awaiting washing from equipment that is ready to use. Give soiled pieces a defined landing place so compost does not spread to seed, markers or cleaned propagation ware. Empty that spot when the task is complete, preserving an open passage into the plant zone.
Keep seed and similarly vulnerable goods here only if the manufacturer’s stated limits for moisture, temperature and safekeeping can be maintained. A wall between them and watered crops helps, but does not create controlled conditions. Closed, clearly marked boxes also reduce accidental mixing and contain loose small pieces.
Ventilate properly on warm days
Keep roof vents clear and counter heat build-up early
Direct sun may raise temperatures quickly within the planted section. Open the roof ventilators when conditions require it, while monitoring heat and moisture levels at intervals. Keep foliage and climbing frames outside their travel path. Weather, crop density and daily use all change conditions, making observation preferable to a rigid schedule.
Guide stems and climbing structures away from hinges, movable windows and operating hardware. Revisit their position as fresh growth develops through the season. Ahead of active use, test every ventilator for free movement and clear away accumulated debris or dead foliage.
Move heat-sensitive goods, and anything harmed by fluctuating temperatures, to another appropriate location. Packaging directions determine how each product must be kept; the compartment is unsuitable whenever it cannot provide the conditions specified for that material.
Direct rainwater in a controlled way
Use the gutters and keep the area around base and doors dry
Roof runoff enters the fitted gutters, which may feed an appropriate drain or a purpose-made collection vessel. Set every container on firm support and position it clear of door openings, service routes and the storeroom entrance.
For convenient watering, locate the outlet where reaching it involves no stairs, awkward bends or extended carrying. Support the water vessel on ground capable of bearing its weight. Periodically remove leaves and sediment at gutter joints and outlets to maintain an orderly flow.
Route any overflow clear of entrances, foundations and the aluminium base. Standing pools interfere with access, spread mud into both sections and saturate the nearby soil. Determine a suitable destination for surplus runoff while planning the site rather than after installation.
Organise the storage space sensibly
Assign hooks, shelving and ground positions by load and everyday demand
Slim shelves lift string, markers, hand equipment and spare components above ground level. Fit them without projecting corners along circulation space or interference with a door. Put everyday pieces at an easy working height and reserve upper levels for light supplies used infrequently.
Place weighty sacks and sturdy tubs in low positions. No stack should lean, topple or bear against the frame or panels, and breakable pots need protection from heavy equipment above. Distributing loads thoughtfully improves both retrieval and routine cleaning.
Create separate zones for irrigation pieces, cleaning kit, plant supports and repotting supplies so the compartment remains legible. Marked boxes make returning each piece straightforward. Preserve sufficient circulation to reach the back shelves directly rather than emptying the front first.
Balance growing space and storage
Classic or Storage: choosing cultivation area or dedicated storage
Classic devotes its complete ground area to cultivation and practical work. It is appealing when another dry storeroom is already available or the priority is fitting the maximum number of beds, planters and benches. Equipment and consumables then have to arrive from elsewhere or share the planted section.
Storage sets aside a defined portion of the building for equipment. The continuous cultivation zone consequently becomes smaller, but nearby tools and supplies remain ordered and separate. Check that what remains can accommodate the chosen crops, circulation and work surfaces without crowding.
The Storage arrangement favours gardeners who frequently repot, train plants, irrigate or clean here and therefore use several pieces of equipment. Someone with a minimal tool collection who prioritises planting capacity may prefer one continuous cultivation section. Drawing beds, shelving and paths to scale reveals the practical difference before ordering.
A stable base
Fit the aluminium base frame to firm, level support across its full area
Firm, horizontal support is essential beneath the aluminium base frame. Irregular ground may distort alignment, prevent panels sitting correctly or hinder the sliding doors. Examine the complete proposed outline before construction. Support must extend beneath the whole footprint rather than correcting only a few isolated spots.
Minor variations in level become more significant over a long model. Verify height, flatness and both diagonals before adding panels to the frame. Use the assembly guide supplied for the selected product and resolve misalignment before proceeding with subsequent parts.
Assess drainage, soil behaviour, frost conditions and applicable site requirements for the actual garden. These findings determine an appropriate foundation. Locate buried utilities, boundaries and neighbouring structures before arranging excavation, anchors or delivery access.
Glazing for the growing area
Choose suitable glazing for the growing area
Toughened safety glass gives unobstructed views and a familiar glazed-greenhouse finish. Crops remain readily visible through it, as do water marks and deposits. Use the fitting and maintenance directions provided for the product, avoiding scouring cleaners, rigid implements and pressure concentrated at one point.
In handling, visual finish and the way it admits light, polycarbonate is unlike transparent glass. Your preferred appearance, maintenance routine and intended use should guide the choice. Specify the panel type with the model. Whichever material is selected, install it correctly and inspect retaining parts at intervals.
Tinted storeroom panels are intended to obscure what is inside, unlike the crop section’s glazing. Keep equipment back from their surfaces nonetheless. Clearance makes washing easier and stops protruding implements or unsteady piles from loading the panels.
Plan access without pinch points
Align entrances with garden paths and practical carrying routes
Position both entrances in relation to the routes used around the garden. Before settling on the site, consider how tools, crops and growing media will approach it. Sliding panels also require unobstructed space at the sides; walls, raised planting areas and substantial pots must remain outside their operating path.
Allow a full watering can, large planter or sack of growing medium to pass without sharp changes of direction or brushing the panels. Clearance immediately inside and outside matters just as much as opening width. Loose edging, steps and abrupt changes of level add avoidable difficulty when carrying loads.
Consider connections to the dwelling, composting point and water supply. A direct line may still be inconvenient where wet weather makes the surface slippery or the route crosses delicate planting. Choosing a durable, dependable path makes routine greenhouse care easier in every season.
After the main season
Inspect and wash equipment, then put it away only when dry
After peak cultivation, gather empty pots, clips, ties and plant canes, removing anything damaged. Wash serviceable pieces and let them dry through before placing them back in assigned positions. This avoids trapping dampness and grime during prolonged storage.
Clear loose compost and spent vegetation so the glazing, framing and base can be reached. While they are exposed, inspect fasteners and make sure door runners and ventilators have no blockage or built-up dirt. Complete this work before incoming seasonal supplies begin to constrict storeroom circulation.
Do not leave wet cardboard, damp fabrics or soiled tubs in long-term storage. Besides concealing other contents, they may create marks or unpleasant smells. Even rarely handled pieces should be checked for lingering damp before going into rear boxes or high shelves for an extended interval.
Special requirements for garden chemicals
Store fertilisers and plant protection products safely as instructed
Retain fertilisers, crop treatments and related substances in their original designated packaging, following the maker’s directions. Keep every label readable. Never transfer these materials to food packaging, and separate them from seed stocks and vessels used to collect produce.
Convenient proximity to crops cannot compensate for inadequate containers or unsuitable environmental conditions. Relocate a product if this room cannot satisfy its stated ventilation, moisture or temperature limits. Consult that product’s own documentation for the correct response to leaks and spills.
Provide heavy tubs, chemicals and edged implements with a steady, protected position that children and animals cannot reach. Shelving must also remain secure, with contents arranged so opening the entrance cannot dislodge them.
Work area in the growing zone
Create a compact potting area without narrowing the main path
Placing a bench by the connection with the storeroom reduces carrying while sowing and repotting. Size and locate it to preserve access to doors, ventilation controls and the main passage. Soil lifts more readily from a washable top. Beneath it, keep only dry-compatible materials that do not impede access.
Bring only the growing medium, pots and implements needed for the immediate job. Afterwards, return cleaned equipment, close any remaining materials and discard waste appropriately. A small receptacle for cuttings prevents plant debris spreading across the bench or into stored supplies.
Keep the central passage usable throughout each task. Watering cans and crates need an assigned side position rather than a temporary home across an entrance. When large planters are common, rehearse their route during setup; this exposes inconvenient shelving, bench corners or crop supports before planting.
Longer versions
Divide additional space into clear functional zones
A longer model may hold a larger crop collection together with extra supplies and working gear. Resist filling every additional metre with shelving. Organising the interior in a deliberate progression—entrance, equipment, work station and cultivation—keeps circulation understandable and cuts repeated journeys from end to end.
A larger planting scheme commonly brings more pots, ties, supports and irrigation pieces. Include those quantities in the storage plan without accumulating surplus stock. Reconfigurable boxes can change purpose through the year. Secure long canes upright or lengthways so they cannot fall across an entrance.
Divide long shelves into manageable sections so regularly used items do not disappear behind seasonal materials. Clear cross-routes also make plants and panes accessible without having to move several items first.
Compact versions
Assign every permanent position before fitting out a restricted footprint
A compact model can still benefit greatly from its storeroom where no suitable alternative exists in the garden. However, every permanently parked crate consumes a noticeable share of limited capacity. Give priority to equipment used for cultivation here, and house large or seldom-needed items in a more appropriate location.
Mark the beds, staging, pots and necessary circulation on a scaled sketch, then examine the cultivation area left beside storage. Draw plants at mature size with their supporting structures rather than as new seedlings. This helps prevent overcrowding once the first season reaches full growth.
Choose dimensions by considering the intended storage-to-planting proportion and the activities planned inside. Tall crops call for a different arrangement from numerous pots or benches. In practice, generous circulation often adds more value than another narrow standing position that eventually obstructs access to glazing or crops.
Keep track of your stock
Review supplies routinely and replace only genuine shortages
For regularly consumed materials, note remaining quantities and identify packs already in use. Delete empty containers and unusable pieces from the inventory immediately, leaving an accurate picture of serviceable supplies.
Review quantities before busy working periods, purchasing only the gaps relevant to upcoming jobs. Legible names separate similar components and partly consumed packs, while a brief location reference makes each one quicker to retrieve.
At season’s end, review actual consumption. Reduce repeat orders for supplies that consistently remain unused, while deliberately replenishing small components that repeatedly run short. In this way, stock levels follow real activity inside the greenhouse.
Plan ahead for arrival and construction
Organise delivery access, a working area and sheltered short-term storage
Ahead of arrival, confirm that every component for the chosen model can reach the build location. Remove obstructions from the approach so glazing and frame sections avoid tight corners and dense planting. Prepare a clean, ordered lay-down area for parts awaiting construction.
Provide ample workspace outside the marked footprint. Move shrubs, loose objects and outdoor furniture where they cannot hinder construction or future maintenance of gutters and external panels. Designate a packaging collection point that will not occupy an entrance or circulation route during the work.
Gather the model’s assembly guide and associated paperwork before work starts. Check the consignment against its documented contents prior to fitting frame sections or glazing, then follow the supplied sequence throughout construction.
Frequently asked questions
Answers about selecting and managing a Storage greenhouse
How can I calculate the space required for storage?
List every item intended to remain next to the greenhouse and note its actual dimensions. Then plan shelving, floor positions and unobstructed access. The remaining area must be sufficient for your plants, work furniture and walkways.
Which items suit the storage compartment?
Appropriate contents include clean, dry items: spare planters, canes, irrigation pieces, hand equipment and correctly sealed potting supplies. Anything subject to defined heat, moisture or safekeeping limits belongs here only when the maker’s directions can be satisfied.
Will tinted panels keep heat-sensitive goods cool?
No. Their main function is to make the contents less visible. Tinting establishes no controlled temperature and cannot substitute for specified containers or safekeeping conditions. Follow the individual maker’s directions for anything vulnerable to warmth or light.
Which glazing option suits my requirements?
Set the unobstructed outlook and familiar finish of safety glass against polycarbonate’s different visual and daylight qualities. Consider maintenance guidance for both materials and confirm the panel choice offered with the particular model.
What is the best way to check doorway clearance for bulky equipment?
Measure the largest object against the opening specified for the selected model. Include handles and other projections, plus the manoeuvring area available on each side. Drawing both doorway and object to scale can expose awkward turns before purchase.
How do I preserve convenient access to the roof vents?
Maintain open space around the sides and underside of each ventilator. Shelving, climbing frames and tall crops have to stay clear of both its travel and controls. Clean away foliage and debris periodically, testing free operation ahead of the active season.
What kind of site does the built-in aluminium base require?
Support it continuously on a firm, horizontal surface capable of carrying the structure. Arrange drainage so rainfall and overflow cannot pool beside entrances or around the base. Preserve external working clearance for construction, cleaning and routine gutter inspections.
How should heavy supplies and shelving be positioned in the storeroom?
Use low standing areas for substantial sacks and secure tubs. Put everyday small components on shelving that can be reached comfortably. Neither the shelves nor their contents should reduce doorway clearance, narrow circulation or bear upon glazing and framing.
Choose the right Storage version
Relate cultivation, equipment capacity and entrances to your gardening routine
Compare the proposed location with both the crops you intend to raise and the equipment earmarked for this compartment. A suitable version leaves workable room for plants and circulation while preventing pots, shelving or tools from encroaching on either entrance.
Product comparison checklist
✓ Measure the largest item to be kept permanently in the storage compartment
✓ Plot the longest canes, widest crates and largest pots on the layout
✓ Check door type and glazing for the chosen version before ordering
✓ Keep side operating space clear for sliding doors and carrying
✓ Plan where collected and overflowing rainwater will go before site work
✓ Check assembly instructions, contents and clear assembly space before starting