









Polycarbonate High Tunnel Greenhouse
Durable high tunnel offering generous sheltered space for vegetables, seedlings and an extended growing season
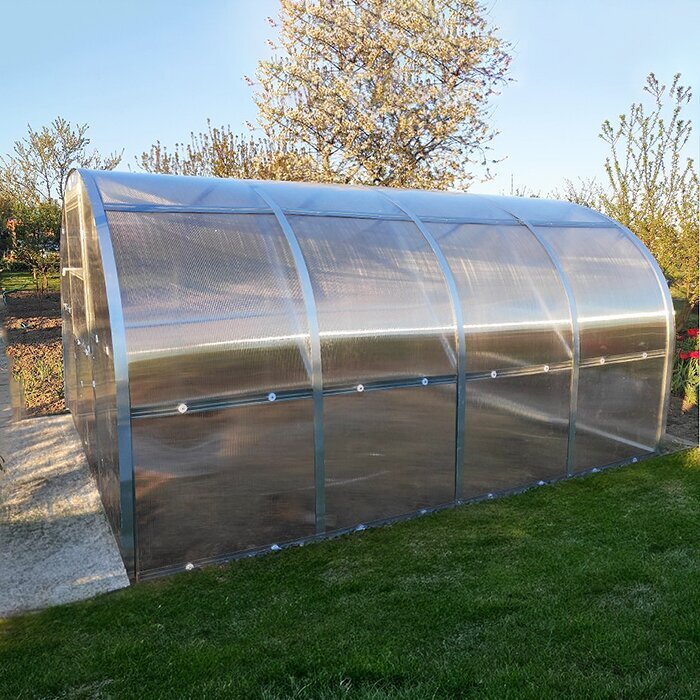
Our Bloomcabin polycarbonate high tunnel greenhouse is intended for gardeners seeking a spacious, lasting shelter for vegetables, seedlings and warmth-loving crops. At three metres across, the tunnel leaves ample floor area for neatly planned beds, an access path and watering equipment. Instead of flexible polythene, the galvanised steel structure carries a solid covering of 6 mm polycarbonate panels.
The base length is 4 m with compatible extension bays available when a larger cultivation area is needed. Its hoops anchor the galvanised steel frame into the soil. Together with the permanently fitted polycarbonate cover the result is a sturdy, sheltered area for cultivation. You can also browse our greenhouse and conservatory range and our planning guides.
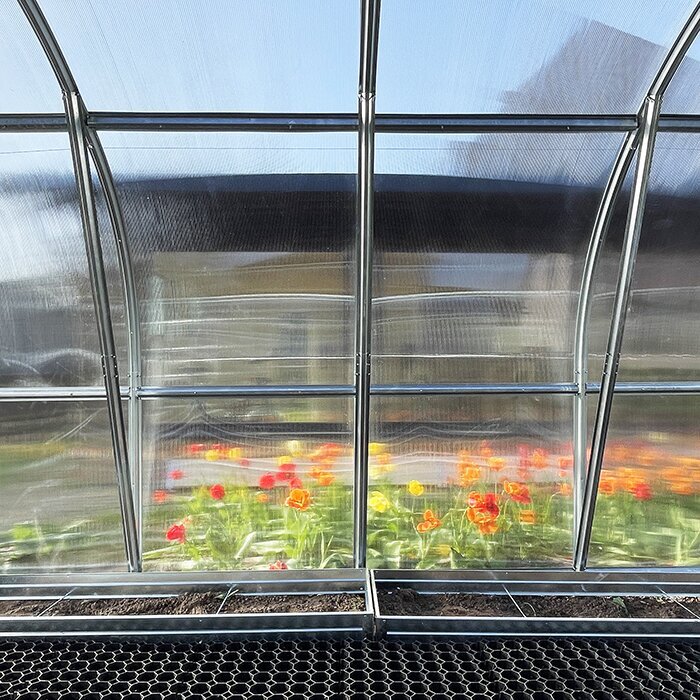
Sturdy galvanised steel frame
Assembling and accurately aligning the galvanised steel frame
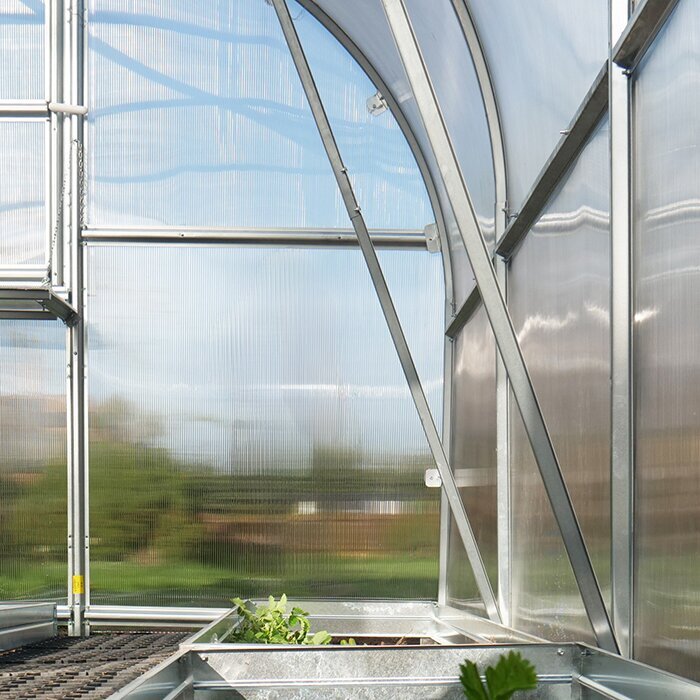
Galvanised steel forms the frame, with 56 mm-wide Omega profiles made from 1 mm material providing the tunnel’s supporting structure. Sort all components first, then place them according to the construction sequence. Doing so makes the hoops, lengthwise connectors and braces easier to identify before any bolts are secured. The zinc coating helps resist corrosion, so avoid scratching it or using tools liable to cause damage.
A distance of 1 m separates each hoop, while the supplied braces spread forces through the structure. Establish a straight, consistent line across the entire tunnel before tightening anything. Misalignment at the opening bay carries through every added section and may complicate installation of the cladding, door and windows. Recheck the overall width, sight line and regular position of all hoops before securing the bolts fully.
Approximately 35 cm of every hoop is set into the soil, so the site needs firm ground capable of accepting that depth. Investigate filled ground, buried utilities and persistently saturated spots in advance. The anchors depend on the complete structure and properly fastened cladding to perform as intended. Its specified wind rating is up to 30 m/s, conditional on installing every required part and observing the assembly guidance.
What are the advantages of a polycarbonate high tunnel?
A sturdier cover than polythene, with considerably more cultivation room than many small greenhouses
Choose this model when the interior will be used regularly to raise vegetables and other plants. There is ample room to establish fixed beds alongside practical access routes. Because the tunnel length is selectable, its footprint can also reflect the plot and the amount of growing room genuinely needed.
3 m wide
Across its width, beds and an uninterrupted access route can be laid out distinctly, reducing the need to step on cultivated soil while tending or gathering crops.
Modular extensions
A 4 m starter model is supplemented by individual 2 m bays, letting you select a total length appropriate to the plot and the workload you can manage.
Even with an extended version, all specified frame, anchoring and fixing parts must be fully installed.
6 mm polycarbonate
The UV-resistant cover keeps direct rainfall off crops and creates a light-transmitting, protected growing space.
6 mm polycarbonate instead of thin film
How to install, inspect and clean the solid polycarbonate panels carefully
Conditions beneath solid cladding may alter rapidly, including both heat and moisture levels. Monitor the tunnel frequently, adjusting the side openings to suit. Condensation is possible on the inner panel faces when air moisture and surface temperatures diverge. If it appears, reconsider how and when you ventilate and irrigate.
M5 screws paired with D40 plastic washers secure each panel. Follow the indicated panel direction, keeping the sheets relaxed rather than forcing them into place. Bring all fasteners up gradually and uniformly instead of finishing one screw at a time. Afterwards, examine the complete fastening pattern, replacing absent washers and correcting tilted screws or sheets that fail to meet the frame evenly.
Ordinary upkeep usually requires only clean water and a soft textile or non-scratching sponge. Avoid stiff bristles, edged implements and harsh cleaning products, all of which may mark the finish. Lift off soil, vegetation residue and early algae growth carefully. Keeping the outer face clean admits more daylight, while tidy junctions and fasteners make subsequent condition inspections simpler.
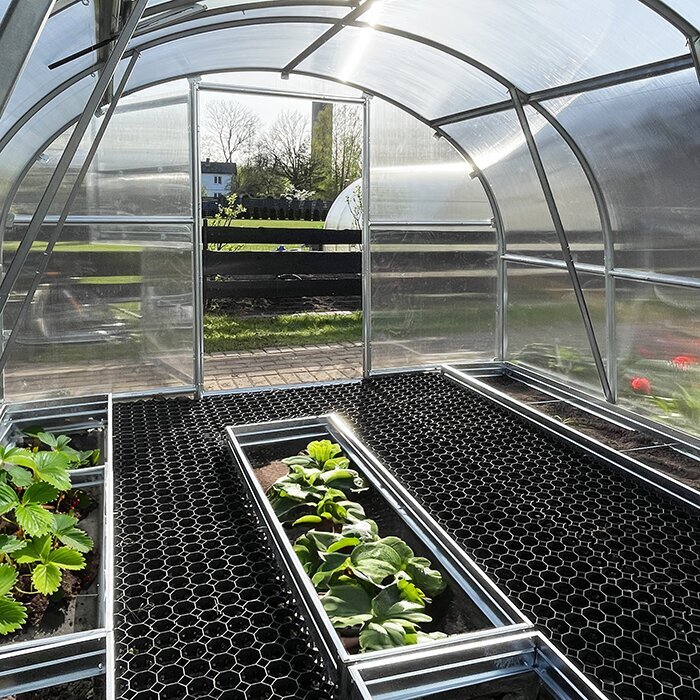
Technical specifications
Key details of the Bloomcabin high tunnel greenhouse
Width: 3.00 m.
Height: 2.10 m.
Length: Base model 4 m; extensions in 2 m steps.
Frame: Galvanised steel, 1 mm material thickness.
Profile: Omega profile, 56 mm wide.
Hoop spacing: 1 m between hoops.
Snow load: 210 kg/m².
Ground anchoring: Each hoop extends approx. 35 cm into the ground.
Cover: 6 mm polycarbonate with UV protection.
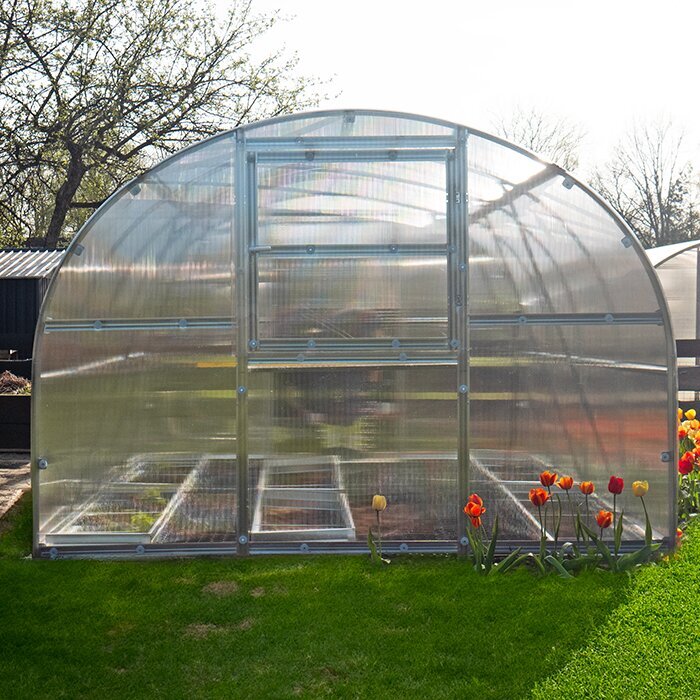
Access: One door at the front.
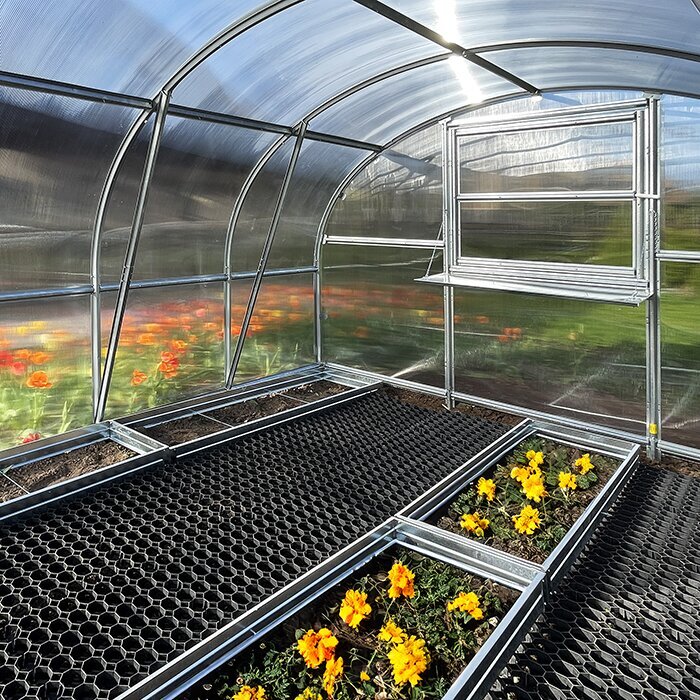
Ventilation: Two side windows support ventilation and temperature management.
Warranty: 12 years, subject to the relevant guarantee conditions.
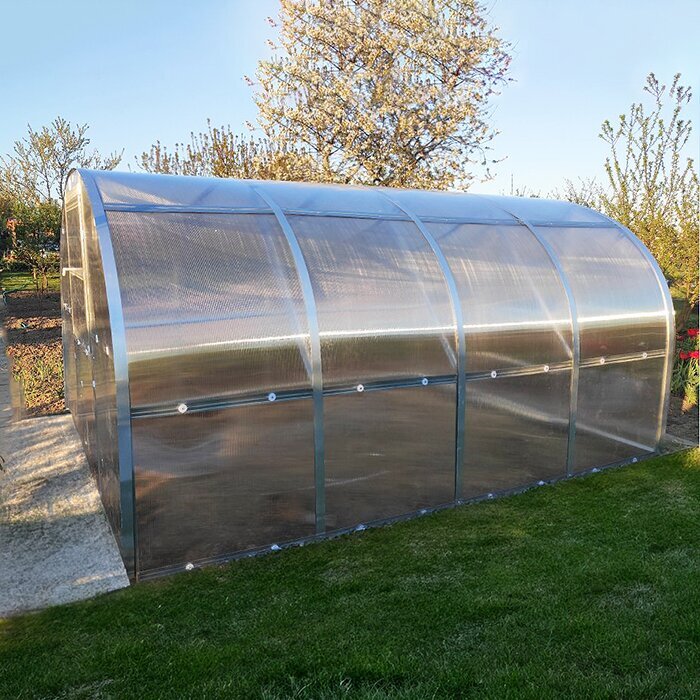
Ventilation and access
The front door provides entry, while two side windows help you manage the growing climate
With 2.10 m of height, the interior supports upright working and taller produce, including cucumbers and tomatoes. Entry is through the door at the front. Leave the space immediately beyond the threshold unobstructed, allowing tools, watering cans and harvest boxes to pass safely without brushing against the plants.
Maintain a clear approach to each side window from outdoors and within the tunnel. Keep crops, training frames and stored materials away from their full opening arc. The bed layout should also account for plants at mature size, when foliage may otherwise make the windows difficult to reach.
Test the door and windows from time to time by moving them through their full travel. Clear away compost, soil and foliage around hinges and openings. Where movement becomes difficult, find and remedy the obstruction or misalignment instead of applying force.
Organise the space by care needs
Arrange crops for short routes and easy access
When dividing the interior, consider not only plant type but also height, checking needs and harvest frequency. This helps use the available area and keeps every crop sensibly accessible.
Tall-growing crops
Train suitable plants upwards to benefit from the available height. Locate their supports where they will not restrict either side window or access to adjoining rows.
Keep young plants visible
Place seedlings together where they can be reached comfortably. This allows regular observation of growth and water requirements without walking through unrelated growing beds.
Frequently harvested vegetables
Locate vegetables requiring frequent attention or picking near the entrance. This reduces walking distance and avoids taking full harvest boxes along the tunnel’s entire length.
Lower-maintenance crops
Reserve the furthest beds for plants that need fewer visits. Even there, preserve an open route so tending and picking do not require other items to be shifted.
Plan before assembly
Plan the location, ground and future use before installation
Mark out the footprint for the chosen length and level the site as far as practicable. During construction, retain a broad perimeter where hoops and polycarbonate sheets can be manoeuvred safely. Decide in advance where surface runoff will go. Water shedding from the solid roof should drain away rather than pooling beside the frame or across the entrance.
Because each hoop penetrates roughly 35 cm, identify underground electrical cables, water pipes and drains in advance. Clear substantial stones and similar obstacles during site preparation, not midway through construction. If the plot slopes or is irregular, form an even base that lets the hoops follow one straight alignment and achieve their intended embedment depth.
Work out a safe route for moving every package between unloading and the finished base. Keep that route and the construction zone free of compost, loose soil and gardening equipment. Once erected, the two long elevations still need exterior access for cleaning, checks and other routine attention.
For further help with preparation and purchasing, visit our planning guides.
High tunnel or classic greenhouse?
When does a high tunnel make more sense than an aluminium greenhouse?
Traditional aluminium greenhouses have an angular outline, allow different visual treatments and may serve as a deliberate focal point in a garden design.
By contrast, this tunnel emphasises one broad cultivation zone, a resilient frame and the flexibility to add more bays later.
A high tunnel is the practical option when productive cultivation calls for the greatest possible sheltered area. Select a conventional greenhouse instead where an architectural shape and its contribution to the garden’s appearance carry greater importance.
Growing in Ireland
Let the garden’s exposure and local weather guide use and maintenance
Growing conditions differ markedly across Ireland and even between nearby gardens. Atlantic influence commonly brings damp air, wind and fast-changing weather, with the maritime effect especially noticeable around the coast. Inland or sheltered plots develop their own patterns, including occasional spring frost. Base tunnel routines on observations from the particular garden, not on one nationwide timetable.
Shelter can help early sowings and young growth make useful progress during spring. As the year advances, crops favouring warmth receive some relief because wind and precipitation meet their leaves and fruit less forcefully. Harvesting may continue further into autumn where the remaining daylight and temperature still support healthy growth.
Keep notes through the opening season, recording unusual heat, prolonged dampness and any patches where plants develop poorly. These details will make it easier to refine the crop arrangement and maintenance routine for that particular setting in the following year.
Finding the right position
Choose a sunny place and allow enough room for air exchange
Good sunlight is valuable during the cooler parts of the growing year. Check the proposed plot at different times to see how nearby trees, boundaries and buildings affect it. Allow clearance around the two side openings as well, ensuring that surrounding objects do not compromise ventilation.
For a garden with substantial exposure, identify the usual wind direction and avoid placing the tunnel in an artificial corridor created by structures. Well-spaced natural screening may provide useful shelter, provided it neither casts persistent shade nor prevents air moving around the tunnel.
Future upkeep matters when selecting the site. Preserve a convenient approach to the entrance and leave serviceable clearance beside both long elevations, allowing exterior examination of glazing sheets, window openings and their fasteners.
Crop planning
Use the 3 m width efficiently for tomatoes, cucumbers, peppers and early salads
At 3 m across, the tunnel can take beds along both sides and an aisle through the middle, or three slimmer cultivation strips. Arrange taller tomatoes and cucumbers where their eventual foliage will cast minimal shade on shorter produce. Install or plan anchor points for training strings and supports before any planting begins.
Spring space can be assigned to lettuce, kohlrabi, radish, herbs and seedlings before summer vegetables needing greater warmth occupy those beds. When the main harvest finishes, cleared sections may be replanted with resilient leafy produce or herbs suited to the later season.
Label each occupied section and note the varieties previously grown there. Those records simplify the next rotation while allowing established aisles and ventilation clearances to remain in their existing positions.
Summer ventilation
Ventilate early on hot days, before excess warmth and moisture accumulate
An enclosed tunnel may become hot during bright Irish weather despite mild outdoor conditions. Begin opening the side vents early rather than waiting for visible plant stress. Prompt airflow limits the sharpest rise in temperature and carries moisture away from crowded foliage.
Tomato foliage benefits from being kept comparatively dry, so avoid practices that add needless condensation. On mild days, make use of suitable outdoor air to refresh the enclosure. Following irrigation, continue ventilation where conditions allow until excess dampness around the plants has dispersed.
During sustained warm weather, changing the time of irrigation and introducing temporary shade may be worthwhile. Judge these responses according to the garden’s region, tunnel aspect and the crops currently inside.
Watering
Deliver moisture at root level without wetting the entire enclosure
Since the solid roof excludes much of the rain, the beds require a deliberate watering plan. Localised methods and drip lines work well because moisture reaches the root zone without routinely soaking leaves or raising humidity throughout the tunnel.
Irrigation intervals vary with the season, temperature, soil composition and the size and density of the crops. A heavy soil behaves differently from a raised bed or free-draining sandy ground. Test conditions in the root zone and water in response, rather than following the same timetable every week.
Stored rainwater is suitable for irrigating the growing beds. Site tanks and lay hoses where they will not narrow the aisles, create trip hazards or interfere with entry through the front door.
Select a practical length
Begin at 4 m, adding bays only where the plot and workload justify them
For many domestic gardens, the starter length can accommodate a useful range of produce. Add-on bays become worthwhile when there is an enduring need for further cultivated beds. In this way, tunnel capacity can increase alongside food growing or the gradual development of the plot.
Consider the likely ultimate length before erecting the initial structure. Keeping the intended extension end open makes it simpler to position neighbouring beds, compost storage, irrigation runs and circulation routes coherently from the outset.
A longer arrangement may suit a modest food garden where distinct crop groups are to be separated. Only add that area when there is sufficient time and capacity to plant, irrigate and maintain it properly.
Irish winter care
Inspect the frame and fastenings ahead of winter and following severe weather
The load imposed by snow varies with drifting, temperature and water content, and the accumulation may not be distributed evenly across the roof.
After storms or significant snowfall, examine the structure from ground level outside. Deal promptly with loose connections, unusual changes in shape or snow gathered more heavily on one side. Clear an accumulation using methods that protect both the steelwork and polycarbonate. Never stand on the roof or use implements with sharp edges, and avoid transferring most of the remaining weight onto one side.
Ahead of colder weather, methodically examine the M5 screws, D40 plastic washers, ground anchors, door and side openings. Clear vegetation from panel-to-frame junctions and verify that every movable element shuts correctly. Secure or remove pots, tools and training equipment that could be blown against the cladding. Progress methodically from the doorway towards the final bay so concealed or awkward points are not overlooked.
Rotation and end-of-season tasks
Plan each new crop in sequence, then inspect the tunnel once it is clear
Set out the intended crop order well in advance. After harvesting, each bed can then be conditioned for what follows while neighbouring produce and the main access route remain undisturbed.
Empty a harvested bed fully before introducing its successor. Take unhealthy vegetation out of the enclosure, then condition the soil for the crop due to follow. Use this opportunity to examine irrigation fittings and plant-training equipment serving that section.
At the final clearance, take away old labels, empty containers and tying material, then wash down the work areas. Examine the watering system for damaged or obstructed sections. With foliage gone, inspect panels, fasteners and steelwork carefully; previously hidden surfaces will now be much easier to see and reach.
Suitable for allotment plots and domestic gardens
Generous sheltered cultivation space for allotment plots and home gardens
This tunnel works in larger domestic gardens and on plots where productive use of the cultivation area matters more than the ornamental quality of a traditional greenhouse. Its straightforward shape is primarily intended to maximise useful shelter around the plants.
On an allotment, consult the site’s own conditions before construction. Establish whether limits or requirements apply to the tunnel’s dimensions, placement or separation from boundaries before committing to an extended configuration.
Because the width remains constant, irrigation, aisles and planting beds can follow the same orderly pattern when extra bays are added later.
Questions and answers
Bloomcabin high tunnel greenhouse FAQ
What needs to be ready before delivery and construction?
Provide an unobstructed route from the unloading point and identify a sheltered, dry place where packages can wait. Complete the basic site preparation before construction is due to start. Afterwards, organise the components systematically and reconcile them with the documents included in the shipment.
May I build the tunnel before deciding on the beds?
Yes. Bed construction may follow the tunnel assembly. First reserve a passage connecting the entrance with both side openings. Once that essential circulation is established, arrange the remaining interior around the crops you intend to grow.
Will the greenhouse remain frost-free through winter?
No. Although solid polycarbonate reduces direct exposure to weather, internal temperatures may still fall below freezing. Respond to readings inside the tunnel by protecting or relocating vulnerable plants, or by harvesting them before damaging conditions arrive.
Does condensation on the panels’ inner face indicate a fault?
Not by itself. Water droplets can develop when panel temperature differs from the moist internal air. If this happens, assess the dampness of the growing medium, the amount being irrigated and the available ventilation. Keep foliage from remaining wet and thin or space dense growth sufficiently.
Is the solid polycarbonate cladding left in place year-round?
Yes. These rigid sheets remain fastened to the structure in every season. Use non-abrasive methods for cleaning and periodically examine their edges, screw fixings and plastic washers for movement or damage.
How do you keep the far end accessible in a longer tunnel?
Reserve one unbroken aisle running between the entrance and final bay. Keep planting beds, crop supports and irrigation equipment within their assigned zones so the route and both side openings remain usable from end to end.
What should you inspect if the door or windows stop closing correctly?
Start by checking the frame’s alignment and looking for movement in nearby sheets, screws or washers. Then remove any foliage, plant-training equipment or stored objects interfering with the opening. Identify and correct the underlying problem before trying to move the affected door or window again.
What paperwork should I retain for a warranty claim?
Retain your purchase receipt together with all documents supplied for this model. Consult them for the applicable conditions, exclusions and procedure to follow when submitting a claim.
Bloomcabin high tunnel greenhouse
Select a length that keeps construction, access and routine upkeep manageable
Match the intended growing capacity to the area genuinely available before purchasing. Account for moving the packages onto the plot, maintaining an unobstructed approach to the entrance and retaining room to work around every elevation. Use the checklist below for a final review of the preparations.
See how the high tunnel compares with our other greenhouses and conservatories.
Checklist before ordering and assembly
✓ Confirm your chosen tunnel length again before placing the order
✓ Leave the full delivery route to the build area unobstructed
✓ Inventory and organise every component against the documentation before construction
✓ Follow the instructed order when fitting the frame, panels, door and windows
✓ Reserve enough open workspace for handling and positioning the panels
✓ Inspect every joint and movable component once construction is complete
Plan your high tunnel