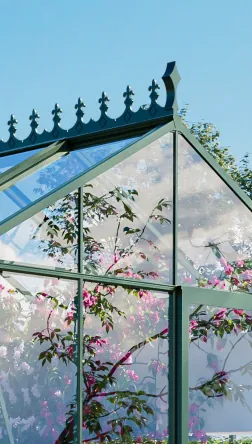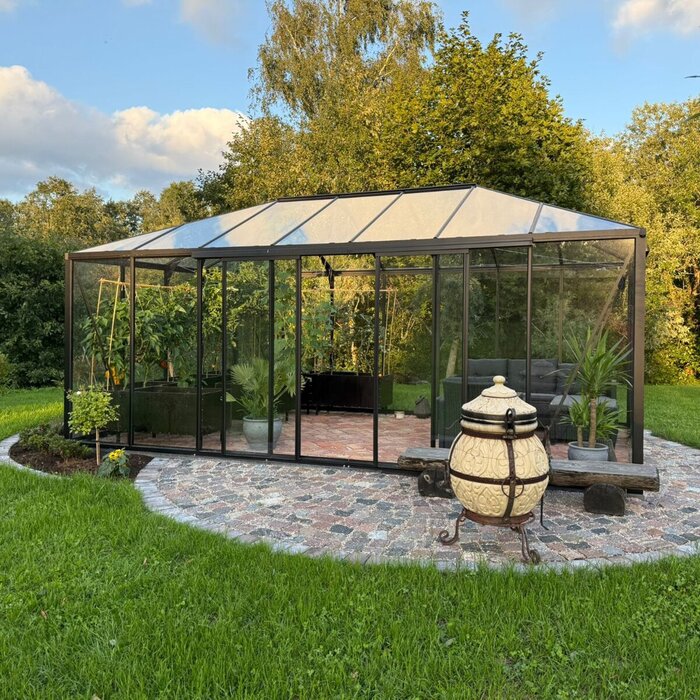





Bloomcabin Oasis Pyramid Greenhouse
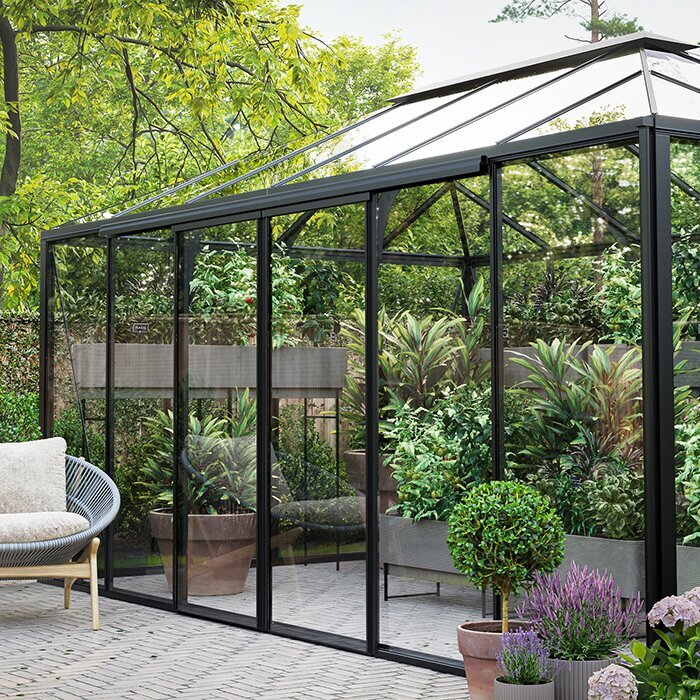
Pyramid greenhouse with an architectural apex, roomy centre and adaptable interior
The Bloomcabin Oasis Pyramid Greenhouse pairs protected growing with a striking garden presence. Roof planes rise symmetrically towards the centre, recalling a compact glazed pavilion while leaving the interior useful for propagation, care and harvesting. Near the house or among beds, paths and shrubs, Oasis makes a confident feature.
The current range includes square and rectangular footprints. You can choose among several combinations of glazing, frame colour and door position. Each decision influences looks, usable floor area, movement, daylight and routine tasks. The technical summary sets out the frame construction, rainwater gutters and integral aluminium base.
Choose the site by considering sunlight, views from the house, ground and access together. Provide summer ventilation, a convenient water route and working space at the door. A scaled plan helps select the footprint and reveals clashes with paths, beds or drainage pipes before work starts. Explore the Oasis Pyramid Greenhouse with Bloomcabin Ireland.
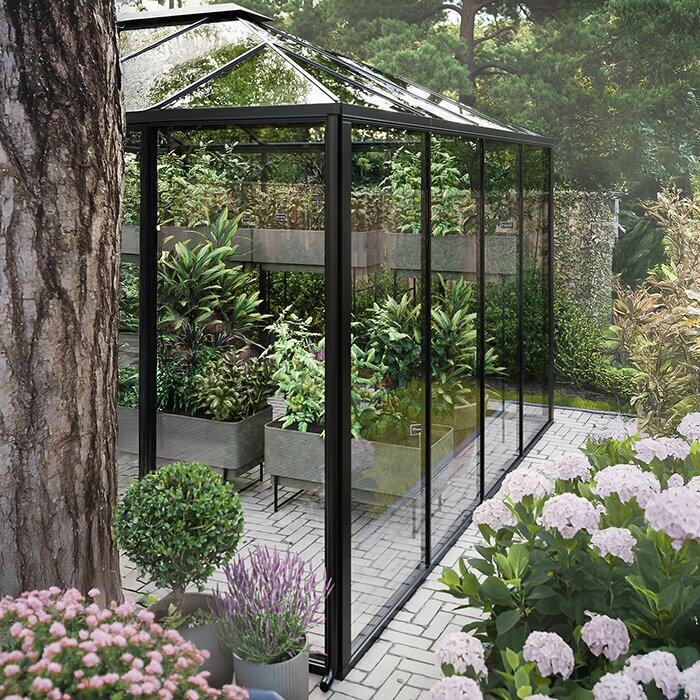
The pyramid shape in gardens
What sets Oasis apart from a continuous-ridge greenhouse
Slopes approach the same apex from several directions, creating the characteristic pyramid profile of Oasis.
Seen from different angles, the roof keeps its definition and works particularly well in prominent garden positions.
Within the greenhouse, converging slopes emphasise the middle instead of directing attention down a pronounced lengthwise line.
Distinctive silhouette
The clearly defined form suits both formal, linear gardens and traditionally planted settings.
High centre
More headroom centrally than at the sides
Flexible glazing
Toughened safety glass or polycarbonate
Wide colour choice
RAL colours for coordinating house and garden
Light from several roof planes
Daylight patterns beneath a roof that rises to an apex
Sunlight reaches the angled roof from different quarters as the day advances. The pattern inside consequently moves more noticeably than it would beneath one uninterrupted pitch, and individual planting zones will not stay equally bright. Before deciding where benches and crops go, visit the site early, around noon and later in the afternoon, noting temporary shadows cast by the dwelling, nearby trees or boundary hedging.
With toughened clear glass, foliage, flowers and plant outlines can be appreciated readily from the surrounding garden. Polycarbonate handles incoming light differently by diffusing it and screening the interior more. The decision therefore involves the garden view, crop requirements and privacy, as well as whether shelving, containers and everyday gardening supplies should remain conspicuous from outside.
Use the real site rather than assuming perfect sunshine. On clear days, southern exposure, reflective masonry or a sheltered courtyard may build heat; partial shade calls for thoughtful crop placement. Choose glazing in conjunction with ventilation, movable shade and the intended interior arrangement.
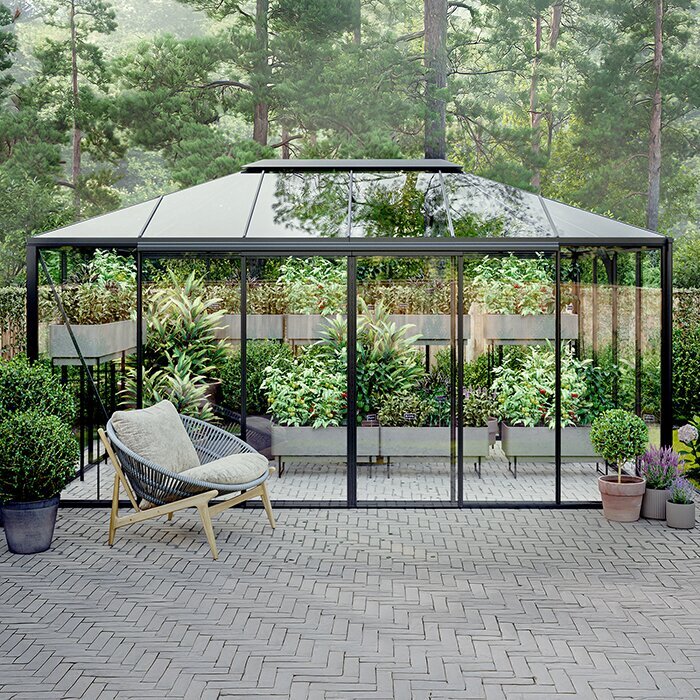
Finding the right setting for a pyramid greenhouse
Four particularly important points when selecting the position
As Oasis is highly visible in the garden, good growing conditions and an attractive position should work together.
01
View from the house
Mark the intended footprint in the garden, then view the proposed apex from frequently used rooms, the patio and principal paths. A pleasing sightline is worthwhile, but it should not compromise daylight, access or healthy plant growth.
02
Sun
Look beyond orientation and observe the site’s changing light through the day. Deciduous trees vary their shade by season, while buildings and evergreen hedges screen it more consistently. The planned crops also determine whether the position is suitable.
03
Door side
Aim the sliding door towards a straightforward route for moving soil, pots, produce boxes and watering equipment. The path should remain usable in wet weather. Leave ample room outside for opening the entrance, setting down loads and turning.
04
Rainwater
Record the gutter outlets during the site survey. Reserve nearby space for pipework or a suitable storage vessel without blocking inspection access. Plan the onward drainage route alongside the supporting base and the existing ground levels.
Technical data
Key dimensions and equipment features at a glance
Size overview
14 sizes
Approximately 5.6–14.2 m²
Compact version
Approx. 2.35 × 2.35 m
Roof apex: 2.69 m; wall height: 1.93 m; door height: 1.85 m
Square version
Approx. 3.10 × 3.10 m
Roof apex: 2.64 m; wall height: 1.93 m; door height: 1.85 m
Rectangular version
Approx. 3.10 × 3.85 m
Large rectangular version
Approx. 3.10 × 4.60 m
Construction
Reinforced, powder-coated aluminium
The specification includes integral gutters, an aluminium base and alternative sliding-door layouts. Select a door suited to its wall width and the main approach path. Powder-coated profiles are available in RAL colours for coordination with façades, window frames and lasting garden elements.
Using the height beneath the apex
The pitched sides provide their greatest usable clearance around the middle
Map the floor from the middle outwards according to available headroom. Put trellises and taller specimens where the converging slopes leave sufficient space, reserving the lower perimeter for shorter plants, benches or other working surfaces.
Central positions may accommodate tomatoes, trained climbers or substantial citrus specimens. Arrange pots and supporting frames so that watering points, stems and produce can be attended from the principal walkway without casting lasting shade over adjacent planting.
The apex figure alone cannot describe the clearance available to every plant. On a section drawing, show each tall specimen together with its pot and training frame. The diagram should reflect how headroom progressively decreases as the sloping roof approaches either side.
Combining growing and garden design
Four suitable ways to use it
01
Centrepiece in a kitchen garden
Oasis can form the centre of a kitchen garden, close to raised beds, herbs, compost and water. Keep warmth-loving crops inside and hardier vegetables outdoors. Clear paths make it easier to move harvests, plant waste and tools between these areas.
02
Zone for tall crops
Place climbers and large containers beneath the roof centre, where upward growth has more room. Lower plants, seed trays or worktops can occupy the edges. Use secure supports that do not intrude into doorways or obstruct ventilation openings.
03
Flowering plants behind glass
Clear glazing allows flowering and strongly shaped plants to contribute to the garden view. Keep the arrangement practical: faded blooms, watering points and every side of each container must remain accessible. Staggering plant heights prevents larger specimens from completely hiding smaller ones.
04
Flexible reserve space
Leaving one zone open eases transitions between propagation, peak growing and overwintering. It can temporarily hold young plants, harvest boxes or extra pots, keeping the greenhouse adaptable without repeatedly rebuilding permanent growing areas.
Ventilation, paths and seasonal planning
Allow the Oasis layout to change with its plants. Install fixed elements only where they will not hinder the sliding door, roof vents or seasonal rearrangement of the interior.
Ventilation and shading
Oasis may heat rapidly in sunshine while conditions outdoors remain mild. Respond to the internal environment when ventilating or shading, not simply the outside temperature. Retain ample daylight, because sustained dense shade limits the light required for crop growth.
Warm air can leave through the high-level vents, with replacement air entering at the sliding doorway. Keep vigorous growth and training systems away from both openings so this circulation route remains effective. Reassess the interior whenever weather conditions swing during the day. If nobody will be present, arrange dependable watering and ventilation beforehand rather than leaving either to chance.
Adjustable shading can follow the sun, crop stage and changing use of the greenhouse. Fit and operate it without obstructing roof vents or rubbing against glazing and frames. A seating spot may need shade at different times from light-loving fruiting crops.
Working routes and layout
Lead the main walkway directly from the sliding entrance. Planting areas, shelves and controls should be reachable without leaning over delicate crops. Retain floor-level room for turning, setting down boxes and working with a watering can or hose.
Test shelves and potting tables in place with the pots or trays you intend to use. Check the remaining passage with overhanging foliage and work boxes present, not only while every surface is empty.
Any stand-alone fitting must be stable on the chosen surface and remain outside circulation space. Test benches and shelves under the weight of planted pots or full trays, not just when empty. Allocate heavy tubs a lasting position that can still be approached easily for care.
Seasonal change
Spring calls for open benches where seed trays can be handled, seedlings pricked out and young plants transferred through successive stages. Organise batches so inspection and irrigation stay straightforward. Decide in advance which tables will be taken away or given another purpose once larger crops occupy their permanent positions.
Summer priorities shift towards ventilation, irrigation and convenient picking. Redirect strong new growth whenever it encroaches on a passage or air opening. Grouping crops by water demand reduces unnecessary work, provided taps, valves and hose fittings can still be operated without leaving equipment across the walkway.
Autumn may require a revised arrangement to shelter sensitive potted specimens. Inspect everything first so infected foliage, pests or needlessly saturated material are not carried indoors. Moveable furniture frees floor area but cannot make every plant suitable: reserve winter accommodation for specimens whose mature size and care requirements fit the available conditions.
Plants, containers and work surfaces
Arrange plants and work areas by how often they need watering, care or movement. Keep seedlings and frequently used tools readily accessible. Large permanent containers need stable support and clear maintenance access, even when the greenhouse is full.
Beds and plant containers
Choose between ground beds and containers according to crop needs and the flexibility required. Beds support permanent plans; pots allow easier rearrangement. Set the balance before installation and coordinate it with the principal walkway and irrigation method.
Give containers stable support and controlled drainage. Position trays, outlets and watering points so escaped water is quickly noticed and removed. Do not allow persistent damp beneath pots or beside the integral aluminium base.
Empty floor dimensions do not show the full space needed. Overhanging foliage, broad pots and open boxes extend into working areas. Separating growing zones from the main route simplifies care, harvesting and cleaning throughout the season.
Caring for tall crops
Tomatoes, trained climbers and sizeable citrus specimens require lateral working room as well as vertical clearance. Gardeners should be able to inspect stems, foliage and produce without compressing neighbouring growth. Estimate each plant's later spread before assigning a young specimen its position.
Check ties, supports and training frames regularly so they do not constrict new growth. Put plants requiring frequent side-shoot removal, pruning or harvesting where they remain easy to reach.
Shorter planting may occupy the perimeter when light remains adequate and taller pots do not conceal it during watering.
A workspace for sowing and potting
A modest propagation bench establishes one dependable place for seeding, pricking out and moving plants into larger pots. Size and locate it to preserve passage width while keeping anything stored below it easy to retrieve.
Choose an easy-clean surface with room for trays, pots and current tools. Return unused supplies afterwards to dry, accessible storage rather than leaving them on the bench.
Using a mobile bench keeps the room adaptable; shift it elsewhere or take it out when mature crops or winter pots demand the area.
Watering and equipment
Organise the water supply, hose and tool storage as one work zone. This avoids repeatedly crossing paths while watering and keeps controls visible. Preserve separate access to gutters, framing, doors and vents for inspection and cleaning.
Order in the work area
Assign hand tools, plant ties and labels their own convenient storage point. Essential items are then readily found without taking over the bench.
Keep shelves, containers and tools stable, clear of the glazing and outside the main passage. Store frequently used equipment near the work zone; less-used items may sit farther away if inspection and maintenance access remains open.
Leave enough clearance beside the structure for cleaning and visual checks. This also makes fallen leaves, soil and plant debris easier to remove.
Watering
Especially in larger versions, decide in advance where water enters and how it will be distributed. Keep the connection accessible without moving heavy pots. Guide or store the hose to prevent kinks and plant damage. Plan electrical components and water installations separately, using competent specialists where required.
Separate drip zones can serve crops with different water needs, such as deep tubs beside shallow planters. Keep lines visible enough to reveal leaks but clear of feet. Check emitters and outlets regularly, as debris can restrict flow and cause uneven watering.
Site filters, controls and shut-off valves where they are convenient to operate and a leak can escape without harming the greenhouse or its contents. Labels help users distinguish one circuit from another. Ahead of freezing weather, identify components that require emptying or insulation, using the instructions provided for the actual fittings installed.
Maintenance
Inspect panes, gutters, roof ventilators and sliding entrances at regular intervals, looking for obstruction, poor movement or damage. Clear foliage from rain channels and remove grit, soil or pebbles from the door runners before drainage slows or movement becomes difficult.
Wash panes and coated aluminium using gentle implements and products approved for those materials. Scouring or other abrasive treatment may harm either finish.
Cleaning thoroughly before a new group of plants arrives improves visibility during inspection and clears stale organic matter from corners that are awkward to reach.
Rainwater, flooring and size choice
Plan the floor, rainwater system and footprint in sequence. First establish firm support and drainage, then place storage and pipes, and finally test the selected size against the complete layout. This keeps fixed items clear of the entrance and maintenance areas.
Collecting rainwater
The integral gutters can direct rain into a suitable store for vegetables and container plants. Short, orderly pipe runs simplify inspection, while a closed or properly covered vessel limits debris. Before watering, check that the stored water’s condition suits the intended plants.
Select storage volume by balancing the greenhouse roof catchment, rainfall at the site, space and likely consumption. Oversizing is unhelpful if the vessel blocks servicing or cannot be washed readily. Locate the outlet where a can may be placed underneath or an irrigation line attached without creating an obstruction along the normal route.
Provide an overflow that carries surplus rain clear of the supporting foundation.
Flooring
Choose a durable internal floor that provides secure footing for watering, potting and cleaning. It should support movable tables and containers and remain grippy when wet. Loose soil in the main passage increases cleaning and may enter the sliding-door track, so growing and walking areas can use different surfaces.
Suitable choices may include permeable paving, gravel or another surface appropriate to the use.
Coordinate the completed floor height with the threshold while keeping every drainage route unobstructed.
Choosing the size
Plant quantities, bench and shelving measurements, circulation needs and seasonal alterations all contribute to the size decision. Floor area alone can be misleading once wide tubs, spreading leaves and open boxes occupy the room. Determine as well whether every part will be used for cultivation or whether a portion should accommodate people.
Draw the equipment to scale using its true outside measurements rather than estimating from area. Plot the entrance, primary route, benches, water supply and largest pots. Test whether each can be reached without first shifting something else, and include the spread plants are expected to develop at maturity.
For square and elongated plans, consider whether activities will radiate from the middle or follow a lengthwise route.
Foundation and assembly
Accurate assembly of the complete frame begins with firm, level support underneath
A flat, stable sub-base remains necessary despite the integral aluminium base. Design it for the soil, local frost and drainage, then establish the outside dimensions and finished level accurately. The final junction must shed water and preserve free movement of the sliding door.
Because all the sloping roof sections converge over the middle, assembly depends on a base that is accurately aligned and square. Verify the level and both diagonals before following the prescribed construction sequence. Protect frame parts and panes while they await installation. Safe equipment for elevated tasks and a sufficient team should be organised in advance.
The 30 m/s wind and 210 kg/m² snow ratings require proper anchoring and a site-appropriate base. Before assembly, consult the relevant planning authority about any applicable foundation rules, boundary clearances, site conditions or permission.
Planning in four steps
1
Define the use
Start with the permanent plant list, expected mature heights and the question of including a modest seat. The answers indicate the necessary footprint, useful task areas and the spare capacity required as the planting changes through the year.
2
Test the site
Observe when direct sun reaches the proposed position and where buildings, hedges or deciduous trees cast shade. Also check that everyday access, the water route and views across the garden suit the chosen door side.
3
Choose the equipment
Treat footprint, glazing, sliding-door type and RAL finish as a coordinated selection. Compare the proposed colour and form with the house exterior, existing window frames and established garden palette.
4
Prepare the base
Resolve the ground, anchors, drainage and rainwater route before assembly. An accurately prepared base helps the roof planes meet correctly and avoids difficult adjustments during construction.
Frequently asked questions
FAQ – Bloomcabin Oasis Pyramid Greenhouse
How do I test the chosen dimensions outdoors before placing an order?
Mark the selected version’s outer boundary at the proposed location. Within it, plot the main passage, benches, largest containers and clear entrance area. This full-scale layout shows whether circulation and working room will remain adequate after the plants mature.
How should I decide which way the entrance faces?
Face the entrance towards the main garden route, providing a direct line for carrying soil, pots and harvest boxes. Keep clear space outside for opening, setting down loads and turning, then continue the route indoors without narrowing the principal walkway.
Which glazing gives an unobstructed view of plants?
Toughened clear glass gives the most direct view of plants, containers and fittings. Polycarbonate diffuses light more and screens the interior from outside. Choose according to the desired transparency and the lighting needs of the crops you intend to grow.
Are double sliding doors possible?
Yes. Paired sliding doors are available on compatible wall sides from approximately 3.10 m wide. Before choosing them, confirm that the wider entrance suits the garden approach and planned interior arrangement.
How should a rainwater-store overflow be planned?
Route the surplus discharge so it leaves the greenhouse support safely and predictably. Keep the vessel and connecting pipes positioned to preserve access for gutter, pane and maintenance work.
Can the integral aluminium base replace prepared ground beneath it?
No. The aluminium base still has to sit on flat, load-bearing ground with effective drainage. Accurate setting-out allows the door runners, wall frame and converging roof sections to come together in their correct positions.
Can growing plants share the greenhouse with a compact seating spot?
Yes, if the selected size provides sufficient space once everything is arranged. Position a modest bench or table clear of the main route and plant-care areas, and choose something readily repositioned as seasonal demands change.
What warranty applies?
Bloomcabin gives the greenhouse structure a 12-year guarantee. Read the applicable terms before ordering to understand its coverage, requirements and exclusions.
Bloomcabin Oasis
A distinctive garden centrepiece with a practical purpose
Oasis suits gardeners who want a greenhouse to contribute deliberately to the wider garden design. Coordinate its footprint, position, glazing, door orientation and internal layout to create a sheltered growing space that remains practical and enjoyable in daily use.
Before configuring
✓ Outline the selected model outdoors, including its working area at the entrance
✓ Record early, midday and late-day shadows on your location drawing
✓ View the proposed RAL finish beside the house and windows in daylight
✓ Plot the full width of pots, benches and mature growth within the layout
✓ Choose positions for the rainwater vessel and its safely routed overflow
✓ Resolve final floor height, water drainage and structural anchors as one plan