
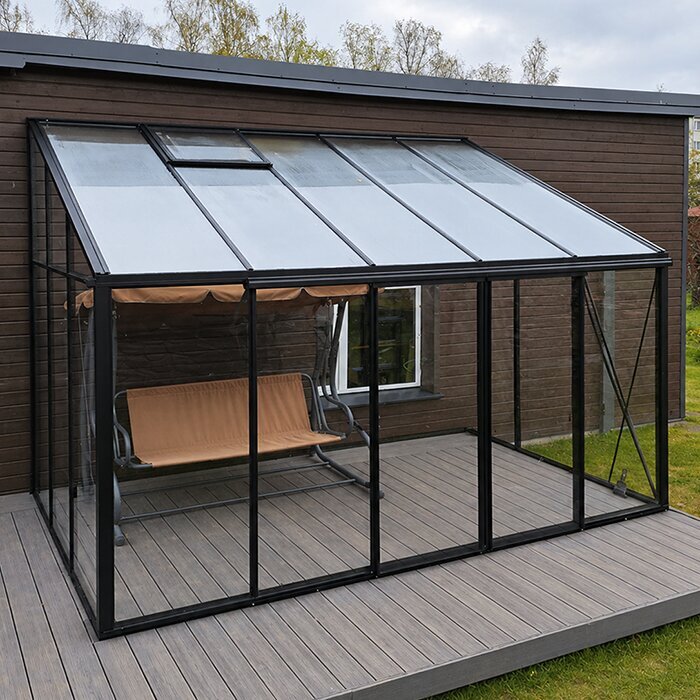



BloomCabin Lean-To Greenhouse for UK Gardens
A space-saving greenhouse designed to sit beside your home
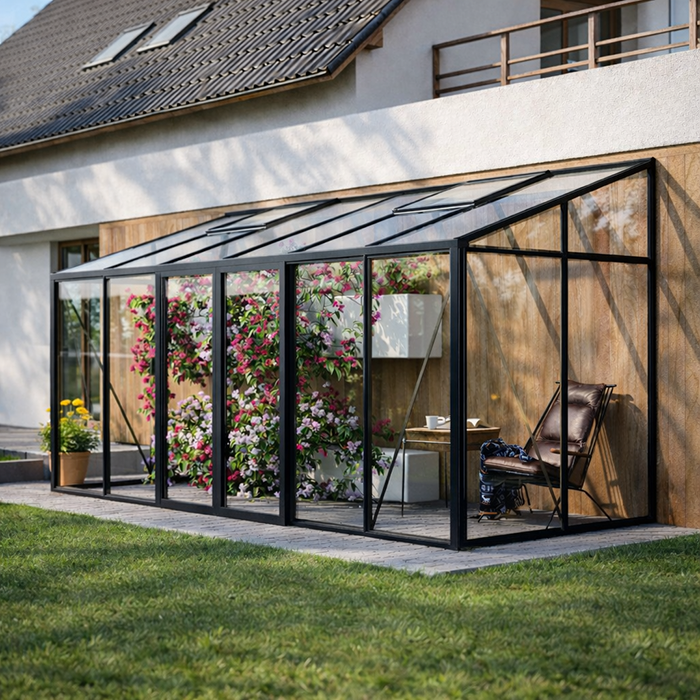
A BloomCabin Lean-To Greenhouse is a space-efficient aluminium greenhouse designed to stand directly against a suitable house, garage or garden wall. By placing the structure along an existing wall, it creates a protected growing area without taking over the centre of the garden. The broad glazed surfaces admit natural light, while the slim frame helps the greenhouse sit neatly beside the building. It is an effective way to turn an otherwise overlooked strip beside the home into productive space.
If you are comparing greenhouse styles, explore the wider BloomCabin greenhouses and conservatories range as well. The Lean-To Greenhouse is especially useful when easy access from the home matters, or when a patio, courtyard or side return cannot comfortably accommodate a freestanding model. Its position makes quick jobs such as watering, checking seedlings or picking herbs more convenient. The chosen wall must, however, provide enough clear width and height for the selected configuration.
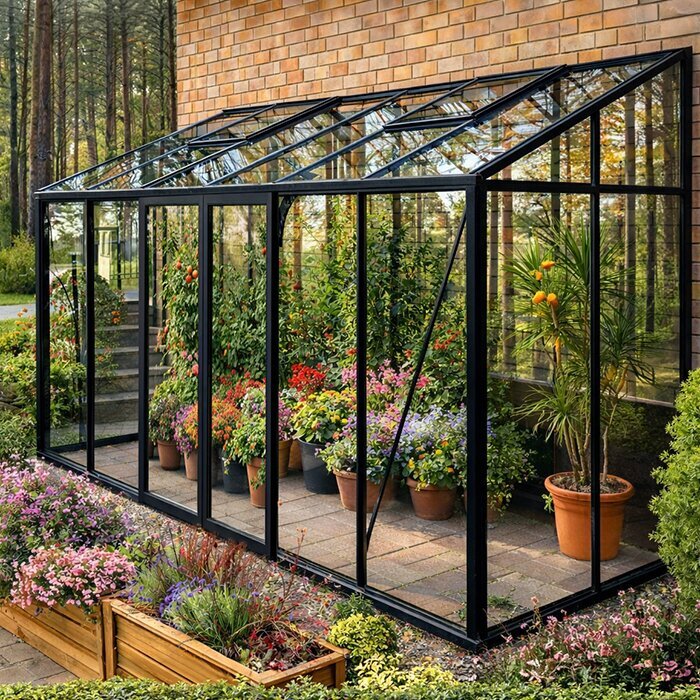
A practical use of space
Make useful growing space beside your home
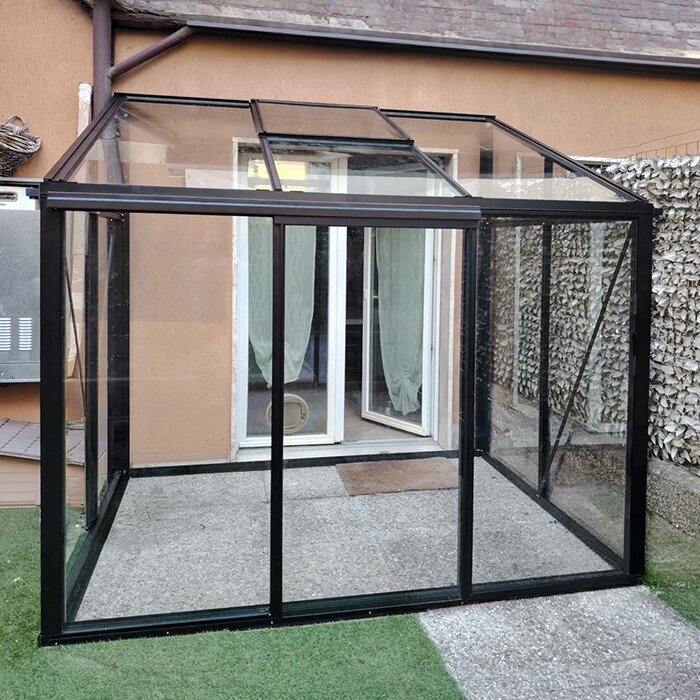
Side gardens, patios and courtyards may offer ample wall length but little depth. Treat the proposed site as both a growing area and a thoroughfare: note the routes people use, the doors and windows that must remain unobstructed, and how the greenhouse entrance will connect with the path. On a larger property, positioning it beside a wall can also provide a natural transition between house and garden. Clear wall dimensions, available projection and practical access are more important than the garden's total area.
Plan water and electricity requirements before finalising the site. Decide how water will be brought in and where watering equipment can be kept without obstructing the entrance or path. Consider electricity only if the intended use genuinely requires it. Any outdoor electrical work should be planned and completed safely by a suitably competent person.
The BloomCabin guide to aluminium greenhouses provides a detailed overview of frame construction and glazing options.
Why choose this design?
Start with how you want to use your Lean-To Greenhouse
Define the main growing or leisure purpose first, then estimate the floor space, headroom and access it will require once plants and equipment are in place. Use that plan to assess the wall, foundation, entrance and surrounding paths. This is more reliable than selecting a model for its appearance alone.
Space-efficient layout
The wall-side format keeps more of the remaining garden open and can turn a narrow perimeter area into organised growing space. Check that the projected depth still leaves a usable route past the greenhouse where one is required.
Close to the house
A nearby entrance is convenient for carrying seed trays, watering cans and harvested produce. Plan the route carefully, including steps, tight corners and changes in level, so bulky panels and frame components can also reach the installation area safely.
Bright glazed interior
Glazing across the roof and exposed sides allows daylight to reach plants from above and around the growing area. Actual light levels depend on the wall's orientation and shade cast by eaves, fences, trees and neighbouring buildings.
A neat fit beside your property
The slim aluminium frame gives the structure a tidy appearance beside the property. Precise site preparation is still essential: uneven masonry, projecting sills or a misaligned foundation can prevent the frame and wall junction from fitting correctly.
BloomCabin construction
Aluminium, safety glazing and practical details for regular use
BloomCabin uses aluminium profiles for the greenhouse structure. Aluminium combines strength, corrosion resistance and a clean finish, making it well suited to a greenhouse that remains visible beside the home throughout the year. The material requires relatively little routine attention, while the slim profiles keep the glazed areas and planting visually prominent.
The Lean-To Greenhouse can be configured with polycarbonate or 4 mm toughened safety glass. Sliding doors do not need the clearance required by hinged doors, which is particularly useful on narrow paths and patios. An integrated gutter collects water from the greenhouse roof, while the built-in aluminium base connects the frame to a correctly prepared foundation. Before installation, decide where rainwater will discharge so it does not pool around the base, stain the adjoining wall or run onto a path where it could freeze or become slippery.
BloomCabin aluminium greenhouses have a 12-year warranty and are rated for wind speeds of 30 m/s and snow loads of 210 kg/m². These ratings depend on correct preparation, assembly and anchoring, so follow the supplied instructions and ensure the supporting wall and foundation are suitable. Review the full warranty terms on the UK warranty page before ordering.
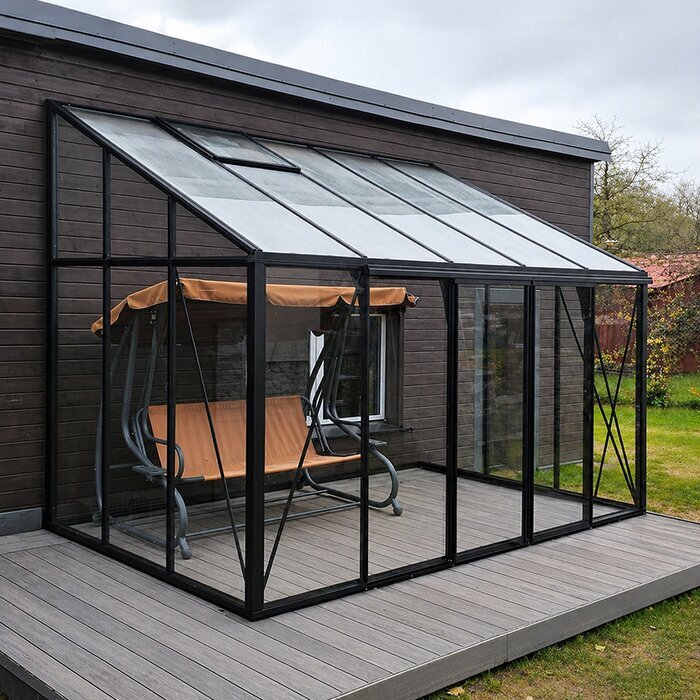
Glazing choice
Glass or polycarbonate for your Lean-To Greenhouse?
Consider the view from both the garden and nearby rooms when choosing glazing. Toughened safety glass is transparent and gives the structure a crisp appearance; polycarbonate is lighter and translucent, so it softens incoming light and screens the contents. The right choice depends on whether uninterrupted views, diffused light or a less exposed working interior matters most at this location.
4 mm toughened safety glass
Clear panes make plant growth and the condition of the interior easy to inspect from outside. They also reveal condensation, splashes and clutter more readily, so the glazing and visible staging benefit from regular cleaning and organisation. During periods of strong sunlight, use ventilation or shading as required for the plants being grown.
✓ Clear, crisp appearance
✓ Excellent light transmission
✓ Open views through the greenhouse
✓ Attractive for prominent positions beside the home
Polycarbonate
Choose polycarbonate when the greenhouse will function chiefly as a working growing area and an uninterrupted view through the structure is not essential. Its translucent finish makes fine interior detail less visible from the house or patio and gives the structure a softer visual effect than clear glass. Consider how that appearance will sit beside nearby windows and outdoor living areas.
✓ Lightweight panels
✓ Diffused natural light
✓ Impact-resistant material
✓ More screening for pots and supplies
Planning the right configuration
Choose a size and layout that suit your wall and gardening plans
Measure the proposed location before ordering and compare every relevant site dimension with the model under consideration. Check the space at ground level and above it, including clearance around the entrance and any area needed to clean the outer panels. Mark doors, windows, drains, meters and paths on a simple site plan so you can confirm that each remains usable after installation.
01. Size and proportions
Measure at several points rather than assuming the wall, paving and eaves are parallel. Record the smallest clear wall width, projection and height, excluding any space occupied by sills or pipework. Use these clear dimensions when checking model fit and retain enough working room for assembly and pane cleaning.
02. Door position
Align the entrance with the route used to carry compost, pots and tools, but examine the whole approach rather than the doorway alone. Steps, gates and narrow passages affect everyday convenience and may determine whether large components can be brought to the site.
03. Ventilation
Check how the roof ventilation will operate in relation to the adjoining wall, eaves and planned interior fittings. Keep opening mechanisms accessible when staging and mature plants are in place. Arrange the interior so warm, moisture-laden air can move towards the roof openings rather than being trapped by tall crops or shelves.
04. Glazing
Select glass when a transparent finish and open views are the priority, or polycarbonate when lighter panels, diffused light and greater screening are more important.
05. Foundation
Base the foundation dimensions on the installation information for the selected model, not on the nominal space available. It must be level, stable and capable of supporting the complete aluminium base continuously. Account for local ground and drainage conditions when planning the work, and verify the finished dimensions before frame assembly begins.
06. Accessories
List the shelving, staging and shading you expect to use, then check their locations against the door, vents and working route. Confirm that the remaining growing area can accommodate the mature spread of the intended plants. This makes it easier to distinguish essential accessories from items that would simply crowd the greenhouse.
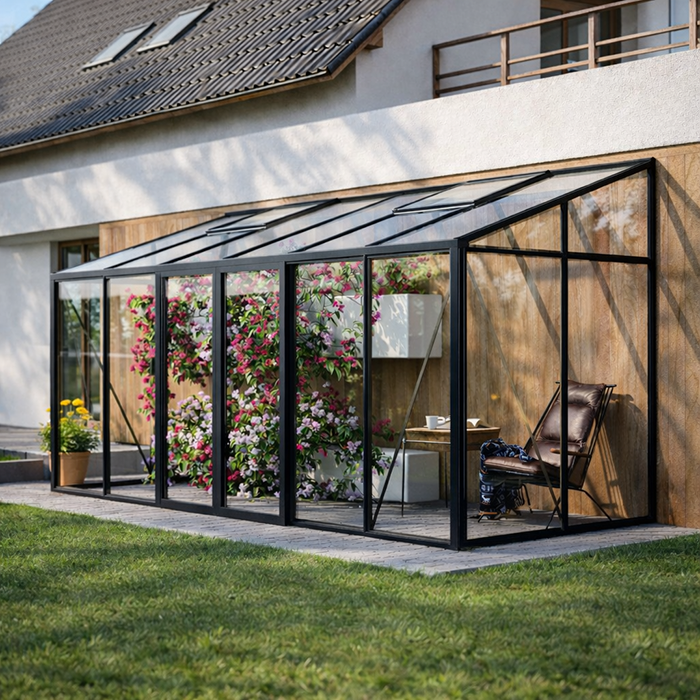
For gardens in the UK
Choose the best position for your greenhouse in a British garden
Conditions can differ markedly between an enclosed courtyard and an exposed rural garden, or even between two sides of the same property. A wall may shelter the site from one direction yet channel gusts around a corner, while nearby buildings can alter shade and rainwater flow. Inspect the position at different times and after varying weather: note persistent puddles, debris collected by wind and any concentrated run-off. These signs can reveal site issues that dimensions and photographs do not show.
Observe sunlight across the day and, where possible, at different times of year. A convenient wall may be shaded by the house itself, a neighbouring building, fencing or mature planting. Also consider the surface behind the greenhouse: future repairs, painting or repointing will be harder once access is restricted. Choosing the site therefore involves balancing plant light, a sound wall, workable access and the long-term needs of the property.
If you are still comparing models before deciding, the UK greenhouse buying guide gives a broader overview of greenhouse choices, while the UK greenhouse set-up and planting guide is useful for planning the interior after installation.
More than one purpose
What can you do with a Lean-To Greenhouse?
Because it sits close to the home, this greenhouse can support several compatible uses if the interior is planned carefully. Plants will usually need most of the available light and ventilation, while potting requires a steady work surface and supplies within reach. Seating also takes up valuable floor space. Decide on the main purpose first, then fit secondary activities around it without making plant care or movement difficult.
Grow vegetables and herbs
Use the protected interior for tomatoes, cucumbers, peppers, salads, herbs and young plants, matching each crop to the available light and headroom. Allow enough separation for watering, inspection and airflow as the foliage develops, rather than planning only around the size of newly planted crops.
Create a potting area
Staging or shelving can create an efficient place for sowing, propagation and potting. Keep heavy materials low, place frequently used items within comfortable reach and avoid storing so much equipment that fallen compost or water cannot be cleaned from the floor.
Display favourite plants
Clear glazing can provide an attractive backdrop for citrus, flowering plants, climbers and decorative collections. Group plants by compatible care needs and retain access to every container; a display becomes difficult to maintain if rear pots cannot be watered, turned or inspected.
Make a garden retreat
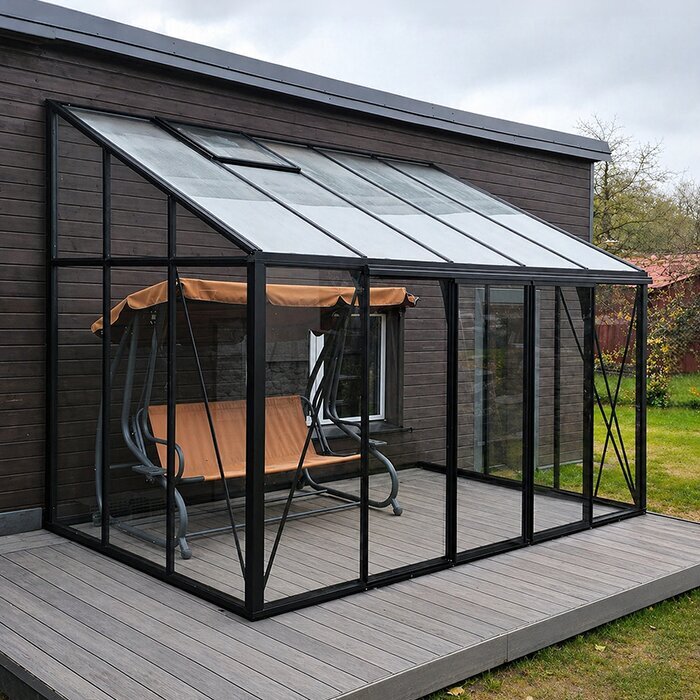
In a larger model, compact seating can be added without turning the whole interior into a sitting area. Place furniture where it will not shade plants, restrict the entrance or prevent cleaning, and choose materials suited to greenhouse conditions. Movable pieces make it easier to release space when crops expand later in the season.
Installation and preparation
Prepare the wall and foundation before installation
Inspect the full wall from ground level to the eaves before ordering. Note windows, doors, downpipes, vents, cables, taps, roof overhangs, outside lights and projecting masonry, including anything above normal eye level. Compare their positions with the dimensions of the selected configuration. The wall must be sound and suitable for the required connection; seek competent advice if you are unsure about its construction or condition.
Complete the correctly sized foundation and check that it is level before assembling the frame. BloomCabin greenhouses are designed for self-assembly and include detailed instructions, but long profiles and glazing still require careful handling. Arrange enough help, keep the work area clear, use suitable protective equipment and postpone installation during unsuitable weather. The aluminium greenhouse FAQ answers common questions about installation, glazing, delivery and options.
Before work begins, check any planning, building, leasehold, title or boundary requirements that apply to your property. The owner is responsible for securing any permission needed. If the greenhouse will adjoin a shared wall, or the property is rented, listed or otherwise protected, make the relevant enquiries before ordering rather than assuming its compact footprint removes every requirement.
Long-term care
Keep your Lean-To Greenhouse bright, clean and easy to use
Wash the aluminium profiles and glazing with mild products and soft cleaning equipment, avoiding abrasive methods that could mark the surfaces. Clear leaves, moss and other debris from gutters so rainwater can leave through the intended route. Remove soil from the sliding-door track and check that opening mechanisms move freely. Cleaning is most effective when staging and pots are positioned so the edges, corners and lower panels remain reachable.
Inspect the greenhouse in spring and autumn and after unusually severe weather. Check for loose fixings, displaced seals, blocked drainage, damaged panels or a door that no longer runs true. Address problems promptly and use compatible replacement parts where required. During winter, monitor snow build-up and any material that may slide or fall from the adjoining building.
For purchasing and delivery details, use the current UK purchase and delivery information.
Choosing between greenhouse styles
Lean-To Greenhouse or freestanding greenhouse?
A freestanding greenhouse can be positioned away from buildings and accessed from every side. It may be the better choice when the sunniest growing position lies elsewhere in the garden, when no suitable wall is available or when easy access for cleaning the exterior is important. It also leaves house and garage walls clear for future maintenance.
A Lean-To Greenhouse is a strong option when a suitable wall also provides useful light and convenient access from the home. It uses a narrow strip efficiently, but the installation must be coordinated with windows, services, roof drainage and the wall's condition. Choose between lean-to and freestanding designs by assessing the entire site rather than comparing footprints alone.
If you want to compare aluminium construction and quality more generally, see BloomCabin's greenhouse quality guide.
Making the space work harder
Lay out the interior before the greenhouse arrives
Sketch the floor area to scale before ordering. Mark the entrance and a continuous working path, then place staging, shelves, containers and any seating within the remaining space. Use the expected mature size of crops rather than the dimensions of seed trays. A layout that appears generous in early spring can become congested once tomatoes, cucumbers or climbing plants occupy their supports, making watering and harvesting unnecessarily awkward.
Use height selectively. Narrow staging can keep propagation trays at a comfortable level, while shelves can hold small pots without consuming the whole floor. Taller crops should be positioned so that their foliage does not overshadow seedlings that need stronger light. Avoid attaching unapproved loads to the greenhouse frame or building wall, and keep hanging items clear of vents, glazing and door movement.
Make ventilation and shading part of the regular care routine rather than waiting for visible plant stress. Check conditions around dense foliage and beneath staging, where heat or moisture may linger away from the doorway. In warm periods, ventilate early enough to release accumulated heat; in cooler weather, maintain appropriate airflow instead of keeping the greenhouse continuously closed. Adjust shading as sunlight and planting change through the season.
Choose an interior arrangement that can adapt through the growing year. Spring propagation may require ample space for trays, summer crops greater height, and autumn clear surfaces for cleaning pots or sorting produce. Movable containers and sensibly sized staging make these transitions easier. At the end of each crop, remove dead material, wash reusable containers and clean concealed areas before pests or disease residues become established.
Frequently asked questions
Lean-To Greenhouse FAQ
What is a Lean-To Greenhouse?
A lean-to greenhouse is designed to stand against a suitable existing wall, which forms one side of the enclosure. The aluminium frame and glazing create the roof and remaining sides. Unlike a freestanding model, it must be aligned with both the supporting wall and the prepared foundation.
What should I check in a narrow side garden?
The key figure is the usable passage left after allowing for the greenhouse projection, not the garden's overall width. Mark the footprint and entrance on the ground before ordering, then walk the route to judge everyday access and the space available for cleaning. Check above the footprint as well, because an eave, pipe or sill may create the narrowest point.
Which glazing gives the clearest view through the greenhouse?
The 4 mm toughened safety glass provides the clearest view of the garden and the greenhouse interior. Polycarbonate is translucent, so it diffuses light and provides more screening for pots, trays and stored supplies.
Why does the foundation need to be level?
A stable, level foundation helps the frame remain square, the glazing fit correctly and the sliding door operate as intended. The integrated aluminium base does not compensate for an uneven or incorrectly sized foundation, so follow the installation information for the selected configuration.
Can it be used as a garden room?
A larger configuration can accommodate seating as well as plants, although it remains a greenhouse rather than an insulated room in the home. Temperature, humidity and condensation will vary with sunlight, ventilation and planting. Select moisture-tolerant furniture, retain an unobstructed exit and do not let relaxation space interfere with plant care.
Should I choose the largest configuration that fits?
No. Choose the model that accommodates mature plants, staging and a comfortable working route while retaining practical access for installation and cleaning. Check overhead and wall-mounted obstructions as well as the footprint, and confirm that all components can reach the site before ordering.
Where can I check ordering information?
Use BloomCabin's How to Order guide for the current UK ordering process.
BloomCabin
Choose the right BloomCabin Lean-To Greenhouse for your home
Use the site measurements and gardening plan to narrow the range, then compare the relevant model dimensions, glazing and installation requirements side by side. Prioritise a clear entrance, workable plant-care space and access for ventilation and cleaning. A well-matched model will be easier to use throughout the growing year than one chosen on external dimensions alone.
For additional planning information, visit the useful information for UK customers section before finalising your order.
Details to confirm for your chosen configuration
✓ Confirmed wall width, available depth and height
✓ Positions of doors, windows, gutters and pipework
✓ Preferred glass or polycarbonate glazing
✓ Preferred door position and clear access to vents
✓ Foundation dimensions checked against the instructions
✓ Delivery route and assembly access checked
How to order your Lean-To Greenhouse