
Keeping a Pergola Breezy While Adding Privacy
Pergola planning
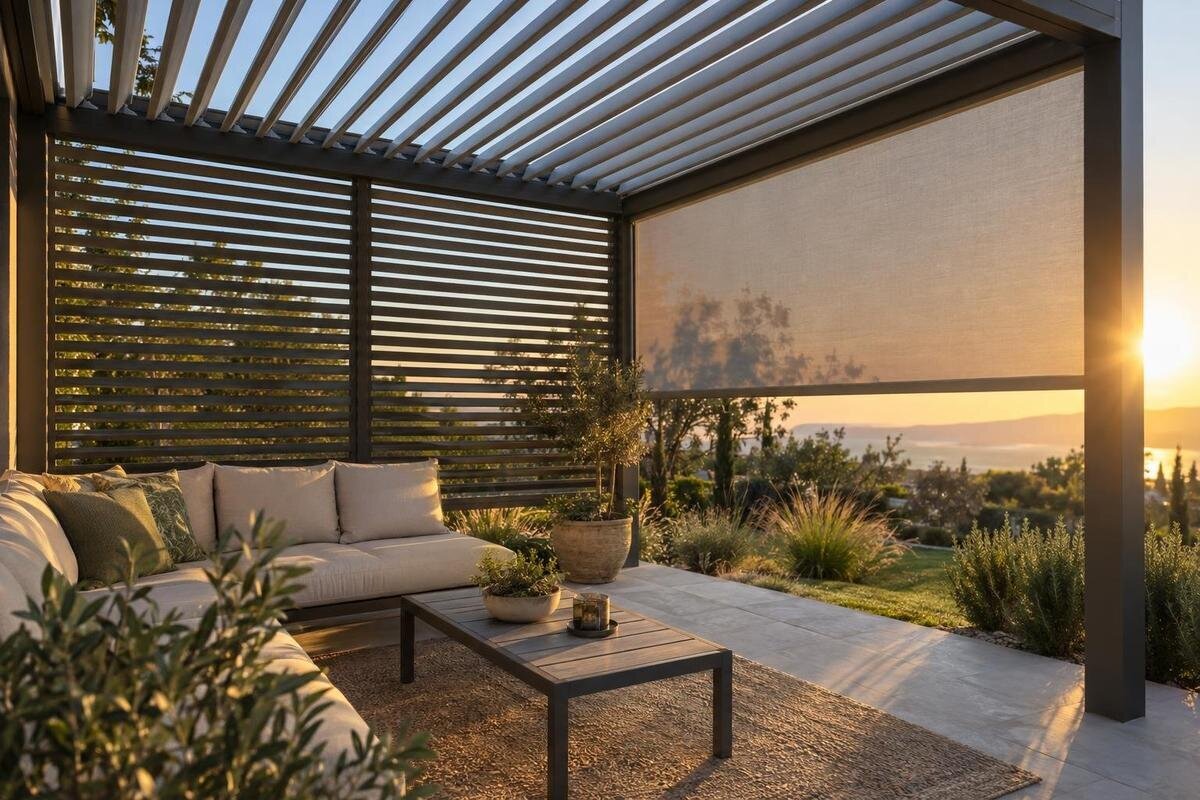
Privacy under a pergola is usually a question of one or two exposed views, not a reason to screen every side. A panel can block the view from a neighbour’s window or a nearby path, yet also interrupt the breeze reaching the seats. Plan both at once: note where air reaches the seating area during the hours you use it, mark the important sightlines, then preserve an open route through the space. This guide explains how to place selective screening, judge the gaps around it and ask about model-specific side options without mistaking roof ventilation for air movement at seating level.

Identify the views that need privacy
Privacy is easier to plan when you can name the source of exposure. Is the concern a neighbour looking down from an upper window, a direct view through a gap in the boundary, people passing along a path, or a line of sight from another home? Mark each observer’s likely position on a simple plan, then mark where people sit, eat or talk. Draw a line from each observer to the occupied area rather than treating the pergola’s outer edge as the target. A high window may see over a low screen, while a side path may be screened by a shorter treatment; the relevant relationship is angle and height, not the number of open sides. This map prevents a broad enclosure becoming the default before you know what must be screened.
Separate the views that need screening from those you are comfortable leaving open. Note whether privacy matters across the whole pergola or only at one end, and whether the concern arises while sitting, standing or moving through. A dining area overlooked throughout a meal presents a different requirement from an entrance briefly visible to someone passing. Give each sightline a short note explaining when and why it matters. If only one corner is overlooked, covering every side solves a broader problem than you have identified. This list of priorities helps you judge later compromises: which view must be blocked, which can remain partly open, and where you would rather retain an outlook and a route for air.
Observe airflow where people sit
Do not choose a screened side from a compass point or one breezy afternoon alone. Spend time in the intended seating area at the hours it is normally used and note which edges feel open, where air reaches, and whether nearby buildings or boundary walls create still corners. Repeat the observation on more than one occasion, because direction and strength can vary from day to day. You are not trying to forecast conditions; you are learning the usual movement around this particular outdoor space. A sketch with arrows and time notes is more useful than a label such as “breezy side”, especially where a wall, hedge or neighbouring structure interrupts an otherwise open approach. Note whether air reaches the chairs or only the more exposed edge.
Record whether you notice air around your legs and upper body while seated, rather than only when standing at the pergola’s edge. Keep these observations separate from anything you notice overhead. When considering the Bloomcabin Bioclimatic Pergola, use the seating-level observations to describe the conditions you want to preserve; the model name alone does not tell you how a screened layout will feel. Add the time and direction to your sketch, including occasions when the seating area feels still. Comparing these notes helps you distinguish a frequently useful opening from an edge that happened to catch the breeze during one visit.
Map seating, access and sightlines together
Place furniture before drawing a screen. Mark the usual chair positions, table, route into the pergola and any door or gate that must remain easy to reach. Then draw lines from exposed neighbouring windows, balconies or paths to those seats. This shows whether coverage belongs beside the table, at the far end or along only part of a boundary. It also helps prevent a panel landing across an entrance or narrowing the route people use between the house and garden. If seating changes with the occasion, show the second arrangement too; a screen that works for a reading chair may interrupt conversation around a table. Include furniture or storage that normally stays in place, so the open route on the drawing reflects everyday use.
For a wall-adjacent layout, show the house wall clearly rather than drawing the pergola as though all its edges were open. If the Bloomcabin Wall Pergola is on your shortlist, use its name on the plan so the supplier knows which model the proposed layout concerns. Draw any privacy treatment separately from the existing wall, and mark the route between the house, table and garden. This reveals whether the proposed screen would narrow an entrance or leave the seats between two closed edges. Keep the alternative furniture arrangement on a separate sketch so you can compare access and openings without confusing the two layouts.
Place screening across the relevant sightline
For one direct view, a partial side treatment may be enough if it blocks the line from the relevant observer to the occupied area. The aim is to cover the sightline with the least obstruction that meets the brief. A treatment at the wrong end may leave a diagonal view open, so adjust its position on the drawing before choosing a material or height. Where several viewpoints converge, a longer section may be needed; still, test each viewpoint separately rather than assuming continuous coverage is necessary. Mark the seats and standing positions you want to protect, because the screen should answer those views, not simply follow the whole edge of the pergola. This also makes it easier to see where an opening can remain.
Describe the required coverage precisely when discussing the Bloomcabin Pergola: identify the view to be blocked, the seats to be protected and the part of the side you want to leave open. A request to screen one end of the dining area is clearer than a request for privacy along an entire boundary. Keep the proposed treatment’s position and height distinct on the drawing, since changing either can alter the sightline it interrupts. If the treatment has gaps or a visible pattern, examine the view through it from the observer’s angle rather than judging privacy only from inside the pergola.

Draw a route for air through the seating area
For air to pass through the seating area, allow a route in and a route out. If a solid panel blocks the side from which a breeze usually arrives, a narrow opening at the far end may not recreate the same feeling at the seats. Open sides facing one another can make it easier for air to cross, even when a third edge is screened, but the result depends on the surroundings and conditions. Put the chairs and proposed panels onto the same drawing, then check for other obstructions such as a tall planter or fixed furniture near an opening. This is a practical way to spot obvious blockages, not a guarantee of a particular breeze.
Compare two possible screen positions on separate copies of the same plan. Keep the seats and nearby obstructions in place, then trace where air could approach and leave in each arrangement. If you are considering the Bioclimatic Pergola, this comparison gives you a specific side-layout question to discuss rather than a general request for a breezy pergola. Show where a shorter screened section might preserve an opening, or where moving a seat would place it closer to the open route. The arrows describe the route you hope to retain; they do not predict air speed or guarantee comfortable conditions on a still day.
Compare privacy treatments by coverage and openness
Privacy treatments vary in how much of the view and side opening they occupy. An opaque panel can block a direct sightline, while a slatted, mesh or partial screen may leave some view through it; do not assume one type offers complete privacy and unrestricted air at the same time. Consider the actual view through the treatment, the observer’s angle and the open area left around it. Decide which outcome has priority on each edge. If hiding a specific window is essential, a see-through treatment may not be enough. If cross-flow matters most, a solid barrier across the breeze side could be too much. Mark the trade-off on the plan before choosing a product.
For the Wall Pergola, establish which side treatments are compatible before comparing their coverage and openness. Then assess each available option against the same priorities: the view it must interrupt, the opening it would occupy and the route you want air to follow. Avoid comparing one treatment in its most open arrangement with another covering a whole side; use the positions you would actually need for privacy. If the required coverage would close the useful air route, revisit the screen position or seating layout. The aim is to understand the compromise each option makes, rather than choose a material on appearance alone.
Distinguish roof ventilation from side airflow
Roof-level ventilation and a breeze around people are separate design questions. An opening or ventilation feature overhead cannot necessarily replace an unobstructed route through the sides. If a privacy screen closes the side from which air reaches the seating area, movement above the roof does not prove that air will pass around the table at seat height. Likewise, an open side does not guarantee circulation if surrounding walls or still conditions limit the approach. Sketch roof openings and side openings separately, and ask what each is intended to do. This keeps the privacy decision focused on the boundary without overreading what an overhead feature can achieve.
When discussing the Bloomcabin Bioclimatic Pergola model, keep roof questions and side-layout questions separate. Ask what roof arrangement is offered for the selected configuration, then consider the proposed privacy screen against the seating-level airflow sketch. Do not assume that the model name confirms an adjustable roof or a particular ventilation rate. A useful comparison records the overhead arrangement alongside the sides that would remain open, without treating either as a substitute for the other. If two layouts use the same roof but different screen positions, assess those side positions on their own merits: which sightline each blocks and which route each leaves around the occupants.
Include nearby walls, boundaries and planting
Privacy and air do not stop at the pergola posts. A house wall, high boundary, neighbouring balcony, dense planting or the side of an outbuilding can change how open the space feels. A gap that looks generous in plan may sit behind an obstruction; an exposed edge may not offer a direct view from next door. Include fixed features on the sketch and mark which are permanent, seasonal or likely to change. Do not rely on a hedge as an immediate screen or a dependable way to guide air: its size and density will change as it grows. If planting is part of the design, allow for its mature position when checking sightlines and openings, not only its present shape.
For a site enquiry about the Bloomcabin Pergola model, extend the sketch beyond the structure itself. Show the nearby wall or planting beside the proposed opening, not just the opening between the posts. Mark which edge faces the exposed view and where an existing boundary already provides coverage. This helps distinguish privacy supplied by the setting from privacy that would require an added treatment. It also makes a potentially enclosed corner easier to recognise before adding another screen. Review the pergola and its immediate surroundings as one layout: an opening within the structure may still face a substantial obstruction just outside it.

Confirm accessory compatibility for the exact model
Before ordering or arranging installation, get the side treatment and roof configuration described for the exact pergola model, not only the product family. Ask whether the proposed screen and any required fittings are included, supplied separately or unavailable for that model; do not assume an accessory shown in an image is part of the package. Confirm where an approved treatment can be fitted and what openings remain when it is in place. If an answer affects attachment points or the structural arrangement, ask the manufacturer or a qualified installer to confirm it rather than improvising a fit. Compatibility is a practical detail to verify, not something to guess from a photograph.
An enquiry about the Bloomcabin Wall Pergola configuration can bring these decisions together in one annotated sketch. Label the required privacy edge, the route to remain open, the seats and nearby obstructions. Ask the supplier to distinguish the proposed arrangement from any alternatives, so you can compare each response with the same brief. Record which items belong to the pergola package and which are optional or separate purchases. If the offered screen differs from the one you drew, update its position and extent before deciding. A compatible accessory still needs to meet your particular privacy and airflow priorities; compatibility alone does not settle the layout.
Test the layout before finalising it
Mark the proposed screen’s footprint with removable tape or another temporary marker that will not damage the surface. Sit in each usual seat, then stand and move along the normal access route to check whether the position would leave enough room. Ground markings show the footprint, not the height or privacy of the finished screen. Assess the sightlines separately on your sketch, using the intended screen height and the seated or standing positions it needs to protect. Check from the identified viewing positions where possible without entering someone else’s property. This exercise can reveal awkward placement, but it cannot reproduce the final material or prove how air will move around it. Note any changes before redrawing.
Repeat the check at different times when you normally use the pergola, because a layout that works in one set of conditions may feel different in evening air or with people using other seats. Keep separate notes for privacy, airflow, glare and access so one benefit does not hide a drawback in another. If the model or accessory choice changes, update the sketch and recheck compatibility rather than assuming the first plan still applies. A good result is not simply the maximum number of covered sides; it is the least screening that answers the real sightline concern while leaving a connected route for air and ordinary movement. A clear plan also makes it easier to compare options on equal terms.
Frequently asked questions
How do I decide which side of the pergola to screen?
Mark where people sit and draw sightlines from the exposed windows, balconies or paths. Check from seated and standing positions, then screen only the edge that interrupts those views. The boundary itself is not automatically the right place for a panel.
Can a privacy screen leave a pergola breezy?
It can, if the layout leaves a connected route for air to reach and pass the seating area. A solid panel across the useful breeze path may reduce movement, while a gap on its own does not guarantee circulation.
Does roof ventilation keep air moving around the seats?
Not necessarily. Air movement above the pergola and through its sides are separate questions. An opening overhead does not prove that air reaches the table or chairs, so consider side openings and nearby obstructions as well.
Will a slatted or mesh screen provide privacy?
That depends on the pattern, viewing angle, distance and light. A treatment that looks private straight on may reveal the seating area from a diagonal view. Check it from the observer’s likely position and confirm compatibility with the selected model.
Are privacy screens included with a pergola?
Do not assume that a screen shown in an image is included or compatible. Ask which approved side options are available for the exact model, and confirm what is supplied separately.
Good pergola privacy does not come from closing every open side. It comes from identifying the views that intrude on the way you use the space, placing coverage only where needed and keeping a connected route for air through the seating area. A sketch showing observers, seating, screens, surroundings and breeze direction makes the trade-offs visible before you commit. Confirm model-specific accessory compatibility separately, and treat roof ventilation and side-level airflow as distinct questions. That gives you a practical plan for greater privacy without relying on a fully enclosed perimeter.
