
Choosing Pergola Height by Headroom, Roof Clearance and Façade Scale
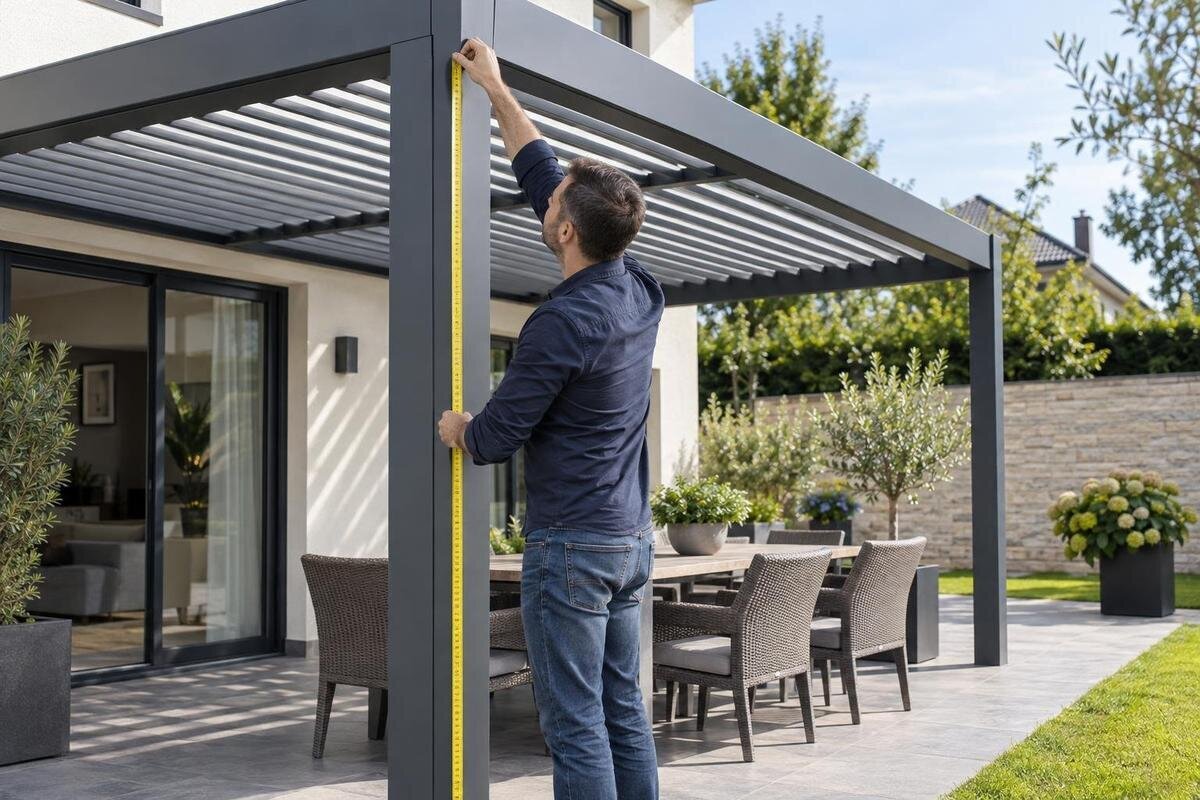
Pergola planning
Pergola height is easy to overlook when a plan concentrates on footprint. Yet a structure can cover the intended area and still feel awkward if its underside interrupts a route, a moving roof component passes close to an opening, or its top edge sits uneasily against the house. A measured cross-section puts those relationships on one vertical drawing. Start from the terrace as it will be finished, then show the frame, roof movement and façade against the same datum. The result is more useful than a single overall-height figure: it helps test usable headroom, check clearances and judge visual scale before a configuration is agreed.

Measure from the proposed finished terrace level
Take a section through the part of the house and terrace where the pergola will sit, rather than using a generic side view. Establish the proposed finished terrace level as the main datum and show the existing surface separately. If new tiles, bedding, a raised deck or another finish are planned, include its known build-up; do not assume the existing paving is the final floor. Mark the door threshold, any step and the points where supports meet the surface. Each vertical measurement can then be read from a level that will exist when the structure is in use. If the finish is undecided, label the assumed build-up and mark it as provisional instead of hiding the uncertainty inside a single height.
Draw the façade, relevant opening, terrace edge and pergola profile together, using one unit throughout; millimetres are convenient for a measured drawing. Label each dimension’s endpoints instead of relying on scale alone. Choose the section line to pass through an important entrance or support; where these do not align, add another section rather than combining unrelated points. Show the top of the frame separately from the underside of the beam, and record the height from finished floor to each. State what floor level a supplier’s quotation assumes, so a dimension measured from existing ground is not mistaken for the eventual clearance after resurfacing.
Overall height and usable headroom
Pergola height can refer to several different points. The highest outside edge, the top of a wall connection, the underside of a crossbeam and the clear space below are not interchangeable. A drawing or quotation may state one measurement without making the others obvious. Ask where each figure begins and ends, and mark those endpoints on your section. Then identify the lowest fixed part above each route used for walking or standing; it might be a beam, trim, gutter or fitting rather than the main roof. Keep the external top height visible too, because it helps you judge how the frame sits beside the house. One maximum-height figure cannot answer both questions.
Consider where people actually pass and pause: the path from the door, the side beside a post and the place where someone stands to serve a table can have different clearances. Check the whole usable width, not only a point in the centre, and include fixed furniture or hanging items where their position is known. The Bloomcabin Pergola product listing gives an area range of 9–24 m², which describes plan area, not usable headroom. Use the selected configuration’s dimensions to test the lowest clear point against the finished-floor line. If you are comparing two heights, label both versions on the same section so the difference is visible along each route.
The roof’s movement envelope
Record the roof in the positions that matter to its operation, not just as a closed outline. A fixed roof has a static profile; an adjustable or retractable arrangement may pivot, slide, fold or travel along a track. The space needed depends on the exact mechanism, so draw the closed position and every open position supplied for the chosen configuration. If a component passes close to a doorway, window, wall, light or balcony edge while moving, show that path as well. A roof can clear an opening at rest yet occupy the same space during movement. Do not estimate the swept envelope from a photograph or from a generic product name.
Ask for a dimensioned side view that makes the movement easy to read: identify the moving component, its limits and any part that projects above or below the fixed frame. If the system passes through an intermediate position near an opening, include that position rather than comparing only fully open and fully closed states. The Bloomcabin Bioclimatic Pergola page identifies the product model; the movement envelope for the selected arrangement still needs to be shown on its configuration drawing. Put that outline over the finished-floor section and compare it with nearby openings and fittings. Label each position clearly so the drawing can be read without guessing which outline represents the moving roof.
Drainage and fittings in the height profile
A roof edge may also carry drainage components, depending on the design. A gutter or channel and its outlet can affect the visible height, while a downpipe may occupy a route beside a post or wall. Do not guess their position from a general illustration. Ask for the proposed arrangement to be shown in section and elevation, with water-collection parts marked and the intended discharge route identified by the responsible designer or installer. On your own drawing, note nearby doors, vents, balcony edges and wall finishes that could constrain the route. The point is to check the complete assembly, not just the main beam, against the available vertical space.
Accessories belong in the profile too if they are part of the proposal. A light, fan or other suspended fitting can reduce usable headroom even when the frame itself clears the route, so record its body depth and position from the documented configuration. Do not assume that a fitting is included, compatible or suitable simply because it appears in a picture. If a quote refers to the bioclimatic model listing, ask which drainage parts and accessories are included in that specific offer and where they sit. Any electrical selection or installation should be confirmed by a qualified professional; it should not be resolved by changing a height dimension on a sketch.

Wall-mounted heights beside doors and windows
For a wall-mounted pergola, put the façade in the same section as the roof and terrace; do not represent the attachment as a line without context. Mark window heads and sills, door heads and thresholds, lintels, shutter boxes if present, eaves or soffits, vents and any balcony edge. This shows where the roof line meets the building and whether a moving part could interfere with an opening. Record the height from the finished floor to the proposed fixing line as well as to the lowest beam or frame element. Neither measurement alone describes the arrangement. Check the view from indoors and outdoors: a roof line that appears clear of an opening from outside may obstruct the view from inside.
Height is not proof that a wall can carry a connection. The wall construction, concealed services, fixings and design loads need to be assessed by a qualified installer or engineer as appropriate to the project. Do not choose a fixing height solely because the fascia or lintel looks convenient. In a quote request, identify the wall and opening positions and ask for the proposed connection and roof profile to be shown on a drawing. The Bloomcabin Wall Pergola page identifies the wall-mounted model; use a project-specific drawing to establish the proposed fixing line and its relationship to the openings.
Posts and walking routes under a freestanding pergola
A freestanding pergola needs a height check at the sides as well as beneath the central roof area. Draw the post positions in plan, then take a section through each line of supports: the beam or edge member may be the lowest point at the side even when the centre feels open. Mark paths from the house to the garden, the gaps between posts and any route to a gate or seating area. On the section, include the post bases and show whether the finished surface is level at each one. A central measurement alone will not tell you whether a post-side route feels constrained. Check the route around furniture as well as the space directly beneath the roof.
Post location also changes how the frame looks from the doorway and how much of the terrace remains unobstructed. Mark the support positions on the plan, then link them to the corresponding sections so each height belongs to a real point. When comparing a configuration of the regular Bloomcabin Pergola, check support locations, beam depth and clear height together on its project drawing. These dimensions show how the frame relates to the routes you have marked. Do not infer them from the floor-area figure or a perspective image. If two post arrangements are being considered, compare them using the same finished-floor datum and the same route through the space.
Pergola height in relation to façade proportions
Height is also a visual decision. On the section, mark the house’s floor levels, window and door heads, soffit or eaves and other strong horizontal lines. Add the proposed pergola top and underside so you can see how much of the façade sits above and below the frame. If the pergola is set against one part of the building, include the adjacent wall area too; the relationship can look different when viewed across a wider elevation. A dimensioned side view makes it easier to compare a proposed height with the house rather than judging the frame in isolation.
There is no universal façade ratio that makes a pergola look right. A higher top line may feel detached or visually dominant in one setting, while a lower line may interrupt a window or doorway in another. Treat those as effects to test, not fixed rules. Draw two or three possible top lines on the same section, then look at them from the terrace and from a usual approach through the garden. A straight-on photograph marked with those lines can help with the visual comparison, but use measured dimensions for the actual decision rather than estimating height from the image.
Different terrace levels and low points
A terrace may not be level from the house to its outer edge, or it may include a step between paved areas. In that case, show each relevant surface on the section and measure from the level directly below the pergola at that point. The same beam can leave different clearances above two finished levels. If the roof or frame follows one line while the terrace changes level, an average ground measurement can hide a low point. Add another section where needed and mark which walking route each one represents. Include the beginning and end of a step so the drawing shows where people change levels, not only the overall rise.
Where a wall-mounted option is being considered, show the finished level at the wall and at the outer side on the same drawing. If you are considering the Bloomcabin Wall Pergola, ask for a project-specific section that relates the proposed frame to both terrace levels. This lets you compare the clear height at each end rather than relying on a single overall figure. If paving or a deck may be changed later, state which finished level the height decision uses and whether the drawing includes that future surface. Any change to support positions or levels should be confirmed against the supplier’s and installer’s drawings, rather than improvised from a general height figure.

Height dimensions in the quote and drawing
Terms such as overall height, post height, mounting height and clear height can refer to different endpoints. Ask the supplier to label the top of the structure, the underside of the lowest beam, the wall connection where relevant and the finished-floor datum on the drawing. If the roof moves, request the positions that affect nearby clearances as well as the closed outline. Check whether any stated dimension includes a trim or drainage component, and whether the drawing shows the same floor level used in your section. Clear labels make it possible to compare two proposals without assuming that similar words mean identical measurements.
When requesting a configuration for Bloomcabin Bioclimatic Pergola, include the product name and ask for the roof arrangement and its measured positions to be identified on the project drawing. Keep units consistent, and ask for revised dimensions if the proposed terrace finish changes. A written quote can then be compared with the drawing: the same model, floor level, roof positions and fitting assumptions should be under discussion. If the drawing leaves a dimension ambiguous, ask what points it measures before treating the figure as usable headroom. A clear answer is more valuable than comparing two headline heights that were measured differently.
Preparing a cross-section for a pergola quote
A useful enquiry can include a measured section, a simple plan and a straight-on photograph of the relevant façade. On the section, show the finished terrace level, door and window openings, proposed pergola line, nearby obstructions and the dimensions you want confirmed. On the plan, mark the direction of the section and the routes people use. Label estimates as estimates, and note any surface finish or fitting that has not been decided. A photograph gives context, but it should not replace measurements: perspective can make vertical relationships look different from their true dimensions.
Name the model you are asking about, such as Bloomcabin Pergola, and request a drawing for the selected configuration rather than treating a catalogue image or area figure as a height specification. If you are comparing alternatives, use the same floor datum and mark each proposed top line and clear height on the same base section. Where a proposed height raises a local consent question, verify the project requirements with the relevant local authority or a qualified professional; a product dimension does not settle that question. This preparation gives a quote request a clear basis and makes headroom, roof movement and façade scale easier to assess together.
Frequently asked questions
How much clear headroom should a pergola have?
There is no single figure that suits every layout. Consider the people and routes using the space, then check the lowest fixed obstruction above them, including beams and fittings. Ask for the clear height to be dimensioned from the proposed finished floor at the relevant points.
Should I measure from the existing patio or the planned finish?
Use the planned finished terrace level as the main reference, and show the existing surface separately. Include any known build-up for new paving or a raised deck. If that finish is not decided, label the level and allowance as provisional.
Can an opening roof change the required height?
It can affect the space around the structure, but the exact effect depends on the mechanism. Compare the fixed frame with the roof’s open, closed and moving positions shown for the selected configuration. Do not assume that every adjustable roof moves in the same way.
How do I plan the height of a wall-mounted pergola above a door?
Show the door, its opening, the proposed fixing line and the roof profile together. Check the route of any moving parts as well. A qualified installer or engineer should assess whether the wall and proposed connection are appropriate; appearance alone cannot confirm that.
How can I tell whether the height suits the façade?
Compare the proposed top line with the house’s windows, doors, eaves and other visible horizontal lines on a measured section. A side-on view or a photo marked with alternative heights can help you judge the proportions from the terrace and from the garden.
Before settling on a pergola height, read the section from the finished surface upwards: first the usable clearance, then the roof’s full movement and fittings, and finally the top line against the façade. If a figure is measured from a different floor level or refers to a different edge, the comparison is not yet like for like. A clear drawing makes those differences visible and gives the quotation a precise basis. The best choice is not simply the tallest or lowest option, but the configuration that accommodates movement and circulation while sitting coherently beside the house.
