
Where to Position a Pergola Heater for Seating
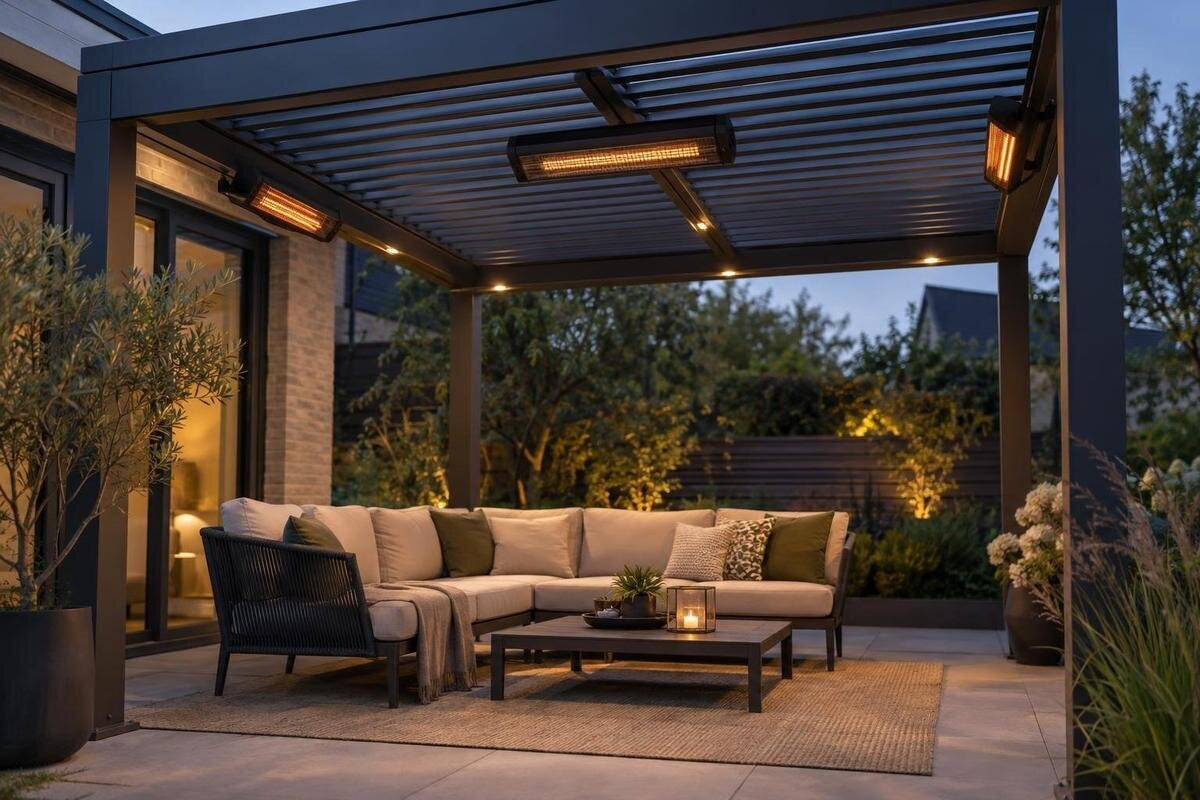
Pergola heating guide
Choose a pergola heater position by first identifying where people sit, then checking whether the heater can direct warmth towards them while meeting its clearance requirements. The roof centre is not automatically the best place. Mounting, orientation, weather exposure and electrical provision depend on the specific heater and structure. Use a seating sketch to compare possible locations with the heater instructions and the pergola maker’s approved fixing points, rather than treating the sketch itself as installation approval.

Map the seats before choosing a heater position
Draw the pergola from above and mark the dining table, lounge chairs and any other regular seats. Note which way people usually face, whether they sit close together or at opposite ends of the table, and which places are used most often. Include approximate measurements where possible; a rough measured sketch shows gaps that a perspective photograph can hide. Record how many people normally use the space, too. Give the favourite seats or those used for the longest periods priority. A heater that looks centred on the roof may still leave the main chair outside the area it is intended to warm.
Separate everyday seating from occasional extra chairs, and draw another version if the furniture changes between meals and relaxed evenings. Note whether people remain at the table, move to a sofa or use several seats in rotation. For example, label the dining chairs and lounge seats separately so that a discussion about the main seating area does not overlook one group. Identify which seats you want the heater to serve and which are a lower priority. If the pergola contains two distinct seating groups, do not assume one position will reach both simply because they fit under the roof. Keep a note of how the space is actually used alongside the drawing: a table set for occasional visitors may not deserve the same priority as the two chairs used every evening. This gives the supplier a specific seating arrangement to assess.
Separate pergola floor area from heater coverage
The pergola’s floor area and a heater’s coverage are different measures. The Bloomcabin Bioclimatic Pergola listing gives an area range from 9 to 24 m², which helps identify the structure size under discussion but is not a heating-area claim. Posts, furniture and the selected arrangement also affect where people can sit. Use the size you are actually considering in your sketch rather than treating a catalogue range as one fixed floor plan. This distinction matters when a dining group and a lounge area share the same footprint.
Outline the core seating zone, then a secondary area if you hope to include it. Compare those outlines with any coverage drawing or orientation guidance supplied for the exact heater, not with the pergola’s stated square metres. A heater may face one group while another sits outside its coverage or behind an obstruction. Keep the scale consistent when comparing a manufacturer’s drawing with your plan; do not stretch a coverage outline to fit the furniture. Also distinguish the table outline from the chairs around it, since the people occupying those chairs are the priority. If the manufacturer does not provide a coverage diagram, do not invent a radius from the pergola’s size; ask what can be confirmed for that fixture and proposed position. A larger roof does not automatically mean one heater will serve all of it.
Aim a radiant heater at the occupied seats
For a radiant heater, the direction of its output matters as much as its mounting position. Plan for the heater to face the occupied seats rather than an empty part of the pergola. People and surfaces in its path may receive warmth differently from those outside it, and solid objects can interrupt that path. Check the exact heater manual for the allowed mounting orientation and angle; do not choose a tilt by eye if the instructions specify limits. The direction of a chair matters, too: someone facing away may not receive warmth in the same way. Show both the chair’s location and the direction its occupant normally faces on your plan.
Draw an arrow from each candidate mounting point towards the priority group and mark any screen, high item of furniture or structural feature between the two. Label the points so that the supplier can discuss each option without confusing their positions. When requesting a heat-coverage diagram, provide both product identities: Bloomcabin Pergola identifies the structure, while the heater’s own instructions govern its direction and any stated coverage. Ask about the exact pergola and heater models rather than relying on a generic image of an outdoor heater under a roof. If there are several possible positions, compare their directions on separate copies of the same seating plan. This makes it easier to see which seats each proposal is intended to serve without mistaking several alternative arrows for a plan to install several heaters.
Account for walls and open sides
Note which boundaries are walls, open sides or screens, and where a doorway or regular route enters. Do not assume a heater should sit on a wall just because the pergola adjoins one, or that a wall will spread warmth across the seats. The Bloomcabin Wall Pergola listing identifies a wall-mounted pergola; it does not establish that a heater may be fixed to that wall, its frame or any particular point. Check approval for the proposed mounting surface separately from the choice of pergola. A nearby wall may also limit the directions in which the heater can face or fall within the space that must be kept clear around it.
Show the sides as they are normally used, not only in the most sheltered arrangement. If screens, curtains or panels are present, note whether they stay open, close or move during a typical evening; their position can affect the space around the heater and the conditions set out in its manual. A location that works with a side fully open may not be acceptable when a screen is drawn across it. Ask the heater maker or installer to consider the actual arrangement rather than assuming that all sides behave in the same way.

Use the heater manual to set clearances
Treat clearance instructions as part of choosing the position, not as a check to make after installation. Read the manual for the exact heater model and identify the required space above, around and in front of it, along with any separation from nearby materials or furnishings. The manual may define the reference points and permitted orientation, so a distance taken from a different heater or a general online guide is not a substitute. Do not shortlist a spot that works only if a stated clearance is ignored.
Use a simple side view as well as the top-down seating plan. The overhead view shows which seats the heater faces; the side view helps compare the proposed point with roof elements, furniture height and the clearances in the manual. Mark these zones from the manufacturer’s instructions, not by estimating them from a photograph. If the manual does not cover the proposed pergola arrangement, ask the heater supplier or installer to resolve that gap before finalising the position. The aim is to rule out unsuitable points early, not to design a mount yourself.
Keep chairs, tables and walkways in the plan
Plan for normal movement, not just a staged photograph. Mark the route from the entrance to the seats, the space needed to pull a chair back, and the area where someone stands to serve or clear a table. Include chairs in their usual pulled-out position and any recliners or folding seats when open. A heater can point towards a seated person but still be too close to a routine movement or to furniture that enters its clearance zone. Check each candidate position against both the seat and the way people use it.
If you are considering the model shown in the regular pergola listing, add your furniture dimensions to the plan rather than using the catalogue arrangement as a seating template. A product image cannot show how far your chairs pull out or where guests walk. Trace the route from the doorway to each seating group, including the space used when carrying food to the table. This helps distinguish a genuinely clear passage from a gap that disappears when someone is seated. Mark moving items, such as chairs or fitted screens, and note where they sit when open or stored. Keep them outside any clearance specified by the heater manufacturer. If an everyday arrangement puts an item in that space, revise the layout or ask about another approved position.
Get approval for the exact fixing point
A practical-looking beam or post is not automatically an approved attachment point. Pergola frames differ, and a mounting method can only be assessed against the instructions for the specific structure and heater. Do not assume every cross-member, slat, post or wall can take an accessory, or choose a location simply because it is easy to reach. Ask the pergola supplier to confirm the proposed point and configuration, and obtain documented mounting approval before arranging installation.
For the structure shown in the Bioclimatic Pergola listing, identify the selected configuration and label each proposed mounting point on your sketch. Provide the heater model and show which way it would face. Make the location unambiguous by referring to recognisable features, such as the entrance side or the corner nearest the dining table, rather than describing it only as left or right. Those descriptions can reverse depending on where the viewer stands. Ask which points, if any, are permitted and whether the proposed orientation meets the manufacturer’s conditions. Keep the response tied to the labelled position so that an alternative suggested during the discussion is not confused with the original proposal. Do not transfer approval from another pergola or heater; any confirmation should refer to the exact configuration under consideration.
Check weather exposure and electrical access
A pergola is not automatically sheltered from every condition that matters to a heater. Exposure can differ between the area under a roof, an open edge and a side that receives wind-driven rain or spray. Check the heater’s outdoor rating and the manufacturer’s conditions for the actual position; do not infer a rating from the pergola’s appearance or assume that a roof makes every location suitable. If the site is particularly exposed, include that detail when asking about a possible position, rather than treating it as a separate issue to consider later.
For an electrically powered heater, include the proposed point, controls and likely supply route in the discussion with a qualified electrician. The electrician should review the requirements for that exact heater and outdoor setting; the convenience of an existing outlet does not settle the mounting location. When considering the wall-mounted pergola model, show the relationship between the building, seating and proposed heater so that electrical access can be considered alongside the layout. Mark where you would like to operate the controls, without prescribing a wiring route yourself. Keep electrical review separate from approval of the fixing point: a location with convenient access to power still needs to meet the heater’s positioning requirements and the pergola manufacturer’s mounting conditions.

Recheck the position when the layout changes
If the pergola has moving or adjustable roof elements, a retractable canopy or screens, assess the proposed heater position in every configuration you expect to use. A spot may clear one position and interfere with another, or a change in the opening may affect what the heater manual allows. List the relevant configurations beside the plan rather than relying on a single photograph with everything open. For the bioclimatic pergola model, confirm which features belong to the selected configuration before including them in this assessment. The listing identifies the structure and its area range, but does not establish heater clearances. Where an element moves, show its different positions so that the proposed heater location can be assessed against each one.
Revisit the drawing if tables, sofas or screens are moved for larger gatherings or at different times of year. Mark the normal arrangement and any occasional layout that matters, then check whether the heater can still serve the intended seats without compromising its required clearances. If it cannot, decide which arrangement the heater should serve or ask the supplier to assess another approved position. Resolving the layout on paper is clearer than moving a fixed appliance later without rechecking its manual and mounting approval.
Give the supplier and installer a usable plan
Prepare a simple plan showing the seating, table, usual walking route, proposed heater location and the direction it would face. Add a side view for the clearances and roof elements, and label the position as proposed until approval is confirmed. Include the exact pergola and heater models, the outdoor conditions to consider and any screens or moving parts that affect normal use. Separate your seating preferences from the questions that remain open: which seats matter most is your decision, while mounting approval and electrical requirements need the relevant professional input. If you have compared several positions, identify the preferred option and retain the alternatives as separate drawings. This is a planning brief, not an installation drawing; its purpose is to make the proposed arrangement clear to everyone involved.
Share the plan with the pergola supplier and, where relevant, a qualified electrician or installer. If you are choosing the model shown on the Wall Pergola product page, include that reference and identify the selected configuration. Request confirmation for the labelled fixing point rather than a general answer about heaters under pergolas. Keep the heater manual and any written approval with the plan, using a date or version number to distinguish the agreed layout from earlier alternatives. If a seating position, screen or roof configuration changes, update the brief before relying on the old placement decision.
Frequently asked questions
Should a pergola heater go above the centre of the seating area?
Not automatically. The roof centre may not be an approved fixing point, and a heater aimed from there may not serve the seats people use most. Compare the seating plan with the heater’s permitted mounting angles and required clearances, then ask the pergola supplier to confirm the proposed mounting point.
Is there a standard height for a pergola heater?
There is no universal height that applies to every heater and pergola. Follow the exact heater manual for its permitted mounting position and orientation, and have the pergola supplier confirm the fixing point. If electrically powered, ask a qualified electrician to review the installation requirements.
Can a heater be attached to any pergola post or beam?
No. A post or beam that looks convenient is not automatically approved for a heater. Ask the pergola manufacturer to confirm the exact fixing point for the specific structure and heater, and obtain documented approval before installation is arranged.
How can I tell whether one heater will serve a dining table and a lounge area?
Mark both groups on a seating plan and compare them with any coverage or orientation guidance for the exact heater. Check for obstructions and whether the heater can face the intended seats while meeting its mounting requirements. Pergola floor area alone cannot confirm that one heater will serve both groups.
Do walls and open sides affect where the heater should go?
They can affect available mounting positions, obstructions and exposure. Mark walls, open sides and any screens on your plan, then check the heater’s instructions for the actual arrangement. Do not assume that a nearby wall or a roof makes a position suitable.
Positioning works best as a practical layout exercise: mark the seats, prioritise the main group, check the heater’s direction and required clearances, then confirm the fixing point and site conditions. The roof centre and total pergola area are not substitutes for those checks. If the approved location cannot serve every seat, decide which arrangement matters most or ask the supplier to assess another approved option. The result should be a position that suits the way the seating is used, rather than one chosen simply because it looks central.
