
Electric Infrared Heaters Under a Pergola: What to Check
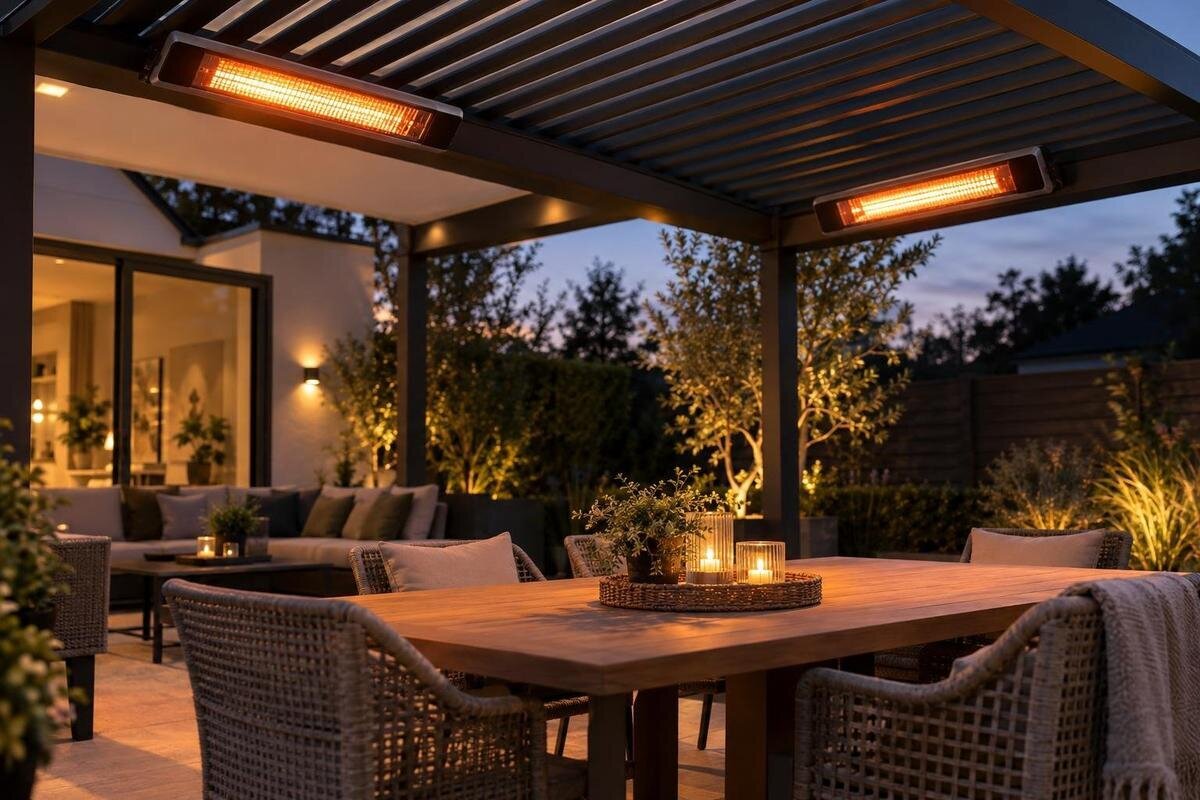
PERGOLA HEATING
When you plan an electric infrared heater under a pergola, a bracket that physically fits is not enough. The heater maker must allow that model to operate in the intended outdoor position, and the pergola manufacturer must approve the fixing point and any interaction with the roof or accessories. Check the exact manuals together, map their clearance requirements onto the real layout and ask a qualified electrician to assess the electrical plan. If either approval is missing or unclear, resolve it before booking the installation.

Why both manufacturers' instructions matter
Both sets of documents matter because they answer different questions. The heater manual defines the appliance's permitted orientation, mounting arrangement, clearances and exposure limits; the pergola manufacturer's instructions define approved fixing points and any limits on altering or loading the structure. A heater can be rated for outdoor use without being approved for attachment to a particular frame, and a beam that appears substantial is not automatically intended as an equipment support. Use documentation for the exact heater version and pergola configuration, including accessories that affect the proposed point. A leaflet for a similar model is not a substitute.
Bring the two sides together before finalising the layout. Record the heater make and model, the pergola model, and the roof and accessory configuration, then send the same details to both suppliers. If you are considering Bloomcabin Pergola, record that exact model name for identification; its product listing alone cannot establish a permitted heater position. Ask for model-specific documentation or a written response rather than relying on a general statement that infrared heaters are commonly used outside. Keep the manuals and replies available to the electrician and installer so everyone reviews the same proposal.
Check the exact heater manual
Begin by matching the heater to the actual setting. A fully open pergola, a roofed but open-sided position and an area with screens or glazing may not be treated alike in the appliance instructions. Read the complete installation and use sections, not just a headline such as outdoor or infrared. Identify any permitted orientation, mounting surface, bracket, clearance, height range, operating position or exclusion listed by the manufacturer. Look for specific restrictions on covered patios, semi-enclosed areas or roof-mounted use. The exact manual should say whether the intended environment is allowed; do not assume a roof makes an outdoor location sheltered enough.
Match every instruction to the precise heater model and any included or optional bracket. A product family can contain units with different installation conditions, so do not borrow a clearance figure or surface approval from a visually similar version. If the manual is missing from the product information, request it before ordering or finalising the layout. If it does not clearly cover a pergola or the expected exposure, ask the heater manufacturer in writing. A retailer's broad description or an installer's experience with another model cannot confirm this model's permitted use. Save the exact manual supplied for the item, not only a seller's summary.
Get approval for the pergola mounting point
An appliance manual that describes mounting to a ceiling or wall does not automatically approve attachment to a pergola beam, post, fascia or accessory rail. The pergola's construction and approved fixing points are specific to its design; a clamp, screw or supplied bracket that appears to fit may still be outside the maker's instructions. Do not drill, cut, clamp or otherwise modify the frame on assumption. The proposed fixing can interact with roof components or accessories, so the pergola manufacturer needs to confirm the exact point and method. An attachment might also obstruct access or conflict with other approved fittings.
Ask for written confirmation that names the pergola model and configuration, the heater and bracket, and the fixing location. Ask which mounting accessories are approved and what conditions apply, rather than accepting a general assurance that a heater can be fitted. If the Bloomcabin Wall Pergola is on your shortlist, its name can help identify the structure in your enquiry, but its product page is not mounting approval. If no approved position is documented, ask about another permitted arrangement or revise the plan before purchase or alteration. Keep the response with the drawings and share it with the installer.
Apply the stated clearances to the real layout
Clearance is not a universal ring around the heater. The manual may define different minimum spaces in different directions and specify the surface from which each is measured. Follow its reference points and wording for overhead, side, rear or front space, and for any named material, roof or nearby appliance. Do not replace one model's measurements with a number from a general guide, or assume that changing the heater's angle leaves the clearances unchanged. Where a diagram is unclear, ask the manufacturer to identify the starting point and surfaces covered. Do not measure from the centre or bracket unless the manual says to do so.
Apply the instructions to a drawing or measured layout of the finished pergola, not an empty outline. Include beams, walls, roof edges, installed lights, screens and furniture, plus anything that moves into the area during ordinary use. Consider where seats are used and moved; include people only where the manual specifies a distance or restricted area. If Bloomcabin Bioclimatic Pergola is on your shortlist, name its exact configuration when requesting a layout review; the model name alone does not set heater clearances. Keep every stated zone available in practice, and mark it on the copy used by the installer.

Account for moving roofs and accessories
If the roof, shade or a side enclosure moves, check the heater against each position allowed by the pergola instructions. A clearance that exists with the roof open may change when it is closed or adjusted, and another position can place a different surface closer to the heater. Confirm that the mounting does not obstruct movement and that both manufacturers permit the arrangement in all relevant positions. Do not assume that a closed or slatted roof is protected from the heater's heat, or that it provides sufficient weather protection for the appliance; the actual manuals govern. Unless the pergola maker explicitly approves a moving part as a mounting point, do not assume it can carry a heater. If the heater manual addresses operation while the roof moves, follow that condition too.
Also include additions that are easy to overlook at purchase: curtains, screens, awnings, glazing, insect mesh, decorative panels and extra fittings. Each can change nearby surfaces, clear space or exposure, even if it does not change the heater itself. Tell both suppliers which accessories will be fitted and where they sit, and ask whether use with them is permitted. For the wall-mounted Bloomcabin pergola, as with any structure, ask about the final configuration rather than an undecorated frame. If an accessory remains undecided, record that the approval does not cover it. A screen temporarily drawn across an opening still belongs in the check.
Check weather exposure and outdoor ratings
Check the actual weather exposure at the planned position; a roof does not by itself describe how much rain, wind or dust can reach the heater. An open side, wind-driven rain, splashes, direct sun and salt-laden air may affect what the manufacturer permits. Read the exact outdoor rating and all qualifications in the heater documents. The word outdoor, or an IP marking considered on its own, is not a guarantee for every exposed position or every type of weather. Ask the heater manufacturer whether the proposed place is within the model's stated limits, including the direction from which weather can reach it and whether the limits differ between sheltered and exposed positions.
Review the complete arrangement, not only the heater casing. Controls, connection points, cables and accessories also need instructions and ratings that match their actual location; an enclosure rating for one part does not automatically apply to the rest. Tell the supplier if the site is near the sea or particularly exposed, and ask about any use or maintenance conditions. Do not infer resistance to salt or long-term exposure from a general outdoor description. The Bloomcabin Pergola listing identifies a pergola model; it does not establish an outdoor rating for a heater or the combined installation. Confirm who supplies each accessory, then have the electrician review the full proposal.
Plan the electrical supply with a qualified electrician
Bring a qualified electrician into the planning before the heater location and pergola details are fixed. Provide the exact heater model, its manual and rating-plate information, the intended position, and details of lighting, motors or other powered features already planned. Ask the electrician to assess the supply, circuit, switching, isolation, cable route, controls and any interaction with existing equipment for this specific proposal. Do not assume that a nearby socket, spare circuit or lighting supply is suitable simply because it is close. This is a professional design check, not a reason to adapt wiring or use an extension arrangement to make an unconfirmed position work. Provide the layout early enough for the supply and route to be reviewed.
Coordinate that assessment with the mounting approval rather than leaving either task until installation. The electrician can assess the electrical arrangement; the pergola manufacturer must confirm what the structure allows, and the heater maker must confirm appliance conditions. Ask each party to work from the same drawing and exact model identifiers. If you are considering the Bloomcabin bioclimatic pergola model, include its name and final configuration in the enquiry rather than asking about a generic pergola. Keep any agreed cable route and controls in the reviewed plan. If responses differ, have the parties resolve the discrepancy before work begins.
Coordinate the heater with lighting and controls
Map the electrical equipment as one coordinated layout. Include the infrared heater, pergola lighting, any roof motor, sensors, switches and controls, even when different suppliers are responsible. A location suitable for one fitting does not automatically suit another: the heater's clearance zone may overlap another unit or restrict maintenance access. Ask the relevant manufacturers and electrician to review positions and moving components together. Keep the heater's own operating instructions in view; do not assume a light switch, timer, remote or shared circuit can control it simply because those items are in the same area. Any control arrangement must be checked for the exact heater. Show where controls can be reached and where routine servicing is expected.
Decide what is included and what may be added later. When comparing options for the Bloomcabin wall pergola model, identify the planned configuration and accessories, then request confirmation of the heater location and any supported fittings separately. Do not infer compatibility from a photograph or model name. If lights, screens or controls are still undecided, mark them on the plan as pending rather than leaving them out. Ask which items are explicitly supported and which need separate approval. Once the package changes, circulate the updated layout to everyone reviewing it. This avoids one supplier approving a bare frame while another works from a more crowded finished design.

Keep the approval and layout on record
Before installation, assemble a clear record that can be checked against the finished arrangement. Include the exact heater and pergola models and versions, the proposed fixing point and approved bracket, the manual clearances and reference points, relevant roof and accessory positions, weather conditions considered, and the electrician's assessment of the supply and controls. Attach the manuals and any written approval, and mark conditions beside a simple drawing. If approval is limited to a specific orientation or configuration, make that restriction visible. Note each manual's edition or date and any revisions. A shared record helps prevent a detail changing between planning and installation without anyone noticing.
Send one dated, current copy to the supplier, installer and electrician, and keep their replies with it. For a project that includes the Bloomcabin Pergola model, record the product reference alongside the technical documents so the structure being reviewed is unambiguous; do not use the listing in place of those documents. Before work starts, compare the proposed location, accessory set and cable route with the approved version. If any item differs, ask for a revised check before proceeding. This matters when the heater, structure and electrical work involve different parties, who might otherwise be working from different plans.
When to pause or revise the plan
Treat the plan as ready only when all three questions have clear answers: does the heater manual permit the intended outdoor setting and orientation; has the pergola manufacturer approved the exact mounting point and configuration; and has a qualified electrician assessed the electrical arrangement? Then check that every stated clearance remains available in the real layout and that exposure is within the heater's limits. One positive answer cannot replace another. If the manuals conflict, the mounting point is undocumented or the weather rating is unclear, pause and ask the relevant manufacturer rather than copying a nearby installation or relying on photographs. Resolve any unclear answer before the work proceeds.
If no documented mounting arrangement works, change the location or configuration and have the revised plan checked, consider another heater only after reviewing its own manual, or decide not to fit one. Revisit the assessment if the pergola, roof position, screens, heater, control equipment or electrical plan changes; the earlier answer covers only the arrangement described. An option mentioned during planning is not necessarily part of the approved configuration. After installation, follow the exact equipment manuals and refer unclear operating or maintenance questions to the relevant supplier.
Frequently asked questions
Can any outdoor infrared heater go under a pergola?
Not automatically. The heater instructions must permit the intended outdoor setting and mounting orientation, and the pergola manufacturer must approve the fixing point. Check both exact manuals and have a qualified electrician review the electrical plan before work begins.
How much clearance should I leave around the heater?
There is no universal clearance that applies to every heater. Follow the distances and reference points in the exact heater manual, then apply them to nearby surfaces and accessories. Ask the manufacturer if a diagram or measurement is unclear.
Can I attach the heater to a beam or roof slat?
Do not assume that a beam, rail or moving roof part is suitable. The pergola manufacturer must approve the precise mounting point and configuration. A bracket that fits, or a photograph of another installation, does not establish approval.
Does an outdoor rating mean the heater can be exposed to rain?
No. Check the exact heater rating and the manual's conditions for rain, wind and shelter, then confirm that controls and connections are suitable for their locations. The word outdoor does not mean protection from every exposure.
Can I use an existing socket or lighting circuit?
Do not assume that a nearby socket or lighting circuit is suitable. Give a qualified electrician the exact heater details and information about the existing supply and other equipment so they can assess the specific plan.
An infrared heater beneath a pergola is a model-specific combination, not a universal accessory. The right outcome may be a confirmed location or a revised design. What matters is that the heater's operating limits, the pergola's approved fixing points and the electrical plan match the finished setup. With the exact model documents in hand, an installer and electrician can assess a real arrangement rather than a guess based on an outdoor label.
