
Planning a Pergola to Draw the Eye Through a Long Garden
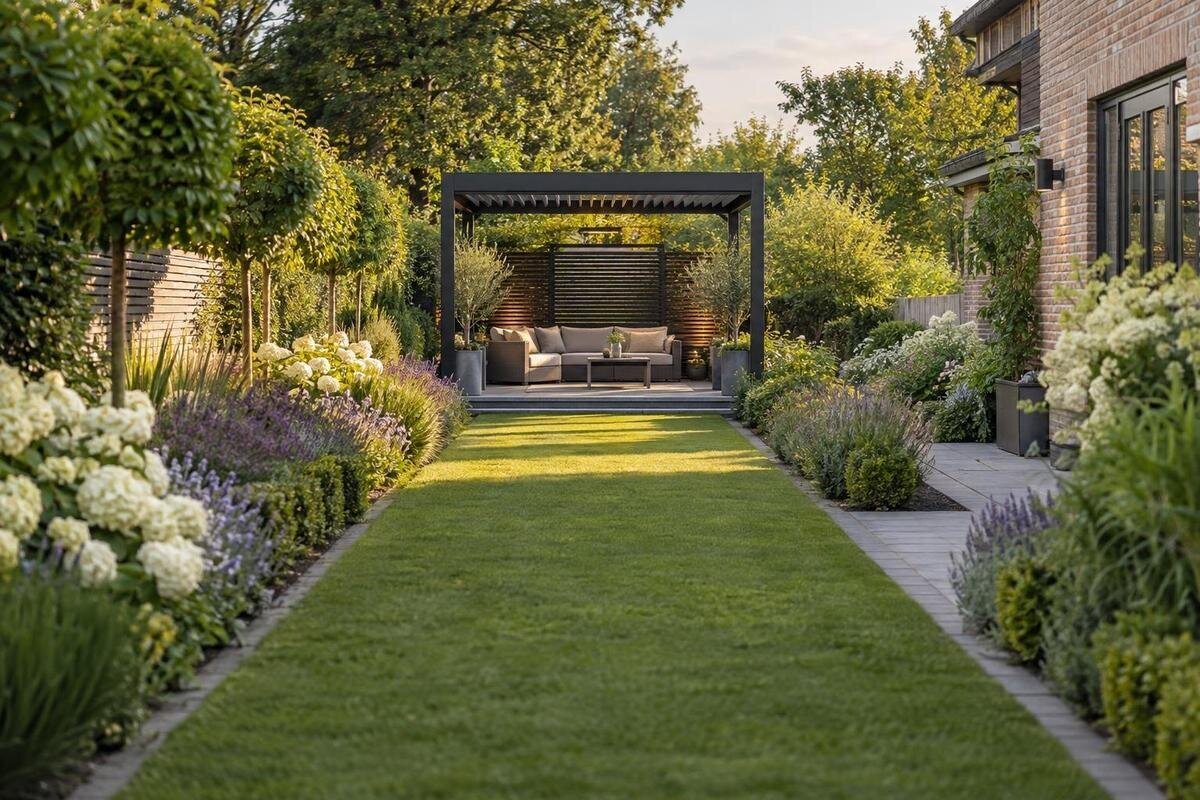
Garden design
A pergola can give a long garden a clear destination, but placing it at the far end does not automatically make the view work. The result depends on what is visible from the house and entrance, how the route approaches the structure, and whether planting creates depth rather than a closed corridor. Plan those elements together on a dimensioned landscape drawing, then judge the proposed composition from the viewpoints people actually use. The aim is a garden that draws the eye onward while still feeling easy to walk through and use.

What to check before choosing 1
Start with the views people actually use
Start by drawing the garden from the points from which it is actually seen: the main room or doorway, the entrance gate, and any place where people regularly pause. The same long plot can look generous from one end and narrow from the other. A tree may hide its far boundary from the house, while the entrance frames the full length. Mark view lines from standing height and, where relevant, from a seated position. Note not only the centre of each view, but what lies at its edges: a pergola may be visible while the route or planting beyond it is still obscured. This perspective check is more revealing than treating the plot as a plain rectangle.
Choose one primary viewpoint and mark the parts that should remain visible beyond or beside the structure. The pergola does not have to sit on the property’s exact centre line to draw attention; it should be clearly visible from the room or route that matters most. If the house is a key viewpoint and the Bloomcabin Wall Pergola is on your shortlist, include it alongside the house openings on your sketch. Consider how the structure would frame the garden from each opening, rather than judging its position from the garden alone. Mark secondary views too, so a strong composition from one end does not obscure a feature you enjoy from another.
Choose how far into the garden the pergola sits
Treat location as a question of depth, not just distance from the house. At the far end, a pergola can provide a clear stopping point, but if it appears pressed against a boundary or hidden by an existing tree, the eye may not read it as a separate destination. A position partway along the garden can create a pause and leave a planted view beyond it. Compare two or three locations on one drawing, noting how much garden lies in front of each and how much remains behind. Also consider whether there is enough space to approach and use the area without the pergola becoming a barrier across the garden.
Once the likely position is clear, add the footprint of the Bloomcabin Pergola to the plan. Its catalogue listing gives an area range of 9 to 24 m², but the area alone does not tell you the shape or dimensions of each option. Use the dimensions of the particular configuration being considered and show its perimeter and support points against boundaries, planting and the path. Then compare the different locations from the main viewpoint. A larger or smaller footprint is not automatically better at the end of a long garden: what matters is whether the structure remains visually distinct at the chosen distance and leaves the route workable.
What to check before choosing 2
Make the route support the view
A straight path aimed at the pergola can strengthen the long axis and make the destination easy to recognise, but it may also divide planting or make the garden feel like a corridor. An offset route can reveal the structure gradually, provided the turn serves a real purpose and does not make everyday access awkward. Put the path on the plan before finalising beds, then connect it to the point where people will actually enter the pergola. Consider the final part of the approach as carefully as the view along it: a route that reaches the back of the structure or cuts across a planted bed needs adjusting.
Decide whether the walk is a direct approach, a route that passes the pergola, or both; those uses may call for different alignments. Allow for the people and garden equipment that will actually use it, including a comfortable turn where the path changes direction. If the Bloomcabin Bioclimatic Pergola is among the options, plot the chosen configuration beside the proposed path and trace each route through the layout. Someone heading further into the garden should not have to weave through the seating area. Check where the approach meets the pergola as well as where it passes alongside it, so the destination remains convenient to reach.
Align the pergola with the house and garden
Use the house, boundary, paving joints and existing trees as reference lines, not as rules that all have to run parallel. Repeating one clear line can make a long garden feel ordered; shifting the pergola slightly can stop the view becoming a rigid tunnel. Consider its orientation alongside the direction from which people will approach. A structure turned for visual effect but reached from an inconvenient side may weaken the destination rather than strengthen it. If the garden has several competing lines, choose one as the main reference and let the others remain secondary.
For a wall-mounted option such as the wall-mounted Bloomcabin model, draw the façade, door and windows at the same scale as the garden. This shows whether the house line supports the main view or pulls attention away from it, and whether the route from the doorway meets the planned outdoor space naturally. For other positions, use a boundary or paving line as a reference, then decide deliberately whether to follow it or introduce a modest offset. Do not centre the pergola by eye alone: the main view, the approach and the visible space beyond it may point to a different alignment. Record the choice on the drawing.

What to check before choosing 3
Use planting to create visible depth
Planting can create a sequence of foreground, middle ground and background, giving a long garden more depth than one continuous border. Near the viewing point, lower or more open planting can keep the view legible; farther along, varied heights and repeated groups can guide the eye towards the pergola. A group can frame one side without being mirrored on the other, making the composition balanced without forming a formal corridor. Leave a clear visual opening through the garden, and avoid filling every gap simply because a bare area looks unfinished on a plan. A change in planting height can also mark the transition from the path to the destination.
Plan by the mature size and documented growing requirements of the plants, not by how small they look in a pot. A shrub that appears unobtrusive at purchase may later block the view or take over the edge of a path. Prepare a planting schedule with expected height and spread, seasonal habit, and the space each group needs; confirm those details for the varieties selected. Repeating a few plant forms at intervals can connect near and distant beds, while changes in height or texture help separate the layers. Leave room for maintenance so the composition does not depend on severe or constant pruning.
Frame the pergola without hiding it
The opening around the pergola matters as much as the planting beside it. A continuous tall hedge across the far end can absorb the structure into its background; a clear gap around or behind the frame helps its outline register. Side planting can lead the view inward, but the densest or tallest mass should not sit directly on the main sightline. Show plants at their expected mature size, including any canopy that may extend across the view. Check the composition from both standing and seated positions. An elevation sketch from the house is often more revealing than a plan alone, because it shows whether the pergola disappears behind the planting.
Compare the background as well as the foreground. A wall, a tree canopy or mixed planting can each change how clearly the same outline stands out, so sketch what actually lies behind the chosen position. If the regular Bloomcabin pergola is under consideration, show its outline against that background, with neighbouring planting drawn at mature size. Look for places where the structure’s outline becomes hard to distinguish or is obscured by branches. The aim is to judge visibility in your own garden, not to recreate a catalogue picture. If the background is busy, a gap in the planting may help; if it is plain, surrounding planting can frame the structure without hiding it.
What to check before choosing 4
Give the focal point room to stand out
A long garden often contains other prominent features: a large tree, a change in paving, a sculpture or a dense planting group. Decide which one should attract attention first from the main viewpoint and let the others support it. If every feature competes for attention through contrast, colour or scale, the garden can lack a clear focal point. An open stretch of lawn or paving can create a visual break between the viewer and the pergola, while repeated planting at the edges links the spaces. The pergola should be easy to notice, but it need not be the only feature worth looking at; a focal point works best when the rest of the garden gives it context.
Judge how much of the garden’s width the structure occupies in the main view, rather than considering its floor area alone. In a narrow plot, a pergola placed across the view may seem to close off the garden; a lengthwise alignment may carry the eye onward. Compare both orientations on the plan and from the main viewpoint. When assessing Bloomcabin’s regular pergola option, consider the space visible beside and behind it. If you plan to use the area for seating or dining, draw the furniture and the route around it too. An empty outline can appear balanced yet become cluttered once the intended furniture is added.
Check the footprint and circulation on a plan
Before settling planting positions or surface finishes, put fixed elements on a dimensioned plan: boundaries, walls, doors, paths, trees to retain and the pergola’s exact outer dimensions. Use the drawing for the option being considered, including any projections and support locations it shows; an area figure alone cannot establish clearances. Check the approach, access around the structure and places where people are expected to pause. If the product drawing or your site measurements are unclear, have a competent designer or installer confirm them rather than estimating from a photograph. Keep the plan at a consistent scale so each revision can be compared fairly.
When considering the Bloomcabin Wall Pergola listing, relate the selected model’s dimensions to the façade as well as the garden. Show the wall, doorway and route together, so you can see how the available space connects to the wider layout. Record any measurements or assumptions that still need confirmation, rather than allowing an uncertain detail to become a fixed point for paving or planting. If you compare several configurations, identify each clearly on the drawing and keep the site outline unchanged. This makes it easier to see whether a difference comes from the pergola’s footprint or from a change in its position.

What to check before choosing 5
Test the view at full scale
A scaled plan is essential, but it cannot show every effect of a full-size structure from ground level. Before finalising the position or planting nearby, use removable markers to show its corners and outside edges, where this can be done without obstructing movement. Walk from the house, entrance and main seating point, then look from the heights at which people will actually view the garden. Check whether the path arrives naturally, whether the pergola reads as a destination and whether a foreground plant would cut across the view. Change one element at a time so you can tell whether the improvement came from moving the structure, altering the route or opening the planting.
If the Bloomcabin bioclimatic model is on the shortlist, use the dimensions of the chosen configuration for the temporary outline. Compare two or three positions from the same viewpoint, keeping the other markers unchanged so that the effect of moving the pergola is clear. Photograph those views if it helps you judge the differences later, and note which position gives the clearest approach and view beyond. A temporary outline is only a perspective and circulation check, not a structural test or installation guide. This trial can expose a crowded approach or a lost sightline while the garden layout is still easy to change.
Plan for planting to mature
The view will alter as planting grows and as some plants change in leaf or colour through the year. Check how much of the pergola remains visible at mature size, not only on the day the garden is completed. Make room for pruning and routine care without turning the main path into a work area, and choose a layout that does not depend on repeatedly cutting plants back to keep the focal point clear. Record intended mature heights and maintenance access alongside the landscape plan. This keeps the drawn composition connected to the garden that will exist after the plants establish.
Consider how ordinary garden activity may change the view as well. Furniture may move, a temporary screen may be added, or a newly planted bed may fill out, altering what is visible along the long axis. Keep an alternative route where practical if the main walkway is occupied, and avoid relying on one narrow sightline that is easily blocked. A durable layout leaves the pergola easy to locate, keeps the approach useful and gives planting enough space to develop without closing the garden in. The aim is not a frozen view, but a clear relationship between the destination, route and planting as the garden matures.
Frequently asked questions
Should a pergola sit at the far end of a long garden?
Not necessarily. It can create a clear endpoint, but a position further forward may make a useful pause and leave a view beyond it. Compare both on a scaled plan and from the main viewpoints, checking that the approach and the remaining garden still work.
Is a straight path always best for a long garden?
No. A straight route strengthens the main axis and makes the destination easy to read; an offset route can reveal it more gradually. Choose a line that works for everyday movement and keeps planting accessible, then assess it from both ends of the garden.
How can planting add depth without hiding the pergola?
Show the expected mature height and spread of each planting group, not just its current size. Use varied layers and frame the view from the sides while keeping the main sightline open. An elevation sketch can reveal branches or tall planting that a plan misses.
How much space should I leave around a pergola?
There is no single figure that suits every garden. Use the dimensions for the specific option being considered, then include the approach, circulation and access needed for normal garden use and maintenance. If the measurements or layout are unclear, ask a competent designer or installer to review them.
Can I place a pergola using a product photograph?
A photograph can help you see the model, but it does not show its dimensions or how it will look from your garden viewpoints. Use a dimensioned drawing on a scaled plan, then mark out the proposed position temporarily to check the perspective and route.
A long garden gains a focal point when the structure, route and planting work as one composition. Begin with views from the house and entrance, compare a position at the end with one further forward, and make sure the path arrives naturally. Use planting at varied depths to frame the view while preserving a clear opening, then draw the selected dimensions and try the layout at full scale. If the pergola remains easy to see and approach from the viewpoints that matter, the eye can travel through the garden without turning it into a corridor.
