
A Pergola in a Minimalist Garden: Keeping One Clear Design
Garden design
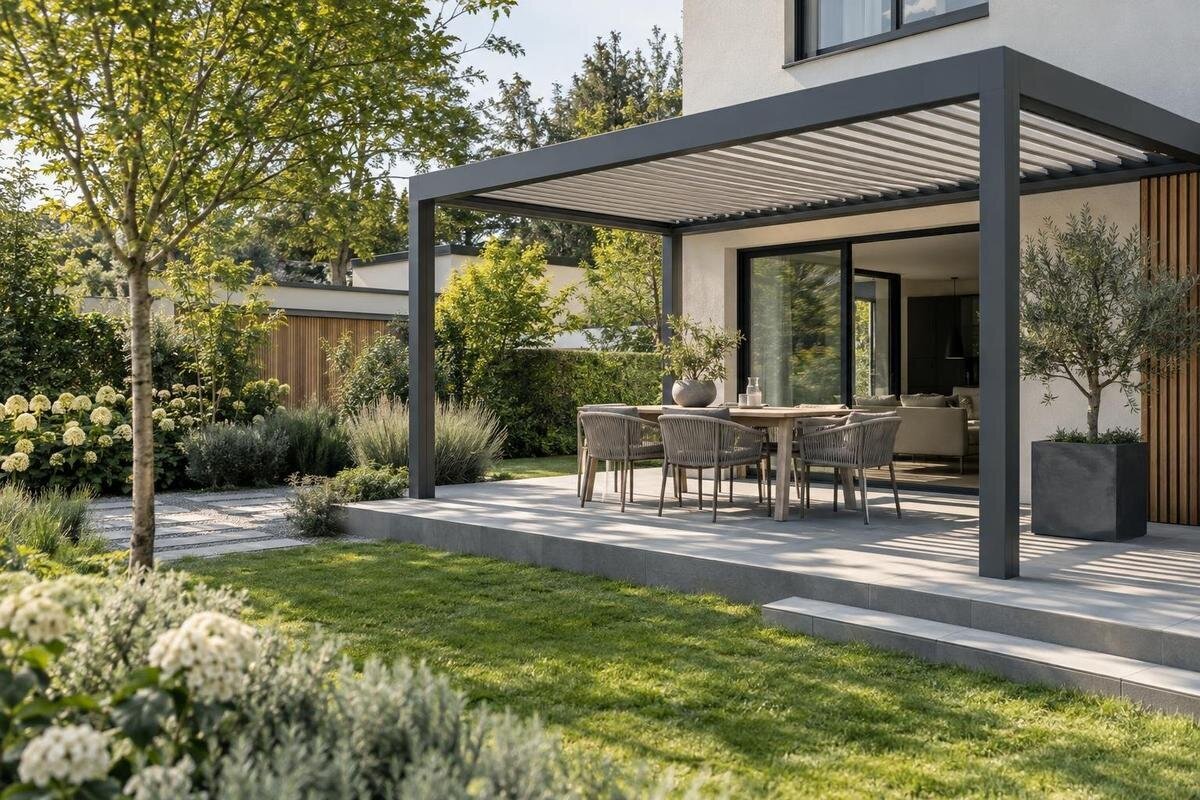
A minimalist garden with a pergola is not simply a terrace stripped of pots and ornament. Its calm comes from a few clear relationships: where the pergola sits, how paving leads to it, which planting areas frame it, and how each edge ends. When these decisions are made separately, even attractive finishes can leave the garden feeling piecemeal. Begin with one measured drawing of the outdoor space, then resolve the joins between structure, hard surface and planting. The aim is not to make every line identical; it is to give the garden a clear hierarchy, with one feature leading and the rest supporting it.

Details to confirm 1
Start with a measured plan
Record the fixed points before developing the design. Measure the usable garden and mark the house, doors and windows, boundary lines, steps, existing trees and any features that must remain accessible. Add the main route from the house to the parts of the garden you use, plus the view you most want to preserve. Include service access points and changes of level where they affect the layout, rather than discovering them once finishes are chosen. A drawing from memory can miss a narrow passage or an offset doorway, so use site measurements and check them against the space. This base plan need not be a construction drawing; it gives every later decision the same reference.
Mark the pergola as an outline on that plan, including its outer edges and the positions that must stay clear; a shaded rectangle alone does not show how the structure relates to furniture or paths. Trace the main route and the footprint of a table or seating area, using actual measurements where available. Then choose one organising line—perhaps a house opening, a terrace edge or the route into the garden—and use it to place the dominant element. This creates a coherent composition without forcing every object onto one axis. For an early area comparison, the Bloomcabin Pergola listing shows options from 9 to 24 m². Treat that range as a shortlist reference, not a substitute for the chosen model's exact dimensions and post positions.
Relate the pergola to the house
Decide whether the pergola should read as an extension of the house or as a separate structure within the garden. A wall-mounted layout visually ties one side to the building; a freestanding layout can be set out as its own zone. That choice changes the plan and the elevations: note how the roof outline relates to doors, windows, façade lines and the garden boundary, rather than judging it from a top-down view alone. The distinction is about composition, not proof that a particular wall or site is suitable. Any proposed attachment and its conditions need confirmation from a qualified professional. A freestanding arrangement also needs a deliberate relationship to the path, planting and open views; otherwise it can seem placed without purpose.
Choose a clear reference, such as aligning an edge with a door opening or carrying a terrace line beneath the structure; avoid several near-alignments that almost meet but look like mistakes. Include the Bloomcabin Wall Pergola in this comparison if you are considering a wall-mounted arrangement. Draw the proposed outline against the façade rather than assessing it in isolation. A side elevation can show its relationship to windows and doors, while a plan shows the route alongside it. Check the view from indoors as well as from the garden: a layout that looks balanced outside may place an edge awkwardly across the view from a room. Resolve that relationship before choosing the surrounding finishes.
Details to confirm 2
Coordinate paving lines with the footprint
Use paving as the ground plane that connects house, pergola and garden, not as a second feature competing with the frame. Choose a principal direction for the joints or boards and relate it to one clear reference, such as the long edge of the terrace or the approach from a doorway. Plot posts and perimeter lines over that pattern. If a post lands awkwardly between modules, adjust the setting-out before installation rather than adding a small cut or border that has no other purpose. Check how the pattern looks from the doorway and from the seating area, not only on a drawing. A consistent grid can make a simple layout feel resolved without adding more materials.
Show where paving stops at planting, walls and thresholds. A narrow perimeter band can be useful if it marks a real change, but repeating a second border around every object quickly fragments a restrained layout. Draw each edge as a continuous line, and note any level or surface changes that need a designer or installer to resolve. When considering the Bloomcabin Bioclimatic Pergola, overlay the selected model's exact footprint and post positions on the paving grid. This makes the relationship between joints and posts visible before the setting-out is agreed. If the paving must meet a doorway or existing path, include that transition on the same plan rather than treating it as an isolated detail.
Keep the material palette consistent
A restrained palette is less about choosing all-white or grey finishes than about controlling how many materials and tones compete. Start with the existing house and the largest surface, usually the paving, then decide how the pergola frame and planting edges relate to them. A useful schedule might name one dominant hard-surface finish, one structural finish and one supporting accent. The accent can be repeated in a planter or threshold, but it does not need to appear on every edge. Let the main planes remain visually quiet so the pergola's proportions and the planting read clearly. If the house already has several strong colours or textures, let those count as part of the palette.
Compare samples beside one another in the actual garden rather than selecting from separate catalogue images. Look at texture, pattern and contrast as well as colour: a strong paving pattern and a conspicuous edge detail can compete even when their colours match. Give each change of finish a reason, such as marking a threshold or defining a planted bed. Where one material ends, decide whether the next surface meets it directly or through a deliberate edge. Note the same finish wherever it recurs, so a trim, planter and threshold do not become three unrelated accents. Writing these choices into a short schedule prevents last-minute additions from changing the composition.

Details to confirm 3
Set out planting in clear zones
Planting can soften the geometry without dissolving it. Draw beds as clear shapes—one continuous strip, a defined corner bed or a few repeated blocks—then align their edges with the pergola or paving where that makes the layout easier to read. A series of isolated pots scattered around the posts often creates more visual stops than a compact planted zone. Repetition helps the eye connect separated beds, but the same plant does not have to fill the whole garden. Keep the overall structure simple and use variation within the planned areas, rather than adding new planting shapes each time a gap appears. Make the bed outlines part of the initial plan, not leftover spaces.
Base the planting plan on documented requirements, not just appearance in a photograph. Record each plant's expected mature height and spread, the conditions it requires and its position in relation to paths, doors, walls and the pergola. Leave enough room for growth and routine access; where clearances are uncertain, ask a landscape professional or plant supplier before setting bed edges. If the Bioclimatic Pergola model is on your shortlist, show its proposed position alongside the mature planting outlines. Look particularly at beds beside posts and routes, where a neat initial arrangement may become crowded. Keep these bed edges adjustable until the structure and planting have been coordinated.
Resolve the edges and junctions
Junctions are more noticeable in a minimal layout because there are fewer objects to distract from an untidy finish. On the plan, mark where each post meets the paved area, where the paving ends at soil, how a path meets the terrace and how the pergola relates to a wall or boundary. Decide which edges continue and which stop; avoid ending a line just short without a reason. A simple detail sketch can clarify how surfaces, trims and planting should meet, even before construction information is prepared. Show whether the edge should form a continuous band, a direct junction or a deliberate gap, rather than leaving the installer to guess.
Where the structure meets the house, treat the connection as both a visual and a building detail. Do not hide an awkward junction behind a planter or assume that a clean-looking line confirms that an attachment is appropriate. The wall-mounted Bloomcabin option is a named example to include in a comparison, but site-specific attachment requirements need confirmation from a qualified professional. Keep access to doors, service points and any wall features that require inspection in the drawing. At ground level, decide whether the frame sits beside a paving joint, aligns with it or has a deliberate separation; a consistent choice looks intentional and is easier to review. Mark the material at each meeting point, so the same detail can be discussed by everyone involved.
Details to confirm 4
Leave space for routes and furniture
Plan movement before choosing the final furniture arrangement. Draw the route from the house door to the garden gate or other destination, then check that it does not pass through the space needed to pull out chairs or reach a planted bed. Mark the swing of doors and gates, and use the real footprints of the table, chairs and loungers you intend to keep. A generic furniture symbol can make a tight plan appear more generous than it will feel. There is no single clearance that suits every setup; measure your own furniture and leave the routes you actually need. Include space for someone to move around a seated group, not only the table itself.
Give the pergola one primary use, such as dining or sitting, and avoid trying to fit every outdoor activity beneath it. Keep one route visually clear, group furniture rather than spreading pieces across the paved area, and allow open space at the transition to planting. When comparing the Bloomcabin Pergola option, test your furniture arrangement within the selected model's exact footprint. Include chairs in use, not just tucked beneath the table. If a seat must move every time someone passes, revise the arrangement rather than accepting the obstruction. This keeps the main activity and the route around it distinct without introducing another border or surface.
Keep lighting and focal points restrained
Choose one main visual focus for each view into the garden: a tree already on site, a framed opening or a deliberate planting group can all serve, depending on the layout. The pergola itself has a strong outline, so several tall planters, a patterned screen and multiple decorative objects may compete with it. Decide what should be noticed first from the doorway and seating, then reduce or relocate secondary accents. Repetition in a few planned places usually reads more clearly than a collection of unrelated features. The point is not to remove personal details, but to give them a defined place and a clear relationship to the dominant lines.
Plan lighting at the same time as routes and furniture, not as a final layer of decorative fittings. Mark the task area, the route that needs to be legible after dark and any single feature you want to pick out; leave other parts visually quiet. A fitting's position should make sense with the pergola outline, furniture plan and planting, rather than adding a new pattern of points. If electrical lighting is proposed, have its layout and installation assessed by a qualified professional. The finished effect depends on the selected fittings and arrangement, so a style reference alone cannot guarantee it. Keep fixtures out of key views where they add clutter rather than helping the space work.

Details to confirm 5
Use a dimensioned drawing to test the design
Turn the concept into a coordinated set of dimensions before committing to finishes. A dimensioned plan should show the pergola's confirmed outside measurements and post positions, paving grid, bed edges, paths, door swings and furniture footprints. Add elevations or small junction sketches to explain the relationship to the house and boundary; a top-down plan alone cannot show every vertical alignment. Include a planting schedule with names, mature dimensions and documented growing requirements, plus the intended materials and edge treatments. This need not be an elaborate presentation, but each person involved should be able to see what meets what and where. Label which measurements are confirmed and which remain provisional.
Keep product information separate from site measurements on the drawing. The Bloomcabin Bioclimatic Pergola listing gives an area range of 9 to 24 m², not a complete setting-out plan for a particular garden. Use the selected configuration's dimensions from the relevant product documentation, and identify any details still awaiting resolution. If a junction depends on a wall, surface level or existing feature, mark that point for the appropriate professional rather than leaving an ambiguous line. A restrained design needs enough detail to explain how its simple surfaces meet. Clear annotations also make it easier to see which parts of the layout would be affected by a change.
Review the garden from key viewpoints
Review the composition from the places where it will actually be seen: indoors through the main opening, on entering the garden and from the seating position. Check whether the pergola's outline frames a useful view or cuts across an important one; look at the paving lines and bed edges from the same viewpoints. A quick elevation or photograph with a simple overlay can reveal an alignment that looks balanced from above but awkward at eye level. Assess each view separately, then choose the strongest overall relationship rather than trying to make every corner equally prominent. Include the approach to the garden, since the design can look different while moving towards it.
Where the concept uses a wall-mounted structure, review views from both the garden and inside the house. If you are considering the Bloomcabin Wall Pergola option, include its proposed outline in each view; the product name alone does not establish the right arrangement for the building. Then assess the composition as a whole: do material changes mark meaningful boundaries, and do the planting zones support rather than obscure the main lines? Show plants at their documented mature size as well as their initial size. Remove secondary accents that compete with the intended focal point. This final review should refine the relationships already established, rather than introduce another layer of decoration.
Frequently asked questions
Can a minimalist garden include substantial planting?
Yes. Keep planting in clearly defined beds or repeated groups, and choose plants with their mature size and growing requirements in mind. Repetition and clear bed edges help greenery sit within the composition; restraint does not require bare ground or a single plant type.
Should the pergola align with the paving?
Not every edge needs to run in the same direction. Choose one primary reference, such as a terrace edge or doorway, and coordinate the pergola footprint and paving grid around it. Other lines can differ where there is a clear reason, provided joints and perimeter cuts still look deliberate.
Is a wall-mounted pergola always the best choice beside a house?
No. It can read as an extension of the building, while a freestanding structure can define a separate garden zone. The right composition depends on the plan and elevation, and any proposed wall attachment must be checked for the specific building by a qualified professional.
How many materials should a minimalist pergola garden use?
There is no fixed number. Choose a dominant surface, a structural finish and perhaps one supporting accent, then repeat them only where they have a purpose. The existing house also contributes colour and texture, so include it when deciding whether another finish is needed.
What should be on a landscape drawing for a pergola?
Show confirmed pergola dimensions and post positions, paving joints and edges, routes, door swings, furniture footprints and planting beds. Add elevations or junction sketches where the structure meets the house, and a plant schedule with mature dimensions and documented requirements. Mark provisional measurements clearly.
A coherent minimalist garden is not an empty one; it is a garden in which the main lines and transitions have been resolved. Set the pergola in relation to the house and routes, coordinate paving with planting zones, and keep the material palette consistent from edge to edge. Use measured drawings and documented planting requirements to check the details before they are fixed. When the posts, paving, beds and views all belong to the same plan, restraint feels intentional rather than unfinished—and the pergola reads as part of the garden, not an object placed in it.
