
What to Check Around Your Pergola After a Storm
PERGOLA CARE
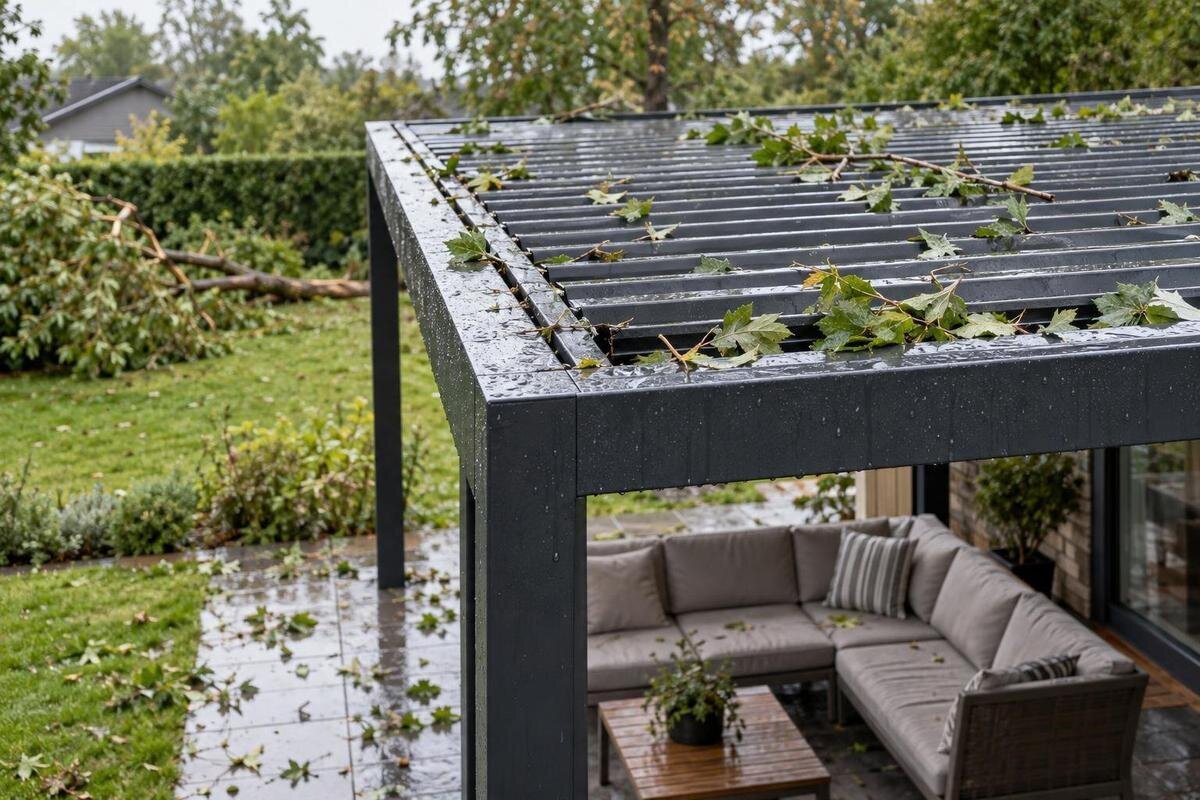
After a storm, inspect your pergola cautiously and only from a safe position. Once conditions have settled, stay at ground level and look for visible changes to supports, frame joints, roof elements, wall connections, drainage and fitted accessories. Photograph concerns before moving anything. A shifted post, new gap or hanging part is a reason to keep clear and arrange a professional assessment, not to climb up and tighten a fitting. This check helps you record what changed; it cannot diagnose structural or electrical damage.

Wait until the area is safe to approach
Wait until wind, heavy rain, lightning and other immediate hazards have passed, and you can see the full structure clearly. Wet paving, standing water, fallen branches or displaced furniture may still make the approach unsafe after the worst weather has eased. If a post looks out of line, a roof component is hanging or a section appears detached, do not walk underneath it for a closer view. Keep children and visitors away and choose a view from a safe position. A pergola that remained upright during the storm is not thereby confirmed safe. If debris blocks the route, stop rather than stepping over it or moving it.
Keep the inspection visual and at ground level. Do not use a ladder, chair or table, climb onto a wall, or lean across an edge to reach a better viewpoint. Avoid pushing or shaking a post, lifting a beam, pulling a screen, tightening a fitting or operating roof controls to see whether they still work. Handling a part could disturb it and make its original position harder to record. The aim is to note visible changes and decide whether further assessment is needed, not to confirm the structure’s strength. If you are unsure whether a component is stable, end the inspection and keep clear.
Record the storm and identify the pergola
Before looking closely, make a short timeline: when the storm eased, when you first checked the area and when each concern was noticed. Record what you observed, such as a gap beside the rear post or water pooled near the wall, rather than writing that the wind pulled out a fixing. Unless a professional has confirmed the cause, leave that explanation open. Note whether rain continued or debris was moved before you took photographs; that context can help someone compare the images later. If you did not see when a change happened, say so.
Look for earlier photographs, order paperwork and any product manual you have. Copy the model name exactly as it appears in your records, including a version or other identifier if shown; do not guess from the shape or colour. If your paperwork names the Bloomcabin Bioclimatic Pergola, use that name in the inspection record, while keeping any installation-specific details separate. If you cannot identify the model, mark it as unknown. Keep the notes and photographs together under the date of the storm. Separate older images from those taken afterwards, and retain the original files as well as any annotated copies. When comparing photographs, note differences in viewpoint or lighting that make a detail difficult to judge. If an earlier image does not show the affected area clearly, record that limitation rather than treating it as proof that nothing has changed.
Check posts and support points for movement
Where the ground is safe, look at each visible post and support point from ground level. Compare their positions with earlier photographs or fixed features such as wall corners, paving joints and door openings. At the base, note a new gap, an exposed or shifted-looking fixing, cracked or lifted paving, separation in the surrounding surface, or soil that appears disturbed. A crack may have another cause, so record where it is and whether you have a before photograph rather than deciding what happened. Do not dig around a base, reach behind a plate or test a bolt by hand.
Give each support a clear location in your notes, such as the side nearest the house or the corner by the garden path. Use the same description in photograph filenames and any enquiry so that someone viewing the images can follow your observations. Photograph the post and its surroundings together, then take a closer view only if you can do so without approaching a suspect part. Record separately what you see at the post, its base and the surrounding paving; do not combine them into an assumed explanation. New movement, a visible gap or a fixing that appears displaced should be assessed professionally, not corrected by trial and error. If replacement is later proposed, the Bloomcabin Pergola product page can identify a model for discussion. Keep that comparison separate from the record of your existing supports: the listing does not establish whether they can be reused.
Inspect the wall connection, if your pergola is attached
If the pergola connects to a house or another wall, inspect only the visible junction from a safe place at ground level. Look for a new gap, an obvious separation, a bracket that appears to have shifted, fresh cracking in the nearby surface, or material that seems to have come away. A mark or crack does not by itself establish that the connection has failed, so describe its appearance and compare it with earlier photographs if available. If the connection is out of view, do not climb or remove a cover to expose it.
Photograph the junction in context, including the nearby post and wall, then take a closer image only if the position is safe. Describe whether the visible change is at the pergola-to-wall junction or on the adjacent wall surface, without claiming to know what lies behind it. If only part of the junction is visible, state which part you could inspect. Do not pull at trim, insert a tool into a gap, seal it or tighten a fitting. If you can see a change at the connection, keep people clear and include it in a professional assessment. Where your paperwork identifies the Bloomcabin Wall Pergola, quote that name alongside the location of the concern. A view of the whole wall and pergola can help explain which junction you mean, but do not move into an unsafe position to obtain it.

Look along beams and frame joints
From a safe position, scan each visible beam or cross-member and the places where components meet. Look for a new bend or twist, an open joint, a section no longer aligned with its neighbour, a crack, or a cap or connector that appears displaced. Where possible, use the same viewpoint as an earlier photograph to compare the frame. An irregular outline in a single view is not proof of storm damage, particularly if you have no baseline image. If foliage hides a section, record that it could not be seen rather than moving it or climbing to get a clearer view.
Note the exact beam or joint involved, and take one photograph that shows its position in the frame and another that shows the visible detail. Describe the location in relation to a named post or the house, rather than simply writing 'left side', which depends on the viewer's position. If several joints concern you, give each a separate note and matching photograph reference. Do not stand under a suspect span, press on it or attempt to close a gap. A bent, cracked or separated part needs professional assessment. If a replacement is subsequently recommended, you can include the Bioclimatic Pergola product page in that discussion. Ask whether the proposal concerns an individual component or the whole structure, and keep the answer with the assessment notes. Visual similarity alone cannot establish that a replacement component is compatible with your installation.
Check roof elements without operating them
From outside the structure, look at the roof or covering as fitted. Depending on the design, visible changes might include a missing or displaced piece, a new gap, a bent element, a torn cover or debris caught overhead. Do not stand beneath a section that appears loose to inspect it from below. Compare its position with an earlier photograph if you have one, but do not assume that a different position means a particular mechanism has failed.
Do not climb up, lift a panel, pull at a cover or move an adjustable element to find out whether it is secure. Avoid using a control to test a roof system if anything appears damaged or out of place. Record the area, the visible position and any nearby signs such as a new opening or water mark. If you know the roof's position before the storm, include that information, distinguishing your recollection from anything shown in a photograph. Where part of the roof cannot be seen from a safe position, mark it as not inspected; do not describe the whole roof as unchanged on the strength of a partial view. If the roof looks altered but you cannot tell why, leave it as an observation for the installer or a qualified pergola professional to assess.
Follow rainwater and pooling at ground level
Look at the ground around the pergola for standing water, changed runoff, washed soil, or a new wet patch beside a post or wall. If the installation has visible channels, downpipes or outlets, note any overflow or debris you can see from the ground. Do not climb to inspect a high-level outlet or reach into a channel. A puddle does not by itself show that the pergola is damaged, but its location and whether it is new can be useful information, especially if the ground surface or a nearby connection has also changed.
Photograph the wet area with a fixed landmark in view and note whether rain was still falling when you saw it. Describe where the water appeared: beneath an outlet, beside a post, along the wall or elsewhere on the paving. If you can observe it again safely, record whether the patch has receded, remained or spread, with the time of each observation. Do not remove a cover, poke into a drain or clear anything overhead as part of the inspection. If pooling persists or water appears beside a visible gap, include both details in the assessment request without assuming they have the same cause. For an installation identified in your records as the Bloomcabin Wall Pergola model, describe the observed water route separately from the model name. A catalogue listing is not a drawing of your particular installation or its drainage route.
Note damage to screens, lighting and other fitted items
If your pergola has screens, lighting or other fitted accessories, look for visible tears, displaced edges, a part that appears loose, a damaged casing or a cable hanging where it did not before. These checks are visual only: do not pull a screen, operate a fitting or touch damaged wiring. Keep clear of a loose item that could fall. Also note nearby branches or displaced objects that may have struck the structure, but distinguish what you actually saw from what you suspect.
Record which accessory appears affected and where it sits in relation to the frame. Take a wider photograph to show the location and a closer one only when it is safe to do so. Distinguish damage to the accessory itself from a visible change where it meets the pergola, without trying to separate the parts. If more than one item is affected, list them individually rather than describing everything as a single fault. Include the pergola's documented model name in any service enquiry, rather than identifying it only by an accessory. If that name is Bloomcabin Pergola, copy it from your paperwork and add any separate accessory details already recorded there. Note whether you know when the accessory was fitted; if you do not, leave that information as unknown. Compatibility still needs to be established before a replacement is ordered.

Know when to keep clear and request an assessment
Keep people away from the affected area and arrange professional assessment if you see movement at a support, a new gap at a connection, a visibly damaged frame member, or a loose or detached overhead component. Do the same if an accessory or cable appears damaged; do not test it to decide whether it still works. If damage is limited to a mark or wet patch, photograph it and note its location rather than deciding on appearance alone that it is harmless. A ground-level check cannot establish the condition of a concealed fixing.
Contact the installer, supplier or an appropriate qualified service professional and explain what you observed, when you noticed it and whether the change is visible in older photographs. Put the main concern first, such as a shifted support or a loose overhead component, so it is not buried among less significant marks. Explain which areas you could not inspect safely and whether any photographs show only part of the concern. If electrical equipment or wiring is involved, keep clear and seek an appropriately qualified electrical service professional. Ask what should remain out of use while you await assessment, rather than testing it yourself. If that assessment leads to discussion of a wall-mounted replacement, the Bloomcabin Wall Pergola catalogue entry can identify the proposed model. Its suitability for the wall and site remains a separate question from documenting the storm damage.
Prepare a clear repair or replacement enquiry
Send a concise description alongside your photographs: identify the affected side or post, describe the visible change, give the date you noticed it and say whether you have earlier images. Include the exact model name from your paperwork and attach the relevant manual or order record if available. Do not remove a damaged part to photograph a label, and do not order a replacement based only on appearance. If the model is unknown, say so; a clear uncertainty is more useful than a guessed name.
Ask the service provider what assessment is needed and which exact part or document they require before any replacement is ordered. Make clear whether you are requesting an inspection, identification of a damaged component or a quotation following an assessment; these are different enquiries. Keep the response and any assessment notes with your storm photographs so that later work can be compared with the original condition. If a new model is being considered, the catalogue entry for Bloomcabin Bioclimatic Pergola can identify one option without implying compatibility with the site or existing connections. Ask for the proposed model or component to be named clearly in the reply, rather than relying on a photograph alone. Preserve the initial record when adding later updates, so that the condition first observed after the storm remains distinguishable from any subsequent changes or work.
Frequently asked questions
When can I inspect the pergola after a storm?
Wait until active wind, lightning, heavy rain and other immediate hazards have passed, and the ground is safe to approach. There is no single waiting period that suits every site. If any part looks unstable or something is hanging overhead, keep clear and arrange an assessment rather than moving closer.
What signs mean I should keep away?
Visible movement at a support, a new gap or crack at a connection, a bent or detached overhead part, or damaged wiring are reasons to stop. Keep people away from the affected area; do not push, test or repair the part. Arrange an assessment by a qualified professional.
Should I operate the roof or screen to test it?
No. If a roof element, screen, cable or control appears damaged, do not operate it as a test. Record its visible position from a safe place and ask the installer or an appropriate service professional to advise.
Which photographs are useful for an assessment?
Take an overall view from each safely accessible side, then a closer view of each concern from ground level. Include a nearby landmark so the location is clear, and note the date. Do not climb or approach a loose part to get a closer photograph.
Does a clear visual check prove the pergola is safe?
No. A ground-level check can record visible changes, but it cannot confirm the condition of concealed fixings or connections. If you noticed movement, damage or unusual behaviour, keep clear of the affected area and seek professional advice.
A useful post-storm check is cautious and well documented: compare visible details with earlier evidence, note what you observed and leave the cause open. Movement, separation or damage is a reason to keep clear and seek professional assessment, not to test a connection yourself. Clear photographs and an accurate model record give a professional a better starting point while leaving technical diagnosis to someone equipped to assess the installed structure.
