
Designing the Wider Garden as a Courtyard Around a Pergola
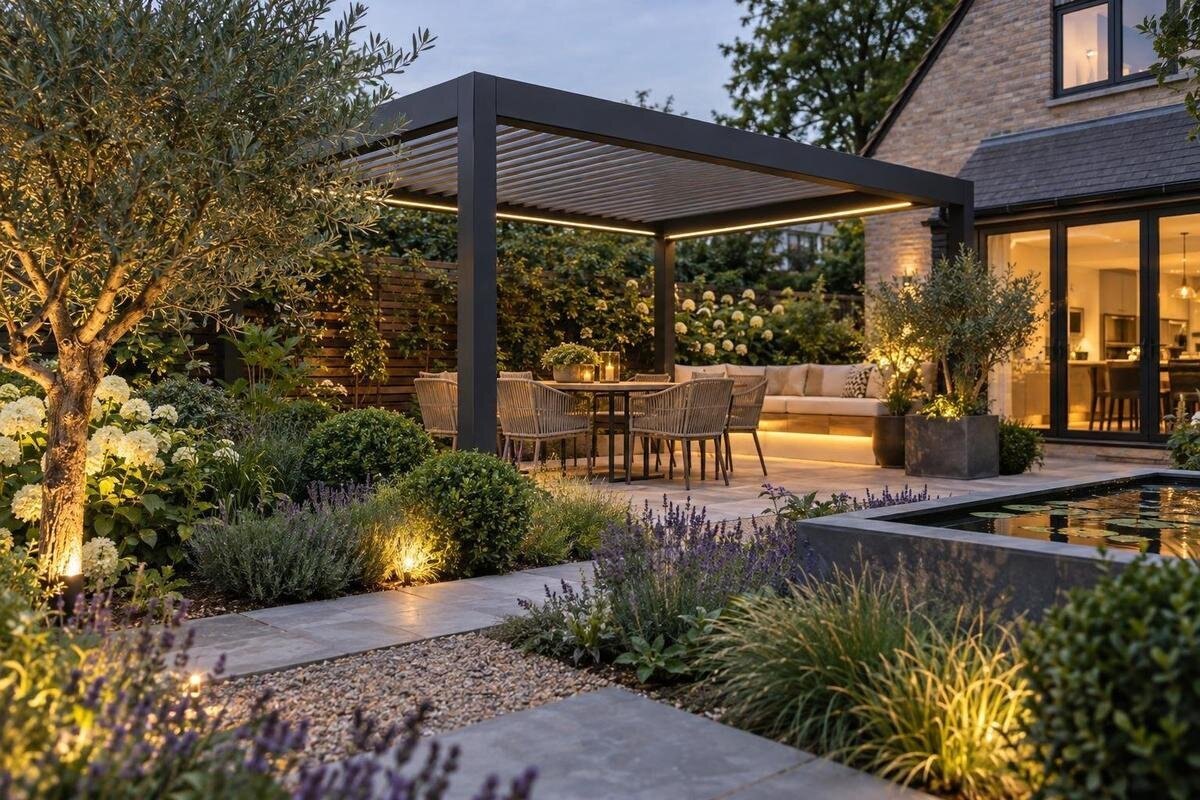
Pergola and garden design
To make a garden feel like a courtyard, plan the ground around the pergola as carefully as the frame. A connected surface, planted boundaries and clear routes can define an outdoor room without turning the rest of the garden into a dead end. Record levels and water movement first, then coordinate paving, planting and seating on a measured plan. That way, the structure belongs to the garden rather than sitting in it as an isolated object.

Start with the whole garden plan
A garden courtyard begins with a plan of the whole site, not a ring of paving around a frame. Measure the area where the pergola might sit and mark fixed points: house doors and windows, gates, existing paths, drains and downpipes, mature trees, boundary walls and changes in level. Note where water collects after rain and where people already cut across the garden. These details show which parts are already doing a practical job. A route or drain that must remain accessible is not spare space for a new border or seating area. Use a scaled sketch to record these constraints before settling the courtyard shape.
Draw an initial boundary that includes the space around the structure as well as the structure itself. Show paving, planting strips, seating and the route through the garden as separate zones; their edges may meet, but each needs a place on the plan. Check the proposed outline from the house and from the main garden entrance. A courtyard can be defined without being closed on every side: a gap in a planted edge or a surface continuing into the lawn can preserve a view and an easy way through. If the design looks convincing only in a top-down sketch, assess it from standing and seated viewpoints before fixing the layout.
Plan the uses before setting the footprint
List the activities the courtyard needs to support before settling its dimensions. Dining, a quiet seat, children’s play or a clear way to another garden area place different demands on the layout, and they do not all need a dedicated zone. Identify what happens most often and place it where it is convenient to reach, rather than automatically centring the pergola in the available plot. Note occasional uses that can share open ground. Think through the sequence too: carrying food out, sitting down, moving to another part of the garden and clearing away. A plan that works only while everyone is seated may leave no practical route when chairs are in use.
Give the main activity enough space before fitting occasional uses around it. Mark the furniture area separately from the route through the courtyard, so that the same patch of ground is not counted twice. If furniture has not yet been chosen, use the dimensions of likely pieces to test the layout. The Bloomcabin Pergola is one catalogue model to compare with the drawing; use dimensions confirmed for the chosen configuration rather than estimating from its name or a lifestyle image. Consider the surrounding space as part of the footprint too: a courtyard needs to accommodate its intended activities, not just its central structure.
Use paving to define the courtyard
Treat paving as both usable ground and a visual cue. A continuous surface can link the route from the house to the pergola; a change in direction, border or finish can mark where the courtyard begins without needing a wall. Decide which approach suits the garden before fixing the shape of the paved area. Align key paving lines with a house opening, garden path or seating edge where that produces a clean connection. At corners, draw how the paving meets planting or lawn rather than leaving a narrow leftover strip that is difficult to use or maintain. The aim is a deliberate transition, not simply the largest hard-surfaced area that fits.
Set the paving limits against verified model dimensions rather than assuming the structure’s area is the complete courtyard allowance. The listing for Bloomcabin Bioclimatic Pergola states a range from 9 to 24 m²; the surrounding plan still needs to account for a path, chair movement, planting and any transition to existing ground. Mark surfaces to retain and show how their edges meet the new paving. Choose a finish for its intended use and the care it will need, and have relevant construction and level details confirmed by a qualified professional. A product’s appearance does not determine the paving finish or how water will run.
Keep garden routes clear through the courtyard
Trace each regular route from its starting point rather than drawing paths as decoration. Include the journey from the house to seating, from a gate to the lawn and any onward connection to a shed or other garden destination where relevant. Mark the most direct line as well as a slower loop if you want one. If people must cross the seating area to reach the rest of the garden, reconsider the position of the courtyard or the path; a courtyard should not turn a normal trip into a detour. Keep its entrance clear enough that a pot, screen or open door does not make the route feel pinched.
A route also needs to work when the garden is in use, not only when it is empty. Check the position of dining chairs, movable seats, planted edges and any gate or door that opens across the path. If considering the Bloomcabin Wall Pergola, show access from the house and the onward route on the same drawing; do not let the structure’s position dictate an awkward way through. Where paths meet, make the junction clear and ensure there is a continuous walking surface rather than a gap that forces people across a planted border. Leave access for ordinary upkeep, such as reaching a border to prune or water it.

Set drainage and surface levels early
Plan run-off before deciding where the paved courtyard will end. Look at the garden after rain and note low points, areas that stay wet, existing drains and the direction water comes from roof downpipes. A new paved area can change where water travels, so avoid casually directing it towards a house, seating area or neighbouring plot. Do not assume that a single channel or a change in paving will resolve a problem without understanding the existing levels. If water already collects or its route is unclear, have the ground and proposed layout assessed by a qualified professional before fixing the design.
On the plan, distinguish the intended surface types and show how they meet planted ground and existing paving. Do not assume that a permeable surface, gravel or planting can take all the run-off from the surrounding garden; the ground and drainage arrangements matter too. Keep drain covers and access points visible and reachable, rather than hiding them under furniture or a dense border. For a wall-mounted Bloomcabin model, mark the relevant wall, downpipe and ground-level relationship on the same drawing. Its type alone does not establish how water will flow around the courtyard, so review the whole setting rather than treating the structure as a drainage solution.
Choose planting for the courtyard edges
Planting can define an outdoor room more softly than a continuous solid boundary. Decide which edges need to feel enclosed and which should remain open to the wider garden. A lower border may mark the paved area without interrupting a view, while taller planting can give a selected seating position more privacy. Choose plants for the site conditions and their mature spread, height, root characteristics, watering needs and maintenance. A young plant can leave a border looking empty at first, but its eventual size may narrow a path or crowd a seat. Use documented growing requirements when deciding how much room each planting area needs.
Draw the planting bed at its intended size and include space to reach in for pruning, watering and general care. Avoid treating an awkward leftover strip beside the paving as a suitable border if it will be difficult to maintain. Keep drains and other access points clear, and consider how seasonal growth will affect paths and views. If climbing plants are part of the idea, check the selected pergola’s product information before assuming that its frame can support them or that plants can be attached to it. Planting should help form the courtyard edge without taking over the circulation space or concealing a drainage issue.
Balance privacy with open views
Decide what needs screening rather than enclosing every side by default. A seat may need protection from a particular view, while the route through the garden benefits from staying visually open. Check sightlines from the house, from the main approach and from the seats themselves; a boundary that feels private while standing may look very different when viewed from a seated position. Existing walls, planting and screens can each contribute to the composition, but a solid edge around the whole courtyard may make it feel disconnected from the garden. Mark the specific views you want to retain as well as those you want to soften.
Plot the chosen arrangement for the Bioclimatic Pergola model on the same view plan as the seating and planted boundaries. This makes it easier to see whether the proposed location frames a useful view, interrupts one or leaves an open side towards the garden. Use height and spacing in the boundary planting to adjust the level of enclosure, and leave a clear gap where people enter or continue along a route. The result need not be symmetrical: a more open edge on one side and a planted edge on another can define the outdoor room while keeping it connected to the wider landscape.
Place seating without blocking movement
Use the actual furniture outline when deciding where seating belongs. For a table, show the chairs in both their tucked-in and pulled-out positions; for lounge seating, include the space needed to approach and leave each seat. Then check that a person can move between the entrance, seating and the rest of the garden without weaving through the furniture. A small shift in the table or a change in the direction it faces may keep a useful route open. Leave the space around seats practical to clean and maintain, rather than filling each gap with pots simply because it appears empty on the plan.
If different activities share the courtyard, draw each arrangement separately. For example, compare the everyday seating layout with the extra space needed when more chairs are brought out, then decide which items can be moved and where they will go. Compare the confirmed dimensions of the Bloomcabin Pergola model with both arrangements, rather than judging the fit only with the furniture tucked away. Identify which spaces must remain clear in either layout and which can accommodate occasional seating. A route that works for everyday use should not disappear when guests arrive. This helps you assess the courtyard as a usable space rather than a static furniture display.

Compare pergola types within the landscape plan
A wall-mounted or freestanding pergola changes how the courtyard relates to its surroundings, so consider the type alongside routes, planting and paving. A wall-mounted layout brings the house edge into the composition; check doors, windows, downpipes and the way people enter the garden. A freestanding layout needs a clear relationship with the approach path and the planted or paved edges around it. Neither type automatically solves a problem of drainage, privacy or circulation. Compare how each option works with the same intended courtyard uses, rather than changing the landscape plan just to make a model appear to fit.
The Wall Pergola product page identifies a wall-mounted model, but its name alone cannot confirm that a particular wall or layout is suitable. Use verified dimensions and product information to draw the proposed arrangement, and have the attachment requirements assessed by a qualified professional where needed. Keep the surrounding plan consistent as you compare options: show the same furniture, route, planting and surface limits for each. That makes it clearer whether a different type would genuinely improve the courtyard or simply shift a practical issue from one edge of the garden to another.
Put the whole courtyard on a dimensioned drawing
Before settling the design, bring its parts together on one dimensioned landscape drawing. Show the proposed pergola arrangement, the limits of each surface, the routes through the garden, existing drains and downpipes, and the intended direction of water movement. Add the outlines of seating and the planned size of planting areas, including their expected mature spread. Mark level changes and existing features that need to remain accessible. A drawing at a consistent scale helps reveal conflicts that can be easy to miss when the pergola, paving and planting are considered on separate sketches.
Add notes beside any part of the drawing that still needs confirmation, whether that concerns product dimensions, installation requirements, levels, drainage or planting needs. For the Bloomcabin Bioclimatic Pergola listing, record the chosen configuration so that everyone is working from the same proposal. Separate product questions for the supplier or installer from questions about ground levels and run-off for a qualified landscape or drainage professional. Update the combined drawing when those details are resolved, checking how each change affects neighbouring surfaces, borders and routes. This gives the pergola, paving and planting a coordinated layout before their boundaries are fixed, rather than leaving conflicts to be addressed separately.
Frequently asked questions
How can a pergola courtyard feel defined without being enclosed?
Use a clear change in paving, a planted edge or a screen on the side where you want more definition, while leaving an opening or visual connection to the rest of the garden. Check the effect from both the house and the seating area.
What should I measure before planning the paving?
Record the proposed pergola area, existing paths, doors, gates, level changes, drains and downpipes. Add the intended seating and the space needed to move around it, then draw where new paving meets existing surfaces and planting.
Can planting form the edge of the courtyard?
Yes. Choose plants for their mature size, growing conditions and ongoing care, not just their appearance when newly planted. Leave room for pruning and keep paths, drains and any required product access clear.
How do I plan run-off around the pergola?
Observe where water collects or flows after rain, and mark downpipes, low points and existing drains on the plan. Avoid assuming that a paving choice will solve drainage; ask a qualified professional to review unclear levels or water routes.
Should the pergola be centred in the garden?
Not necessarily. Place it in relation to how the courtyard will be used, the routes through the garden, the views from the house and the space needed for planting and seating. A centred position is only useful if it works with those elements.
When paving, water movement, planting edges and routes are planned together, the pergola has a setting that feels like a room while remaining connected to the garden. The strongest courtyard plan is not necessarily the most enclosed one; it is the one in which seating, access and landscape boundaries work together. Draw the full arrangement before confirming the structure, so the pergola contributes to the wider garden rather than competing with it.
