
Planning More Accessible Dining Under a Pergola
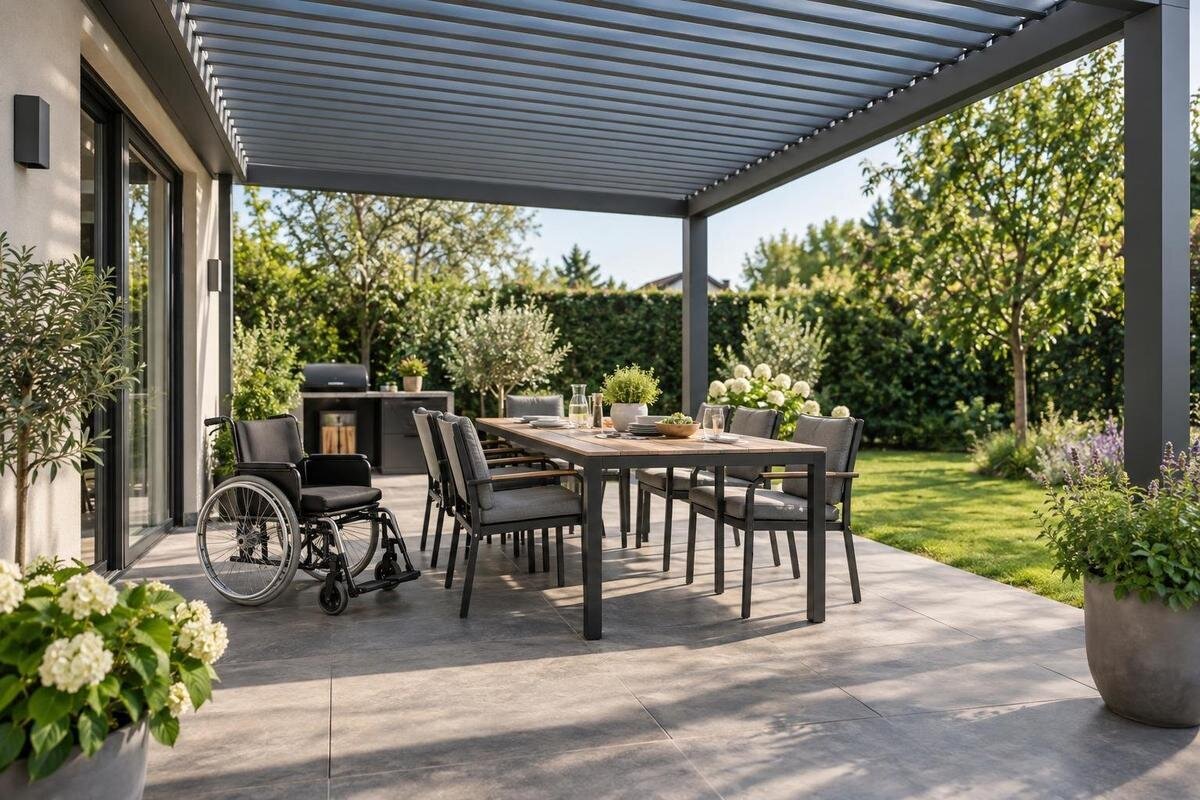
Accessible outdoor dining
Accessible outdoor dining under a pergola depends on more than a step-free doorway or a larger table. The route must remain usable when people approach, turn, pull out chairs and move away after a meal. Plan around the actual users and furniture, then test the arrangement on site before committing to a pergola footprint. This helps identify practical comfort issues; it does not establish that a design meets any local accessibility standard.

Define who will use the dining area
Begin by identifying who will use the space regularly and what they need to do there. A wheelchair user, someone using a walking aid and a guest who prefers a steadier route may approach or manoeuvre differently; an accessible layout must account for individual requirements. Ask each intended user which route they prefer, where they want to sit, whether they need room to turn beside the table and what makes getting in or out awkward. Include occasional guests as well as household members. Do not infer preferences from a diagnosis or mobility aid: the outdoor route, furniture and companions can all affect what feels workable.
Describe an ordinary meal from arrival to departure, including the parts that happen before anyone sits down. Note whether diners come through the house or garden, carry their own plates, serve one another, use a trolley, stay at the table after eating or move chairs to join a group. The layout needs to work when seats are occupied, not only when the terrace is empty. If users have different preferences, record the trade-offs rather than treating one person’s route as the default. Show where mobility aids, bags or serving items can be set aside without blocking access. A concise brief gives a designer or pergola supplier practical requirements to discuss; it is not a compliance assessment.
Map a step-free route from arrival to the table
Trace the route from the actual arrival point—not just the edge of the terrace—to the proposed dining position. If the usual approach begins at a house door, garden gate or paved path, draw the whole route and mark each opening and change in surface. Note steps, raised thresholds, slopes, grates, drainage channels, loose or uneven paving and narrow points. Include the direction in which a person approaches a doorway; an opening that looks wide on a plan may be harder to use if the wheelchair must turn sharply in front of it. A photograph of the current route can help keep the drawing focused on the entrance people actually use.
Step-free planning means checking the approach and exit, not simply creating a level patch beneath the pergola. Mark the usable door opening, the door swing, the route on each side and any place where someone can pause without blocking others. Check whether there is room to operate the door while positioned to enter or leave. A route that works inward can still be awkward in reverse if the table, chairs or wall prevent a turn. If considering a position beside the house, include Bloomcabin Wall Pergola in your layout comparison. Check the proposed configuration against the measured doorway, threshold and approach before fixing its position.
Allow space to approach and turn
Turning room is needed where a route changes direction: at the entrance, beside the table, around a post or on the way back to the house. Draw the route with arrows and mark each turn, rather than placing one circle in the middle of a plan. A wheelchair may roll straight to a table yet have no practical way to turn away when another chair is occupied. Include the return route and approach to the chosen seat; also check whether a user can pause or wait without blocking the only way through. This makes turning a task to test, not an empty area to assume.
Where possible, test the drawing with the person and mobility aid that will use it. The turning space needed depends on the aid, how it is manoeuvred and the user’s preferred direction, so a generic symbol cannot represent every user’s movement. If a trial cannot be arranged, label assumptions on the drawing and keep the layout adaptable. Include the occupied position of nearby chairs in the test, especially beside a change in direction. When considering Bloomcabin Bioclimatic Pergola, compare its confirmed dimensions and support positions with the turning area on your drawing. Show both the approach and return route so the comparison covers the complete movement.
Position the table for a usable approach
Set the table position after deciding where a diner using a wheelchair will approach. Depending on the user’s preference, access may be from the long side or from an end; either can be blocked by a leg, pedestal base, another chair or a nearby pergola support. Leave a clear route to the selected place without requiring other diners to stand up and rearrange the whole table at every meal. Consider whether the wheelchair user wants to sit beside companions or at the end, and make that choice with them rather than isolating the only usable place at the edge of the dining area. If the route reaches the table only through other seats, it may be awkward even if an opening appears on the plan.
Measure the actual table, including its base and the space beneath the tabletop. Check whether footrests can fit underneath, whether there is enough knee clearance beneath an apron or crossbar, and whether the base leaves a usable position at the chosen side. These details vary by table, so an illustration of open space around a generic rectangle cannot settle the question. Put chairs in their intended places and consider how the wheelchair can enter and leave without catching them. When comparing Bloomcabin Pergola, show the table base and the preferred seating position on the layout drawing, alongside the route leading to that place.

Measure the dining area with chairs in use
Measure the dining zone with the furniture you already own or intend to buy. Include the table’s full footprint, chairs pulled back for sitting down or standing up, and the space occupied by a wheelchair or mobility aid at its preferred position. Mark the actual chair backs when pulled out; a plan showing only legs tucked beneath the table understates how much room a meal uses. Include any serving trolley or side table used regularly, rather than trying to fit these items in later. If furniture has not been selected, use its stated dimensions as provisional information and label the assumptions clearly so they are not mistaken for measured items.
Use removable tape or another temporary marker to outline the table, pulled-out seats, approach and turning positions on the patio. Move through the sequence of sitting, serving and leaving, adjusting the outlines if a chair blocks the route. Include the usual number of people rather than measuring only an empty layout, and record the arrangement that works so it can be reproduced on the drawing. This gives you an occupied-furniture footprint to use when comparing pergola configurations. If the regular Bloomcabin pergola model is on your shortlist, overlay its confirmed dimensions and support positions on that footprint to identify any conflicts.
Keep circulation clear between doors and seats
Draw everyday circulation separately from the table footprint. Show the route from the house to the table, onward to any garden entrance and back out, including how diners pass when somebody is seated. A plan that leaves room for one wheelchair may still make other people squeeze past chair backs or force someone to reverse through a narrow gap. Keep door swings, paths to frequently used areas and the serving route in view. If food or drinks are carried from indoors, test where people cross rather than assuming movement will happen only along the edge of the pergola. The route should make sense in both directions and remain clear during an ordinary meal.
Mark fixed features as well as furniture: walls, steps, drains, posts, planters and storage all affect a usable route. A loose chair can be moved, but a plant pot or bin often becomes a permanent pinch point unless it has a planned place. Check the route after chairs are pulled out and after the table is set, not just on the empty patio. For a wall-mounted layout, compare the Bloomcabin wall-mounted option with the measured doorway-to-table route and confirmed support positions; attachment to the house does not by itself remove circulation conflicts. If chairs are moved for cleaning or storage, make sure their usual positions do not quietly narrow the route when they return.
Choose seating that can adapt
Choose seating to support the people who will use the space, not only to fill a fixed number of places. A combination of movable chairs and an agreed open position can make it easier to include someone who stays in a wheelchair, while a different user may prefer to transfer to a dining chair. Ask what arrangement is wanted; do not assume that a person will transfer or that a chair can simply be removed without affecting companions. If chairs are stored between meals, choose a spot that does not narrow the access route or require moving heavy items before every meal. Decide whether a preferred place should remain available in the everyday setup.
Work out which seats companions will use, whether anyone needs to get up without disturbing another diner, and where personal items or serving dishes can be reached without crossing the main route. If the table layout changes for a larger gathering, decide in advance which furniture can move and where it goes. Record both the everyday arrangement and the larger layout, keeping the preferred seating position available in each. When considering the bioclimatic pergola option, compare both furniture arrangements with the proposed configuration rather than assessing only the layout with fewer seats.
Fit pergola supports around the usable layout
Separate the pergola’s outer footprint from the clear area needed for dining. A support can sit where a chair needs to be pulled back, a wheelchair must turn or a person needs to pass; a wall, gate or existing drain can further reduce the usable space. Put the proposed supports and boundaries on the same drawing as the table, chair outlines, door swings and routes. Include existing fixed features that are easy to overlook, such as a downpipe or a gate that opens across the patio. Do not assume that a larger stated area automatically creates a better approach: the position and shape of the clear space matter as much as the headline area.
The Bloomcabin Wall Pergola range is listed in sizes from 9 to 24 m². That range is useful when comparing possible footprints, but an area figure does not show how the specific supports sit in relation to your doorway, table or turning space. Check the confirmed dimensions and support positions for the configuration under consideration, then overlay them on the measured furniture plan. If support locations are unclear, ask for those details before choosing. Use the size-and-layout discussion to identify any conflict between a proposed support and the space reserved for a chair, an approach or a turning movement.

Check surfaces and visibility along the route
A step-free route can still be difficult if its surface shifts, rocks under a wheel, has a sudden lip or is repeatedly blocked by loose mats and cables. Assess the full route from the arrival point, not only the part under the pergola. Note how paving joints, drain covers and changes in finish feel to the people and mobility aids using them; do not assume every surface that looks level is comfortable to cross. Keep doormats, bags and portable furniture out of the clear path. Notice whether water collects after rain, and have any proposed surface or threshold changes assessed rather than improvising a ramp or cover.
Check the area in the conditions in which it will be used, including evening meals and after rain. From seated and standing positions, make sure the entrance, furniture edges and any level changes can be seen; avoid trailing leads or objects that are difficult to notice in the route. A pergola should not be assumed to make the approach weatherproof or provide adequate lighting. If the project includes changes to paving, drainage or fixed lighting, ask an appropriate qualified professional to assess the design and installation. These are practical planning prompts, not technical or regulatory specifications.
Test the arrangement before choosing a configuration
Before finalising a configuration, set out a full-scale trial using the actual table and chairs where possible. Mark the proposed supports and door swing, leave seats in their ordinary positions, then test the route with intended users: enter, turn, approach the preferred place, sit or manoeuvre as wanted, and leave while other seats are occupied. Also repeat the trial with the table set and with serving items in their usual places. If the layout changes for a larger gathering, try that arrangement too. A drawing may appear clear, while a physical test reveals that a chair leg, threshold or turning direction changes the route.
Write down what worked, what had to move and which dimensions still need confirmation. Use these notes to update the site and furniture plan before comparing it with the chosen pergola configuration. You can include the regular pergola configuration in that comparison, checking that its confirmed dimensions and support positions leave the tested routes clear. Keep any unresolved layout assumptions visible rather than treating the trial as a final approval. If the project must meet accessibility or building requirements, have the applicable criteria reviewed by a qualified local professional or relevant authority; user testing and a layout that feels comfortable do not demonstrate compliance.
Frequently asked questions
Is there a standard minimum clearance for an accessible dining area?
This guide does not set a universal figure. The space needed depends on the route, mobility aid, furniture and any requirements that apply to the project. Measure the movement the intended users need, and ask a qualified local accessibility professional to check relevant criteria. Do not treat a guessed measurement on a sketch as proof of suitability.
How can I check whether a wheelchair can reach the table?
Test the preferred approach with the person and mobility aid that will use the space, where possible. Check that the wheelchair can get to the chosen place, that the table base and underside do not block the approach, and that there is a workable way to turn and leave. Repeat the test with other chairs in their usual positions.
Does a step-free route mean the pergola is compliant?
No. A step-free route is one practical part of the plan, but it does not confirm that the full design meets an accessibility or building requirement. Have the applicable criteria reviewed by a qualified local professional or relevant authority if compliance is required.
Should the table sit in the centre of the pergola?
Not necessarily. A central position can leave too little room for a turning movement or a route past pulled-out chairs. Place the table according to the preferred approach, the support positions and the routes people need to use, then test the layout with the furniture in place.
Will a larger pergola guarantee more accessible dining space?
A larger stated area does not by itself guarantee a usable route or table approach. The shape of the clear space, support positions, doors and furniture all matter. Compare confirmed configuration details with a measured plan of the occupied dining area before deciding.
Plan the arrival, turning points, table approach and occupied-chair footprint as one continuous arrangement. A trial with the people who will use the space can reveal whether the route remains practical through a meal, while a confirmed configuration drawing clarifies what space the pergola leaves. Keep user comfort testing and formal accessibility review as separate tasks: both may matter, but one cannot stand in for the other.
