
Tracing an Overflowing Pergola Gutter Step by Step
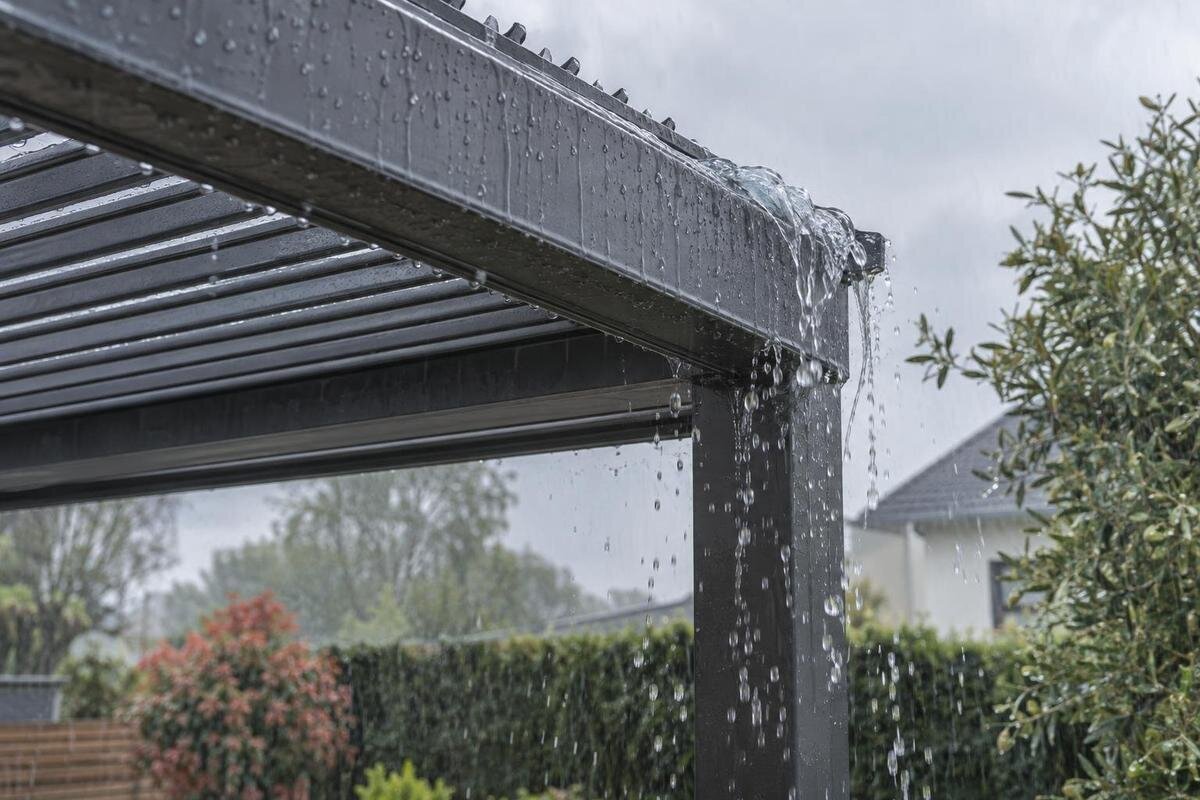
Pergola drainage
An overflowing pergola gutter is a symptom, not a diagnosis. Water may be held back by debris, slowed at an outlet or downpipe, or spilling because the drainage arrangement is reaching its model-specific limit in the conditions. A leaking joint or water arriving from another surface can look similar. Begin by finding the first point where water leaves its intended route, then follow the route from roof to discharge, one section at a time. This helps separate visible obstruction from downstream restriction and from a limit that must be checked against the exact pergola design.

Locate the first point where water escapes
Observe the pergola during rain only from a safe position. Look for the earliest point where water leaves its intended route, rather than the largest puddle afterwards. It may spill over a channel edge, emerge from a seam, escape at a gutter-to-outlet connection, or appear lower down after travelling through a post or downpipe. The landing point can be some distance from the source, so follow the water upwards visually where possible. Note which side is affected and whether water is visibly standing in the channel. A wide photograph of the route and a closer image of the first wet point can preserve details that are easy to miss later.
Record when the overflow starts: as soon as rain reaches the roof, after sustained rain, or during a brief burst. Note the wind direction only if you can do so from a sheltered, safe position, and whether rain is falling directly or being blown sideways. These observations do not establish a capacity limit, but they help distinguish a recurring obstruction from a symptom tied to particular conditions. If several points spill, note whether they start together or in sequence. Do not climb onto the pergola, lean over a wet roof or inspect concealed channels during poor weather. If the first escape point cannot be seen safely from ground level, leave elevated inspection to a competent installer.
Confirm the drainage route for the exact pergola
Before clearing anything, identify the route the water is meant to take. Pergolas do not all use the same arrangement: drainage may run along a visible channel, be concealed within a frame or post, or differ with the roof type. Use the assembly or drainage drawing for the exact model and installed configuration to trace the route from the roof surface to the channel, through each outlet and down to the discharge point. Do not infer the design from a product photograph or assume that a neighbouring model has the same internal path. Note whether the visible route is external or passes through a support, as that affects what you can inspect.
Record the model name, roof type, any fitted screens or enclosure, and changes made since installation. The Bloomcabin Pergola product listing can help confirm the product family name. Match that identity to the assembly or drainage drawing for the installed configuration, then mark the outlets, internal channels, guards and openings on your copy. This gives you a route to follow during the checks below, including any sections you cannot see directly. If the route disappears into the frame, do not probe it with wire or remove covers to find out where it leads. If the drawing and visible arrangement appear to differ, ask the installer to identify the correct diagram.
Inspect the gutter channel for a local obstruction
Once you understand the intended route, look along the visible channel for material that could hold water back. Leaves, seed pods, grit, fine dust, insect remains or a compacted film can collect at a corner or just before an outlet. A short obstruction may make the section upstream spill even when the rest of the channel looks clear. Check accessible low points and the areas around visible openings, but do not assume that a clean-looking top proves a concealed outlet is clear. Residue, a water mark or debris caught against an opening can help you locate where material has gathered. Standing water after rain is not conclusive on its own, because the intended arrangement varies by model.
This is a fault-led inspection, not a replacement for a routine annual care schedule. If the instructions identify an area as user-accessible and the material is loose, remove it only by the approved method and when the structure is safe to approach. Do not push a stick, wire or metal tool into an outlet, scrape seals, take off covers or use a pressure washer to force material through hidden passages. These actions can shift a blockage deeper or damage parts that are not intended to be handled. Photograph what you find before clearing it, then note whether the overflow returns; a repeated symptom after accessible debris is removed means the investigation should continue further along the route.
Check the outlet where the channel narrows
At the point where the gutter or channel narrows into an outlet, look for debris caught at the opening, a visibly obstructed slot, or residue on a fitted guard. Water standing above the opening while the adjacent channel spills can point to an outlet restriction, especially if the rest of the channel appears clear. A partial blockage may still pass some water and look clear once the rain eases, so observe during natural rain only if you can do so safely. Do not reach into flowing water or remove an integral guard simply to see behind it. If water enters an opening but little appears at a visible discharge, record that as a clue for the next check.
Use the drainage drawing to confirm whether the outlet is meant to be open, screened or connected to a concealed passage; do not assume that every pergola has one outlet or a visible downpipe. For a Bloomcabin Bioclimatic Pergola, match the drawing to the installed configuration rather than inferring the outlet arrangement from the product image. Compare what is happening on both sides of the opening: water held in the channel and water emerging at the discharge provide different clues. A blocked outlet mouth and a restriction farther down can produce similar overflow at the roof edge, so continue to the discharge point rather than treating this check as a complete diagnosis.

Follow the downpipe to its discharge point
Where the downpipe is visible, follow every accessible section from the outlet to the point where water is released. Look for a disconnected joint, a displaced bend, a dent or pinch, or debris at the lower end. If the pipe empties into a separate drain, tank or gully, consider whether that receiving point might itself be full or restricted. Where the pipe discharges but water immediately pools around its foot, note that separately: the exit may be clear while the receiving surface cannot carry water away. If you can observe it safely during rain, record whether water reaches the final discharge rather than relying on how the pipe looks when dry.
Some systems route water through a structural post, so the pipe may not be visible from top to bottom. Do not loosen panels or dismantle a post to investigate a suspected blockage. If you have a Bloomcabin Wall Pergola, follow the diagram for that installed configuration rather than assuming its route matches a freestanding model. Note where the route becomes concealed and where it becomes visible again. If the visible outlet is clear but little water emerges, record this as a downstream clue rather than trying to force water through the system. If a separate surface drain is involved, ask an appropriate drainage professional to inspect it.
Compare the flow with rainfall and roof settings
Once visible restrictions have been considered, compare the overflow with the amount and timing of rain. A channel may appear to cope in light rain yet spill during a heavier burst. That can point to a limit in the drainage arrangement, but it does not establish a fault: a partial blockage can become apparent only when more water arrives quickly, and wind can change where runoff lands. Note whether the overflow begins immediately or after a delay, whether one edge or several are affected, and whether the roof is in the same position each time. Record the setting only where the roof design has adjustable parts.
Check the model-specific drainage diagram and weather guidance for any stated conditions or limits; they are more useful than a generic claim about what a pergola gutter should handle. For a Bloomcabin Pergola, the relevant guidance must match its size, roof arrangement and fitted accessories, not simply the product family name. There is no universal storm threshold that can diagnose every pergola. One overflowing event neither proves a defect nor shows how the same setup will perform in different weather. Keep the distinction clear between a restriction you have observed and a possible limit that still needs to be assessed. If the applicable guidance is not available, ask the supplier or installer which document applies.
Check joints and seams for a separate leak
If the channel and visible outlets seem clear, check where water could escape before it reaches the discharge: channel joins, end caps, seams, connectors and points where the gutter meets the frame. A wet trail beginning at a joint while the neighbouring channel is not visibly full may indicate a leaking connection rather than an overflow. If water escapes only after the level rises, the same joint may be exposed by a restriction or heavy flow. Neither pattern proves the cause by itself. Photograph the first wet point and the route below it; the stain or puddle can be some distance from the opening through which the water escaped.
Look for a visible gap, a displaced part or damage without pressing sealant back into place or adjusting screws. A temporary patch can conceal the original route and direct water into less visible sections. For the model shown in the Bioclimatic Pergola product details, as for any other pergola, repair instructions must match the actual joint and installed configuration. Distinguish a visible gap from a wet seam with no obvious damage when recording your findings; both are worth showing to the installer, but neither justifies an improvised repair. Keep photographs of any gap or movement before work begins, and avoid generic sealant unless it is specified for the relevant part.
Check for runoff arriving from another surface
Consider whether water is reaching the pergola from outside its normal roof path. An adjoining roof edge, wall junction or nearby surface may direct extra runoff towards the channel; wind-driven rain can also reach a frame or connection from the side without first overflowing from the gutter. Look above the first wet point for a separate outlet or runoff line, and note whether its flow starts at the same time. If water begins at a wall or nearby roof, tracing only the pergola gutter will miss part of the source. Keep the two paths distinct in your notes: water collected by the pergola and water arriving from elsewhere.
Record any fitted side screens, panels or other enclosure and confirm that the configuration is approved for the specific structure. An added enclosure can change where rain reaches the roof edge or frame, so do not assume that instructions for an open arrangement apply unchanged. With a wall-mounted Bloomcabin pergola, include the adjoining wall and roof edge in your observations, while using the instructions for the installed arrangement to trace its drainage. If an adjoining building surface appears to be the source, have that connection assessed as well as the pergola drainage. Do not redirect water temporarily during diagnosis, as that can hide where it first entered the system.

Compare observations across rain events
If the cause remains unclear, compare observations from more than one rain event when it is safe to do so. Keep notes on when overflow starts, its first location, whether water reaches the final discharge, the roof setting where relevant, and whether an accessible obstruction was recently cleared. Describe the weather in ordinary terms, such as a brief burst or sustained rain, and record wind direction if it is safe. Comparing similar conditions is more informative than comparing a short shower with prolonged heavy rain, because the amount and path of water reaching the drainage system can differ.
Change only one factor between observations. For example, document the system as found, then compare it after a permitted, accessible obstruction has been removed. Do not use a hose, pressure washer or artificial flooding unless the instructions for that exact model specify a test method; forced water can produce an unrepresentative result or enter places ordinary runoff would not. If you use the Bioclimatic Pergola listing to identify your model, keep the installed configuration in the same record so observations from different roof settings or accessories are not confused. If repeated observations show overflow despite a clear visible route, give the record to an installer rather than increasing the flow to prove a point.
Choose a remedy and know when to seek help
If loose debris is in an accessible area and the instructions allow it, clear only that material using the stated method, then observe whether the symptom returns in comparable conditions. Do not cut, drill or enlarge an outlet, remove an integral screen, seal a designed opening or alter the frame to increase drainage. Such changes can affect a model-specific route and make the original cause harder to identify. If the blockage is concealed, returns quickly or involves a connected building drain, arrange an appropriate professional inspection instead of pushing material further in. Stop if the structure is damaged, moving or difficult to access safely.
When asking an installer or supplier for help, provide the exact model and configuration, the first point where water escaped, the weather and roof setting, and whether water reached the final discharge. Include clear photographs taken from a safe position. If you refer to the Bloomcabin Pergola product details, also identify the installed version and any later changes; the listing alone does not describe your installation. Separate what you saw from what you suspect: for example, report that little water emerged rather than stating that a concealed pipe is blocked. Ask whether the observed behaviour fits that configuration and which part of the route needs inspection. This gives the installer a specific problem to investigate.
Frequently asked questions
How can I tell whether the gutter or the downpipe is blocked?
Water or debris held in the channel before the outlet can point to a gutter or outlet restriction. A clear channel with little water emerging from the visible discharge may point further down the route. These are clues, not proof: concealed sections and the receiving drain can also affect flow.
Why does the pergola gutter overflow only during heavy rain?
A partial blockage may pass water in light rain but restrict the flow during a heavier burst. If the route is clear, the drainage arrangement may be reaching a model-specific limit in those conditions. Compare observations with the guidance for the exact model; there is no universal rainfall threshold for every pergola.
Should I use a hose to test the drainage?
Do not use a hose or pressure washer unless the instructions for your exact model give a specific test method. Forced water may reach the system at an unrepresentative rate or enter parts that ordinary runoff would not. Natural-rain observations are safer and more useful for this diagnosis.
What if the gutter looks clear but water still spills?
Check the outlet, any visible downpipe and the point where water is discharged. A blockage may be concealed, the receiving drain may be restricted, or water may be escaping at a joint. Also consider whether runoff from a nearby surface is reaching the pergola. Follow the route rather than assuming the gutter itself is at fault.
When should I ask an installer to inspect the pergola?
Arrange an inspection if the drainage route is concealed or unsafe to access, overflow returns after accessible debris has been cleared using the permitted method, or you can see damage, movement or a gap. Share the exact model and configuration, photos taken safely, and notes about the weather and where water first escaped.
The clearest diagnosis comes from following water from the roof to its discharge point, not from repeatedly clearing the same visible channel. If the gutter and outlet look clear, continue checking the downpipe, receiving point, joints and possible runoff from nearby surfaces. Only compare performance with model-specific guidance after considering those restrictions. A record of the first escape point and the conditions when it appears gives an installer much more to work with than the general observation that the pergola gutter overflows.
