
Creating Dining and Lounge Zones Under One Pergola
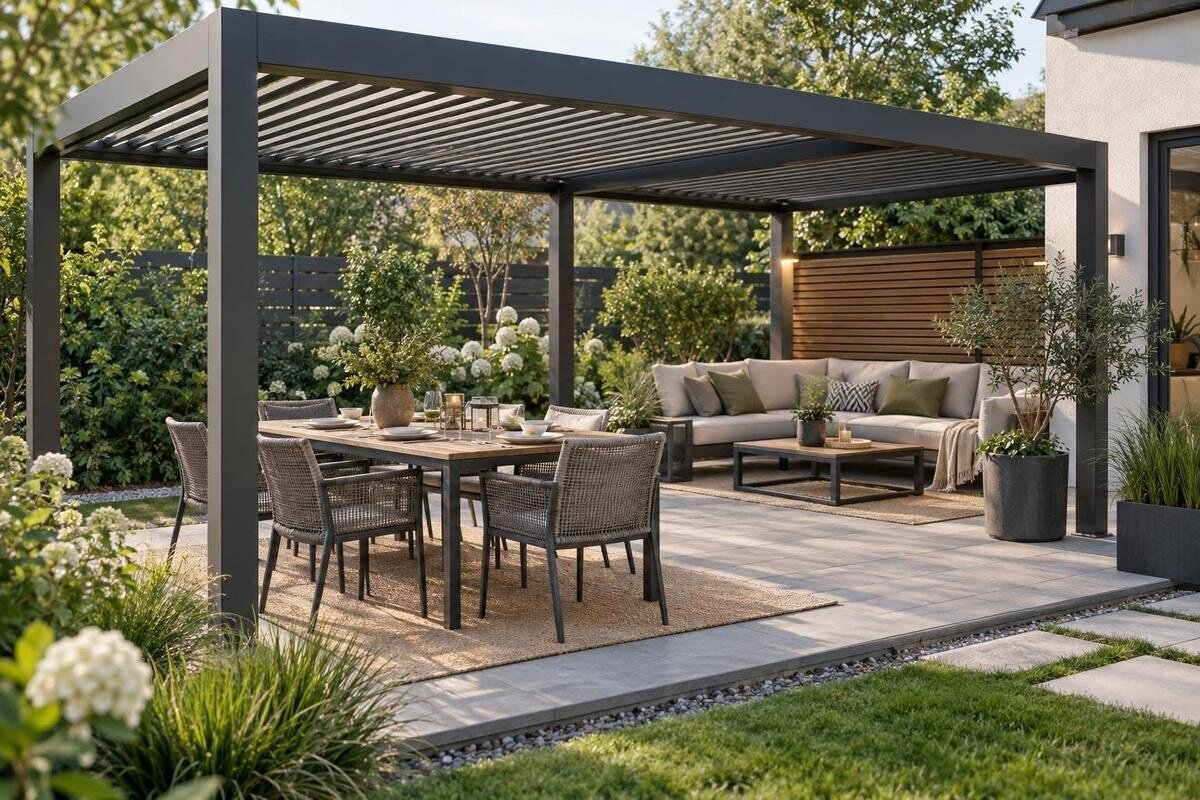
Pergola layout guide
Dining and lounge seating can share one pergola when the plan accounts for both groups in use at the same time. The challenge is not only fitting a table and sofa beneath a roof: people also need room to pull out chairs, serve food, move between the house and garden, and pass one another without crossing the middle of a meal. Measure furniture in its working positions, then draw the routes around it. If the plan works only with every chair pushed in, it is not ready.

Plan for both activities to happen at once
Begin by describing a normal occasion when both areas will be in use. Note how many people usually dine outdoors, whether anyone stays on the lounge seating during the meal, and what else happens at the same time: carrying dishes, moving between the house and garden, supervising children or bringing a drink to the sofa. Include furniture that remains in place, not only the table and main seats. Side tables, footstools and spare dining chairs occupy real space. A plan for regular use is more reliable than one designed around a rare large gathering. If weekends follow a different pattern, record that separately rather than letting an occasional party dictate every day’s layout.
Next, rank the needs that cannot be compromised. At the dining table, people may need to reach each chair without asking a seated guest to move; in the lounge, seats may need to face one another or a particular view. Mark pieces brought out only for visitors as temporary, and decide where they will go at other times. If weekday use and entertaining need different arrangements, identify which one must work without moving everything. This brief should come before choosing a roof size. Use it when considering Bloomcabin Bioclimatic Pergola so that the comparison reflects how you intend to use both seating areas.
Measure furniture in its occupied position
Measure the dining table at its widest and deepest points, then include chairs in the positions where people can sit down and stand up. A chair drawn tight to the table gives a misleading footprint: pull it back as far as someone would in ordinary use, and allow for a seated person while another passes if that is part of the routine. Do the same with the sofa, lounge chairs, coffee table, stools and side tables. Include a footrest when it is used, and note whether any piece regularly moves between the two areas. Item dimensions, a tape measure or a full-size outline on the terrace can all help.
Write the measurements beside each item and sketch the actual arrangement rather than representing the sofa as a vague box. The Bloomcabin Pergola listing states area options from 9 to 24 m², but that range is not a furniture plan: a long, narrow footprint and a squarer one can accommodate the same pieces in different ways. Use the area as an initial catalogue comparison, then obtain the exact width and depth of the configuration under consideration. Bloomcabin Pergola is one reference point; the fit still depends on your furniture and routes. Do not substitute a total-area figure for those dimensions.
Place the table and lounge according to how they are used
Try the dining and lounge furniture in at least two relative positions on paper: side by side, or one beyond the other along the pergola’s length. Side by side may keep both settings close, but it raises the question of chair pull-out room; front to back can save width but may send people through one zone to reach the other. Neither arrangement is automatically better. Compare each with the measured footprint, openings and routes you need. Mark every sketch as a concept, not a standard plan, because terrace and furniture dimensions vary. You can also test an offset arrangement if existing features make a straight layout awkward.
Consider what each activity needs from its position. A table nearer the kitchen door may shorten serving trips, while lounge seating may work better towards a view or a quieter edge; neither is right if it blocks a doorway or sends traffic through seated diners. On each sketch, mark the regular approach to every chair, the view from the lounge and the route back to the house. A small rotation of the table or sofa may improve these relationships without changing the total area. Compare the drawings rather than relying on a symmetrical arrangement. If serving and lounge access depend on the same narrow strip, adjust the layout before choosing furniture.
Keep routes clear between the house and both seating areas
Draw every route people use before adding decorative details. Start at the doors from the house, trace the trip to the table, lounge and garden, and show any door leaf, step, drain or fixed feature that occupies the same space. A route that looks clear on an empty sketch can disappear when dining chairs are pulled back or a door is left open. Mark where people naturally enter and exit; they should not need to cross the centre of a meal simply to reach an outdoor seat. Check sliding or hinged doors in their actual positions, and include a side-gate route if it is part of ordinary use.
Check the routes with people in their usual positions, including a seated diner and someone carrying plates. Avoid using the strip behind occupied chairs as the only way to reach the lounge, and do not route everyone through the gap between conversation seats. There is no one clearance number that suits every household: judge the path with your actual furniture and movement needs. If considering Bloomcabin Wall Pergola, pay particular attention to where the route meets the house. Mark the wall and door positions on the same sketch, including the space needed to open doors. A path should still make sense when two people meet, not only when one person walks through an empty space.

Allow room for serving and chair movement
Dining needs more than the table rectangle. Account for chair backs when people are seated and when they stand, and identify where food and drinks arrive from. If someone serves from the side, keep that side reachable; if everyone serves themselves, decide where plates can be set down without using a lounge seat or blocking the route. Include a sideboard, trolley or extra chair only if it belongs to the routine, but once included it needs its own footprint. Check whether serving requires passing behind the sofa or through the lounge conversation. The dining setting should not depend on clearing an occupied seat before food can reach the table.
Walk through a typical meal while the lounge is occupied: carry a few plates along the route you expect to use, pull out the dining chairs, and ask someone else to pass. This reveals conflicts that an area total will not. A chair may prevent access to another seat; a serving path may cross the lounge; or the table edge may become a pinch point when someone stands. If so, test a different table orientation or zone position before reducing the lounge to unused display seating. Repeat the exercise for the usual number of diners and a common guest arrangement.
Compare the furniture plan with the pergola footprint
Overlay the furniture drawing on a plan of the pergola configuration under consideration. Use the exact outer dimensions and mark support positions, edges and any restrictions shown in the plan or supplier information. These details let you see whether an apparently convenient seat position conflicts with part of the structure. If an important dimension is missing, request it rather than treating the whole outline as unobstructed space. Keep the furniture at the same scale as the pergola and include the pulled-back chairs. This comparison should show where each group sits within the footprint, not merely whether the table and sofa fit somewhere inside its boundary.
Check the arrangement in both directions. Can dining chairs be pulled out without touching lounge seats? Does the coffee table leave room to get into the sofa? Can someone move from the house to the garden without stepping around furniture? If the outline leaves a gap too narrow for your household, identify which furniture position causes the conflict. Compare the regular pergola configurations using this same drawing, changing the outline to match each option’s exact dimensions. Note whether the change improves access to both groups or merely gives one group more room at the expense of the other.
Check changing shade at the table and lounge
Shade is not identical at every seat or every hour. Think about when lunch is served and when the lounge is most used, then note where direct sun falls on the table and on people’s faces at those times. Observe the terrace at more than one time of day if possible; shadows from nearby buildings and the pergola itself move. A setup that feels comfortable during a morning meal may put afternoon loungers in direct sun, or the reverse. Draw the actual seat positions on your sun notes, not just the roof outline, and repeat the check at different times of year if you use the terrace year-round.
When reviewing the Bloomcabin Bioclimatic Pergola details, confirm the roof configuration and any documented operation or coverage for the exact option, then judge it against your location and intended use. Open sides may also allow low-angle sun to reach seats, so consider whether dining and lounge areas need different positions at breakfast, lunch or later in the day. Treat any separate screens or side elements as additional choices unless the product information confirms they are included. If one area has a greater need for shade, make that clear in the plan rather than assuming that both groups will be equally shaded throughout the day.
Define the zones without blocking movement
Separate the two settings visually without creating a physical obstacle. Turning lounge seats towards one another and arranging dining chairs around the table can make the uses clear even when there is no partition. A small side table or an outdoor-suitable rug might mark a transition, provided it stays secure and does not narrow circulation. Large pots and screens need a careful place on the drawing: a border that looks attractive can obstruct a doorway, hide the route or reduce the space needed to pull a chair back. Try moving the furniture first; it may define the zones without adding another object.
Think about sightlines as well as appearance. A lounge seat facing directly into the back of a dining chair may feel like overflow seating, while chairs angled towards one another can give the lounge a clearer identity. Leave a natural gap between groups so a person can pass without cutting between people talking. When considering the wall-mounted Bloomcabin model, include the wall and openings in this visual check. Look from the house towards both groups and from each lounge seat towards the other seats. Decide whether a proposed screen or large pot actually helps define the area, or simply hides an awkward route that needs resolving in the furniture plan.

Compare product configurations against the same drawing
Once the sketch works, use it as a consistent basis for comparing candidate configurations. Keep the furniture positions, clear route and site features on each version, and draw every option at the same scale. This makes it easier to see what changes between configurations without accidentally making one look more spacious by shrinking the furniture or omitting a chair. Include Bloomcabin’s regular pergola options in the comparison using the exact dimensions of each configuration being considered. Where two outlines accommodate both groups, note which gives easier access to individual seats and which requires more furniture to move when guests arrive.
Keep the remaining product questions beside the relevant drawing: any dimensions still needed, support positions or restrictions not yet shown, roof details relevant to the shade you need, and what is included in the selected configuration. Record the answers against each option so that you compare like with like rather than relying on memory. If awkward boundaries, doors or level changes leave a placement question unresolved, a layout consultation or qualified professional can help assess the drawing and site conditions. The aim is to identify which configuration preserves the working arrangement, and where choosing another would require a specific compromise.
Try the layout at full scale
Before settling on a footprint, mark the furniture outlines on the actual terrace with removable tape or temporary markers, then put the pieces in place if available. Sit down, pull each chair out, stand, turn with a plate and walk the route from the house to the garden while the lounge seats remain occupied. Ask the people who will use the space to try it, including anyone who would find a tight turn or an unnecessary step around furniture difficult. A practical test catches awkward movement that a neat plan can hide. Note the places where someone instinctively sidesteps.
Record what needs to change: a table moved away from the door, a coffee table shifted, or a route that needs more clearance. Repeat the test after moving one group rather than changing every item at once. If testing a layout for a particular Bloomcabin Bioclimatic Pergola option, keep that configuration’s outline marked while you make adjustments so the furniture does not gradually drift outside the planned space. Check that usual storage and access remain practical when the furniture is left where it normally stays. Keep the successful arrangement on your final drawing, including the chair positions used during the trial, rather than recording only the tidier positions with every chair pushed in.
Frequently asked questions
Is there a standard gap between dining and lounge seating?
There is no single gap that works for every arrangement. Start with the route people actually use, then test it with dining chairs pulled back and lounge seats occupied. If someone needs to pass between the groups, check that the route feels comfortable for your household and does not cut through the middle of a conversation.
Can a pergola with an area of 9 m² fit both zones?
The area figure alone cannot answer that. Bloomcabin product information lists area options from 9 to 24 m², but the footprint shape, furniture dimensions, chair movement and circulation all matter. Draw the actual table and lounge furniture inside the chosen footprint, including the route people will use, before deciding.
Should the dining table be closest to the house?
It may be convenient if food and drinks will often be carried from the house, but it is not a rule. Check that the table does not obstruct a doorway or place diners across the main route to the garden. Compare the serving path with the way people reach the lounge.
How can I define the two areas without adding a screen?
Furniture orientation can do much of the work. Arrange lounge seats towards one another and dining chairs around the table, then leave a clear transition between them. A side table or outdoor-suitable rug can help mark the change, as long as it does not obstruct the route or door access.
What should I confirm before choosing a pergola model?
Check the exact configuration’s outer dimensions and any support positions or restrictions shown in its plan. Confirm the roof details that matter for your intended shade, what is included and whether the layout suits the site. If site conditions are complex, ask a qualified professional to review them.
Dining and lounging coexist most comfortably when neither is treated as spare space: both sets of seats can be used while a meal, conversation and movement to the garden happen at the same time. The practical test is an ordinary busy moment, not an empty terrace. When the drawn plan and full-scale trial leave each person room to sit, move and reach what they need, the chosen footprint is better matched to daily outdoor living.
