
Planning Pergola Lighting for Meals, Reading and Evenings
Pergola lighting guide
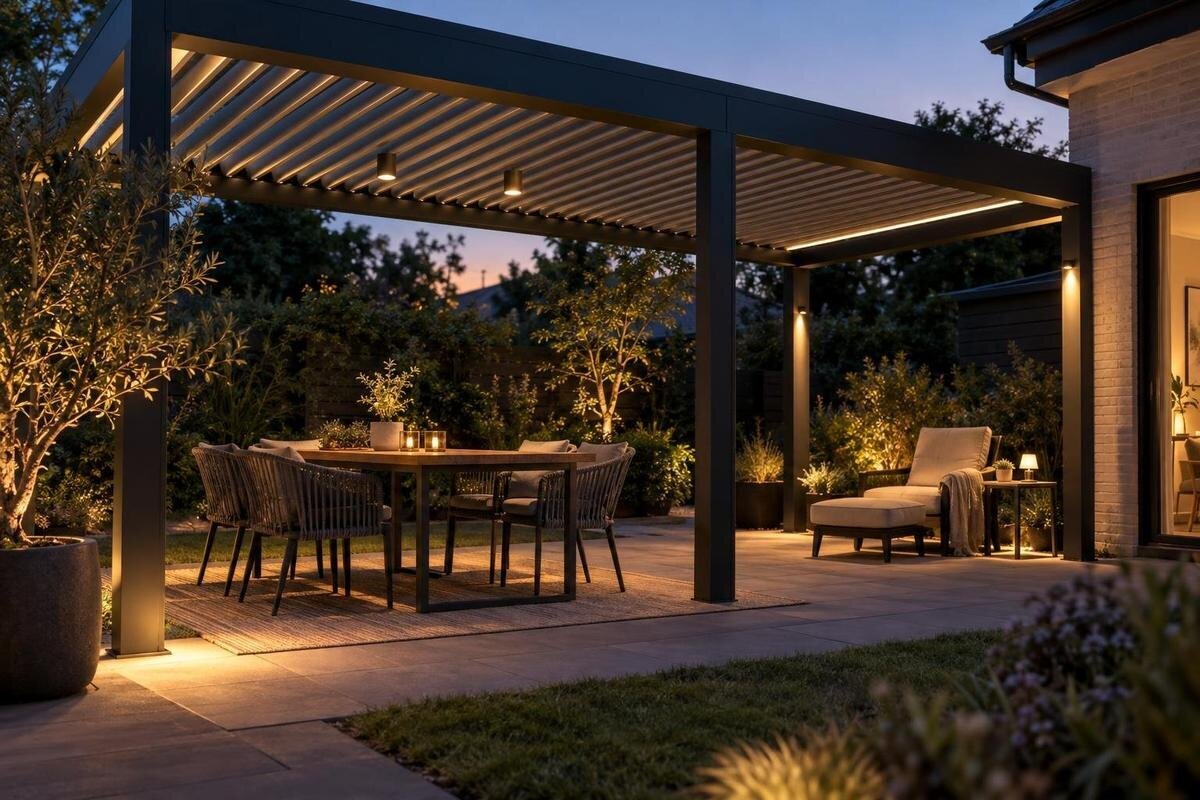
Good pergola lighting is planned around the people and tasks beneath it, not around a row of fittings on a catalogue page. Map the dining table, reading seat and walking routes first; then give task and ambient light separate roles. A check from seated eye level, followed by confirmation of the exact outdoor fittings and approved mounting points, helps keep the final arrangement comfortable as well as practical.

Map the activities and furniture
Start with a measured, top-down drawing of the pergola and its immediate approach. Add the dining table, each regular chair, the reading seat, doors and the routes people actually use; include the space behind chairs where someone needs to pass or serve. If furniture changes between dining and lounging, make two layouts rather than forcing one arrangement to cover both. Note who might read while someone else eats, and mark fixed obstructions that could interrupt a clear route. This reveals which surfaces need useful task light, which routes need enough light for orientation, and where a bright source could sit in a direct view. Keep the drawing practical rather than decorative.
Mark proposed light positions as ideas, not confirmed mounting points. If the plan is for the Bloomcabin Bioclimatic Pergola, note the exact model and configuration so the supplier and a qualified electrical professional can work from the same information. The product page identifies the pergola but does not confirm included lighting or electrical provision. Label the dining, reading and ambient layers separately so their purposes remain clear if a position changes. Mark existing supply points for professional assessment without assuming that a fitting can be connected there. Distinguish confirmed details from open questions, and leave space for revisions. This keeps the furniture layout useful while the technical arrangements are being assessed.
Give the dining table even, comfortable light
At the dining table, plan light for the whole working area, not merely its centre. People need to see food, plates and serving items at each seat, and a bright patch in the middle can leave the ends in shadow. Note where dishes are placed and where someone stands to serve; those positions may change how shadows fall. If the table is extended or shifted for guests, sketch that arrangement too. Include any large centrepiece or other item normally left on the table, since the ordinary setup is what needs to work. Consider faces across the table as well as the surface, so a fitting does not shine straight towards one diner or make everyone look towards a bright point. Describe the result needed—a clear view of the table with comfortable sightlines—rather than prescribing an unverified fitting type.
With chairs in their normal positions, check from every usual seat and from the place where food is served. Notice whether a seated person casts a shadow across their plate, whether the ends receive useful light, and whether anyone sees the source directly. If you are considering the Bloomcabin Wall Pergola, show the dining layout in relation to the wall and the route used for serving. Review the intended arrangement rather than an empty terrace, and include any change in table orientation. Distinguish a problem affecting one seat from uneven coverage across the table, so the proposed solution addresses the actual difficulty. Check that diners can see one another comfortably as well as their plates.
Create a separate pool of light for reading
Reading needs its own task area, even if the pergola also hosts meals. Mark the chair, the reader’s usual posture, the page position and any side surface used for a book or drink. Aim for useful light on the page without a bright source in the reader’s forward view or a hard shadow from hands and book. Turning a chair slightly can change both the direction of useful light and the risk of glare, so draw its real orientation rather than simply marking a reading corner. Keep surrounding light in the plan too: the reader should be able to approach the chair, put down a book and get up again without relying on the reading beam alone.
Plan for how the seat is used: upright for a short read or reclined for a longer evening, and whether another person sits nearby. If the chair moves, check more than one position before fixing the plan; otherwise the light may suit an orientation rarely used. When planning around the Bloomcabin Pergola, identify the preferred reading-light position and ask whether it has a supported mounting option for that configuration. Do not assume that lighting is built in or adjustable. A portable lamp is not automatically suitable outdoors either; check its own rating and instructions. Include its cable or charging arrangements in the layout, keeping walking routes clear in accordance with the product guidance.
Use ambient light for the wider seating area
Ambient light gives the whole area a general sense of space and supports conversation and movement. It should complement the dining and reading tasks rather than compete with them. On the plan, mark places that need background visibility when no one is working at the table or page: the approach from the door, the gap between seats and the edge of the dining zone. Decide how much ambient light is useful while a task layer is on, then consider the scene with task light off. This helps avoid a layout in which one bright point does all the work or every source must be switched on for people to find their seats.
Look beyond the pergola footprint as well. Nearby windows, glass and the view towards the garden or terrace affect how the lit area feels, while the route to the seating area still needs to be easy to follow. Compare the intended evening scene from inside and outside the seating area, not just from underneath the roof. Keep a lower ambient setting available for conversation, and use a brighter task layer only where an activity needs it, if the selected equipment and controls support that arrangement. This is a check on useful contrast and clear routes, not a reason to light every part of the terrace equally.

Plan lighting scenes for a typical evening
Write down a few ordinary evening scenes before deciding how the layers should be controlled. For dinner, identify the table light and the background light needed for serving and conversation. For reading, add the local page light while retaining enough ambient light to move around. For a relaxed evening, decide which task lights can be off; for clearing the table, note when broader light is useful. Include the transition between activities, such as one person reading while others remain at the table. This short list tells an electrician whether the design needs separate groups or adjustable light. It also exposes a common mismatch: one all-on setting may suit setting up but feel unnecessarily bright once people are seated.
For each scene, note which lights should be on, off or dimmed, where supported, and where someone would need to operate them. This turns a general preference for a relaxed evening into a usable control brief. When considering Bloomcabin’s bioclimatic pergola, ask which lighting and control arrangements are supported for the exact configuration. Dimming, app operation and preset scenes are options to verify, not standard features implied by the product name. Describe the desired outcome in plain language: for example, the reader should be able to keep the page lit while the dining lights are off. Leave the choice of compatible electrical components to the qualified professional.
Check glare from every seated position
Glare is easy to miss on a top-down plan, so check the layout from each seat. Sit at the dining chairs and reading chair at their usual height, then look in the directions people naturally face: across the table, towards a book, towards the door and towards anyone speaking. Mark any proposed light that would appear directly in that view. Repeat with a relaxed or reclined posture if that is how the seat is used; the line of sight can change. Check both the person looking towards a light and anyone opposite them, because a source may be comfortable from one seat and distracting from another.
Consider what the light might reflect from: glass, a glossy tabletop or another smooth surface can return a bright image even when the fitting is not directly in view. Include these surfaces on the drawing rather than relying on a fitting count. For a layout using the wall-mounted Bloomcabin pergola, mark the nearby wall and glazing in relation to the seats. Where possible, assess the proposed arrangement in the real seating layout before committing; a daytime view of a fitting alone cannot show its effect after dark. Record which seat is affected and whether the bright source is seen directly or reflected. Check the approach too, since people also see the space as they enter.
Confirm where fittings may be mounted
Every proposed fitting needs a position that is approved for both the pergola configuration and the fitting. A beam, post or underside may look convenient, but appearance alone cannot confirm that it can be used or that a chosen attachment method is accepted. Mark the exact location and ask for documentation covering the specific pergola configuration and fitting. If the chosen model has moving or adjustable parts, check their full range of movement and the access requirements against the manual before selecting a position; this should not be assumed of every design. Leave room for servicing too, so a fitting can be reached as its instructions require.
Send the same sketch to the supplier and a qualified electrical professional, with the exact product name and proposed fittings. For the Bioclimatic Pergola model, request documented mounting approval for the actual configuration rather than relying on a general product image. Keep each proposed position open until the relevant instructions support it, and record any agreed change on the drawing used by everyone involved. If a heater is also being considered, mark its intended position now and check its exact manual and mounting approval separately. Reviewing the two together makes their proposed locations clear before either is fixed, rather than leaving the heater to be fitted around an already completed lighting arrangement.
Coordinate controls and electrical planning
Once light positions are broadly settled, prepare a control schedule to accompany the evening scenes. Identify each fitting or group on the drawing, state which should operate together and which should remain separate, and mark the preferred control locations. Include how people will turn lights on when arriving and off when leaving, as well as adjustments made while seated. Share this with a qualified electrical professional before work is specified, so the supply, cable routes and compatible equipment can be assessed. Keep the brief focused on these practical outcomes and the exact fittings rather than attempting to specify wiring details. The scene descriptions explain what you want; the schedule shows which parts of the plan must deliver it.
Use the exact product reference when discussing any connection between pergola controls and lighting. If you are considering Bloomcabin’s wall pergola, establish whether the proposed lighting controls operate independently or through a supported interface for that configuration. Confirm compatibility across the fittings and associated equipment; a dimmer or remote is not automatically compatible simply because it is available. Where occupants want different light levels for simultaneous activities, make that requirement explicit in the control schedule. Keep unsupported functions out of the specification, and update the scene descriptions if the available equipment cannot deliver them. This avoids ordering controls on the assumption that every preferred function can be combined.

Check outdoor ratings, manuals and maintenance
Outdoor lighting needs a rating suited to its actual position; do not use an indoor fitting simply because it looks right or is described as decorative. Ask a qualified professional to check the exact manufacturer’s rating and installation instructions against the pergola location and exposure, and keep the manual with the product information. Conditions can vary between a more sheltered position and an exposed edge, so suitability should be confirmed for the proposed location rather than assumed from the product category. No single rating number can be recommended without knowing the fitting, site and instructions. The same check applies to associated equipment in the proposed system.
Plan cleaning and replacement access at the same time as placement. Ask how each fitting is to be inspected or serviced under its manual, and whether furniture or other parts would make access awkward. For a scheme based on the regular Bloomcabin pergola, keep the configuration details and fitting manuals together so the maintenance information relates to the equipment actually chosen. Note any furniture that would need to be moved for access, particularly around the reading chair or dining table. Retain the fitting references alongside the lighting plan so that a future replacement can be assessed against the original position and controls rather than selected by appearance alone.
Review the complete plan before ordering
Before ordering, read the drawing as if the pergola were already in use. Follow the route from the entrance to each seat; check table coverage from the end chairs; look from the reading chair towards the page and away from any bright source; then review the calmer ambient scene. Confirm that someone can move around a chair without crossing a poorly lit gap and that no single setting makes every fitting come on unnecessarily. A marked-up plan and short evening-use list make these checks concrete, and give a supplier or installer something more useful to review than a verbal description.
Keep a short record beside the drawing: exact product configuration; proposed fitting models; outdoor rating and manual; approved mounting position; control compatibility; and access needed for maintenance. Mark unanswered points plainly and leave them unresolved until the supplier, fitting manufacturer or qualified professional confirms them. The goal is not a complicated lighting scheme but one in which every source has a task, the background layer remains comfortable, and the equipment is supported by information for the actual setup. That record also helps if furniture or a heater is added later, because the design can be checked against the original layout instead of guessed from memory.
Frequently asked questions
How many lights does a pergola need?
There is no fixed number. It depends on the table and seating layout, the activities to light and the positions approved for the exact pergola and fittings. Plan the light each area needs first; the fitting count follows from that.
Can one light cover both dining and reading?
It may illuminate both areas, but their task needs and sightlines differ. A separate reading layer and dining layer are easier to plan around each activity, with ambient light supporting the space. Confirm that the chosen fittings and controls can provide the arrangement you want.
How can I check for glare before the lights are fitted?
Mark proposed light positions on a plan and check the view from every usual seat, including a reclined reading position. Look for direct views of bright sources and reflections from glass or glossy surfaces. Assess a proposed arrangement in the actual seating layout before agreeing to permanent positions.
Can I use an indoor light under a pergola?
Do not assume that an indoor fitting is suitable outdoors because it looks right or is under cover. Check the exact fitting’s rating and instructions for its proposed position, and ask a qualified professional to assess it. The same applies to associated equipment.
Should a heater be included in the lighting plan?
If a heater is being considered, show its proposed position on the same drawing as the lights. Check the exact heater manual and documented mounting approval separately, and have the arrangement reviewed by the relevant professionals. Do not assume that the heater and lighting can share a position or mounting point.
A useful lighting plan is not the one with the most fittings. It gives diners a clear view of the table, readers light for the page and everyone enough ambient light to talk and move around comfortably. When each layer has a distinct purpose and the seated views have been checked, evening settings can suit the activity without switching on everything at once. The plan should reflect the actual seats, sightlines and approved fittings, not a generic pergola image.
