
Using Pergola Rainwater in a Garden Tank: What to Check
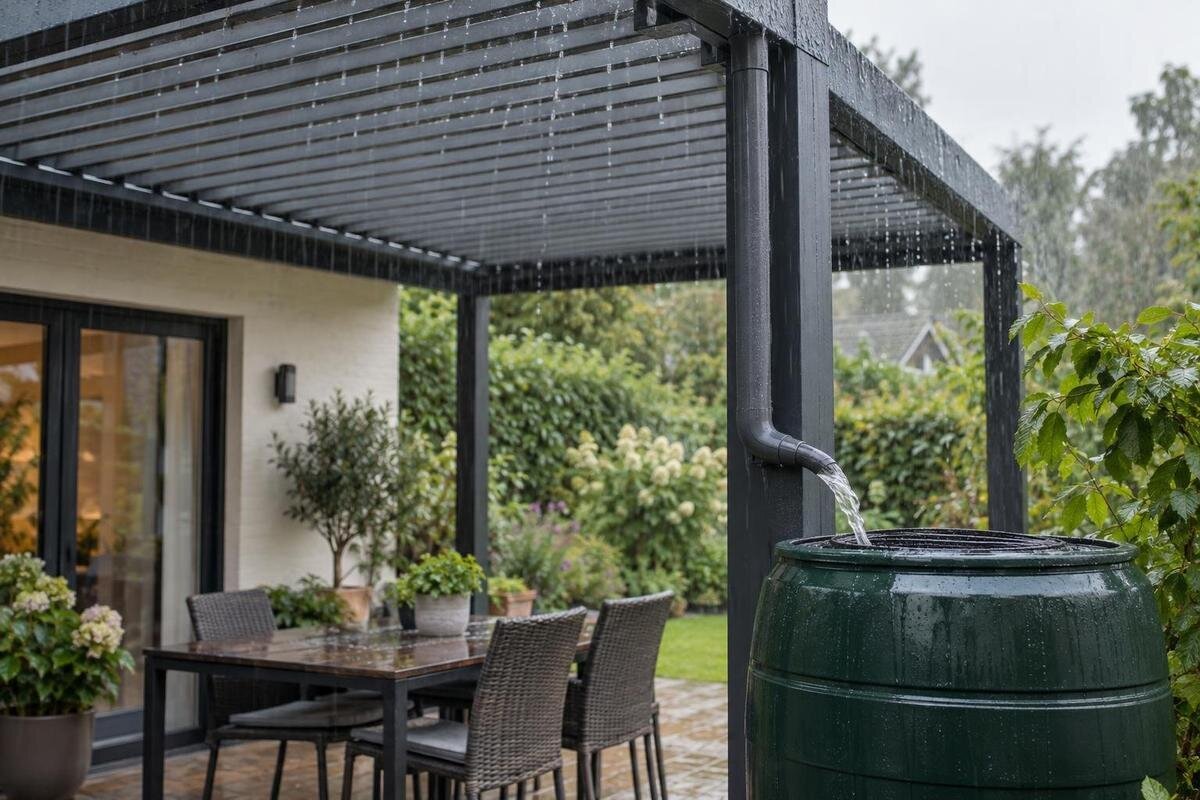
Pergola rainwater collection
A garden tank can make use of water shed by a pergola, but the connection is not automatic. The roof has to direct runoff to a compatible outlet, the route to the tank must not obstruct normal drainage, and the tank needs a safe overflow path. This guide covers how to verify the drainage layout, plan storage around likely supply and garden demand, and decide whether the collected water is appropriate for its intended use.

Can pergola rainwater be collected in a garden tank?
Yes, a garden tank can collect pergola runoff when the roof and its designed drainage direct water to an outlet that can be connected without obstructing normal discharge. The important distinction is between a pergola that sheds rain and a drainage layout that can actually deliver runoff to storage. A visible channel or downpipe does not confirm that the manufacturer permits a tank connection. The outlet position, connection dimensions, approved accessories and route all need to suit the exact model and roof configuration. If the product information does not show those details, get clarification rather than judging compatibility from a photograph.
Also check how collection varies with the roof position and configuration. A movable roof or an added enclosure may change where rain goes, and not every drop falling within the pergola's footprint necessarily reaches an outlet. Do not treat the structure as a watertight roof or assume it captures water in every weather condition. Establish which parts of the roof feed the drainage channels, where those channels discharge, and what happens when the tank is full. Use the drainage diagram for the chosen configuration and confirm that a tank connection will preserve the original discharge route.
Estimate what can reach the tank
The likely supply depends on the part of the roof that actually drains to the outlet, not the size of the garden or tank. A nominal pergola footprint can be misleading if some sections are open, rain is shed beyond a channel, roof elements move, or wind carries water away from the collection points. Ask for a diagram that identifies the catchment surface and outlets for the exact model and configuration. It should also make clear whether the tank would receive all routed runoff or only part of it, with other outlets continuing to discharge elsewhere. Keep that distinction in any estimate: if you plan to connect only one outlet, ask which roof sections feed it rather than assigning the whole pergola area to the tank. Note any assumptions about roof position alongside the estimate so you can compare like with like.
To judge volume, compare that effective catchment with rainfall records for your location and the period when you expect to use the water, then compare the supply estimate with garden demand. A theoretical annual total is not water available on demand: a tank may be full when rain arrives and low during a dry spell. For a specific model such as Bloomcabin Pergola, request an estimate based on its exact roof layout and approved drainage path rather than choosing a tank from the model name or footprint alone. Clarify whether the estimate allows for water diverted away from storage and the tank's starting level.
Trace the outlet from roof to tank
Trace the route from the roof to the tank on paper before buying fittings. Identify each outlet shown in the manufacturer's drainage diagram, then compare its position and connection type with the tank inlet and the available pipe route. Check dimensions and approved transition pieces instead of relying on a generic connector that appears to fit. If the pergola has more than one outlet, or some runoff currently goes to an existing drain, establish how the proposed connection would affect each branch. Keep joints accessible for inspection; a connection hidden behind a fixed panel can make a leak or blockage harder to notice.
A route that looks straightforward on a sketch may still need a site check. The installer should confirm whether the proposed layout can carry the discharge, including any bends, changes in pipe size or longer runs. If you are considering a Bloomcabin Wall Pergola, request its model-specific drainage diagram and compare it with the tank location before settling on a route. Mark the proposed joints, tank inlet and any existing drainage connections on the same sketch. This gives the installer a clearer proposal to assess than a tank location alone. Resolve any uncertainty about the outlet or route before buying connectors, particularly where the planned pipework would be difficult to reach once the tank is in place.
Check every connector and filter
The roof outlet and tank inlet need a compatible connection that does not choke, obstruct or divert the pergola's designed drainage. Confirm which adapter is approved, whether it is supplied separately, and whether the tank inlet accepts the arrangement shown in the product documents. Avoid covering an outlet with an improvised connection: it can conceal a leak or interfere with water that still needs to drain when the tank is full. A qualified installer can confirm the fitting and route for the exact setup, including any point where water must be able to bypass the tank.
Plan debris control where it will be easy to inspect. Leaves, seed pods and other material can collect at a screen; if it becomes blocked, water may be diverted or drainage restricted. Check whether the system includes a removable strainer, whether a separate tank-side filter is compatible, and how each part can be cleaned without dismantling the pergola. For the wall-mounted Bloomcabin pergola, confirm the approved outlet accessories and maintenance guidance for the selected configuration, rather than assuming that any pipe or filter can be attached.

Match storage capacity to your garden's demand
Choose a tank by considering both likely collection and intended use. List the jobs the stored water will serve, how often they occur and whether several uses may draw on the tank at once. Occasional watering of containers has a different demand pattern from watering a larger planted area, but neither calls for a generic tank size based on the pergola alone. Consider when you are most likely to need the water as well as when rain may be collected. Storage can bridge a gap between rainfall and use only if enough water remains available through that period. If you already water the garden, record how much you use for the jobs you hope to supply from the tank. Separate regular watering from occasional cleaning so that an infrequent task does not become the basis for the whole storage choice. Also decide which uses take priority when the level is low; this makes the demand estimate more useful than a single total.
Compare the demand with the supply estimate, and check usable capacity as well as the tank's stated volume. Depending on the design, the outlet level, pump arrangement, sediment allowance or reserve you choose can affect how much water is readily available. A small tank may fill and overflow often; a larger one is not automatically useful if collection is limited or there is no suitable place for it. With the regular Bloomcabin pergola, as with any model, product area alone does not establish how much water will reach or remain in your tank. Measure the proposed tank location for access and maintenance, and have the supplier or installer confirm that the support surface is suitable for a filled tank.
Plan where tank overflow will go
Even a correctly connected tank will eventually fill, and an inlet or filter can also become blocked. Decide where excess water will go before connecting the pergola outlet to storage. The overflow route should accept discharge without sending water back into the pergola drainage or leaving it beside a wall, doorway, path or other vulnerable area. Do not assume that an overflow can simply be left to spill onto the ground. The site's levels, surface and existing drainage options all affect what is practical, and an overflowing tank must not become a blockage in the original rainwater route.
Have a qualified installer assess the route against the pergola's drainage information and the site. An existing drainage point or an assessed ground-disposal arrangement may be possible, but neither suits every property; check applicable local requirements with the relevant professional. Keep the overflow visible and accessible enough to inspect, and do not cap or conceal it to stop a drip. When reviewing Bloomcabin Bioclimatic Pergola, ask how its specified drainage route and your proposed tank overflow would work together. Include the overflow destination in the layout, rather than showing only where water enters the tank, so both parts of the arrangement can be assessed together.
Choose a suitable use for the water
Decide whether the water is intended for plants, outdoor cleaning or another non-drinking purpose, then check that use against the roof surface, tank and cleaning products used on them. Rainwater can pick up dust, leaves, bird droppings and residues as it passes over a roof and through fittings. A screen that catches visible debris does not establish that the water is suitable for every use. If you intend to water edible crops, check the manufacturer's guidance on surface materials and cleaning, and follow relevant food-growing advice rather than assuming that all roof-collected water is appropriate.
Treat stored rainwater as non-potable unless it has been appropriately treated and tested for the intended drinking-water use. Appearance and smell are not reliable ways to establish suitability, and the tank should not be connected directly to drinking-water plumbing. If any connection to household plumbing is being considered, have a qualified professional design and install the necessary separation so stored water cannot flow back into a potable supply. When considering the Bloomcabin Pergola for your collection plan, ask about material and cleaning limitations relevant to the water uses you have listed. Keep those uses explicit: guidance for garden watering should not be taken as confirmation that the water is suitable for household use.
Keep the tank and collection path clean
Include the whole route, not just the tank, in the maintenance plan. Remove debris from accessible roof channels and outlet screens in line with the manufacturer's instructions, inspect connections for leaks or displacement, and check the tank lid, inlet screen and overflow for obstruction. The right inspection interval depends on the site and the product guidance; exposed leaves or other debris may make more frequent checks useful. Use only a cleaning method approved for the roof finish and tank, since residues from cleaning products can be carried into stored water.
If a first-flush diverter is proposed, clarify what it is designed to do, how it is serviced, and how much water it diverts away from the tank. It should not be treated as a water-treatment system. Keep tank openings protected as specified by the supplier, but make lids and screens accessible for inspection. For Bloomcabin's wall-mounted model, request the relevant cleaning and drainage guidance for the installed roof option. Before finalising the tank position, check how you would reach each serviceable part with the tank and connecting pipework in place. Identify which screens you can remove yourself under the supplier's instructions and which parts require professional attention. Include a way to keep water carrying cleaning residues out of storage, following the relevant product guidance, rather than discovering that problem during the first clean.

Check how roof settings and weather affect collection
On a pergola with a movable roof, the operating position may affect how rain reaches the drainage route. Some designs may allow water to pass between roof elements in one position rather than direct it to an outlet, but the behaviour must be confirmed for the specific product. Read the operating instructions alongside the drainage diagram; do not assume that a particular setting retains or channels rain. Avoid changing roof settings or adding enclosure parts just to improve collection unless the manufacturer permits the proposed configuration.
Wind-driven rain, a blocked route, an unusually heavy shower or a changed enclosure can also make actual flow differ from an estimate. A drainage diagram is not a universal guarantee of watertightness or performance in every storm. Check the model's weather limits and configuration-specific guidance, including any relevant information about screens or walls. If considering the Bloomcabin bioclimatic model, distinguish the roof configuration used for the collection estimate from the operating instructions that apply when weather changes. Any collection plan must fit those instructions, rather than depend on keeping the roof in a particular position regardless of conditions. Revisit the estimate if your planned roof or enclosure configuration changes.
Confirm the complete route before relying on it
Before buying or connecting a tank, put the main questions in one written request. What is the exact pergola model and roof configuration? Where does each outlet discharge, and which tank connection or filter is approved? What information supports the collection estimate? Where will overflow go, and who has confirmed that route for this site? Which water uses are appropriate given the roof surface and maintenance products? Clear answers help reveal whether the plan depends on an accessory, a drainage branch or a site condition that has not yet been considered.
After installation, observe the route during ordinary rain from a safe place on the ground. Check that the intended outlet feeds the tank, joints remain dry, screens are not immediately obstructed and overflow travels where planned. Do not climb onto the pergola or wait for severe weather to test the system; follow the manufacturer's inspection instructions and ask the installer to investigate unexpected discharge. Keeping a record of tank levels and water use over time is more informative than relying on one rainfall event, because it shows whether storage and demand actually line up.
Frequently asked questions
Can I connect a garden tank to any pergola outlet?
No. Check that the outlet, tank inlet and connecting route are compatible with the exact pergola model and roof configuration. A fitting that appears to match may still restrict drainage or divert water incorrectly. Confirm the connection against the manufacturer's drainage diagram and approved accessories.
Does pergola rainwater need a filter or first-flush diverter?
The right arrangement depends on the roof, surrounding debris and intended use. A screen can catch larger material but needs to remain accessible for cleaning; a first-flush diverter has its own maintenance needs and reduces the water reaching the tank. Neither device makes water suitable for every purpose.
How should I choose the tank capacity?
Compare an estimate based on the pergola's actual catchment and local rainfall with the amount of water your garden is likely to use. Check the tank's usable volume, not only its stated capacity, and plan for overflow even if the tank is large.
Is pergola rainwater suitable for watering vegetables?
It depends on the roof surface, deposits and cleaning products that may reach the water, as well as how you intend to use it. Check the manufacturer's material and cleaning guidance and follow suitable local food-growing advice. Do not assume that clear water or a debris screen makes it safe for every use.
What happens when the tank fills up?
Excess water needs a planned overflow route that does not block the pergola's drainage or spill in a damaging or unsafe place. Have the route and its suitability for the site checked before connecting the tank, and keep the overflow accessible for inspection.
A pergola-to-tank setup works as one continuous drainage system: a documented catchment, compatible outlet, realistic storage, suitable end use and planned overflow. Confirm the exact roof configuration and site route before connecting the tank, then monitor ordinary rainfall and actual use. If any part of the route remains unspecified, the likely collection and safe discharge remain uncertain.
