
How to Plan Pergola Drainage Away from a Neighbour’s Property
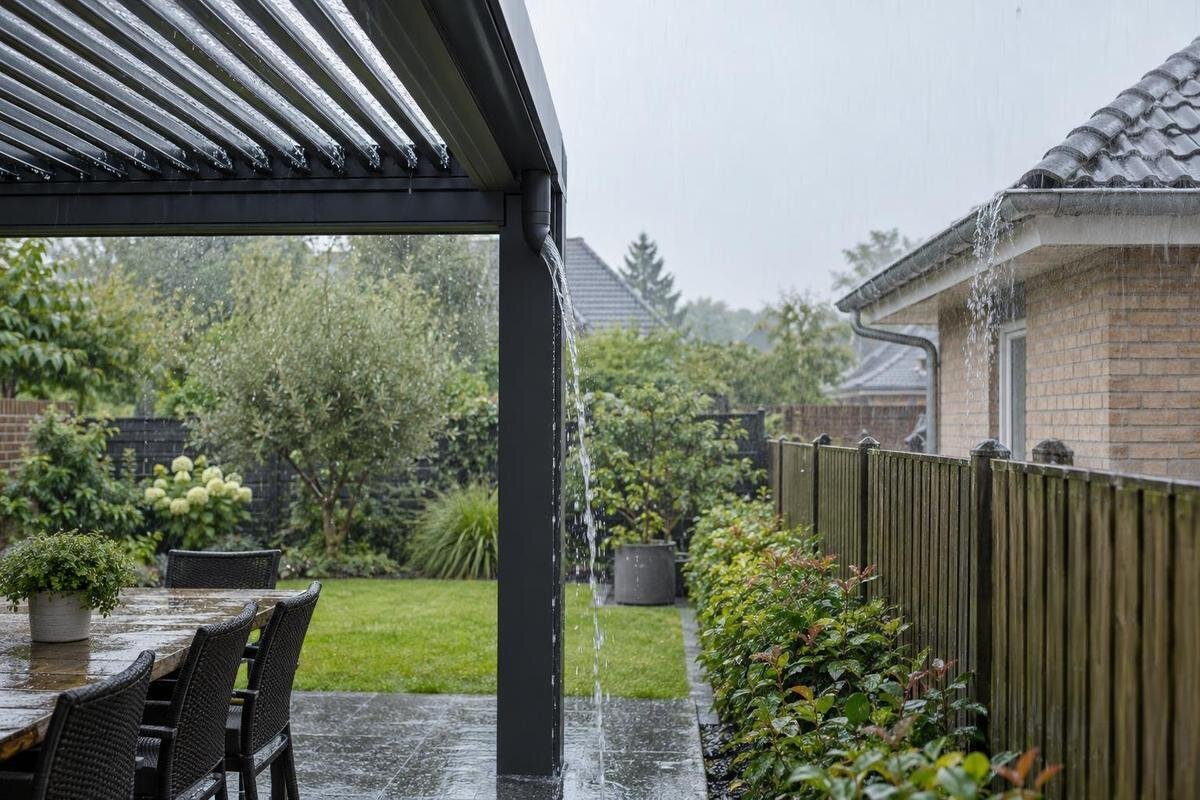
Pergola drainage planning
Planning pergola drainage means deciding where collected rainwater will go after it leaves the frame. An outlet may be correctly positioned on the structure and still send water across paving, towards a low doorway or along a boundary. Map the route through the garden as well as the pergola itself, and include what happens if the usual outlet or receiving point is blocked. The exact drainage arrangement and any local requirements need to be checked for the chosen model and property.

Trace the route from the pergola to the receiving point
Treat the route as a continuous chain: the pergola’s collection surface, any integral gutter or channel, each outlet, a downpipe or connector, the path across the site and the final receiving point. The outlet is only the handover between the frame and the garden; it does not determine where water ends up. Surface flow can travel beyond the visible splash zone, while a pipe can carry it to another part of the property. Plan for routine discharge and a separate overflow direction if an outlet is blocked or the receiver cannot accept more water. If water already arrives from a higher roof or slope, mark that as a separate flow rather than assuming the pergola will manage it.
Start with a simple overhead sketch of the area affected by the pergola. Mark its footprint, the property boundary, building walls, doors and steps, paving, planted ground, existing drains or channels, and any low corners you know about. Note the direction water takes during rain, not just the direction the garden appears to slope when dry. If the boundary is uncertain, check its location instead of treating a fence, wall or paving edge as definitive. Add approximate distances where they help compare possible routes, and label any uncertain levels rather than guessing. The sketch is a planning aid, not a drainage design, but it can expose conflicts early.
Confirm the drainage layout and outlet positions
The drainage layout is model-specific. Depending on the design and configuration, water may be collected along particular edges and carried through a channel or support to one or more outlets; do not assume every pergola drains in the same way. Obtain the current drainage diagram and installation information for the exact model. Mark the collection channels, outlet positions, discharge direction and any stated connection limits. If the roof setting or enclosure configuration could affect drainage, ask whether the information covers your proposed setup. When comparing options such as the Bloomcabin Bioclimatic Pergola, record the precise model on your plan; a product name or image cannot establish its drainage layout.
Consider the outlet direction before settling on the pergola’s position. A side that seems convenient for access may face a neighbour, gate, wall or doorway. Rotating or relocating the structure might change the route, but do not assume that an outlet or frame can be altered. If there is more than one outlet, check the position of each one rather than focusing on the easiest to reach. Keep outlets accessible for inspection and cleaning, not hidden behind a planter or close-fitting screen. If the documented positions leave no practical route to a receiver, resolve the plan with the supplier or a drainage professional before fixed paving or other work makes changes harder.
Check ground levels before choosing a discharge point
Garden levels can be more complex than one visible slope. Paving may fall in one direction while a planted strip or channel carries water another way; a step, retaining wall or raised bed can create a separate low point. If possible, observe the site during ordinary rain from your own property and note where water crosses paving joints, gathers or turns. A dry-day glance can miss a shallow dip, and one rainfall observation cannot describe every condition. If landscaping or paving will change, consider how the finished surface may alter the route. Do not enter neighbouring land or open a drain to investigate; record what is visible and seek professional advice when the flow is unclear.
Place the proposed outlet on the sketch and trace the route around actual ground features rather than drawing a straight arrow through the garden. For a shortlisted Bloomcabin Pergola, mark the selected footprint and orientation alongside the observed direction of runoff. This shows whether the proposed discharge would follow an existing flow towards a boundary. If the plan depends on changing levels or adding an underground route, have a competent drainage professional assess the site. Ask them to consider the finished paving and thresholds, not only the bare ground. Avoid relying on an improvised channel or grading a strip by eye, especially near a doorway or property edge.
Keep the discharge route away from the boundary
Plan for the outlet, connecting route and receiving point to remain on your property and lead to a suitable destination, rather than sending water towards adjacent land. A narrow strip beside a boundary does not automatically contain runoff: water can follow paving joints, pass under a gate or turn along a wall towards a low corner. Check the direction of any outlet splash as well as the ground flow after water lands. A discharge point can be on your side and still send water across the boundary if the surface falls that way. A wall may redirect runoff instead of stopping it, so note gaps, gates, changes in height and low points where water could escape.
If the boundary is close, show it clearly on the drainage drawing and identify a receiver that can be reached without crossing it. Where a Bloomcabin Wall Pergola is being considered, mark the building wall, property boundary and outlet positions together to show the space available for drainage. Avoid planning to use a neighbour’s paving, garden, channel or drain as a convenient endpoint. A route that crosses a shared passage before turning back towards your property also deserves careful review. If a shared or cross-boundary connection is genuinely proposed, confirm the permissions and current local requirements that apply rather than relying on an informal assumption.

Choose a receiving point that suits the site
Choose the receiving point for how it handles water, not simply because it is the nearest patch of ground. A planted bed or unpaved area may be suitable only if its soil, slope, condition and surrounding surfaces allow the flow to remain there. Compacted or saturated ground can behave differently from loose soil, while paving can carry water beyond the point where it lands. A small patch directly beneath an outlet may puddle or erode instead of dispersing runoff. An existing drain is not automatically able to accept another source; its ownership, connection and capacity need to be confirmed for the project. A dry-looking lawn is not proof that the same area can cope in wetter conditions.
Possible approaches include a designated on-site dispersal area, storage with a planned overflow, or a suitable drainage connection. Compare these options against the ground conditions and available space rather than choosing solely by distance from the pergola. When planning a receiver for the bioclimatic pergola option, consider where water would go if that receiver could accept no more. A tank needs a defined overflow route when full, while a dispersal area needs assessment for the proposed site. Neither should leave excess water to find an unplanned path towards the boundary.
Plan pipes and surface channels as one route
Once the start and end points are known, plan the whole connecting route. Mark whether water travels in a visible surface channel or a pipe, where it crosses a path, and where it changes direction or level. A route can be short yet cross a doorway, create a trip hazard or discharge onto paving that carries water onwards. The end of a pipe matters too: it should meet the chosen receiver without an uncontrolled gap that splashes onto another surface. Include access for inspection and cleaning, particularly where leaves or other debris could restrict an outlet or channel. Show the finished landscaping as well as the route during construction so later work does not redirect the flow.
Pipe dimensions, gradients, joints and connections depend on the model instructions and the site; they are not details to guess from a generic diagram. Have a qualified installer confirm the route and any buried work, including which access points must remain reachable after landscaping. Do not narrow an outlet, extend it with an improvised fitting or connect it to an existing drain unless the product documentation and project review allow it. For Bloomcabin’s wall-mounted pergola, include any proposed connection to a building downpipe in this review rather than treating it as part of the pergola system. Mark confirmed connections clearly on the plan.
Check thresholds and existing roof drainage
Where a pergola sits beside a building, keep its rainwater route distinct from the building’s roof drainage unless a qualified professional has confirmed a suitable connection. A house downpipe may serve a different roof area, and its visible location does not prove it can accept additional water or that a connection is appropriate. Do not let an outlet empty behind a fascia, into a wall cavity or onto a narrow strip beside a foundation. Mark doors, steps, ramps, retaining walls and existing drain grates on the plan, since these features can redirect water or make a small puddle more consequential. If roof runoff already crosses the proposed receiver, show that flow separately too.
Pay particular attention to low thresholds and places where a wall meets paving: water can collect there even when the wider garden seems to fall away. When planning the area around the Wall Pergola, show whether rain from the building or higher ground also flows towards that space. Separate routes may meet before reaching the receiving point, so assess their combined destination rather than looking at each outlet in isolation. Have a professional review any receiver close to a wall, doorway or retaining structure. Keep inspection access clear so these vulnerable areas remain visible after paving and planting are finished.
Allow for overflow and documented weather limits
Plan not only for routine drainage but also for a restricted outlet, a full receiver or rainfall beyond the conditions described for the model. In those situations, water may spill from a different point and follow the lowest available route. Mark likely overflow points and check that they do not lead towards a boundary, doorway, neighbouring wall or a place where water could collect against the building. Leaves and other debris can also restrict a route if access for cleaning is poor. For a candidate such as Bloomcabin’s bioclimatic model, review the stated weather limitations alongside the drainage diagram when considering where overflow could occur.
If the product documentation provides controlled observations, note the configuration and conditions they describe. Such observations can help explain intended drainage behaviour, but cannot predict every storm or replace a site plan. Ask which operating configuration the drawing covers, particularly if adjustable roof parts or an enclosure are being considered. After installation, observe the route in ordinary rain from a safe position, noting unexpected splash, pooling or overflow. One observation is not proof that the system will perform identically in all weather, and there is no need to wait for severe conditions to assess the route. If water leaves the intended path, ask the installer to review the cause.

Check current local requirements and responsibilities
Local requirements need to be checked against the actual project. The pergola itself, changes to ground levels, a connection to an existing or shared drain, and work close to a boundary may raise different planning, building or drainage questions. For a property in Malta, confirm current requirements with the relevant local authority, service provider or competent drainage professional, as applicable, before work begins. Do not assume that an outlet may connect to any nearby drain or that a surface channel can accept a new flow. Ask what receiving point is acceptable, whether an approval or other confirmation is needed, and who is responsible for the connection.
Clarify responsibilities as well as requirements. If the route crosses a communal area, serves a shared drain or depends on access near a boundary, establish who can approve, inspect and maintain it. Have uncertain boundaries and buried services identified by a suitably qualified person before the route is finalised. A neighbour’s agreement may help with practical access, but it does not replace any formal approval or technical confirmation that applies. Decide who will keep outlets and channels accessible for cleaning, especially if landscaping or shared property is involved. Keep written responses, the drainage drawing and relevant installation guidance together so the agreed destination and overflow route remain clear after the work is complete.
Review a coordinated drainage drawing before installation
Before installation, review one coordinated site drawing alongside the exact pergola drainage diagram. It should show the footprint and orientation, outlet locations, property boundary, building thresholds, ground features, pipe or channel route, final receiver, overflow direction and access for cleaning. It should also identify who has confirmed the receiver and any proposed connection. Record the selected configuration of the Bloomcabin Pergola model so the site drawing corresponds to the product being installed. Use different markings for observed features and assumptions, making any outstanding questions about levels, connections or the receiving area easy to identify.
Walk the route on site before paving, planting or other fixed work is complete. Check that each outlet points where the plan says it does, the receiving area is still available, and finished surfaces will not redirect flow towards a neighbour or doorway. Resolve any mismatch before the pergola or drainage is installed; moving a route after finishes are in place can create avoidable rework. After completion, keep the model documents and agreed plan for future cleaning and maintenance, and compare actual flow in ordinary rain with the route shown. If water discharges somewhere unexpected, arrange a site review rather than assuming it will eventually soak away.
Pergola drainage FAQs
Can I direct a pergola outlet towards the property boundary?
Avoid treating the boundary as a discharge point. Plan the outlet and the route water follows after it lands so they remain on your property and lead to a suitable receiver. If a shared or cross-boundary connection is being considered, first confirm the requirements and permissions that apply to your site.
Is a lawn or flower bed enough to take the water?
Not necessarily. Soil condition, slope, paving nearby and how much water arrives all affect what happens. A small or already wet area may puddle or pass runoff on to another part of the garden. Have the proposed receiving area assessed rather than assuming that grass or planting will absorb the flow.
Can I connect the pergola outlet to a house downpipe?
Do not assume that an existing downpipe is a suitable connection. It may serve a different roof area, and its capacity, ownership and connection requirements need to be checked for your project. Ask a qualified drainage professional and confirm the model’s instructions before planning a connection.
Can I move or extend the pergola outlet?
That depends on the exact model and its installation instructions. Do not cut, plug or extend an outlet with an improvised fitting. Check the model-specific drainage information and ask the supplier or installer whether the proposed change is permitted and compatible with the planned route.
What information should I request before installation?
Ask for the drainage diagram and installation information for the exact model and configuration, including outlet positions and any stated limitations. Pair these with a site drawing showing boundaries, ground levels, the route, the receiving point and overflow. Check current local requirements with the relevant authority or a competent professional.
A pergola drainage plan is complete only when it shows where the water will end up, including when the usual route is blocked. Looking at outlet positions, ground levels, thresholds and boundaries together helps reveal a discharge point that is on your land but still sends runoff towards a neighbour. Resolve that route before installation, leaving a clear path to the receiving point and access to maintain it.
